
NOTE: The battery pack has 400 volts inside of it. Be sure you know what you are doing and have the proper protective equipment, as it can kill you! It also weights 600lbs, so it can crush you!
I needed to remove the battery pack from my Salvage Nissan Leaf. The 2013-Nissan-LEAF-DG.pdf (Disassembly Guide) I found on the Nissan website has good instructions, but they assume you have an auto-lift (and custom battery moving system).
I didn’t want to purchase an auto lift, so I did it with the following tools on my concrete driveway.
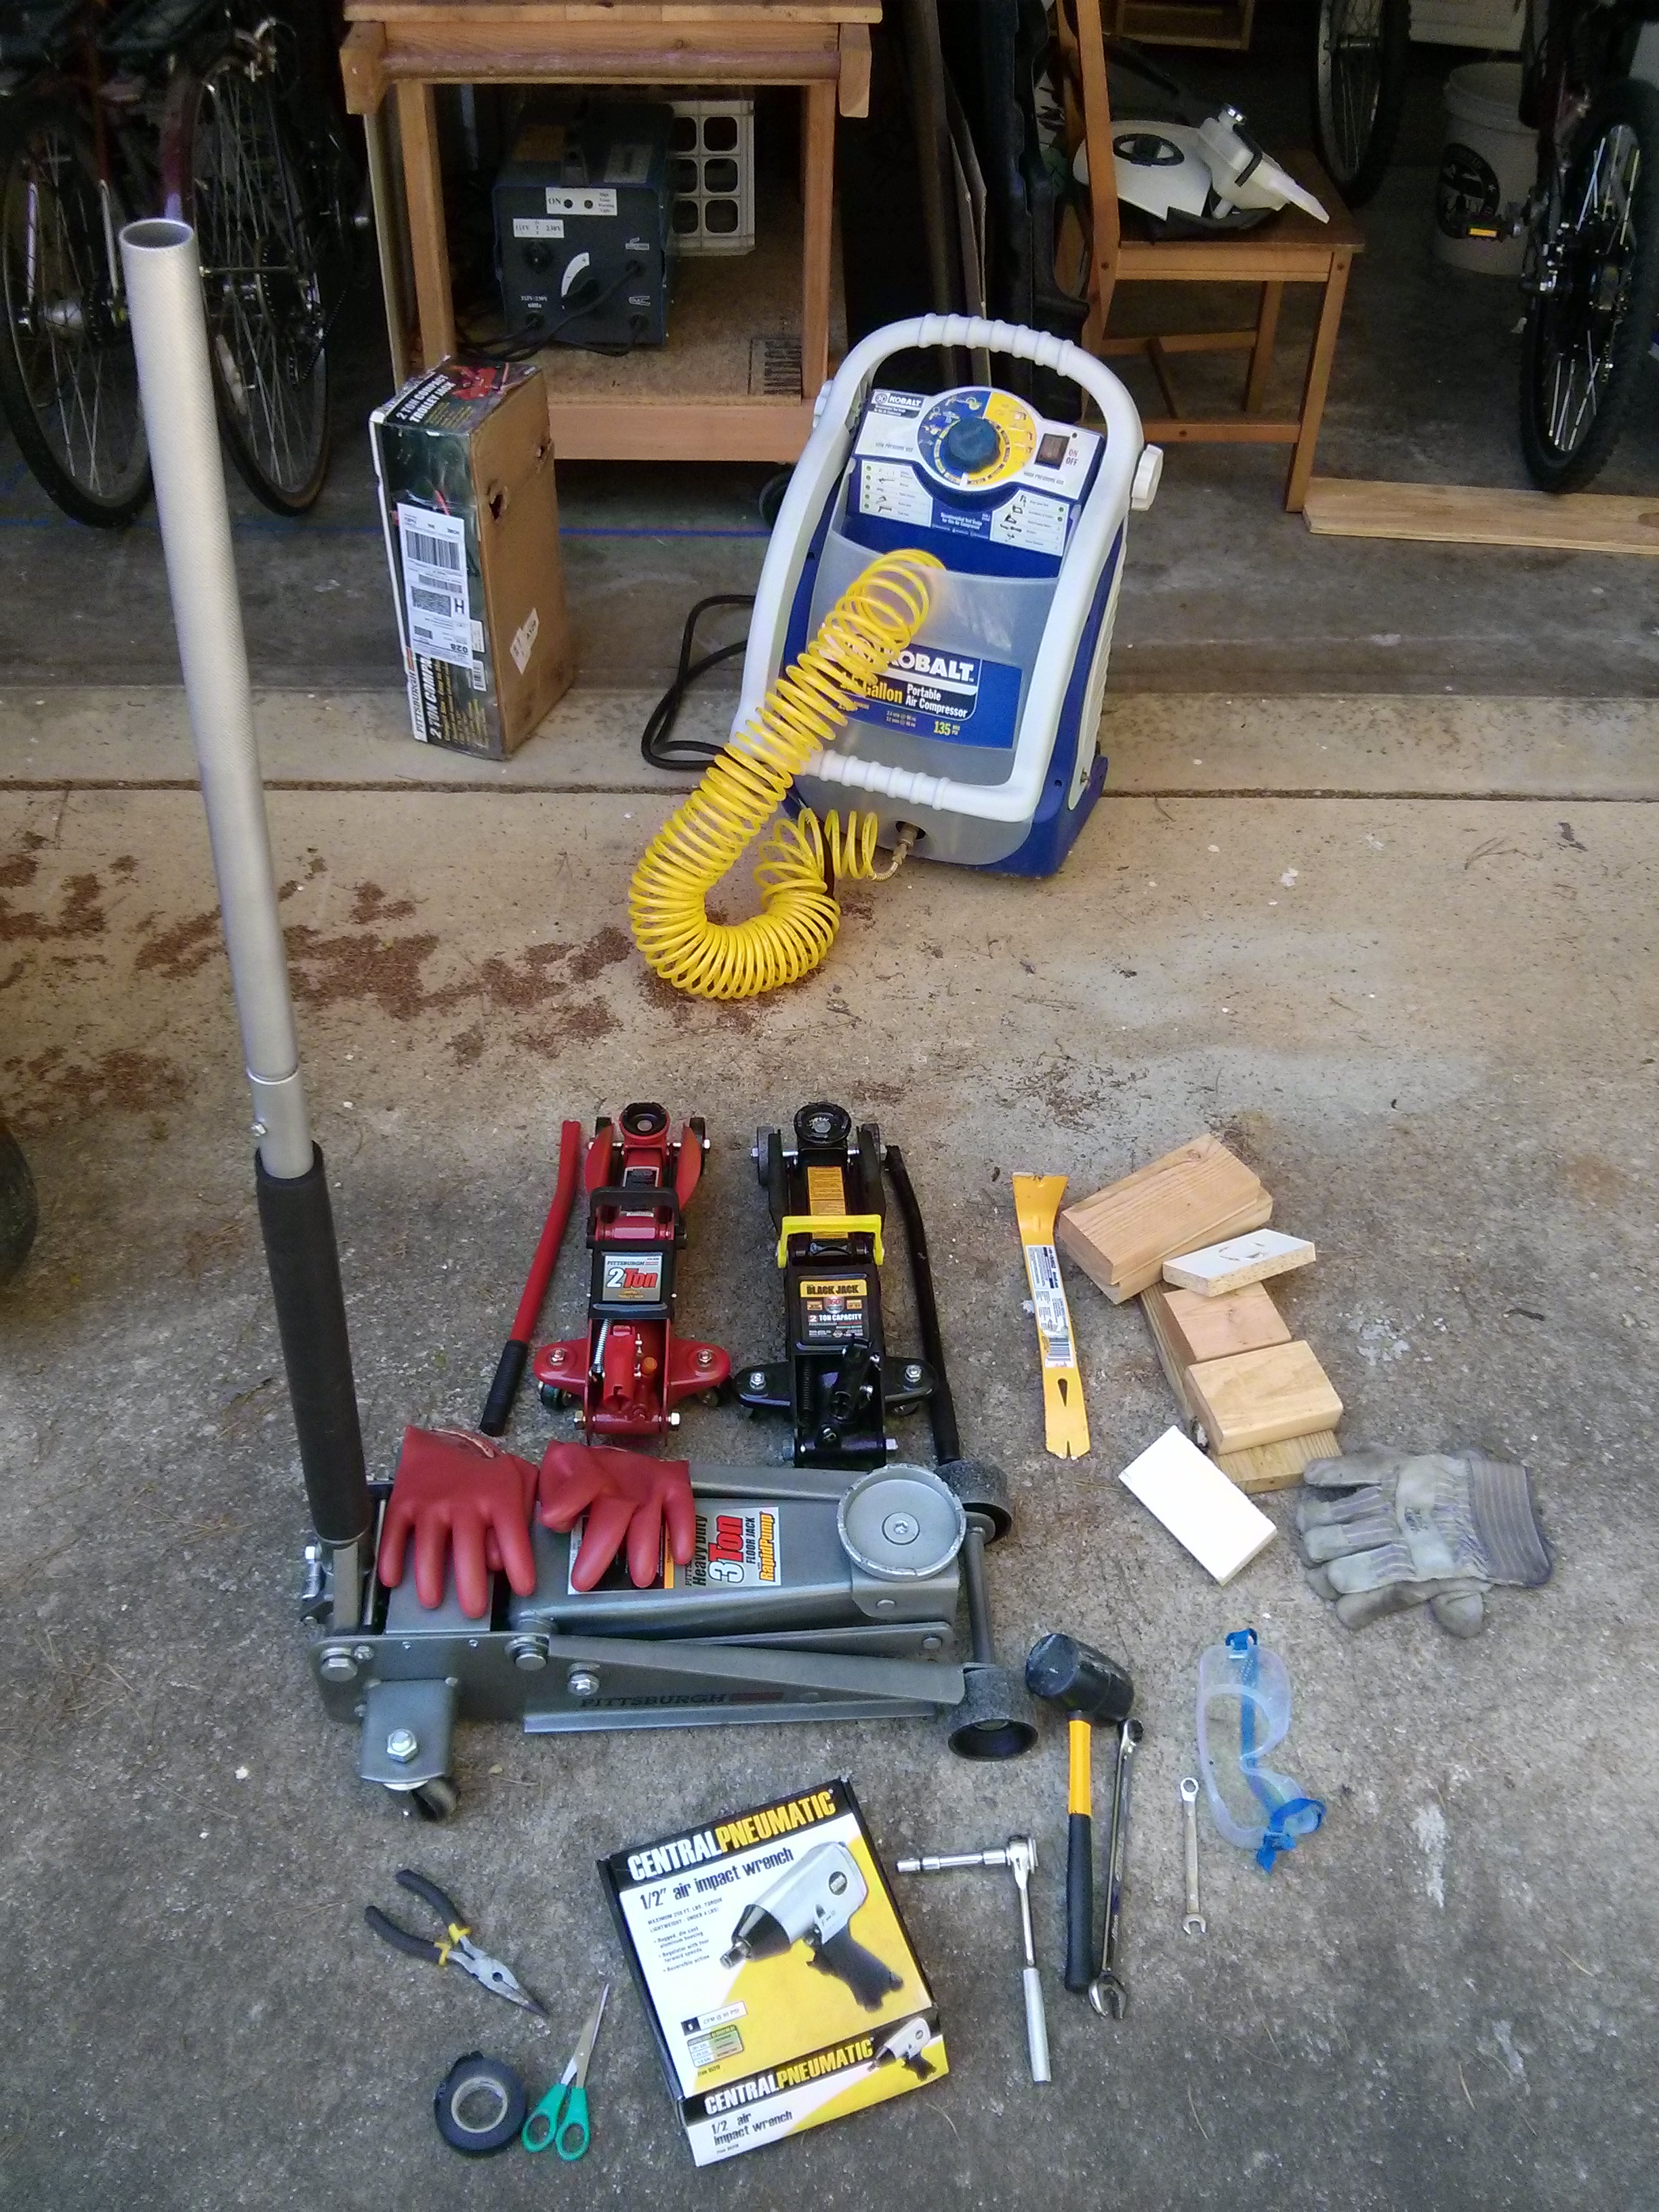
- Class 0 – 500 volt electrically insulating gloves. Necessary when pulling the service disconnect, and the high voltage cables leading from the battery to the motor and interior cabin heater.
- 3 jacks. One was a nice 3 ton low profile rapid pump jack with a maximum lift of 19″. The other two were 2 ton cheap jacks with only a 13″ lift. I would have liked to have three of the high lift jacks, but cost is always an issue. If cost isn’t an issue, just buy an auto lift, it would make a lot of things easier.
- Several scrap pieces of wood, used to space up the 2 ton jacks to be able to reach the battery while the car was lifted 15″ above the ground.
- (not shown, still under the car: 4 jackstands)
- 10mm double ended wrench, and 10mm socket wrench, mostly for removing bolts holding the aerodynamic covers to the bottom of the battery.
- Air compressor, and 1/2″ impact driver, with 18mm socket. Note that Harbor Freight sells sets of impact sockets that skip from 17mm to 19mm, you really need an 18mm. I got mine at NAPA for $7
- 18mm wrench, for eight of the bolts holding the battery to the bottom of the car (potentially optional, if you use the impact driver for everything.)
- 16mm wrench, for 4 bolts on the back of the battery.
- Prybar – used to pop the plastic rivet things holding the aerodynamic plastic plates under the battery.
- Goggles – Eye protection, used all the time, but ESPECIALLY when popping the plastic rivet things, which crack and fly with quite a bit of force. [Update: Removal may be a lot easier, see below].
- Leather gloves – used most of the time, especially when putting a lot of pressure on wrenches!
- Black electrical tape & scissors – used to cover the exposed terminals on the service disconnect, motor HV cable and cabin interior heater connections on the battery.
- Rubber Mallet – Used to bang on wrenches. Could also use a 16mm impact socket with the impact driver.
- Needle Nosed Pliers – Used only to pull the locking tab on the interior cabin heater cable connector.
Safety first!
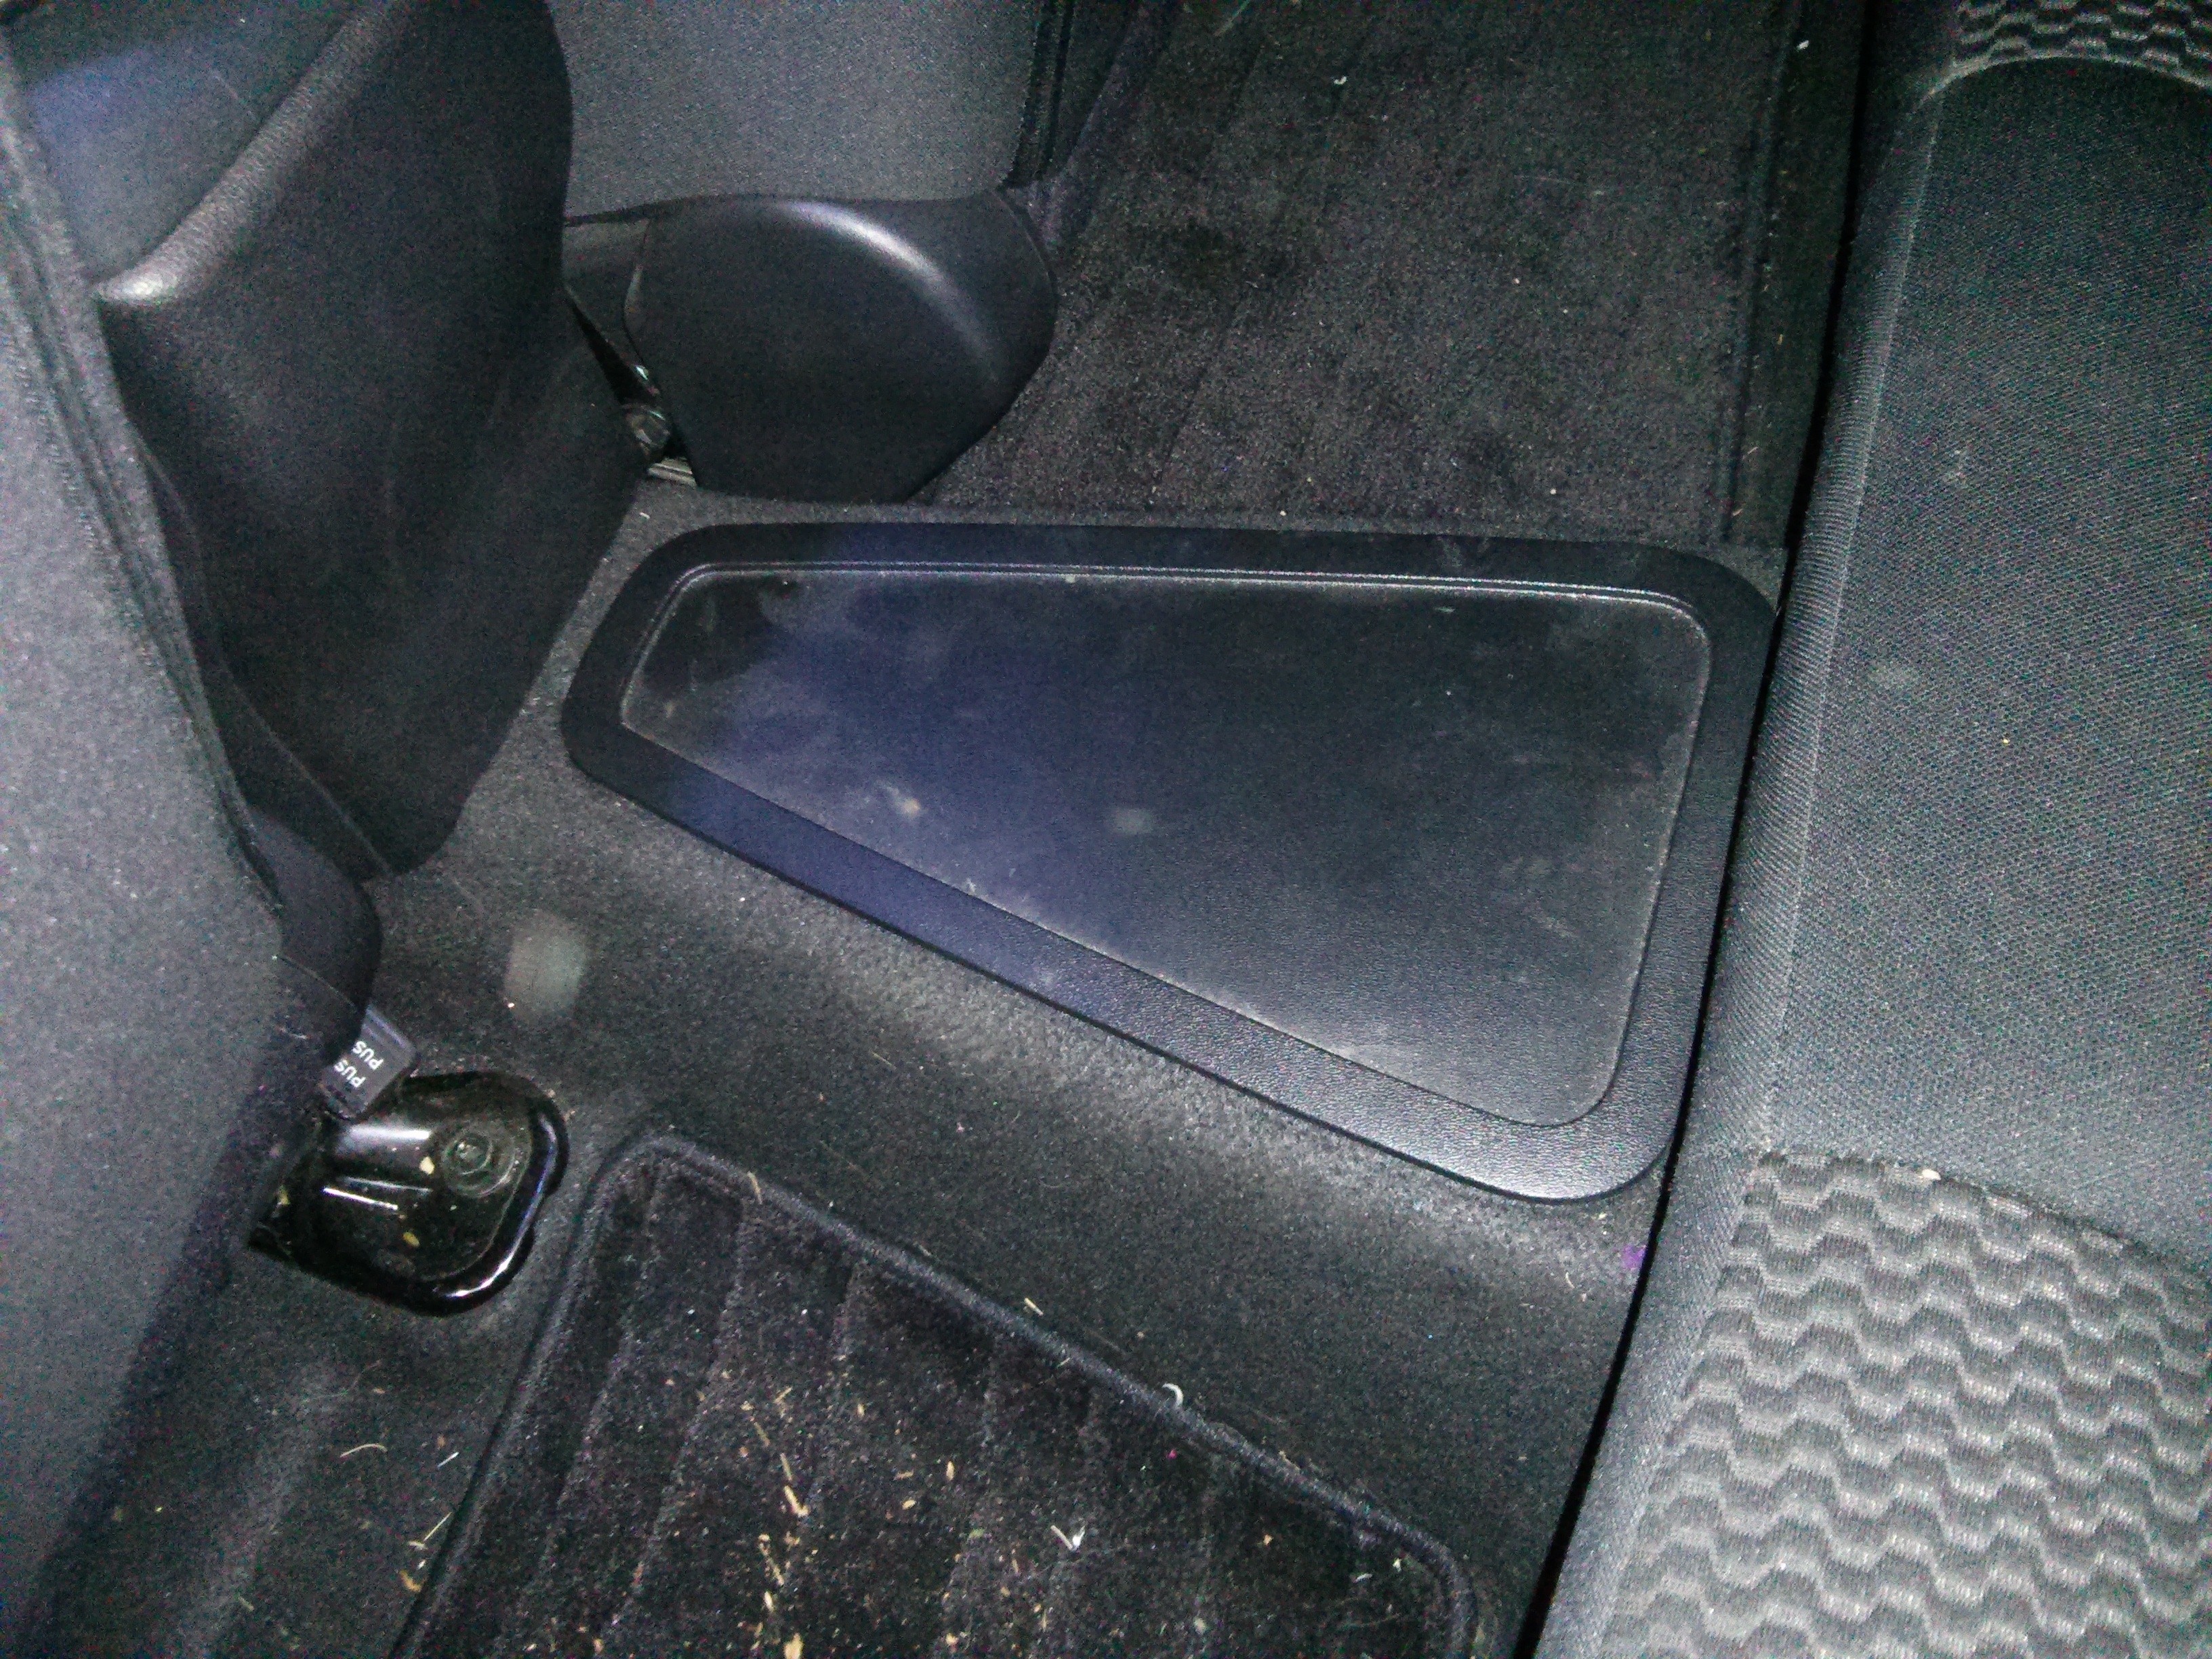
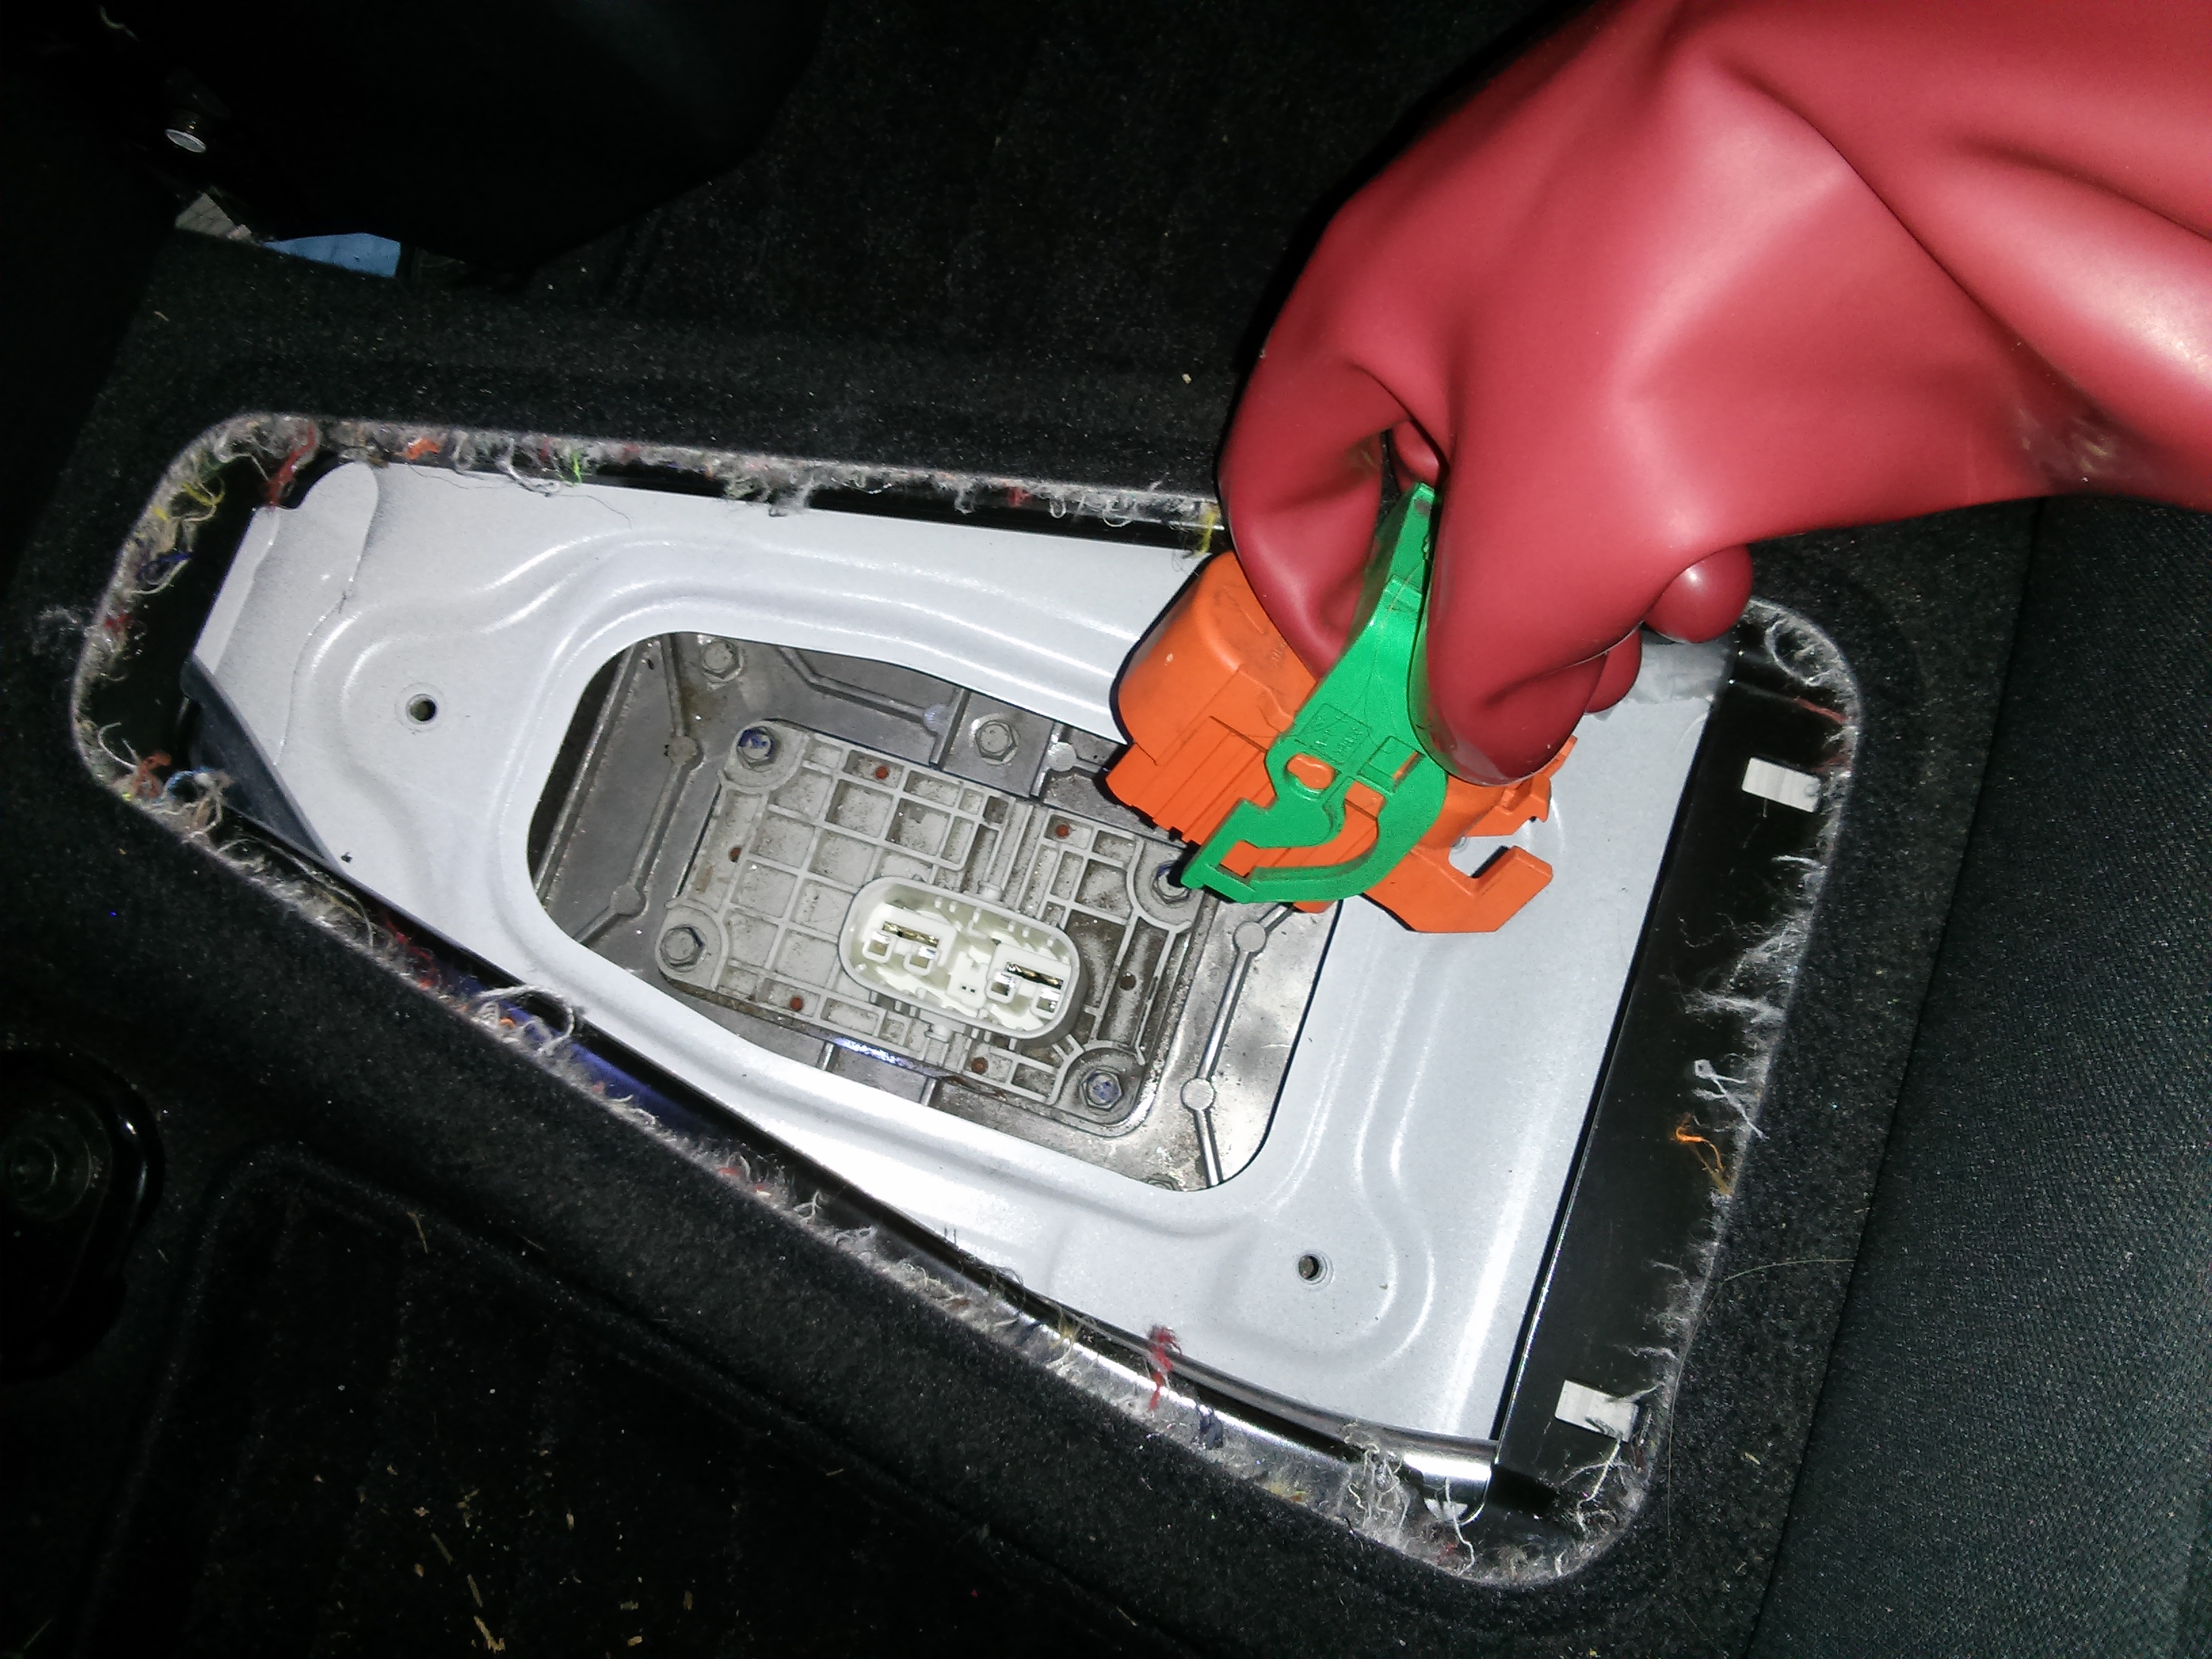
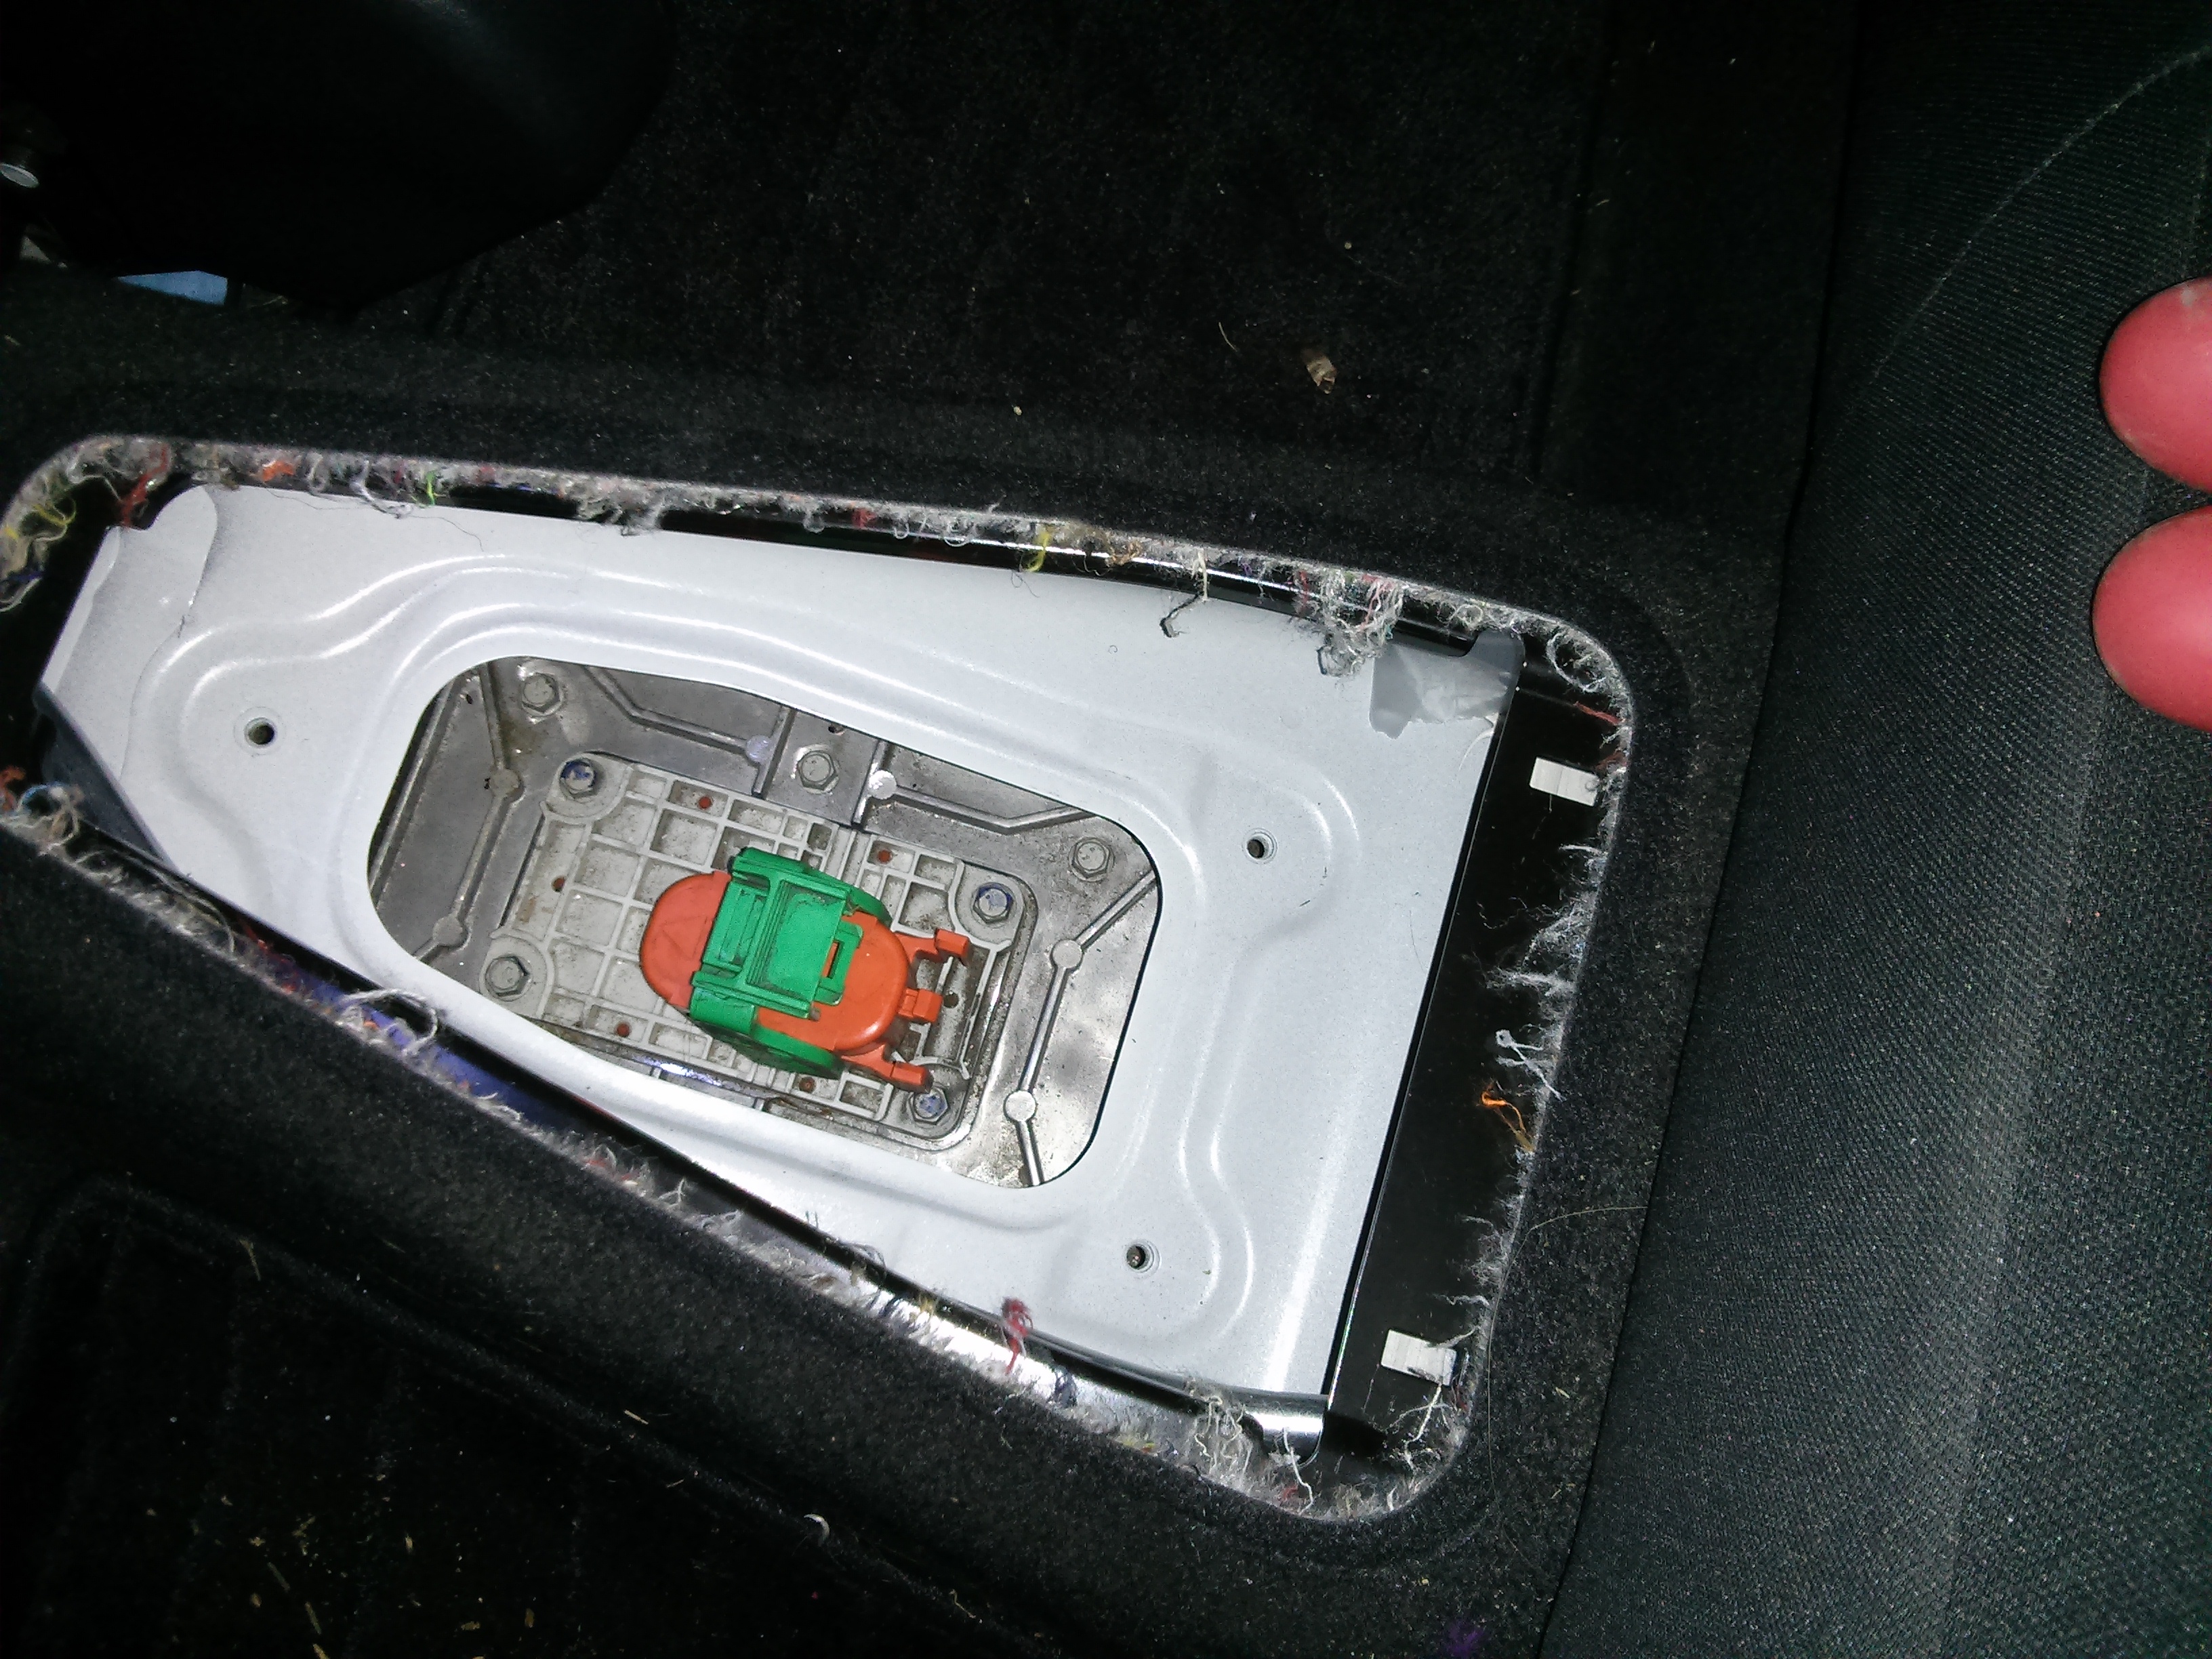
To make the battery less dangerous, I did two separate procedures before removing it. First, I pulled up the service disconnect panel (between the rear passengers foot wells), unscrewed the 10mm bolts holding the metal cover down, and pulled the service disconnect from the middle of the battery. This splits the battery into two ~200 volt halves, instead of a single 400 volt whole. It also opens the circuit to the high voltage cable connections.
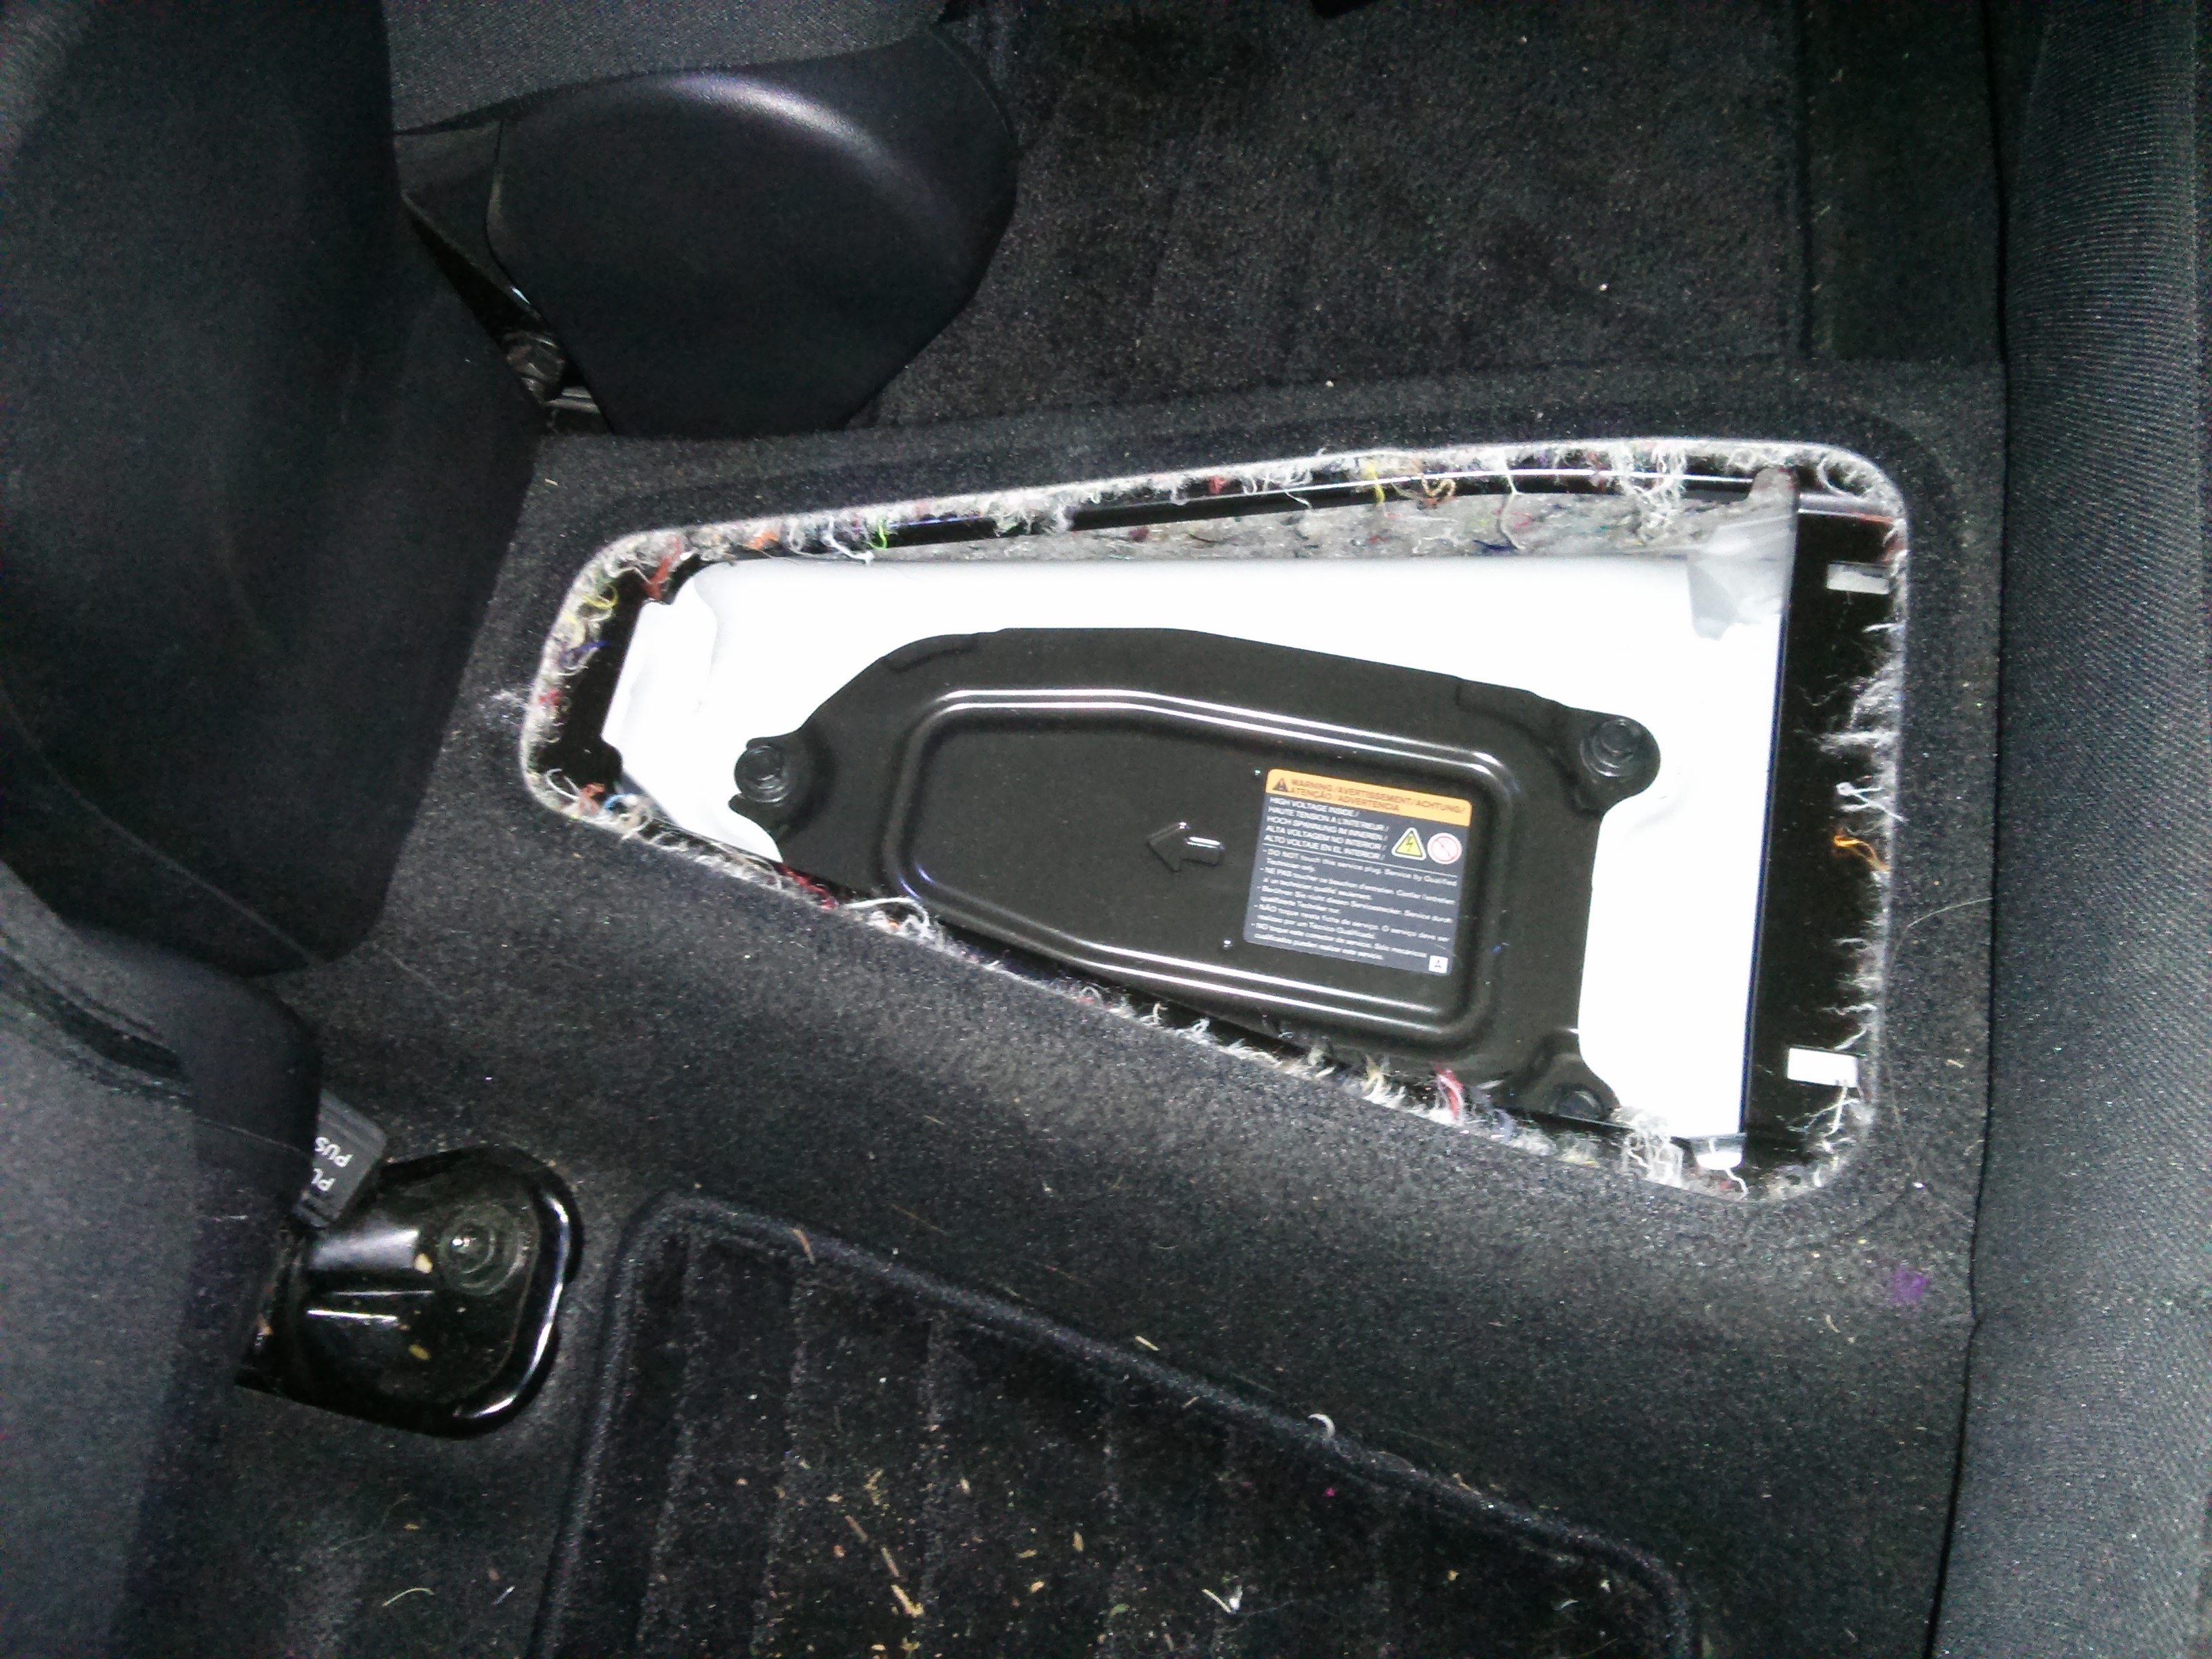
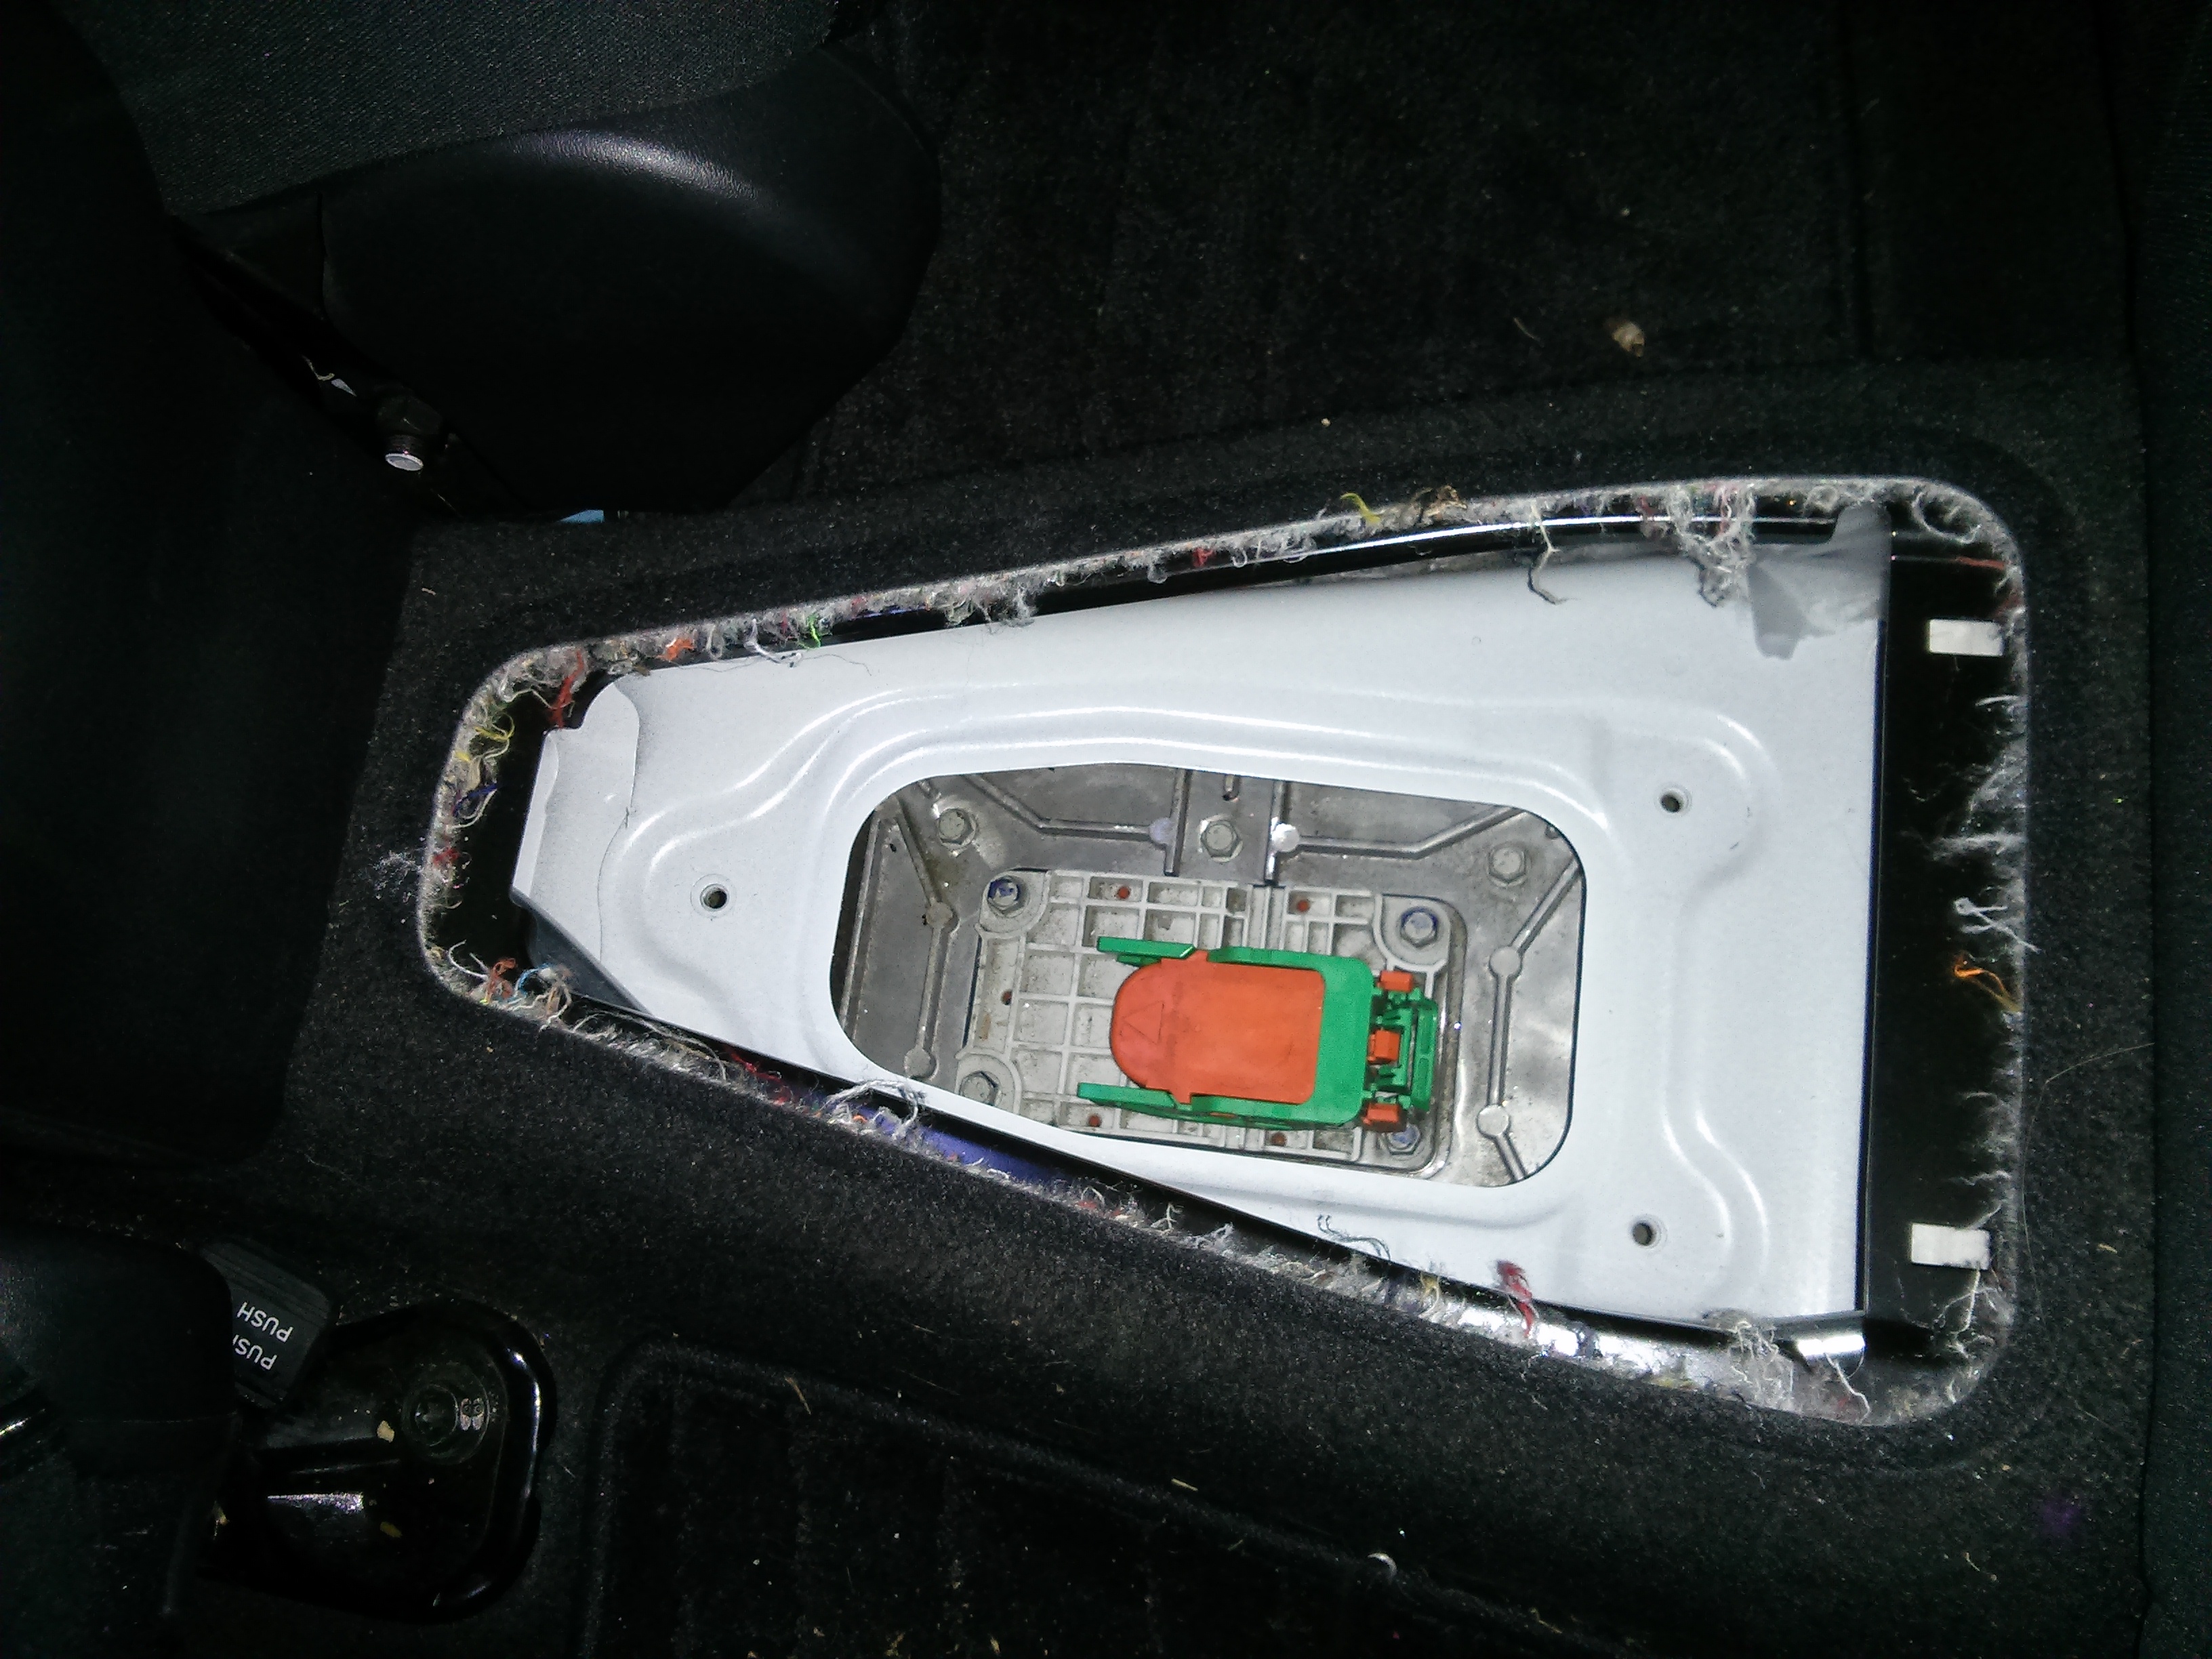
To remove it, you have to lift the back slightly (rotating it up), press in a catch, and then finish lifting and rotating to a vertical position, after which you can pull it out. I wore my 500 volt gloves for this procedure.
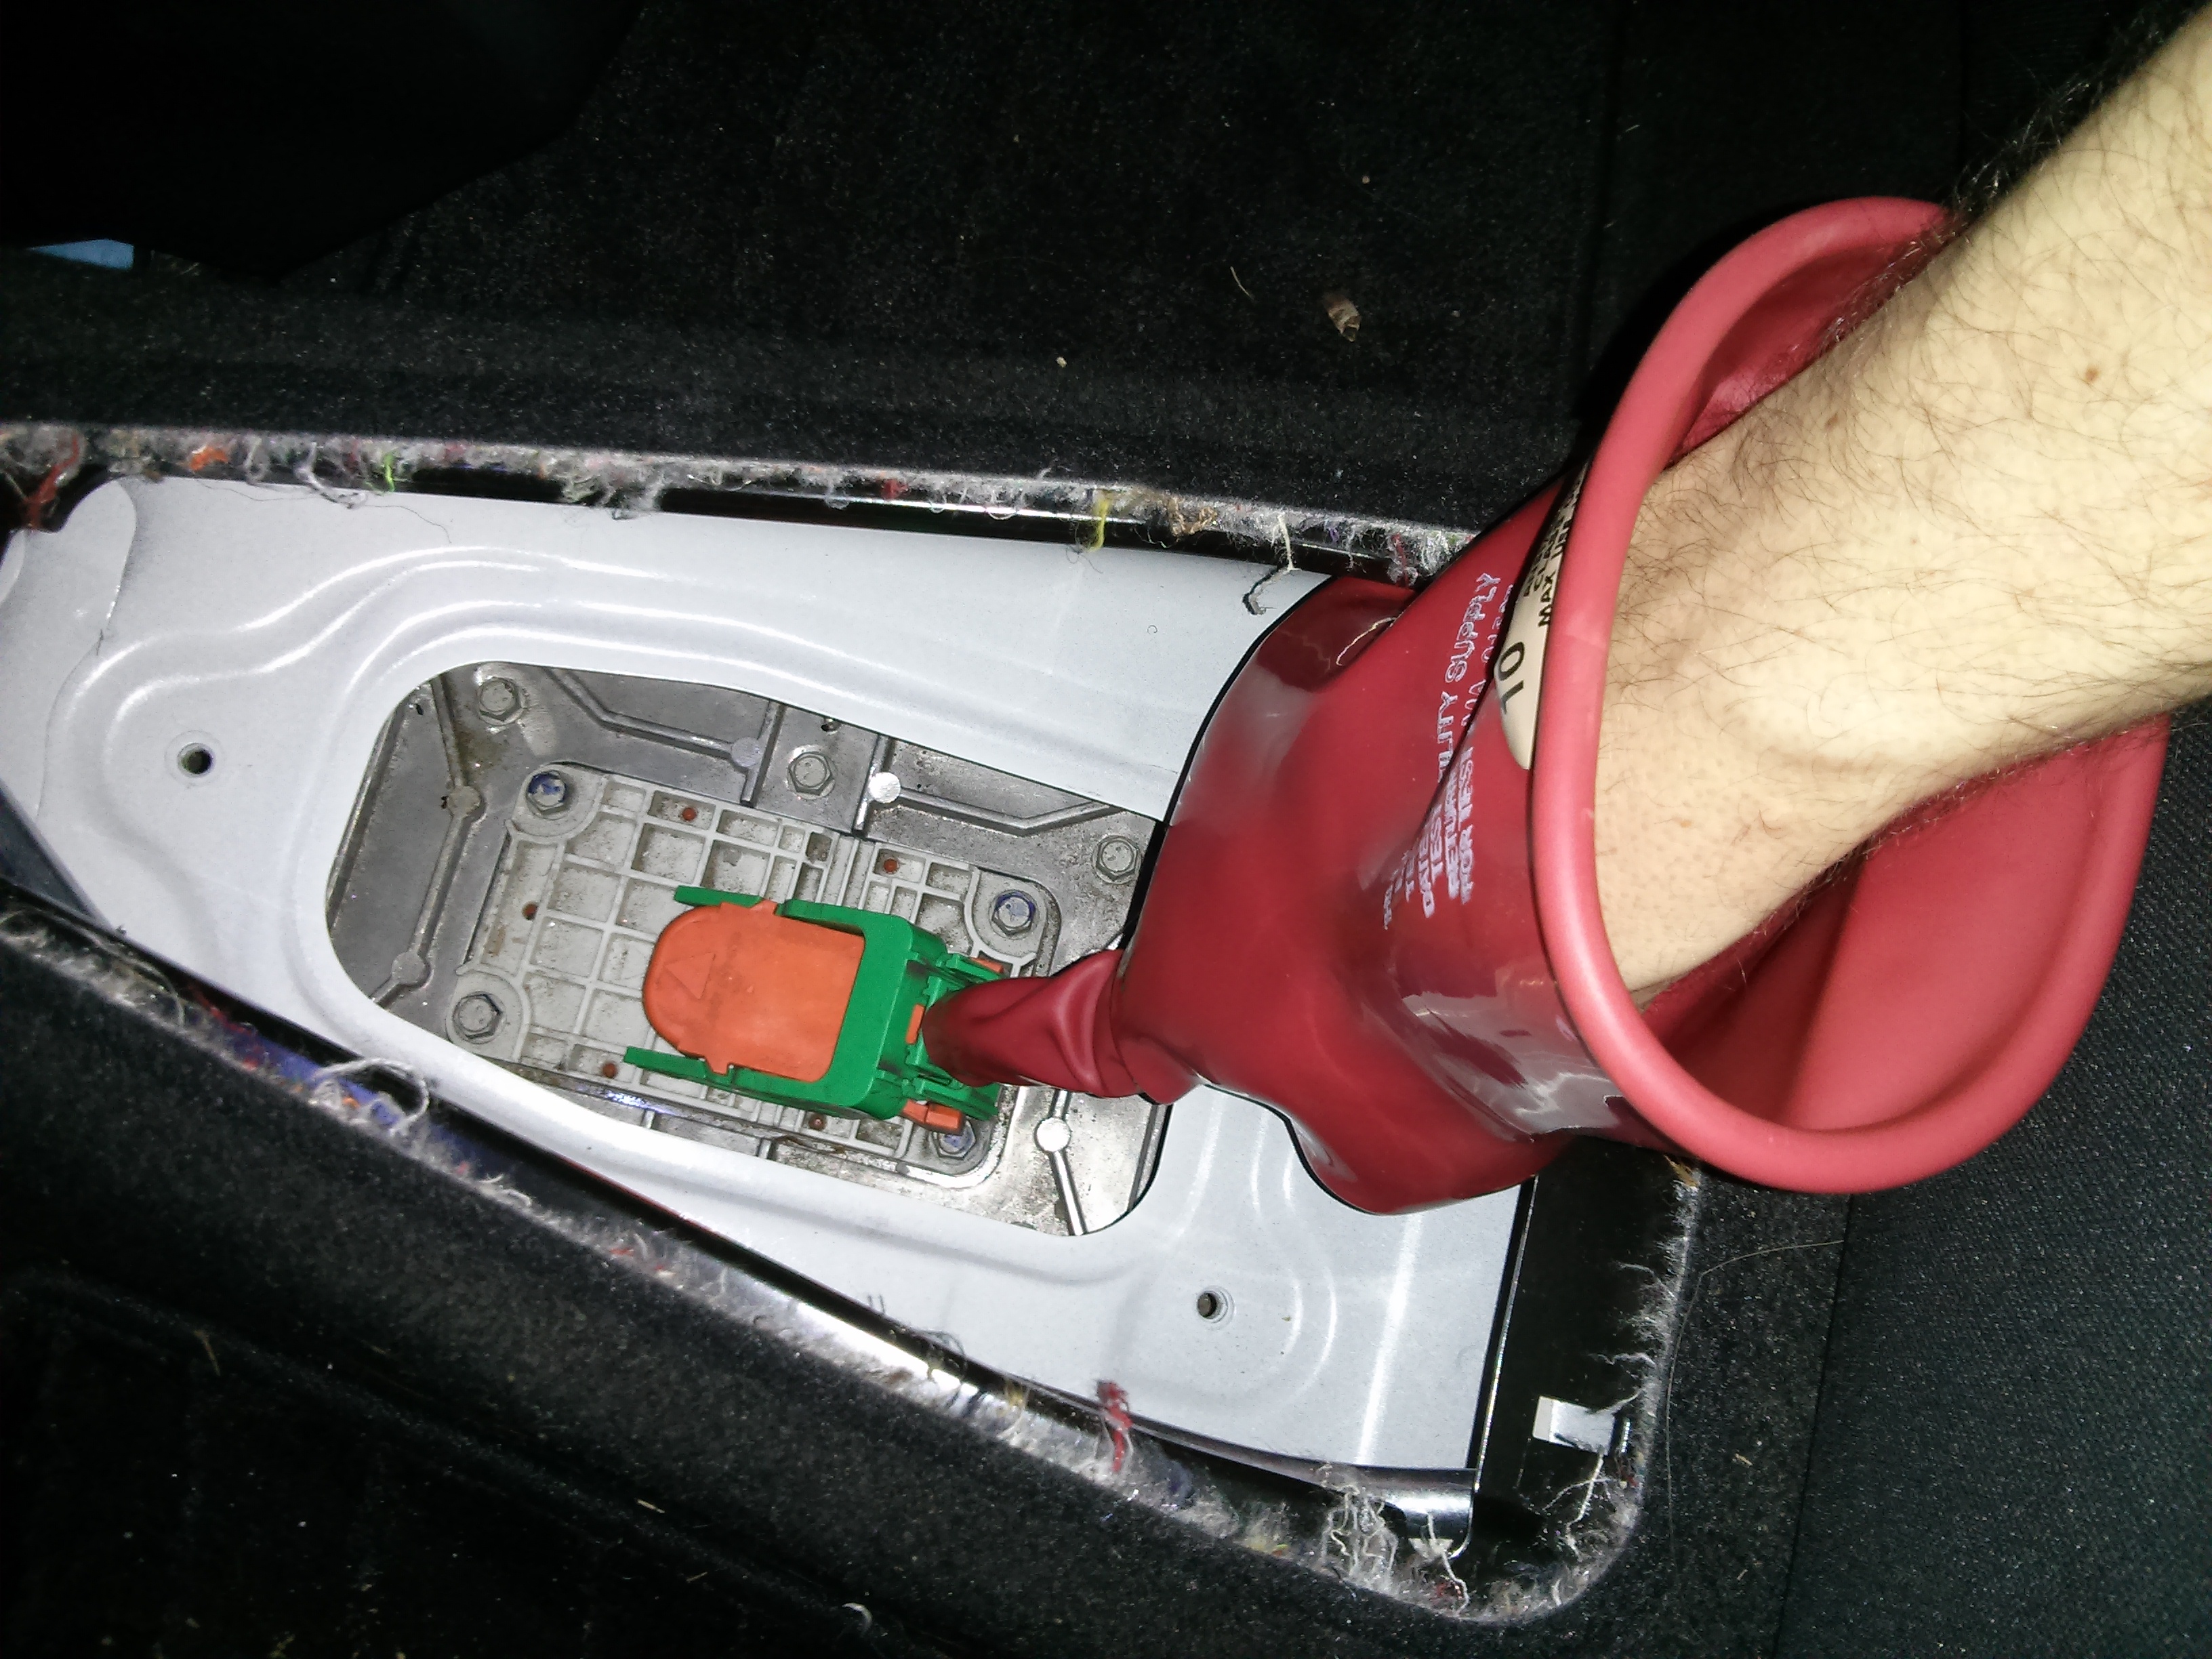
After I pulled the service disconnect, I wrapped the socket with electrical tape. The only way to make sure that nobody accidentally puts the disconnect back in while you are not looking is to keep it in your pocket. (I also bolted the cover back on.)
Note: The inverter portion of the motor unit has capacitors in it that take a full 10 minutes to self discharge. So after you pull the service disconnect, wait at least 10 minutes before doing any work on the orange cables!
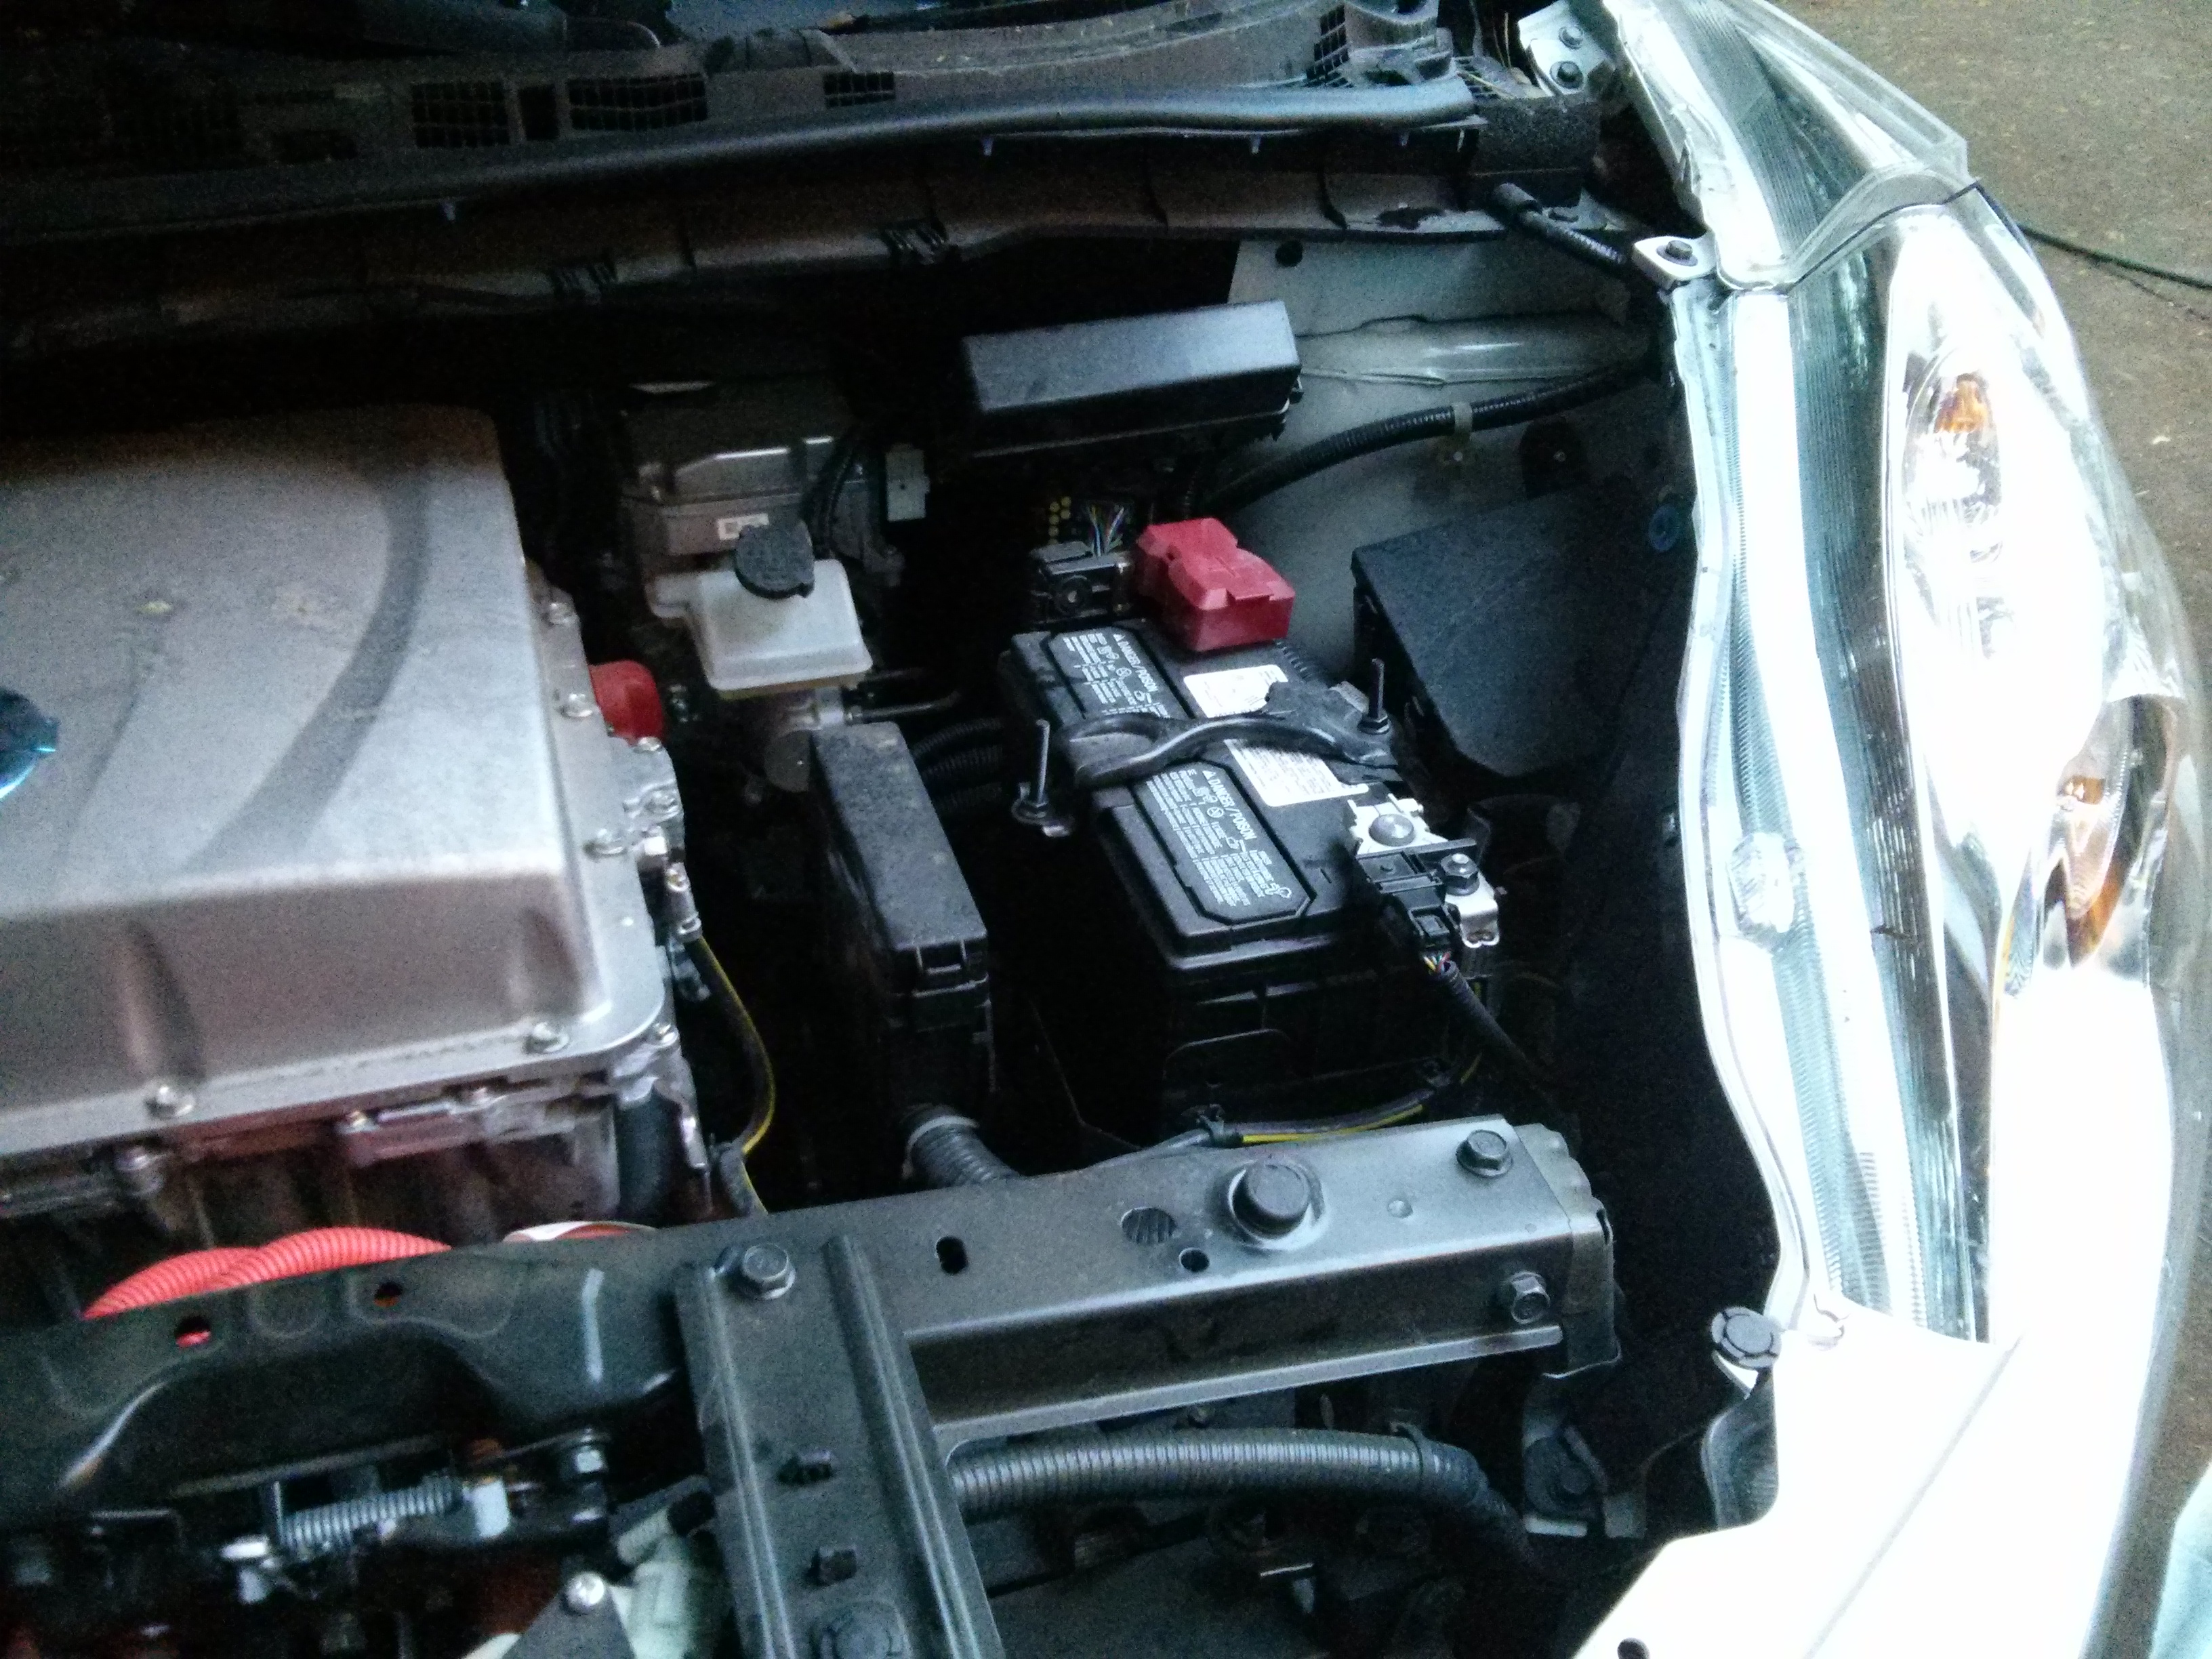
I also removed the connections to the 12 volt accessory battery. This prevents the contractor in the battery from accidentally connecting, hopefully keeping the high voltage terminals from being energized. (However, when removing the connectors and covering with electrical tape, I still wore my 500 volt gloves…)
Information about the battery:
The 2013 Nissan Leaf battery is 60.91 inches long, by 46.77 inches wide, and 10.39 inches tall at the tallest point. The total weight is 606 lbs, and half of this weight is in the last 12 inches, so the center of gravity of the entire unit is skewed way to the rear. (Keep this in mind if you are only using a single dolly under it, I used two…)
It contains 48 modules in series, each module at 8.2 volts for a total of 393 volts, and is fused at 250 amps. 393 volts at 220 amps is 90 kW (about 90 times the average draw of a family of four suburban home). So if you cause a short it will melt/weld metal, blow out flesh, and kill you. Luckily, these modules are safely stored inside a steel case, so the only dangerous points are the service disconnect plug, and the connections to the HV motor wire and HV cabin heater wire.
While this guide may also apply to 2014/2015 or later Leafs, it is specific to the 2013 model. The 2011 / 2012 leafs had a different wiring harness with the charger in the rear of the vehicle.
How to drop the battery:
First: Jack the car up and place it on jack-stands. You will need around 15″ of clearance below the sides of the car and the ground. (11″ of battery + height of whatever dollies you are using). I used two wheel dollies, but you could also use a few furniture moving dollies. (I did have to jack one side of my car up an extra inch to pull the battery out at the very end.) Don’t trust just a jack to hold a weight up that you are under! Be sure to check that all of your jack-stands are level, and not being twisted under load.
Keep an eye on the length of the battery, and place your jack-stands far enough forward and back that you can slide the battery out the side. (I suppose you could also try and slide it out the front or back, but the side worked well for me.)
Second: Remove the plastic underbody aerodynamic shield. It is in 3 parts. The front most part covers the wires that connect to the front of the battery. You will need to remove several 10mm bolts, plus break a lot of plastic snap rivets. I used a pry bar to make this go quick, and wore goggles and gloves to keep the sharp and fast moving plastic shards from blinding me or drawing blood. [Update: It was dark under the car, so I just pried them off and broke them. I have since found that other plastic snap rivets on the car can be removed much easier by using a small flat headed screwdriver to pull the center part out and then the rivet comes right out. I can’t say for sure if the under body rivets were of the same time, but I suspect they can come out a lot easier!]
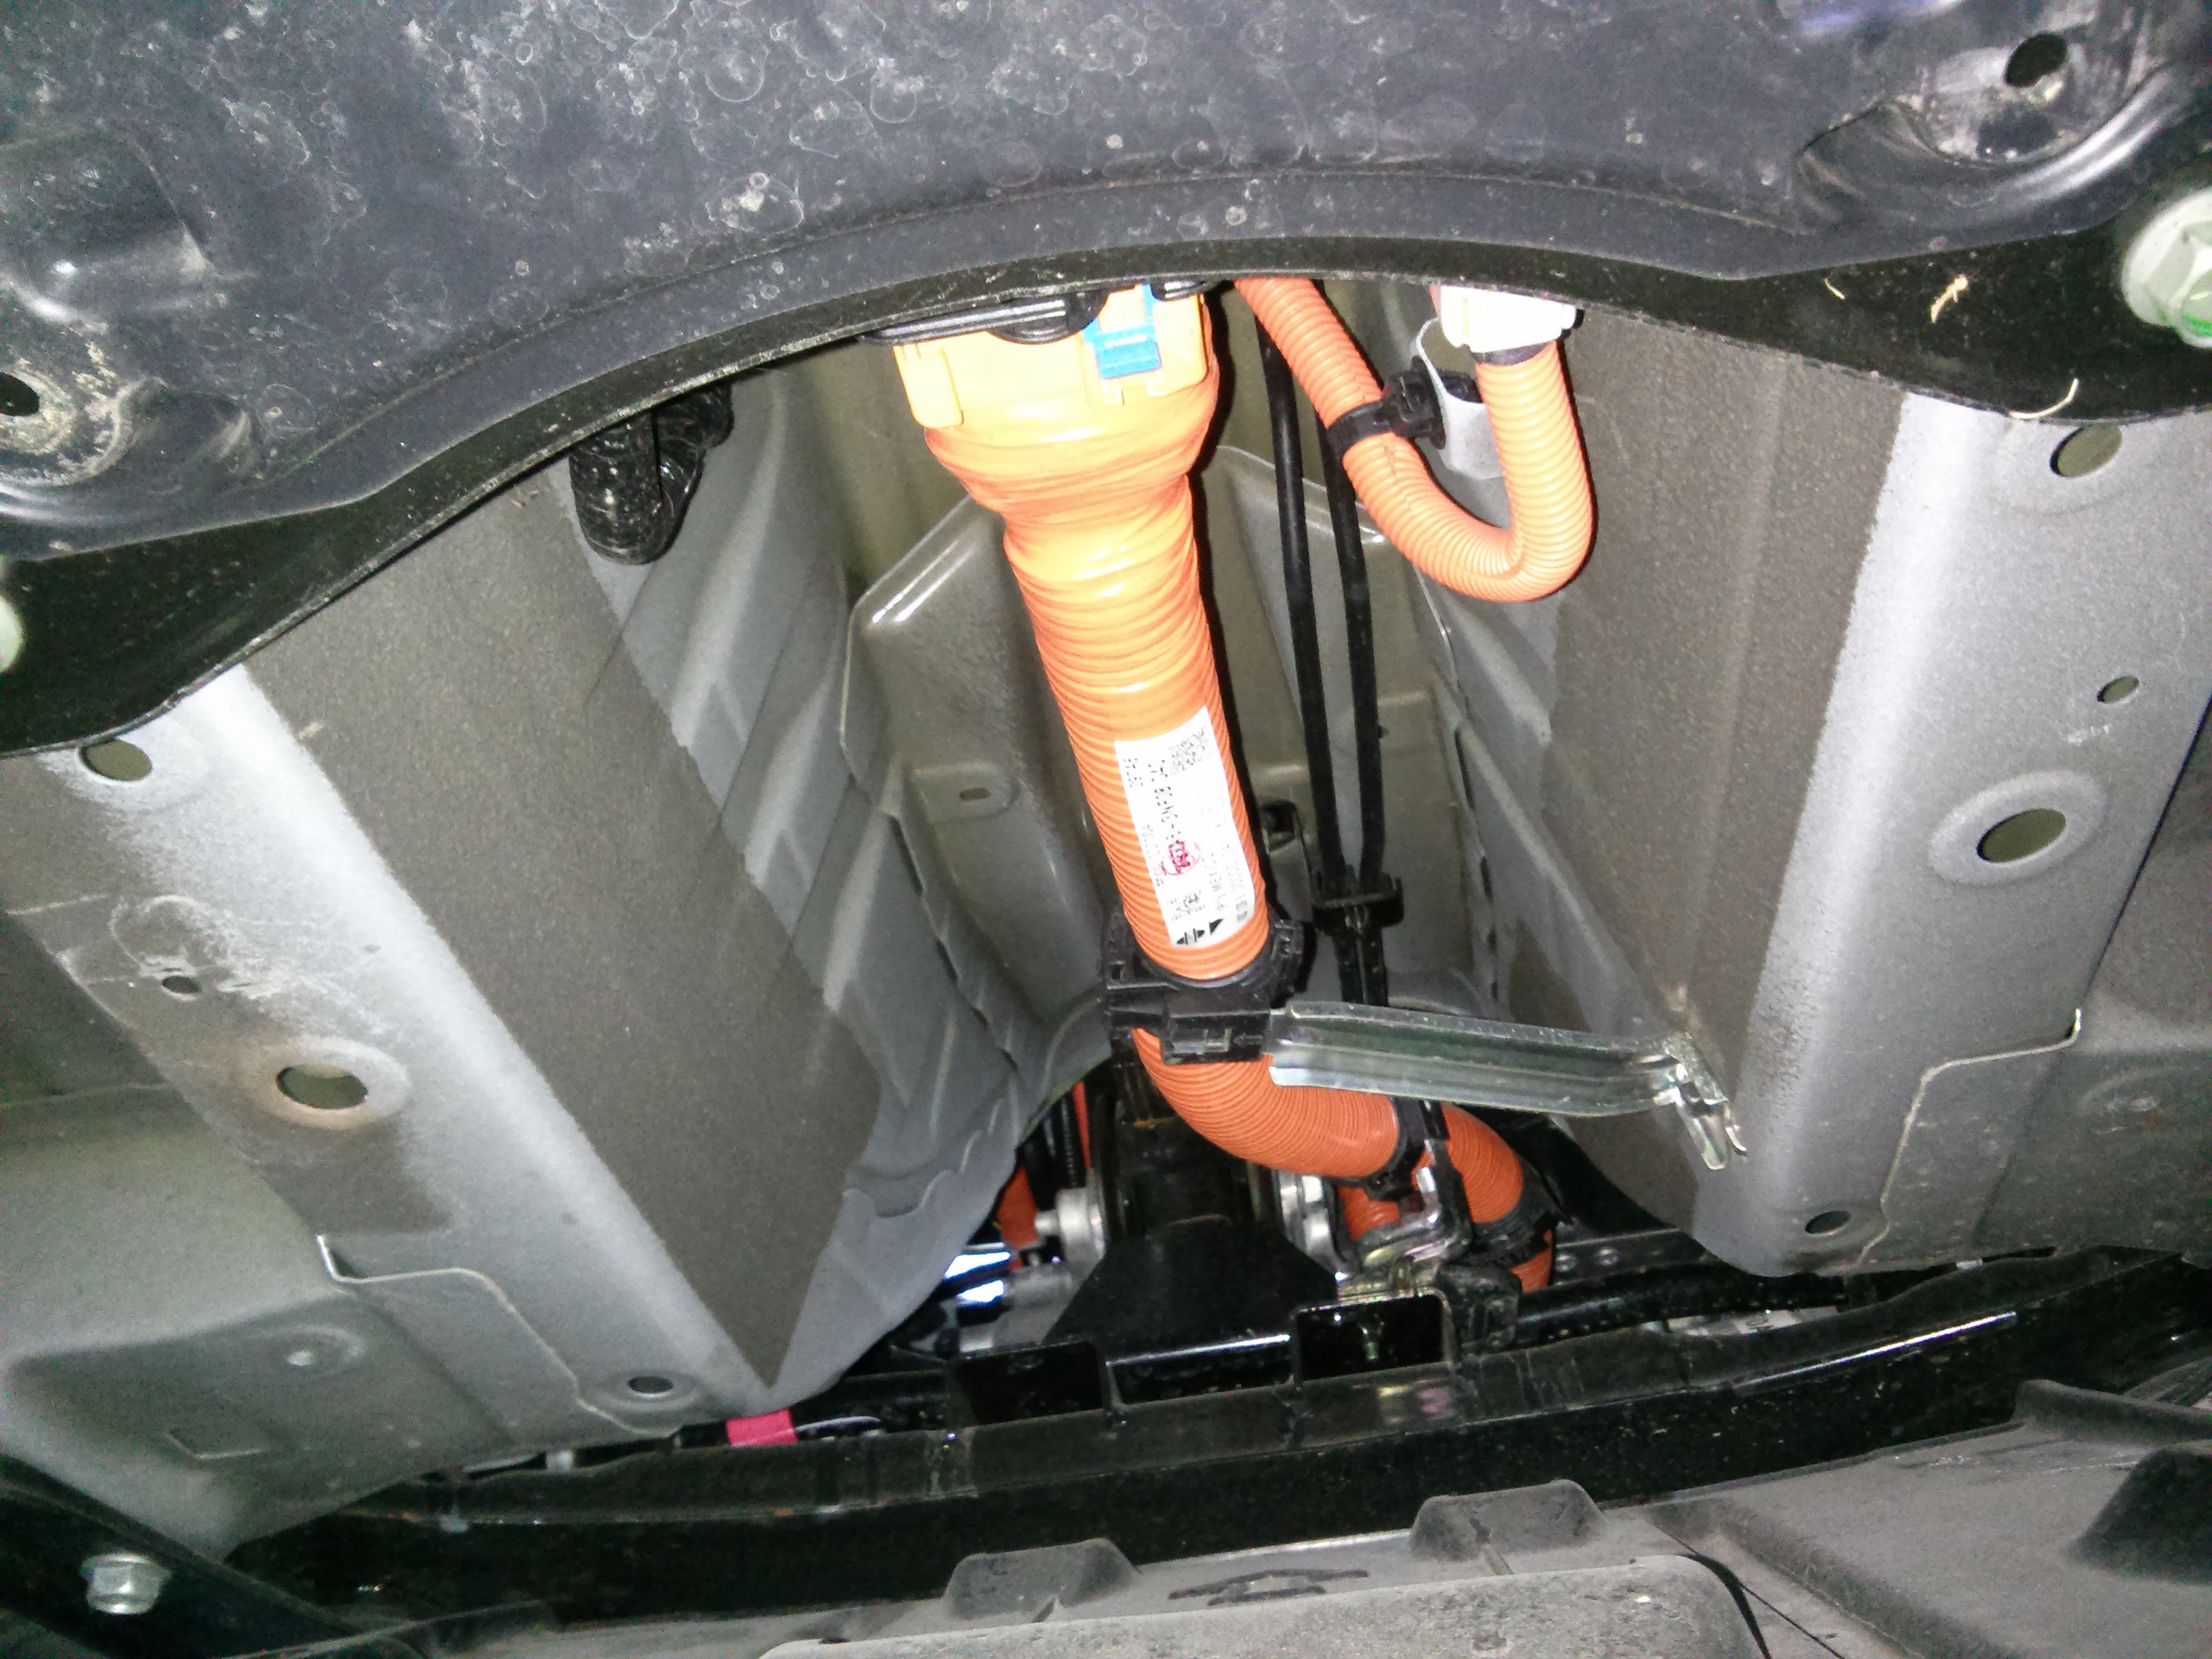
Third: The largest orange cable goes to the motor. Remove the 10mm bolt holding the metal bracket that keeps the wire in place (or disconnect the wire from the bracket). Wearing your 500 volt gloves, Remove the battery harness clamp (pull lock tab out, press release on the side and move collar back, press release on bottom and slide collar back more) then pull to disconnect the connector from the battery. Cover the battery side of the connector with insulated tape at this point in time as a safety precaution.
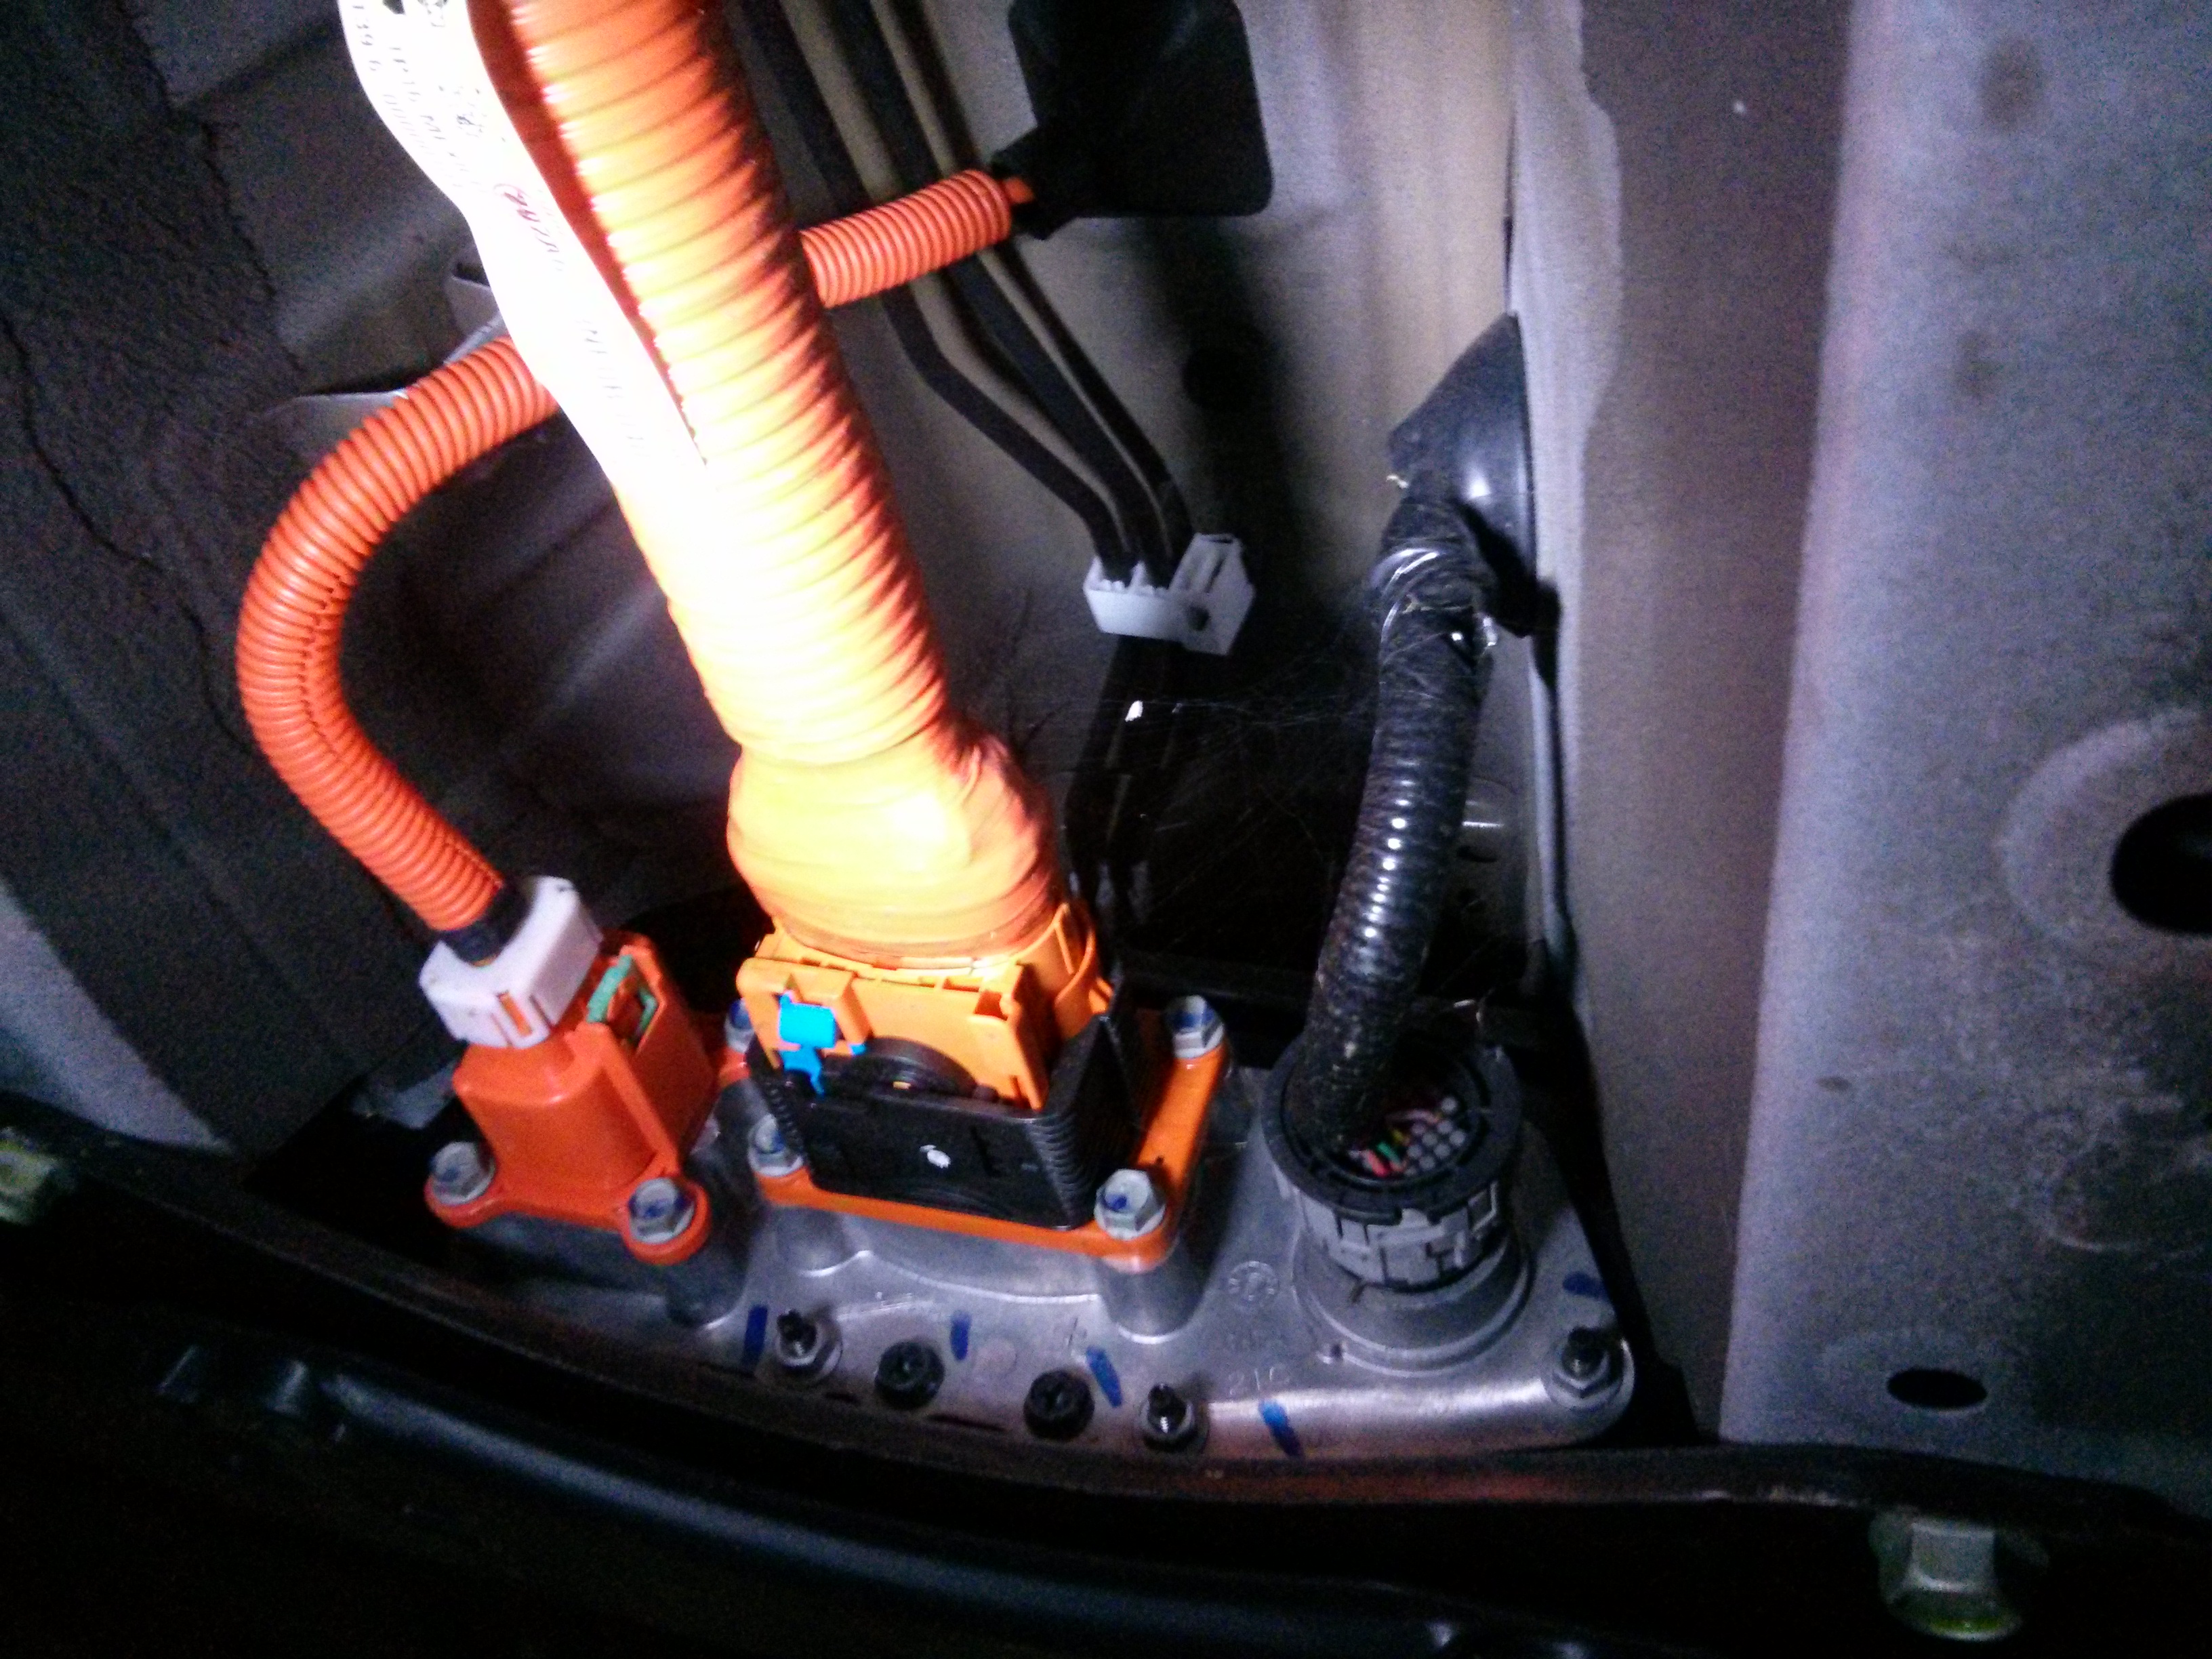
Fourth: Disconnect the cabin heater harness from the battery.
(only one locking tab needs to be pulled back, but I had to use a pair of needle noise pliers to get it while wearing my 500 volt gloves). Cover the battery side of that connector with tape as well.
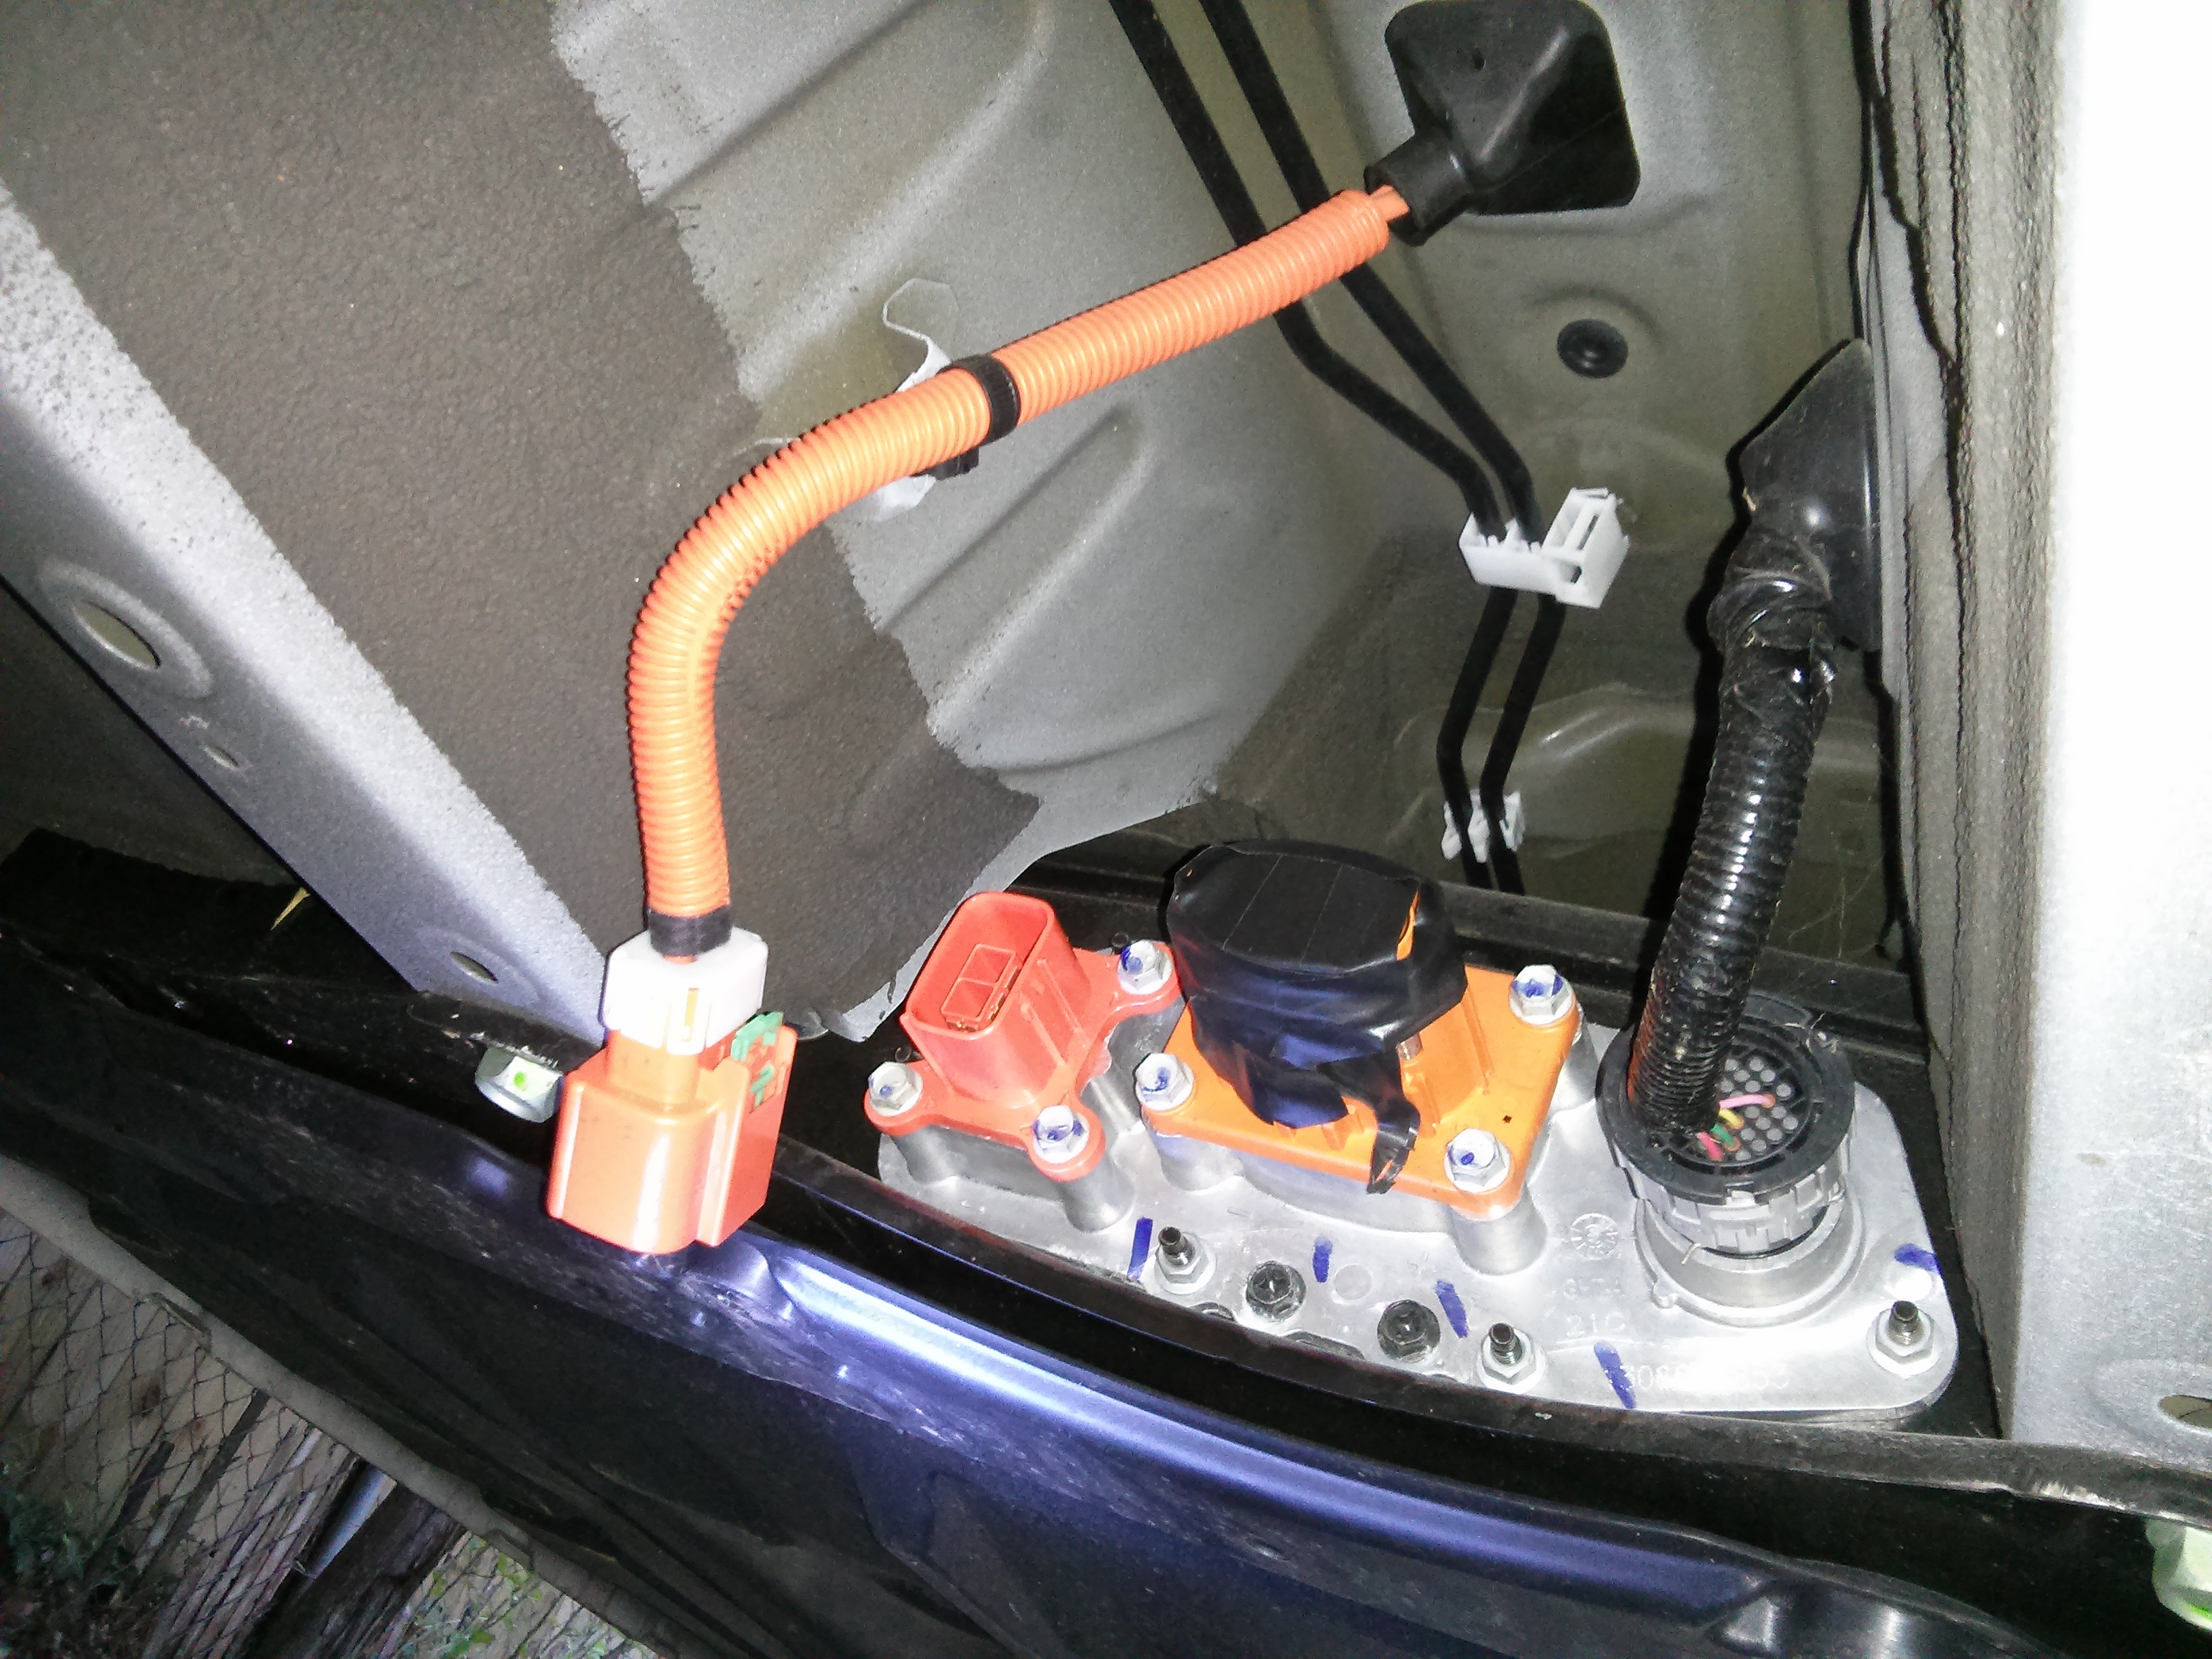
Fifth: Disconnect the CAN bus connector (turn the ring counterclockwise, it will back out as you do. The connector on the battery is some type of slippery Teflon plastic, I tried to put tape over it just to keep dust out, and it wouldn’t stick, but I was able to tape over the plug on the wire.
Sixth: There are a total of 12 bolts holding the battery onto the bottom of the car. There are 3 18mm bolts along each side, on the “rails” under the battery. These six are more than sufficient to hold the battery up while the car is not in motion. Use the impact driver (or a really big wrench and a cheater bar) to start them turning, but do not remove them. Leave them until the end to hold the battery up, when you are no longer under the car, as they are easy to remove from outside.
The other bolts need to be removed while you are under the car. They are two 18mm bolts in the front, and 4 16mm bolts on the back of the battery that hold the battery to two support brackets. (You COULD just remove the two bolts that hold the brackets to the frame, but then you’d still want to remove those brackets as they would stick up past the top of the battery.)
Seventh: With the six edge bolts in place, position your jacks (minimum of 3!) to hold the battery up, and place your wheeled dollies under the battery. I used two smaller jacks on either side of the front, and one large jack in the middle of the rear. (The rear end of my Leaf was crushed, so it was easier to set up a center jack there.) Having 3 jacks gave me guaranteed contact on all 3 (3 points make a plane) but if you have 4 jacks it may work better to use one in each corner. Make sure that each jack is putting slight upward pressure on the battery, but be careful to NOT lift the frame off of any of your jack-stands!
Eighth: Removing the remaining six bolts using the impact wrench, working from outside the car and NOT under it. If your jacks are tightened up, nothing should move.

Ninth: This is the tricky step. Lower each jack slightly, working back and forth until the battery is sitting on the wheeled dollies.
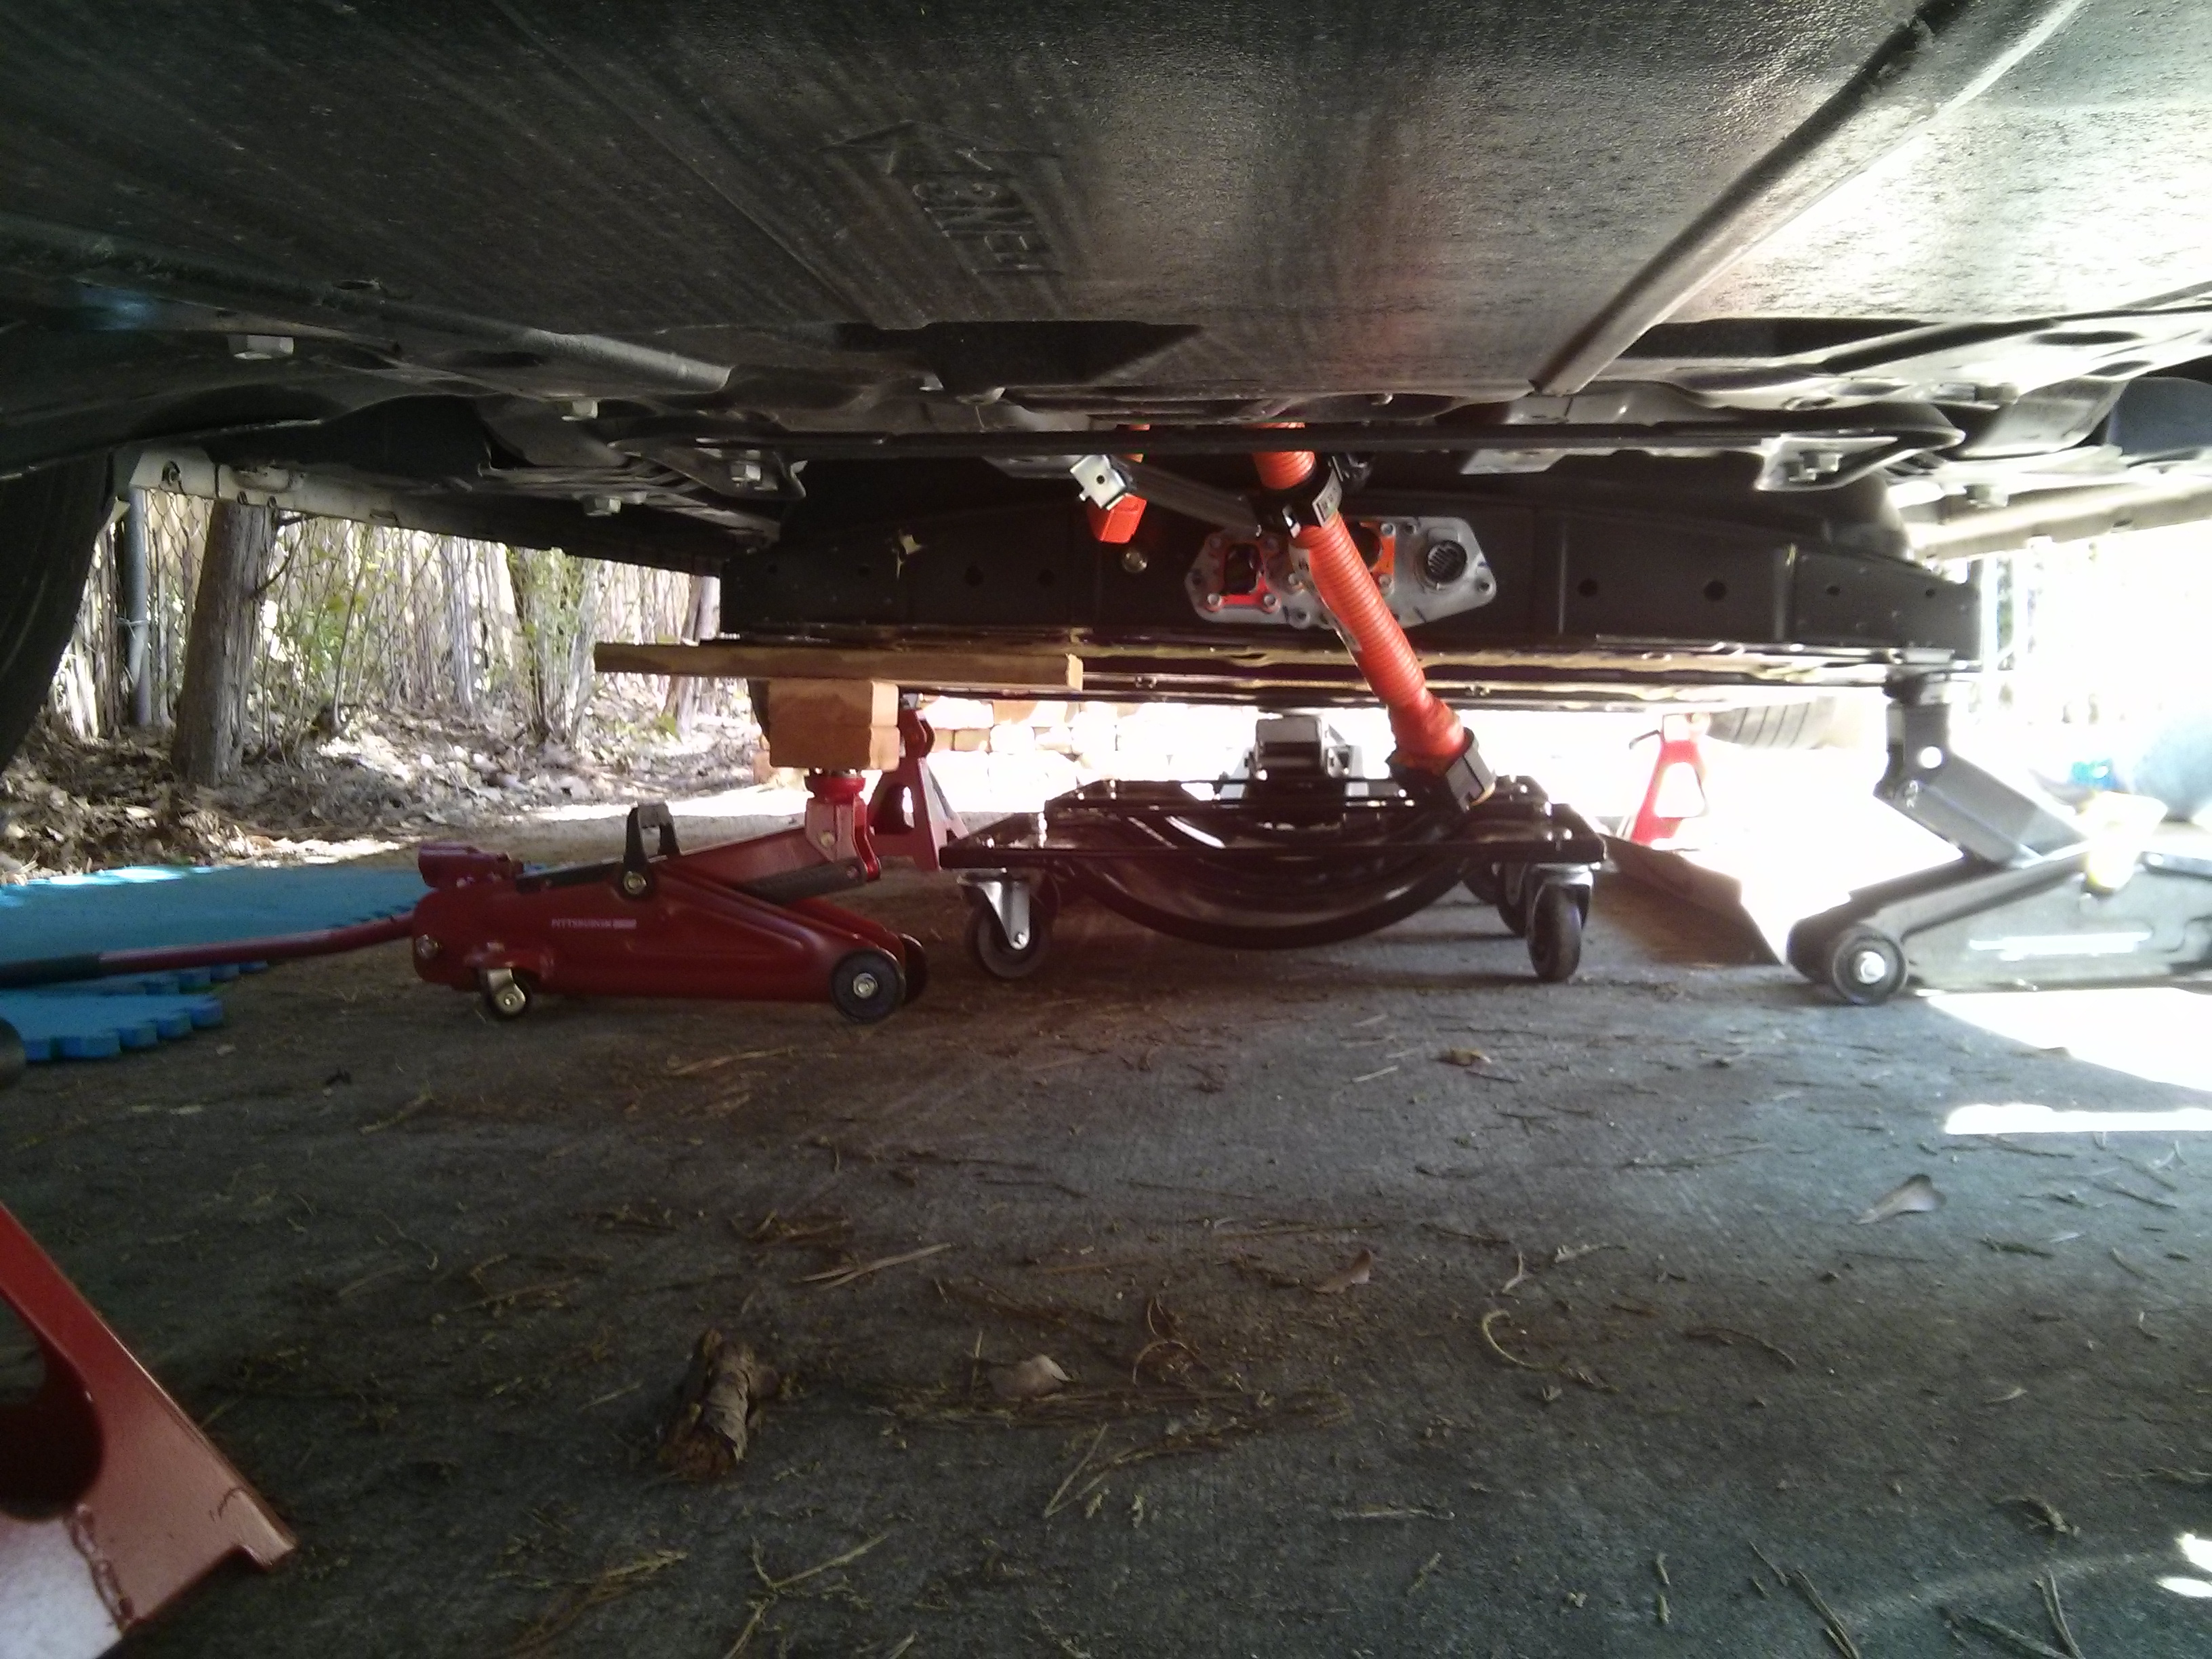
If you have stacks of wood bridging the gap from the top of a jack’s range to the battery, you can prop the battery up with a piece of 2×4 on edge after the battery is lowered enough so that your jack can reach it without wood bocks, remove the blocks, and then put the jack directly under the battery, allowing the jack to lower it all the way down.

Worse case scenario, the battery will fall off the jacks and not onto the wheeled dollies…keep your body parts far enough away that the battery can’t fall on them!
Tenth: Did you leave enough room under the edge of the doors of the leaf to wheel the battery out? (I needed 15.5″, but had only left 15…but I was able to jack up the rear side of the car and it worked out just fine.) Are your jack stands far enough apart? If so, attach a rope or chain to one of the holes on the battery frame and pull it out from under your car.
I used two wheel dollies rated at 1000 lbs each, but you could use furniture dollies, or even just put a lot of pipes on the ground and roll the battery out over them (which would require a lot less vertical space!)
All in all, it was a full days work. I would recommend buying the battery pack from a salvage yard already removed from the car unless you have an auto lift, or can’t find a good deal for just the battery.
Ben Nelson has a nice set of videos of the actual disassembly of a battery pack to get the modules out, so you’ll probably want to watch those videos next:
https://www.youtube.com/watch?v=h0dDHJKzX78
Jay;
Been following your progress with much interest after seeing the links on EVDL.
THANK YOU for providing a blog with descriptive comments and explanatory photos! Not everyone has the ability to view videos (no high-speed internet out here in the sticks yet).
Eventually, I hope to follow in your footsteps and convert my old SCT Rabbit to a more modern battery chemistry and get it back on the road.
Were I to attempt the same, I’d be tempted to look at the possibility of using a cheap inflatable mattress instead of the jacks (with a trolly underneath that). They can be bought for under $50 and some have a max weight of around the 600lb mark. I would think this would make the process much easier and safer. My only concern would be the uneven weight distribution in the pack. Perhaps the mattress would be long enough to double the back end over by a foot or so so it would have twice as much thickness? Oh, yes… and get one with a mains powered pump! MW
Not a bad idea, I hadn’t thought about using an air bladder. Even if it burst (due to the sharp steel edges) the deflation would probably cushion the drop of the battery sufficiently that the modules inside wouldn’t be damaged.
I only had one point where the battery slipped slightly on the jacks, and that was my own fault, so if you are careful and lower each one a little bit at a time the procedure doesn’t seem to be too tricky.
I already had 2 jacks, so the added cost of the 3rd jack was only $30 (and I’m about to sell it for $20 used)…