Installing Modules: Adding extra features
Python comes with many useful modules as part of the default install. However, sometimes you will want to add extra functionality to Python by importing a 3rd-party module. The Python Package Index (PyPI) website lists many such modules. Examples include:
- xlrd - Reads and Writes Microsoft Excel files.
- PDF - PDF toolkit to split/merge/extract pages from PDF files.
- pdfminer - Toolkit to extract text from PDF files.
- PyMySQL - Connect to MySQL databases.
There are several programs (easy_install or pip) that will automatically download and install 3rd party modules for you, or you can manually download the module install file and use python to run their setup script directly. Once they are installed, any python program you write can import and use them.
Automated Installation: easy_install
One of the easiest tools to use for installing 3rd party modules is easy_install. As of Python 3.4, this tool is distributed as part of the default python installation. (For example, on a computer running Microsoft Windows, where python 3.4 was installed in the default location of c:\Python34 it is located in c:\Python34\Scripts\easy_install.exe after you install python 3.4). Another tool that does the same thing called pip may also be installed by default.
Using easy_install on Windows
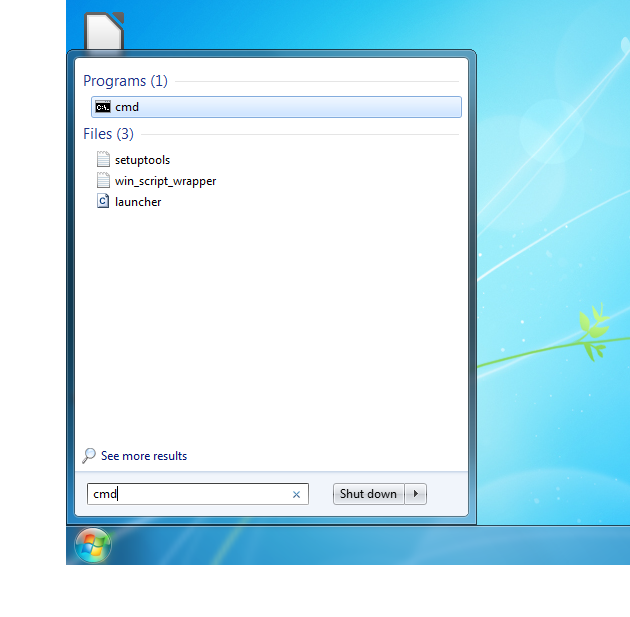
The easy_install.exe program is a command line program, so it must be executed from the windows command line. You can access this by starting the “cmd” application. You can either use the search tool to search for “cmd” (Windows 8) or you can type “cmd” in the “Search programs and files” bar in the Windows Start Menu (Windows 7, Vista, XP)
Once you have the command window open, you need to run the easy_install.exe program and give it the name of the module you wish to install. If easy_install.exe isn’t in the default path, you will need to specify it’s exact location, such as “c:\Python34\Scripts" before the name “easy_install.exe”.
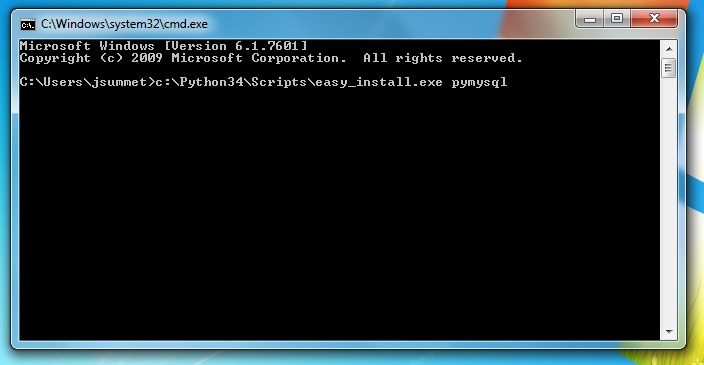
For example, the full command to install the Pure-Python MySQL database module named pymysql on Windows with Python 3.4 would be:
c:\Python34\Scripts\easy_install.exe pymysql
If you had python 3.3 instead, the 34 would be changed to 33. If you had chosen to install python to some other directory, you would need to include the full path to that directory instead, such as:
c:\users\jsummet\MyPrograms\Python34\Scripts\easy_install.exe pymysql
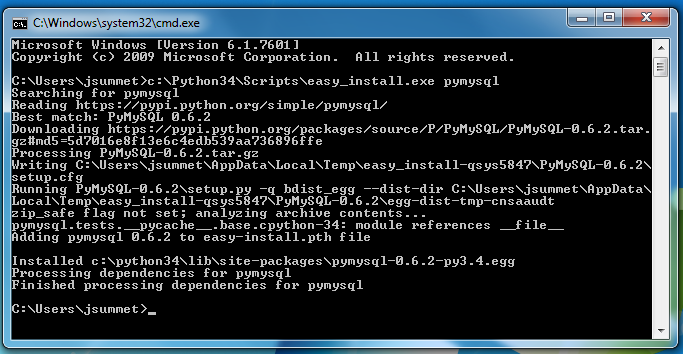
After you issue a successful command, the easy_install.exe program will give you some feedback telling you that it downloaded the module and installed it, that will look like the following:
Using easy_install on a Macintosh
Mac computers from Apple running OSX come with at least one version of python already installed, and will already have easy_install as well. If you are using the default version of Python, you can also use the default version of easy_install. However, if you have installed a newer version of Python (such as 3.4) you will need to specify the easy_install that comes with version 3.4, so that your 3rd party modules will be installed for the correct version of Python.
If you are unsure which version of python you are using, start IDLE and look at the text at the top when it starts up, which will include the python version number. For example: “Python 2.7.3” or “Python 3.4.1”.
You will need to open the terminal application, which is the Mac version of the command prompt. To do this, go to the searchlight (magnifying glass icon in the top right of your Mac’s screen), type in “terminal” and click on the application to open it.
You will also need to use the sudo command to run easy_install with super-user permissions so that it will be able to install modules into the Python folder. When you use the sudo command, it will ask you for your password, but WILL NOT show you any dots or stars while you type it, so you will have to type your password “blind” without visual feedback and then press enter.
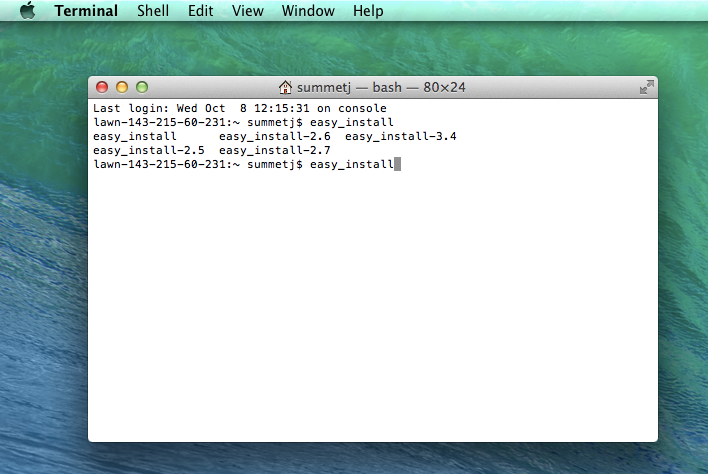
To find out which versions of easy_install you have available, you can type “easy_install” into the terminal command prompt (without the quotes) and then press the TAB key on your keyboard a few times. The terminal will give you a listing of all the possible names for the different versions, such as easy_install-2.7 and easy_install-3.4. You will want to use the name that corresponds to the version of Python you are using. The image below demonstrates what this should look like after pressing the TAB key a few times. Note that multiple versions of easy_install are shown, you need to pick the version that corresponds to your version of python.
For example, if you are using Python 3.4 the command you will type to install pymysql would be:
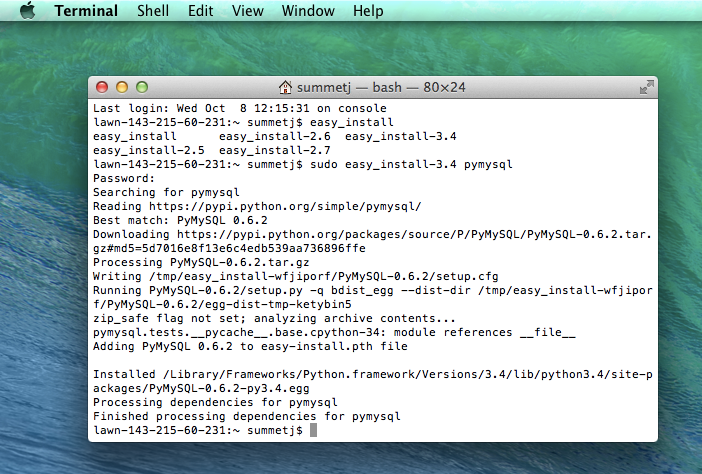
sudo easy_install-3.4 pymysql
When you hit enter after this command, you will be asked to type your password. The terminal will NOT echo characters as you type, so you will have to type blind and press enter/return when finished. After you successfully type your password and hit the enter/return key, the output from easy_install should look very similar to the output in the image below:
Testing your Install
After you install a 3rd party module, you can test to check that the installation was successful by opening IDLE and typing “import <modulename>” (without the quotes).
As long as IDLE does not give an error, you have successfully installed the module! If it gives a “module not found” error then you have ran into a problem. Double check which version of Python your IDLE is using, and make sure that you used the corresponding easy_install script. Also, you will probably need to close IDLE while doing the module installation, and then re-start it after the install is finished before you can import the module.
Manual Installation
If you have found a 3rd party module that is NOT listed in one of the main packaging repositories, you may need to download a .zip or .tar.gz file directly, and use python to install the module directly. This is very rare, and typically only happens for modules that are not well supported.
Another time you may need to do this is if you are using an older version of Python, that is not supported by the current version of the module. For example, PyMySQL version 0.6.2 requires python version 3.3 or higher (it does not work with Python 3.1 or 3.2). So if you were using python 3.1 or 3.2, you may need to download an older version of pymysql (0.5.x) which did support Python 3.1 and 3.2.
I have placed a version of pymysql that works with python3.1 and 3.2 here as a zip file here. (December 24th, 2011)
The zip file above contains a directory named py3k. Inside this directory is a setup.py file. To install the module for your python3 system, you need to go to a command line, navigate to that directory, and run the command:
python3 setup.py install
On windows that could be done with a line such as:
c:\python32\python.exe setup.py install
On a mac, you may have to specify the version of python and use sudo:
sudo python3.4 setup.py install
In Summary:
- Download the module zip file.
- Unzip it, it will create a directory (such as py3k)
- Using a terminal or command prompt, go into the directory that was created, using a command such as: cd py3k
- Use the python executable to run the setup.py file (giving it the “install” argument) with administrator or super-user privileges: sudo python3 setup.py install
Note that instead of python3 you may need to use the specific name or path of your python executable, such as python3.2 or c:\python32\python.exe. Note that your python3 executable must have permissions to edit files in the system’s dist-packages directory. You may have to open the command line or terminal with administrative or root privileges. On a Linux system, you can do this with the sudo program, and it will produce output as follows:
1 2 3 4 5 6 7 8 | summetj@hostname:~/temp/py3k$ sudo python3 setup.py install
[sudo] password for summetj:
running install
running build
running build_py
running install_lib
running install_egg_info
Writing /usr/local/lib/python3.1/dist-packages/PyMySQL3-0.5.egg-info
|
Once you have successfully installed the PyMySQL module into your dist-packages directory, test it by opening Python and trying to import the pymysql module. If it does not give you an error, you have successfully installed the module!
1 2 3 4 5 | Python 3.1.1+ (r311:74480, Nov 2 2009, 14:49:22)
[GCC 4.4.1] on linux2
Type "help", "copyright", "credits" or "license" for more information.
>>> import pymysql
>>>
|