I purchased a used Vaonis Vespera smart telescope, but if I wanted to buy the “official” (and proprietary) Dual Band filter to use for imaging emission nebula, it would cost $400 USD!
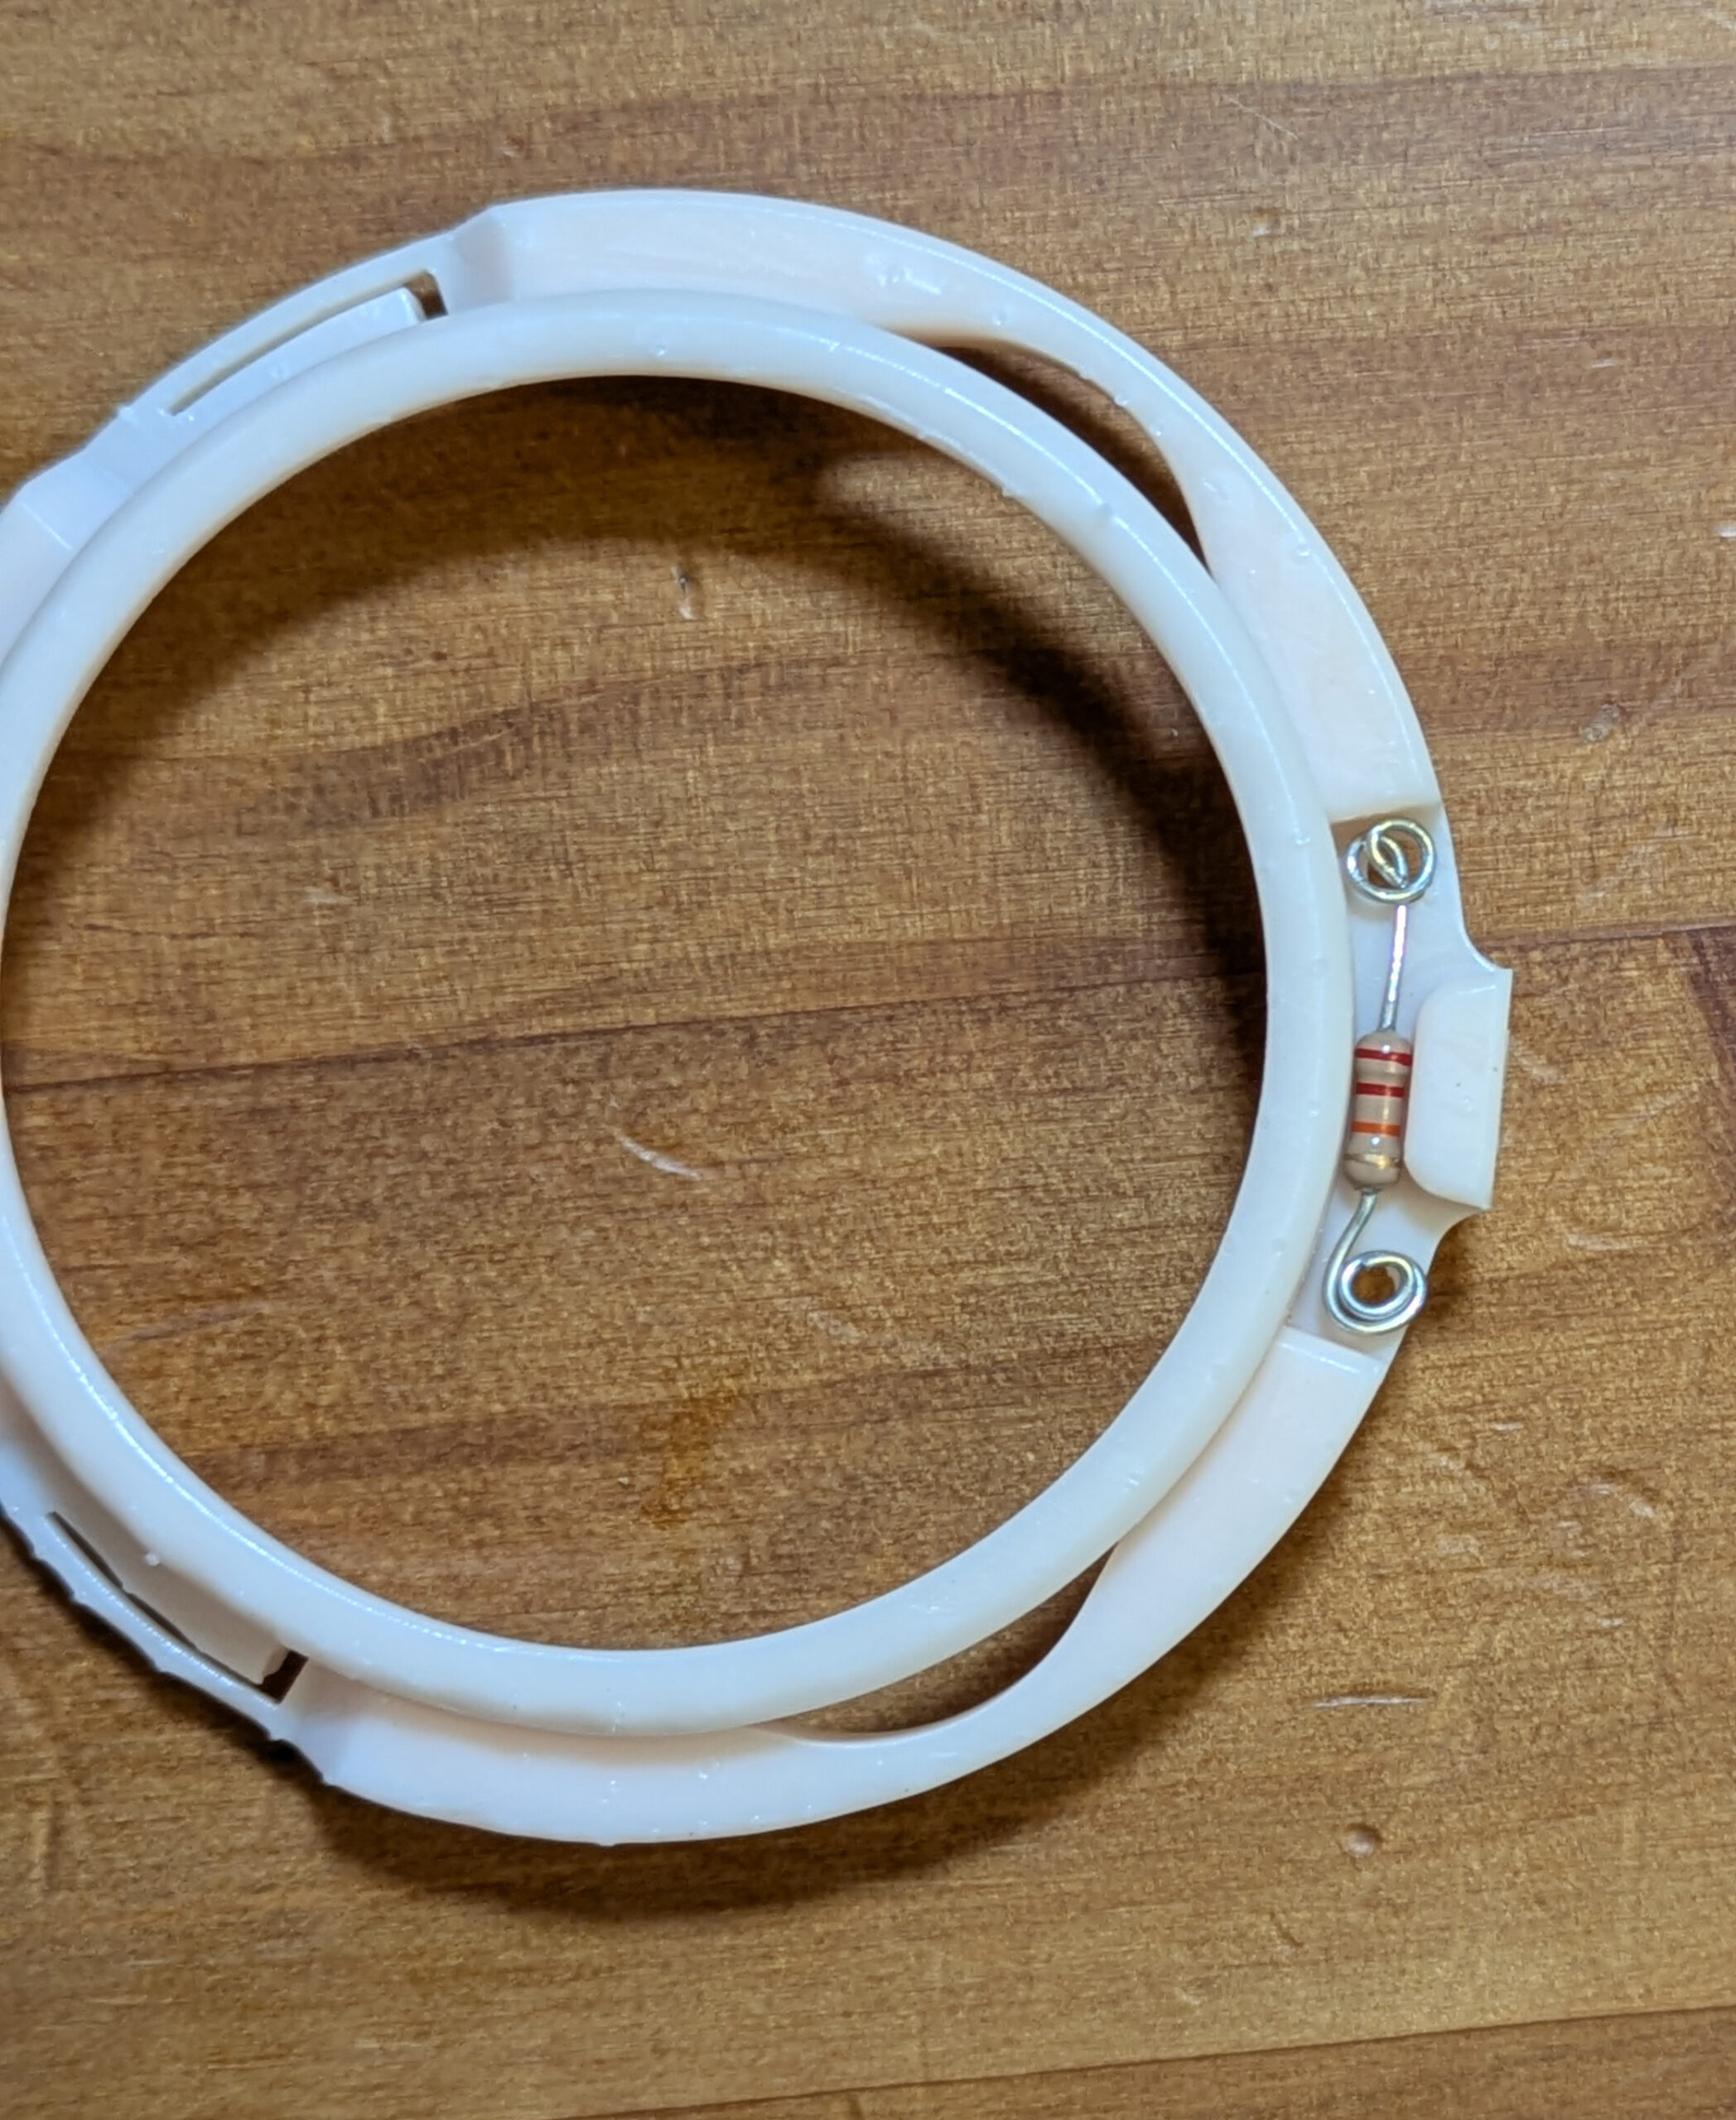
This especially smarts, as I already own a 2″ SVBony SV220 dual band filter that I use on my main telescope. Luckily for me, aureliend2000 has posted a 3D model on Thingiverse that allows you to create your own ‘Vespera compatible’ filter by screwing in any standard 2″ optical filter.

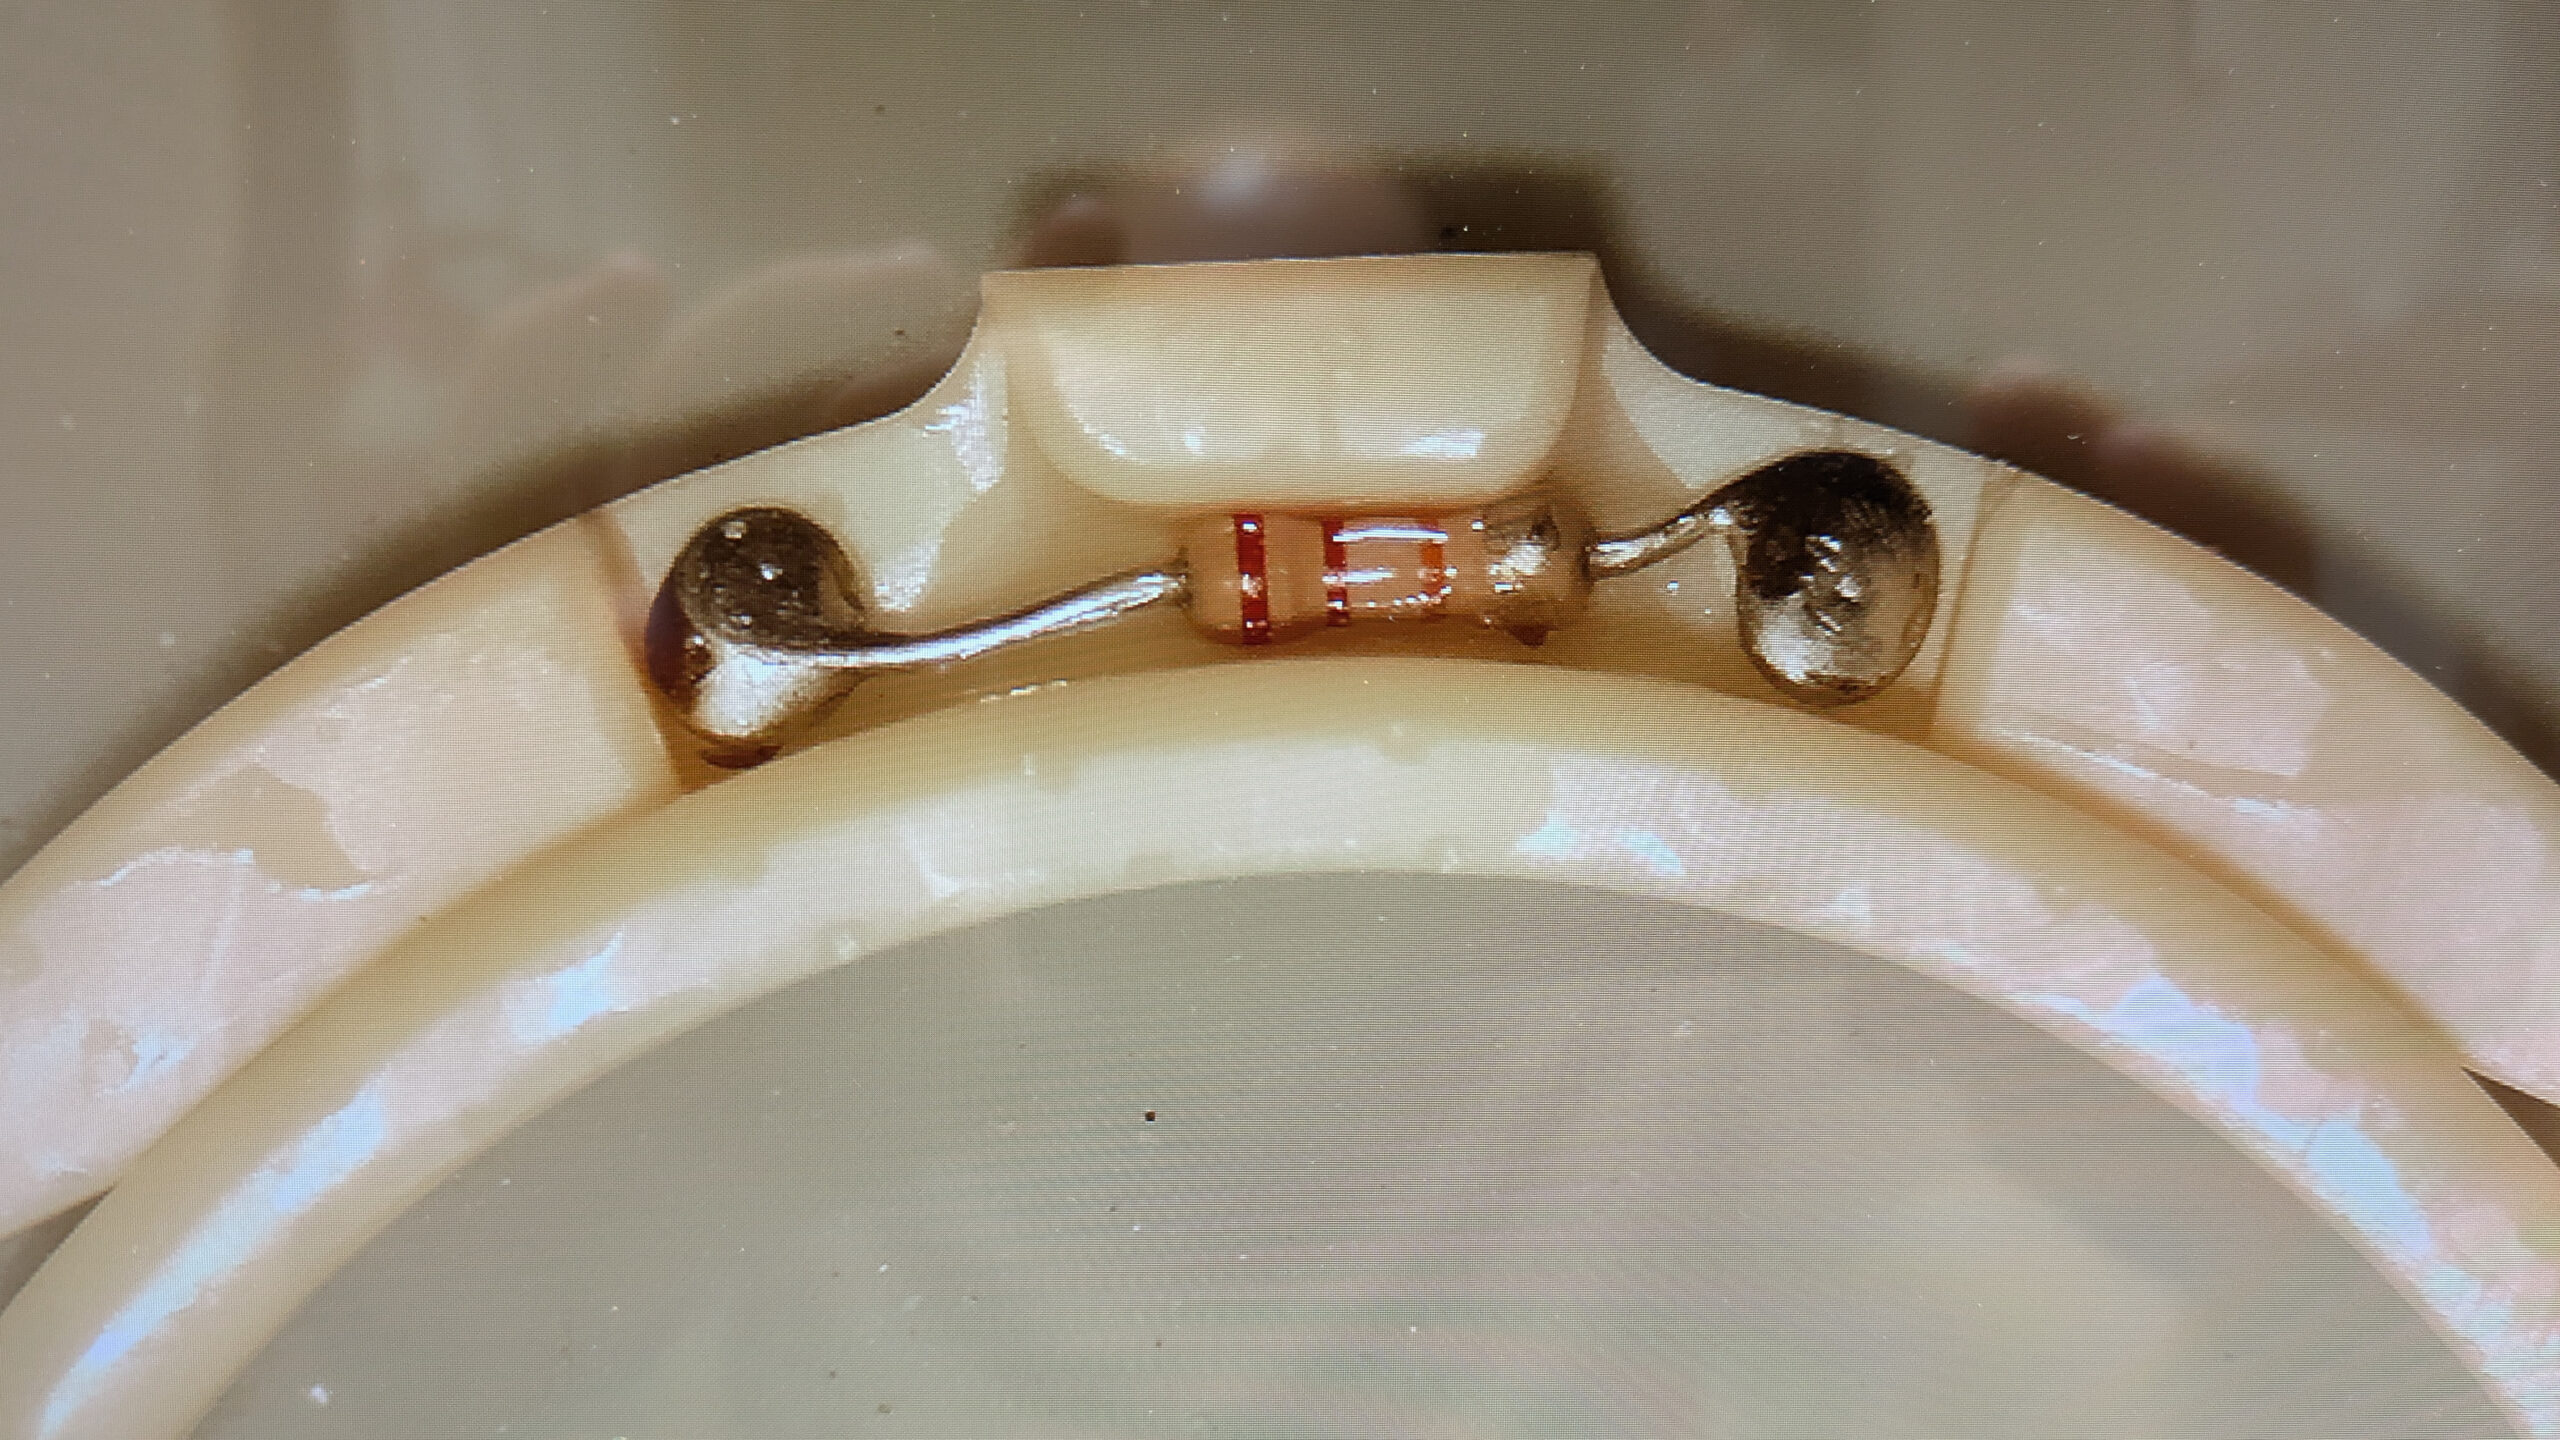
[And if you put a 24k Ohm resistor in the right spot, the Vespera automatically detects that a “Dual” band filter is installed, setting the gain of the camera appropriately.]
Here is a video showing the full process of how I made mine:
Here is a 48min exposure of the Rosette Nebula (from Bortle 7.5) without the Dual Band filter:
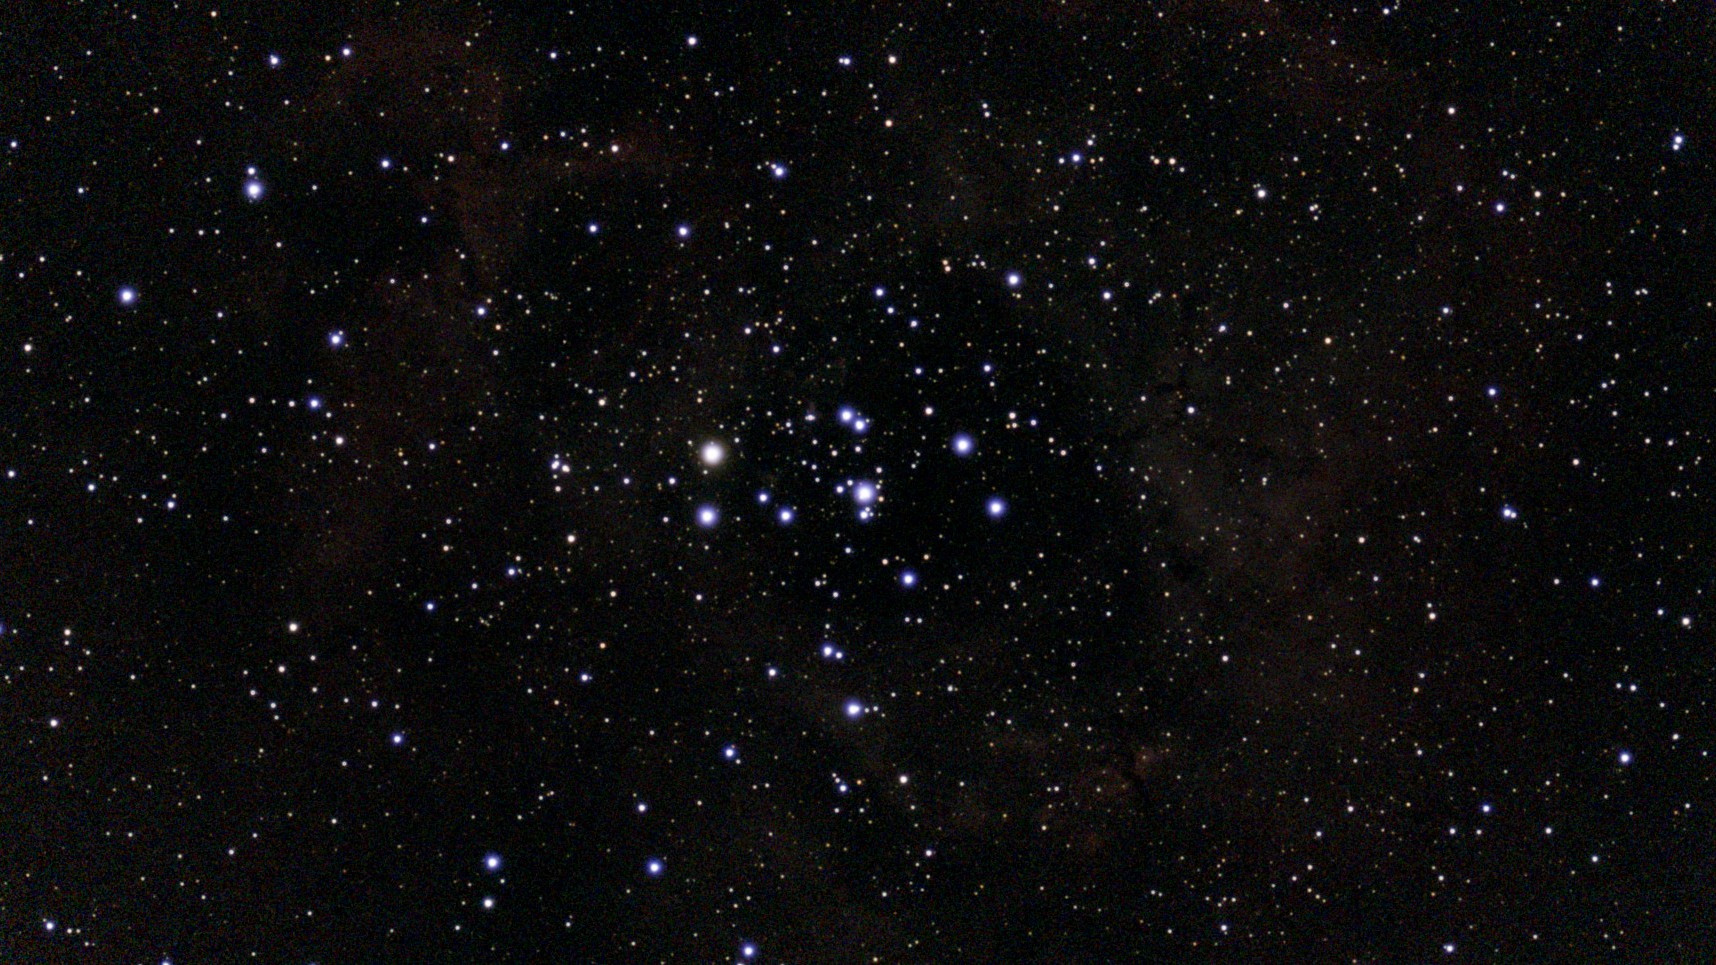
NGC2237_44 (290 exp)
And for comparison, here is a 48 min exposure WITH the SvBony SV220 dual band filter:

NGC2237_44 (287 exp)
And here is a 57 minute exposure of the Owl Nebula using the SV220 dual band filter:
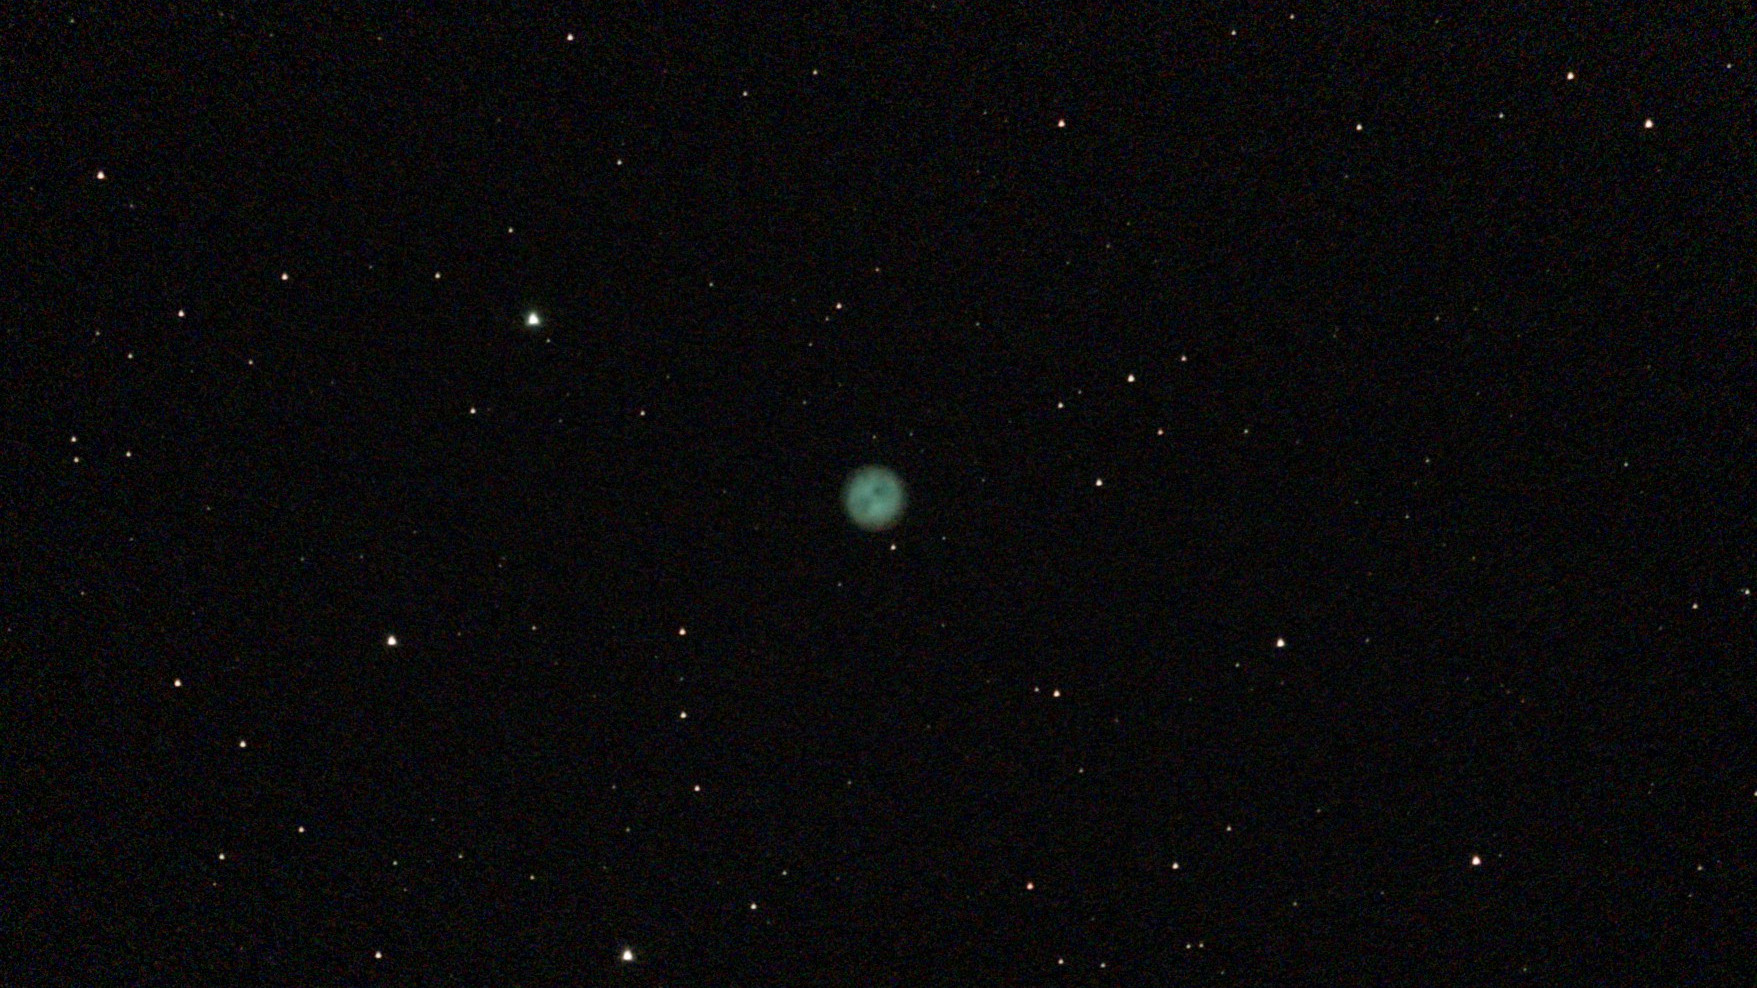
M97 (342 exp)
Considering I already had the SV220 filter, a 3D printer, and a 24k Ohm resistor “in stock” I’m very pleased with the ability to use a dual band on the Vespera without spending (any more) money. I’m so happy with the result that I’ve ordered a sheet of solar film and plan on making my own Solar Filter so I can use the Vespera to image the sun. [Yes, my Zwo Seestar S50 came with a solar filter and a built in light pollution / DB filter….but the optics, tracking, and software of the Vespera are all just slightly nicer, and since I got it used the cost wasn’t outrageous.]


Pingback: Building a solar filter for the Vaonis Vespera smart telescope | Jay's Technical Talk
Hey Jay,
Sorry to disturb you—I’ve seen your posts about running a dual-band filter on the Vespera and hoped you wouldn’t mind a quick question.
How did you reliably get the dual-band filter working on the Vespera?
• Did you initialize without the filter and then install it mid-session, or were you able to solve with the filter on?
• After installing it, do you always restart autofocus? Any preferred exposure/gain (e.g., ~10–15 s, high gain)? Some people say having it on 27dB help.
• Did you notice issues with star roundness or dithering early on, and if so, what fixed it? I was trying to debug the problems using the ftp client.
• Any tips to prevent tilt or light leaks with the printed holder (spacers, flocking, orientation)?
One more thing: I’m considering permanently attaching the 3D-printed holder to the filter (I don’t plan to use that filter anywhere else). Is that safe in your experience? If yes, what adhesive would you recommend (e.g., a small bead of neutral-cure silicone/RTV on the outer ring) and any precautions about thermal expansion, outgassing, or making the assembly too thick for the Vespera clearance?
Thanks a lot for your time—and for sharing your work. Any pointers or gotchas would be hugely appreciated.
I’m using the SV bony SV220 filter and with it I found that I could just insert it into the Vespera and then have it start working as normal. (I might have to wait until the sky is just a little bit darker than usual to get my first calibration working, but otherwise plate solving, focus and calibration all appear to work as they should with the filter in place. I assume the SV220 is close enough to the vespera OEM Dual Band filter that it “just works”.]
I didn’t notice anything specific about the starts, but then again I didn’t look super close as I was focusing on capturing nebulas with the DB filter. I also didn’t take any special precautions about light leaks and didn’t notice any major issues.
My filter to filter holder connection isn’t as good as I would like (the threading is picky and very close, sometimes the filter will fall out if you bump it, etc…) so if you CAN dedicate the filter to the holder, I’d say go for the glue. I would probably either use an epoxy or a UV cure resin around the outside, but a silicone (or even hot glue) would be much easier to remove if you decide you want to use the filter elsewhere. I figure as long as you let it fully cure before use you won’t need to worry about offgasing too much, and I wouldn’t expect thermal expansion would be too much of an issue.
Jay
Thanks a lot, Jay — really appreciate you taking the time to lay that out.
I’m using the same SV220 filter, so that’s great to hear that you were able to just insert it from the start and still get plate solving and focus without any workarounds. I’m in a pretty bad Bortle 8–9 zone, so that might explain why I’ve been seeing more trouble with the initial solve — I’ll try waiting a bit deeper into twilight like you suggested before running the first calibration.
Thanks again for the quick reply hope this helps out people who are also facing the same issue. Really helpful to hear from someone who has actually run it in the field.