How to build an 8×8 play structure out of dimensional lumber.
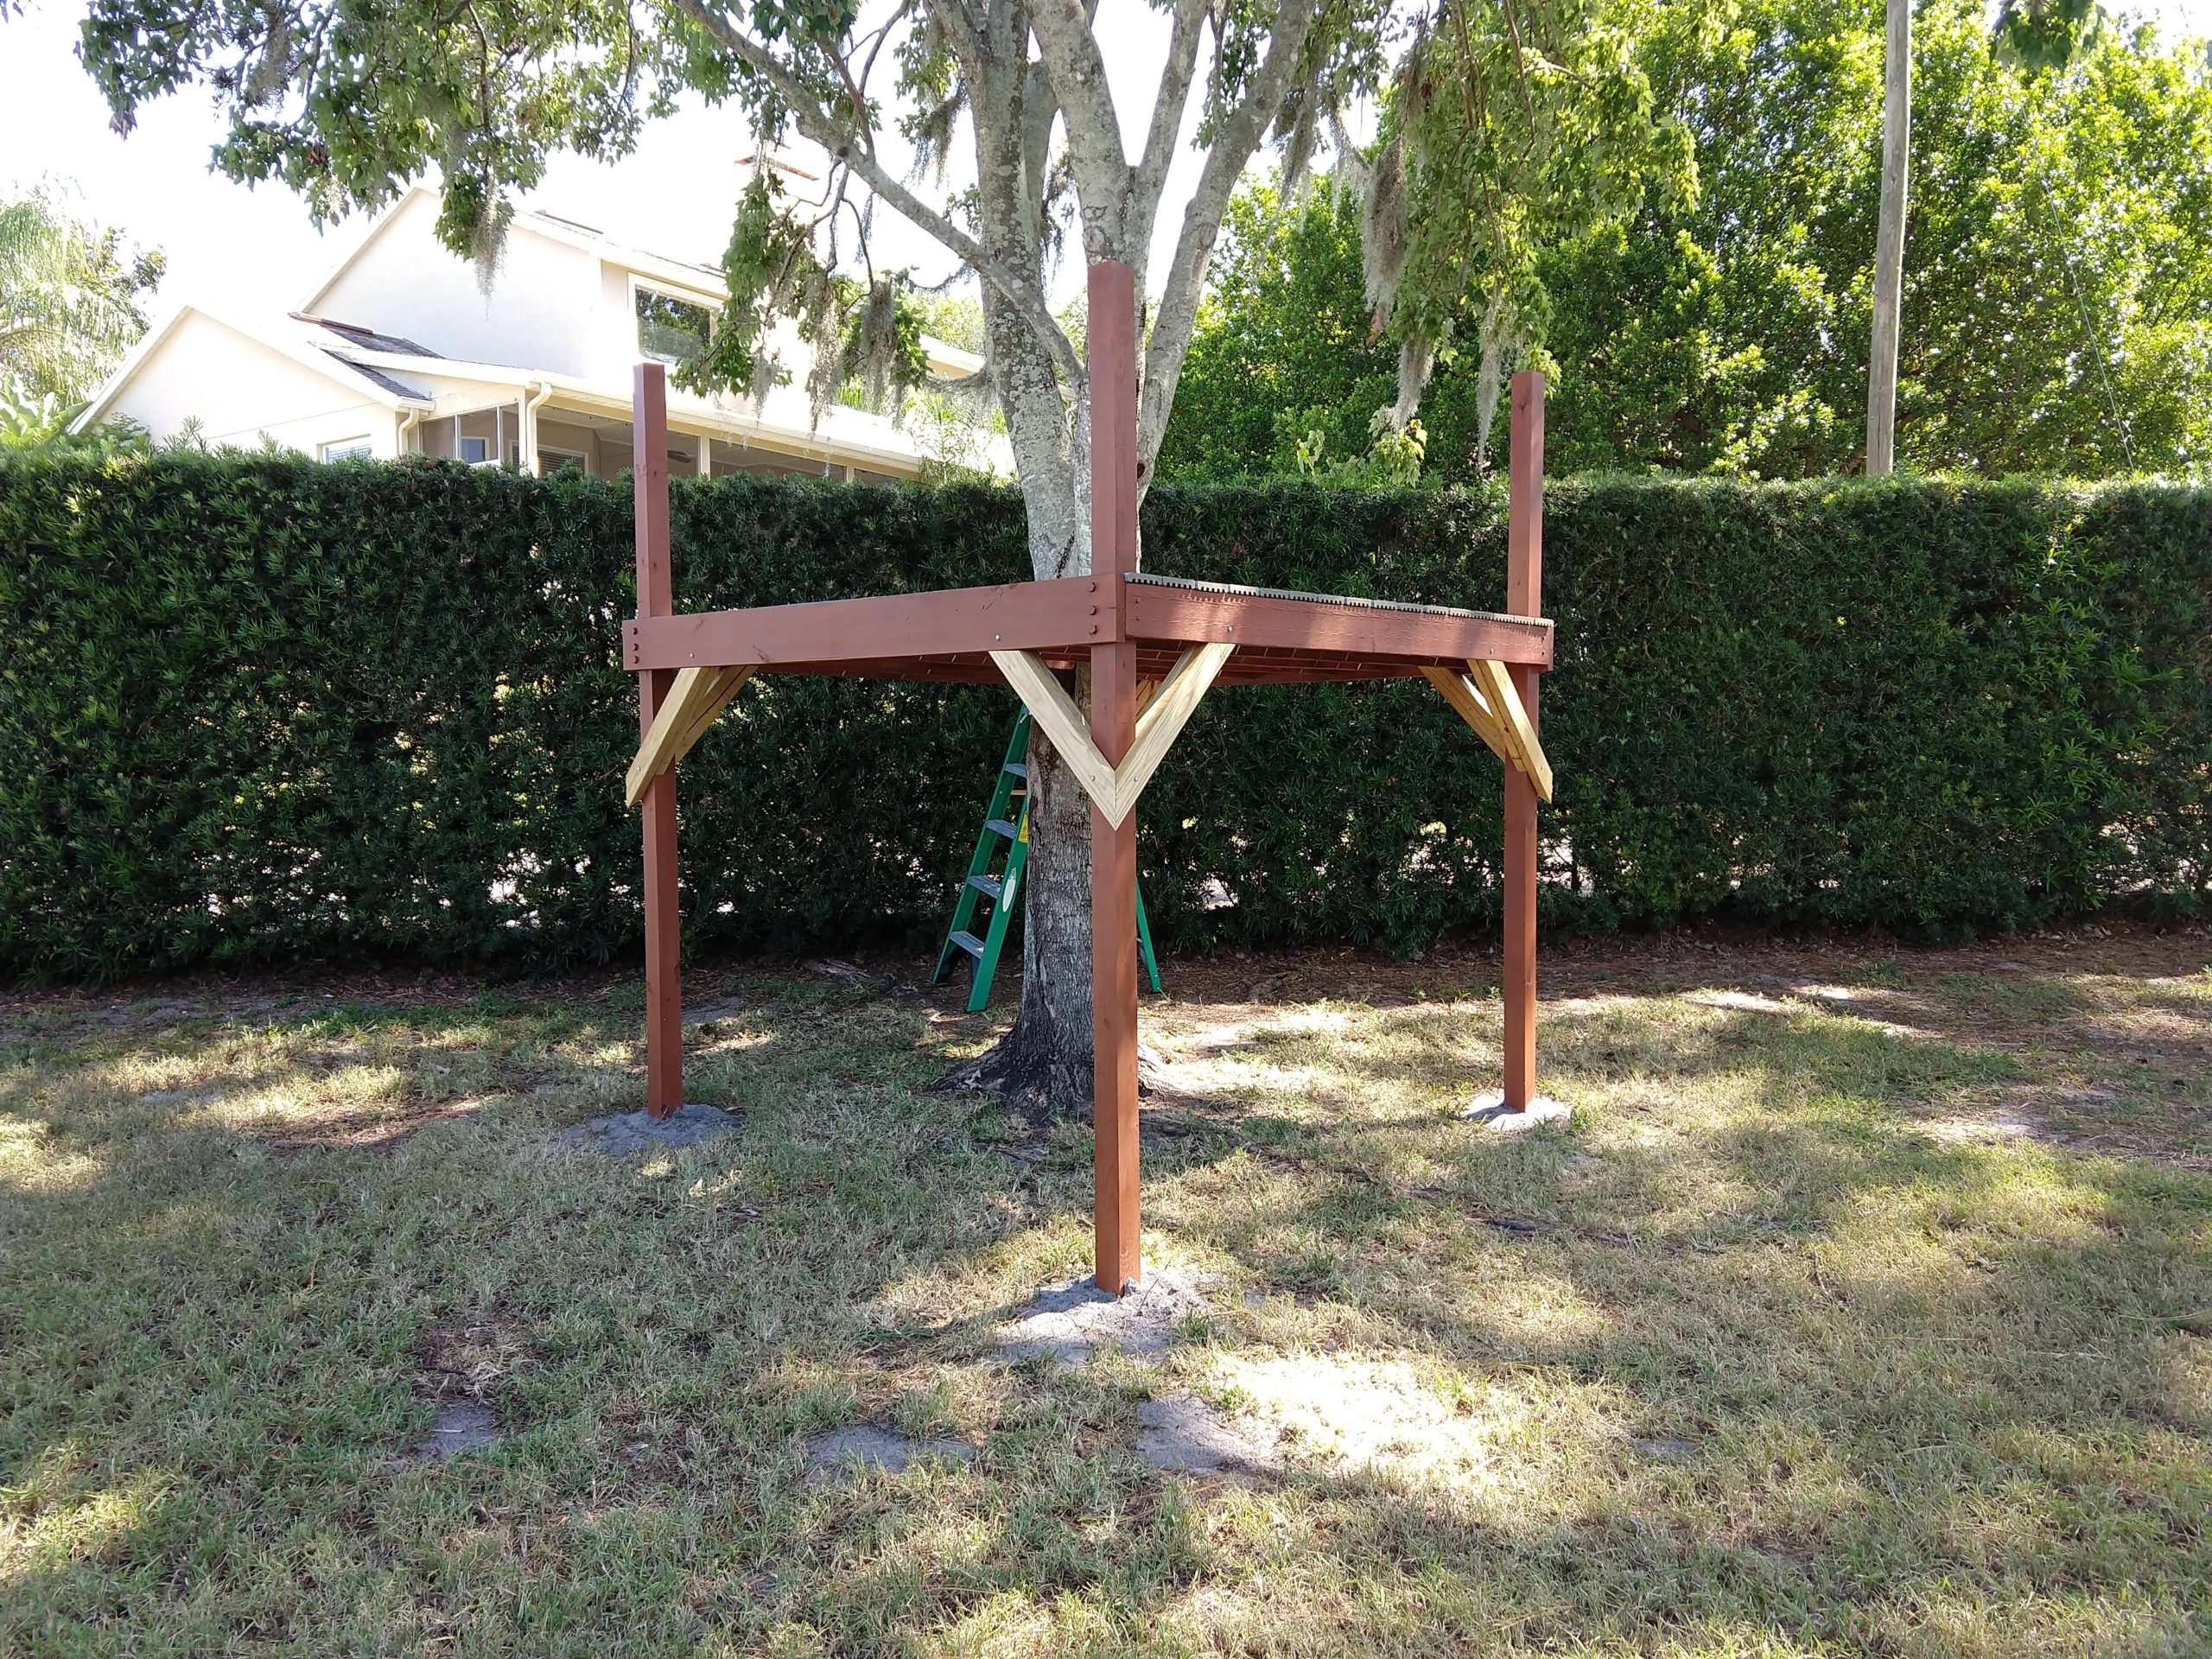
360 view of the play structure. – Spherical Image – RICOH THETA
List of materials and tools for the basic structure (part 1)
Lumber:
- 4x Pressure Treated (Ground Contact) 4×4 posts, 12′ long (8′ or 10′ possible for shorter platforms)
- 2x Pressure Treated 2×8 beams, 8′ long
- 9x Pressure Treated 2×6 Joists, 8′ long (possibly 10 or 11 needed if building box around a tree)
- 6-8x Pressure Treated 2x4s (6 required for fancy corner braces and assembly bracing, but 8 suggested to make things easier. A few small pieces of scrap 2×4 are very useful for temporarily shelves to hold up boards if you are working alone.)
Hardware:
- 12x 5/8″ galvanized lag bolts, 4″ long – mounting beams to 4×4 posts
- 8x 5/16″ galvanized lag bolts, 4″ long – mounting end joists to 4×4 posts
- 16x galvanized joist hangers (may need more if boxing the tree)
- 100x 1.5″ galvanized structural screws – joist hangers to beams (can be replaced with 9 gauge galvanized nails if disassembly is not anticipated)
- 100x 2.5″ galvanized structural screws – joists to beams (can be replaced with galvanized nails)
- 1lb box of 3″ deck screws (used for attaching bracing together and temporarily mounting beams/joists, not actually part of the finished play structure)
- Water sealing wood stain (to color/preserve the wood)
Tools Required:
- Digging tools: Shovel & Post Hole Digger (+ clippers to cut small roots)
- Wheelbarrow or other way to transport dirt and mix concrete
- Hoe or concrete mixer, razor knife to open concrete bags
- Cordless Drill, drill bits, screw drivers
- Framing Level (4′ or longer suggested), large framing square
- Tape Measure & pencil,
- Metal rod (probe for roots), spraypaint or pegs to mark digging locations
- Adjustable Wrench and/or ratchet driver and sockets for lag bolts
- Hammer for setting the joist hangers and “persuading” joists into position.
- Step ladder if you are building a tall platform, or are short.
- Brush or sprayer for applying wood stain.
List of materials and tools for the flooring and corner braces (part 2)
- 2x 4×8 exterior grade plywood (for floor)
or - 17x 5.5″ composite deck boards (for floor)
- 2 lbs of 2″ deck screws
- Circular saw to clean up the edges of the deck boards (if used)
- 4x-6x Pressure Treated 2x4s (8′ long) for the corner braces
- Miter Saw (chop saw), circular saw, or hand saw (for simple corner braces)
- Compound miter saw (if doing fancy corners)
- 8x 5/16″ galvanized lag bolts (3″ long) for corner brace to beam/joist connections
- 8x 5/16″ galvanized lag bolts (4″ long) for corner brace to 4×4 post connections
- Premium waterproof wood glue for corner brace assembly
- 2.5″ galvanized nails (or extra 2.5″ structural screws) for corner brace assembly
2×4 Basics Bench Brackets
I used 10 2×4 basics bench brackets to add bench/walls to 2 sides of the play structure. They come with all of the hardware you need, but I also purchased/used the following lumber for the bench seats & backs:
6x 2x6x10 Pressure Treated boards for seats & top-rail.
6x 2x4x10 Pressure Treated boards for back rests.
[an additional 4x 2x4x10 pressure treated boards are needed if you want to include the bottom safety rails.]
If you have a VR headset, or just want to wave your phone around in the air, you can watch this 360 video of my son running through the play structure:
I used OpenScad to mock-up the basic design to determine what lumber to buy for the basic platform and visualize what it would look like. You can download it here: plan_boxtree.scad


This is exactly what I wanted to do for the kids. Great tutorial! Thanks for the direction.
Thanks for including the videos with the post. Will certainly reference these after my next lumber run.