Back in 2015 I bought a 1st gen Ring Video Doorbell. In 2018 Ring replaced it under warranty after it stopped responding. Two years later, I started having issues with the internal battery not staying charged, even though I had it hard wired with power from an AC doorbell transformer. This resulted in me having to take it off the wall to recharge via the USB plug periodically. Ring offered to give me a 35% off code to replace it, making the Gen2 ring video doorbell a 65$ purchase, so I decided to upgrade. [Moving my Gen1 video doorbell elsewhere where it will activate less frequently and hopefully not need manual recharging as much.]
Ring’s Website currently has a nice description of the difference between the Gen1 and Gen2 Video Doorbell units.
The big gain is in image quality. The Gen2 camera is noticeably better, both with a higher resolution and with better low light performance. The field of view in the Gen2 unit is reduced (155 horizontal and 90 vertical, vs 180 horizontal and 140 vertical for the Gen 1 unit) and while I can tell the difference in visible area, I don’t feel like I’m losing any useful coverage. The difference between the 1080P (Gen2) and 720P (Gen1) is a clear and welcome improvement. In addition to the higher resolution, I feel that the lens is better and produces a sharper image. (Click on the images below to get full sized views as shown in the phone app.)
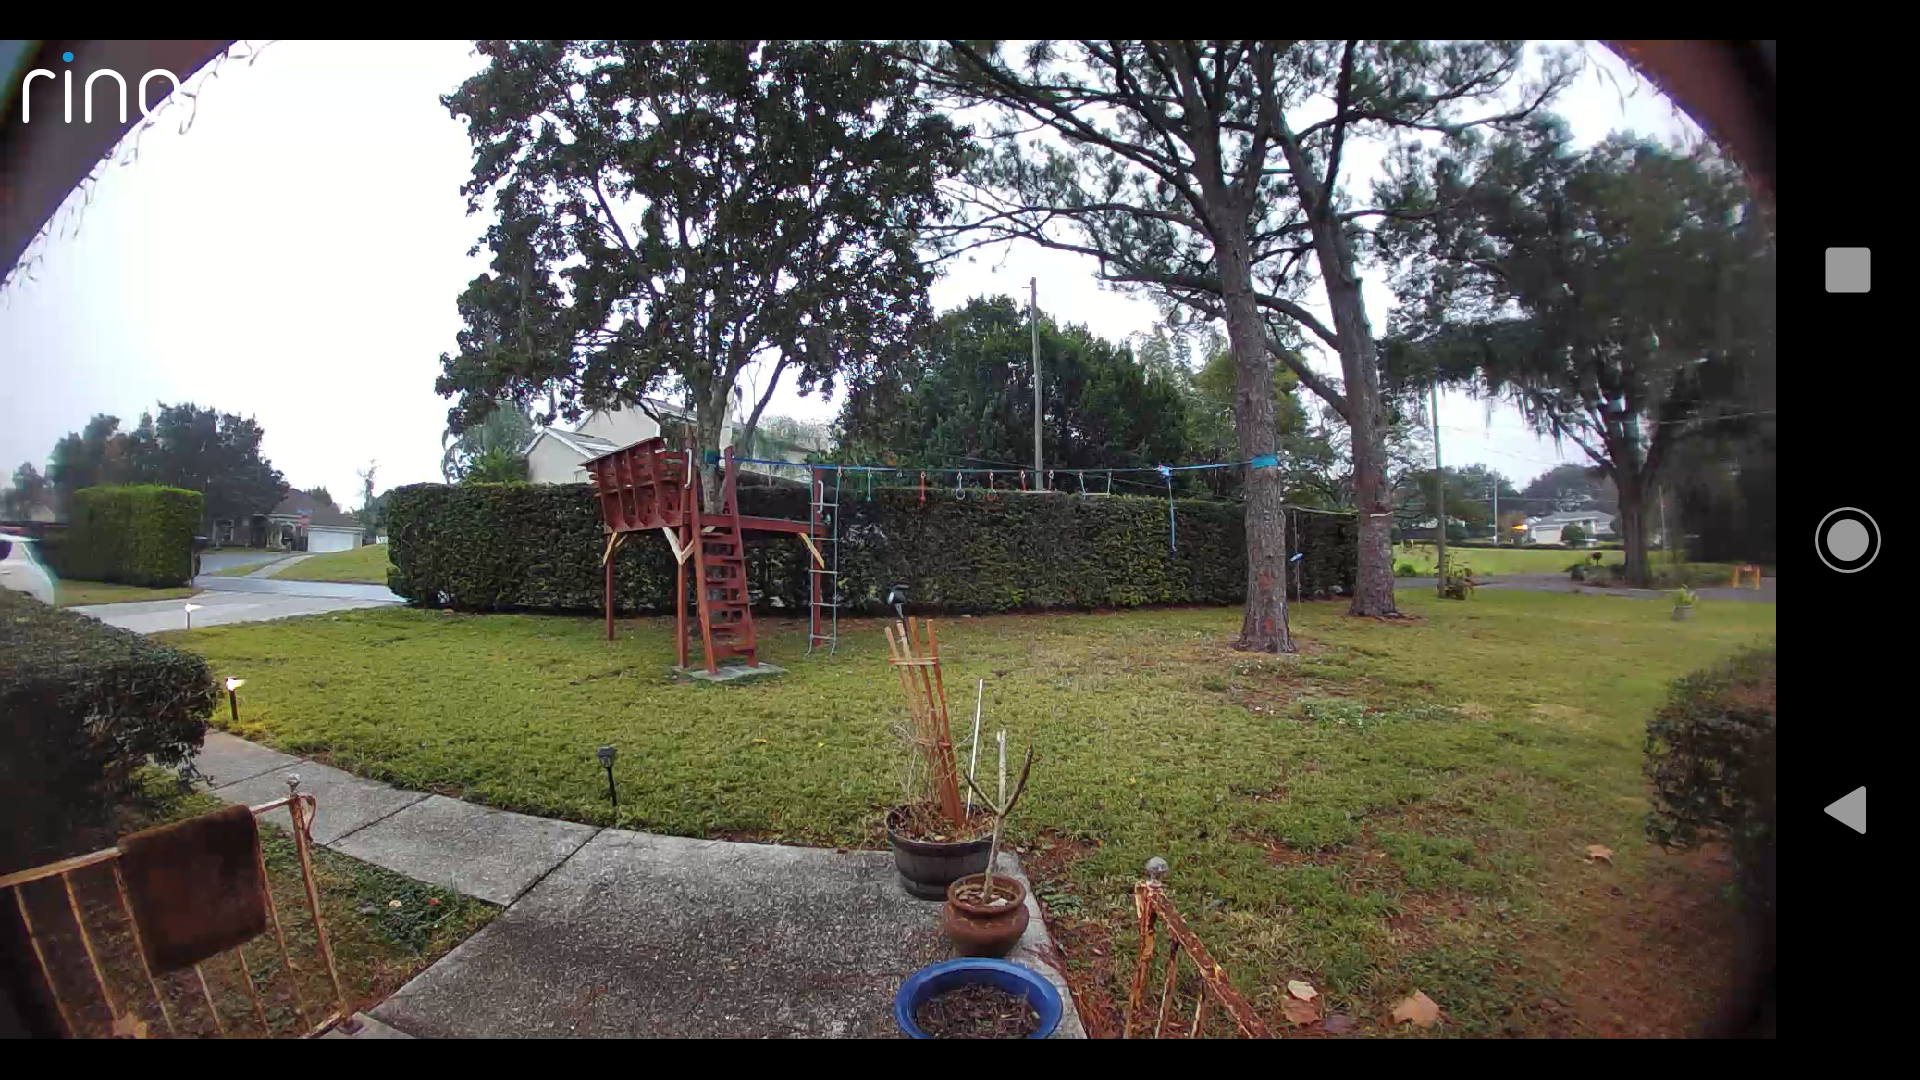
Gen2 – Day
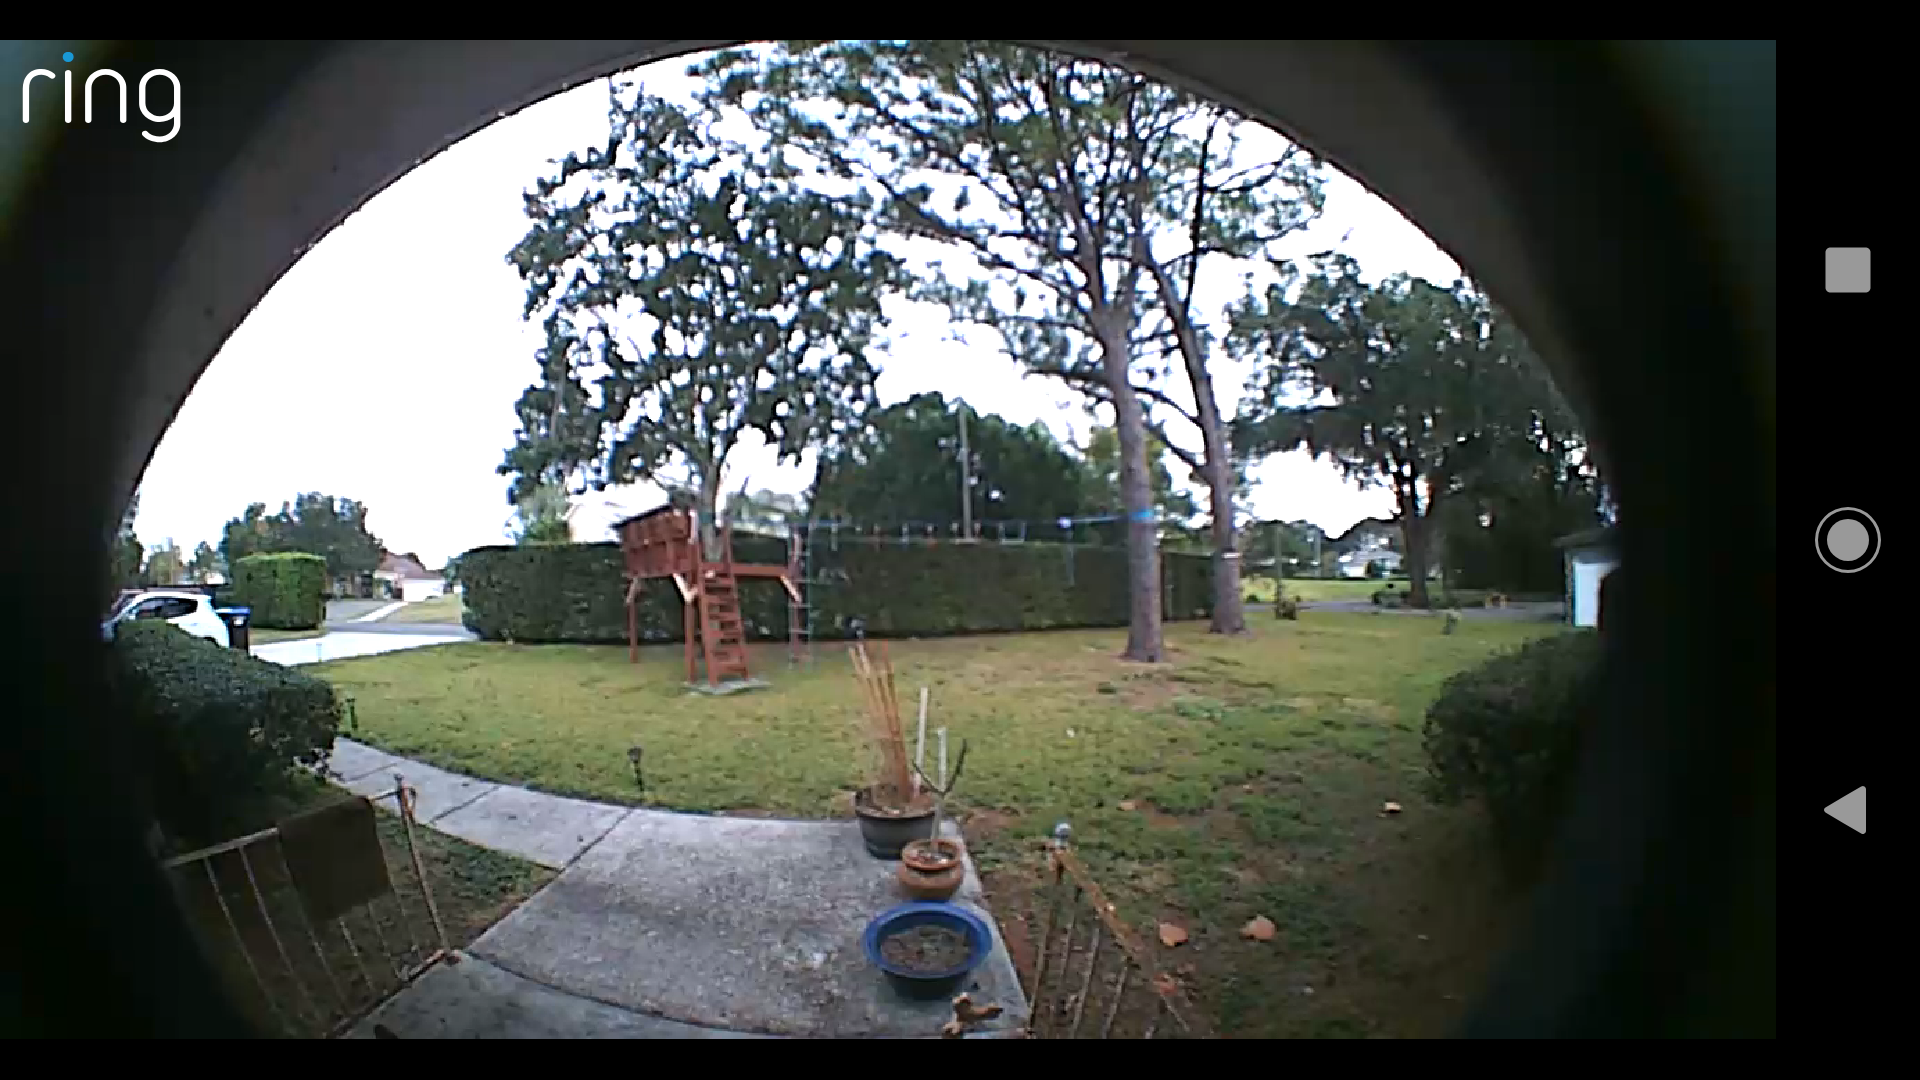
Gen1 – Day
The improvement at night is even more striking.
The Gen2 image sensor has much better low light performance. The time of day and lighting in the below comparison pictures is identical, illustrating the significant improvement in the image quality captured by the Gen2 model. In both cases, my outdoor motion lights are activated, so it’s not pitch black outside, but the Gen2 unit has much better performance.
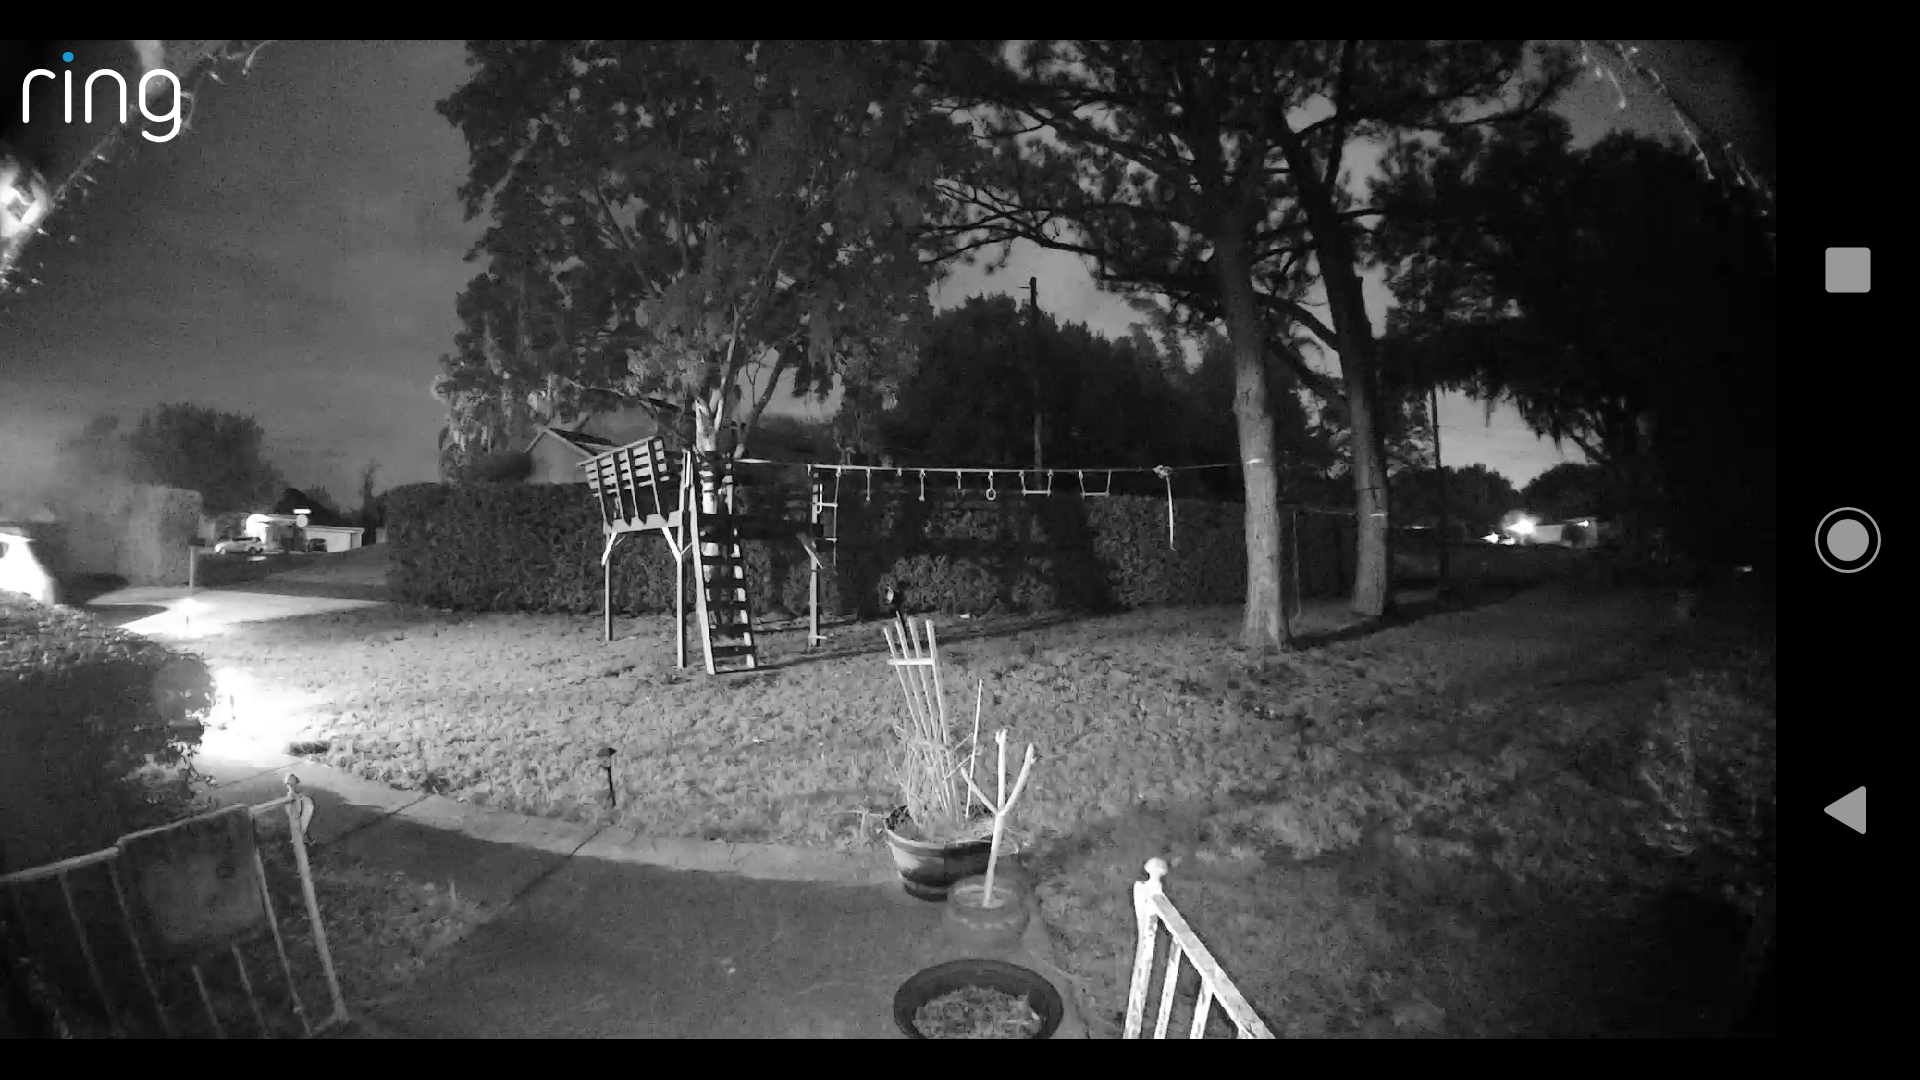
Gen2 – Night

Gen1 – Night
In the Gen1 image, the only way you know the motion lights are activated is by seeing that they are lit up on the far left of the image. In the Gen2 image, you can’t quite see the motion lights due to the slightly narrower field of view, but you can clearly see the light they cast all across the yard.
Upgrade Process from Gen 1 to Gen 2
The upgrade process was relatively painless (but Ring’s “5 minute average install time” is still wildly optimistic). The Gen2 bracket has the same screw mounting hole pattern as the Gen 1 bracket, so I was able to re-use the same holes/screws. [The screws that come with the Gen2 are slightly larger than shipped with the Gen1, so the reverse would not be true, but I doubt anybody is going to downgrade as the Gen1 unit isn’t sold anymore.]

Gen1 Mounting Bracket
One downside is that the Gen1 bracket had screw terminals for the doorbell wires, and the Gen1 unit had spring connectors that electrically connected to the doorbell wires when you attached it to the bracket. This means that you can pop the Gen1 unit off of the bracket (to charge via USB for example) without unscrewing any wires.
However, the Gen2 unit has the screw terminals on the back of the doorbell unit itself. This means that if you want to remove it from the wall, you’ll have to unhook it from the bracket AND unscrew the doorbell wires. It can also be difficult to install if your doorbell wires are short, but Ring has included short extension jumpers with terminals that you can use to extend your existing doorbell wires (but you are on your own to solder/connect to the existing wires).
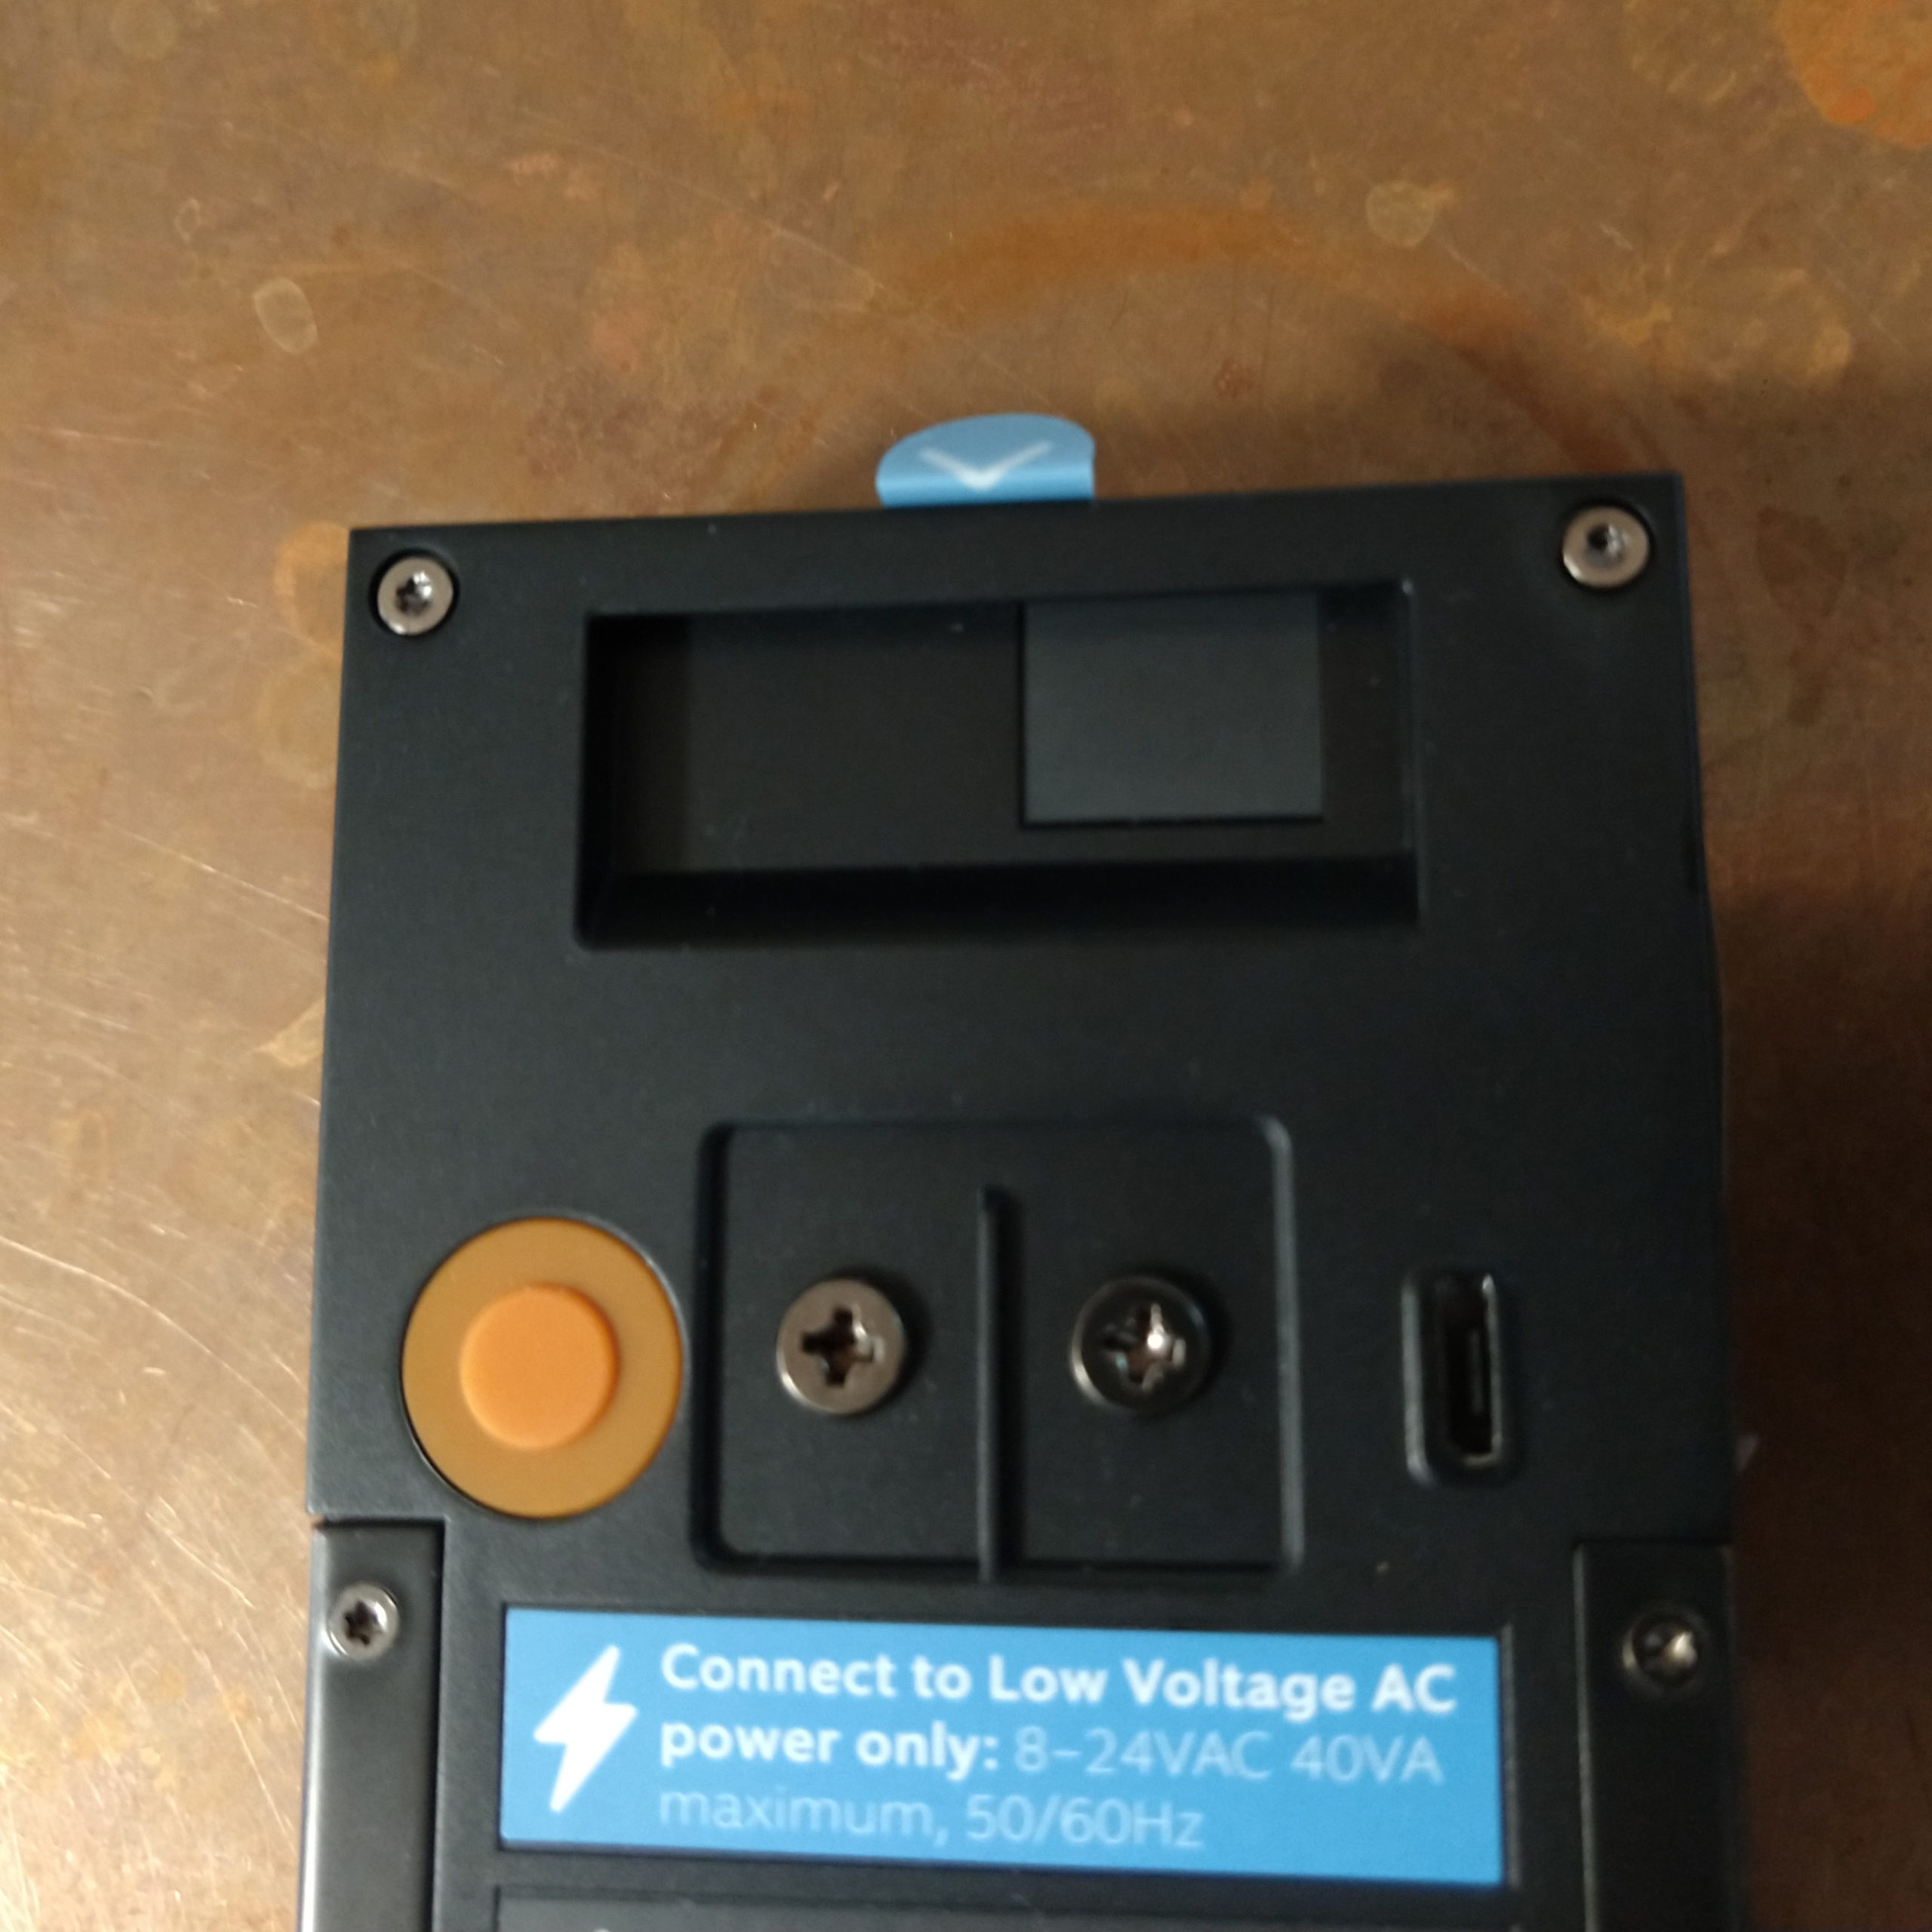
Gen2 Terminal Screws on the back of the unit
One other cost saving measure was that the Gen2 unit did not include a masonry drill bit (or Philips screw driver) in the box, so if you are installing into concrete block or brick, you’ll have to provide your own. But given that the Gen1 unit cost $250 back in the day, and the Gen2 units retails at $99 (Amazon affiliate link!) with frequent promotional deals, I can’t complain too much. I should also note that the security screw heads and screwdriver included are different from the Gen1 model.
You should also be aware that if you accidentally use the longer bracket mounting screws (instead of the security screws) to lock the unit to the mounting bracket, they will pierce the internal battery and cause the unit to burst into flames. The instruction booklet, screw bag warning stickers, warning screen / video in the app, and email they automatically send you when you register the product ALL take care to warn you about this…because the units that didn’t include all those warnings had to be recalled.
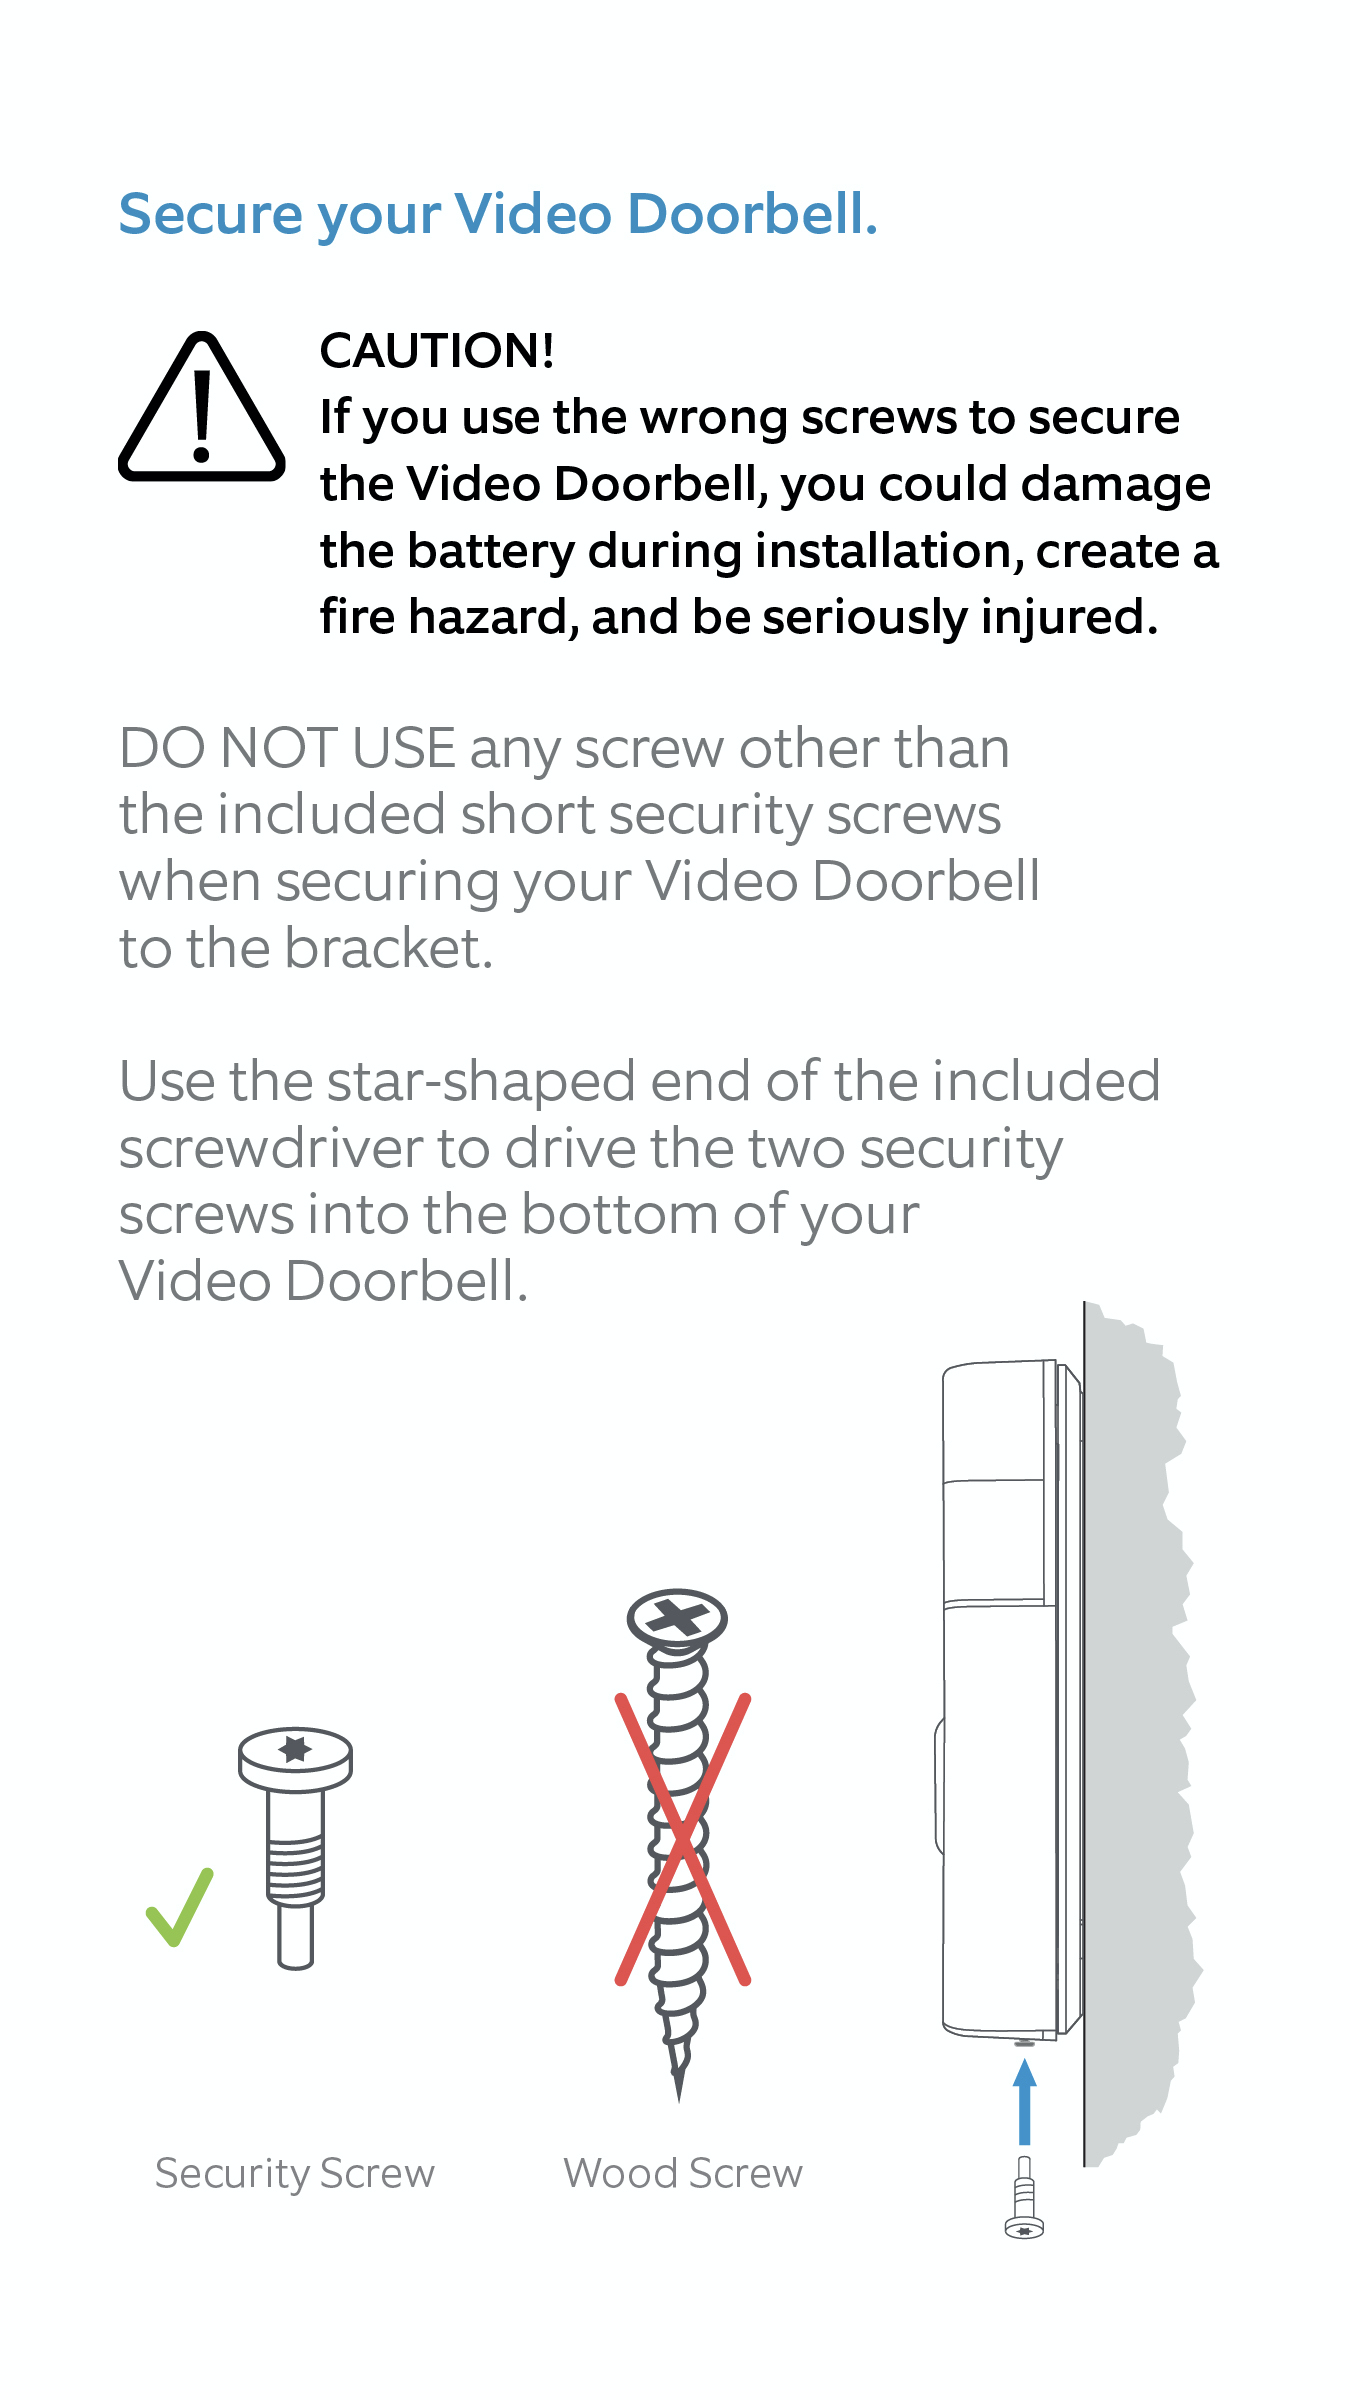
Updated Instructions – Don’t use the wrong screw here…


 falling offline intermittently? Try a battery change.")
 suddenly became a background data hog")
Pingback: Ring Video Doorbell Review | Jay's Technical Talk
What do I have to do to uninstall the gen 1 doorbell within the app and setup the gen 2 doorbell within the app? I’m just not to checked out on what the process is!
Thank you
That’s the easiest part, just go to the device settings->general settings-> remove device to remove the old one.
Then, follow the standard Three line menu -> Set up a Device option to add the new one.
Great review. Question: does the gen 2 require any diode or jumper wires to use the in-house standard doorbell chime ?
Thanks
It has been quite a while since I installed it, but my indoor transformer does not have a diode installed. (I remember the diode setup from the earlier version.) So I think it just works correctly off of the normal 15-20 volt AC doorbell circuit.
Thanks for sharing this detailed comparison. It is great to see a clear side-by-side of the Gen1 and Gen2 image quality, especially the low-light improvements. The notes on installation differences and wiring changes are really helpful for anyone thinking about upgrading. The tip about screw length and battery safety is particularly important—definitely something to keep in mind. Your review makes the upgrade decision much easier to understand.
Does the gen. 2 have a replacement battery?
My original. Ring doorbell is from 2015, is it pretty easy to upgrade to Gen. 2
or is there even a better battery version upgrade for a reasonable price too?
Thank you!
The one I installed does not have a user replaceable battery. Ring does sell doorbell units that take the same “snap in” user replaceable battery that is used for their stick up cameras. It’s called the “Battery Doorbell Plus” but I haven’t tested it.
You can find it at this amazon affiliate link: https://amzn.to/49q7UgH