After my success with a Dual Band filter holder, I spent $38 on a sheet of BAADAR AstroSolar Safety Film (from ScopeStuff in Round Rock TX) and used some 3M VHB double sided tape (cut in very thin strips) to attach it to the 3D printed filter holder. The filter holder is really designed for screwing in a 2″ (50.8mm) astro filter, so it didn’t have as much surface area on the “ring” as I would have liked, but it worked reasonably well, especially as I then sandwiched the outside film within the larger outside ring when I snapped them together. [I cut one bit of film a little too short, so it didn’t go under the ring, you can see it in the bottom left in the photo below.] I put a ring of UV cured resin around the outside of the filter film just as added insurance it won’t pull up in the wind or something.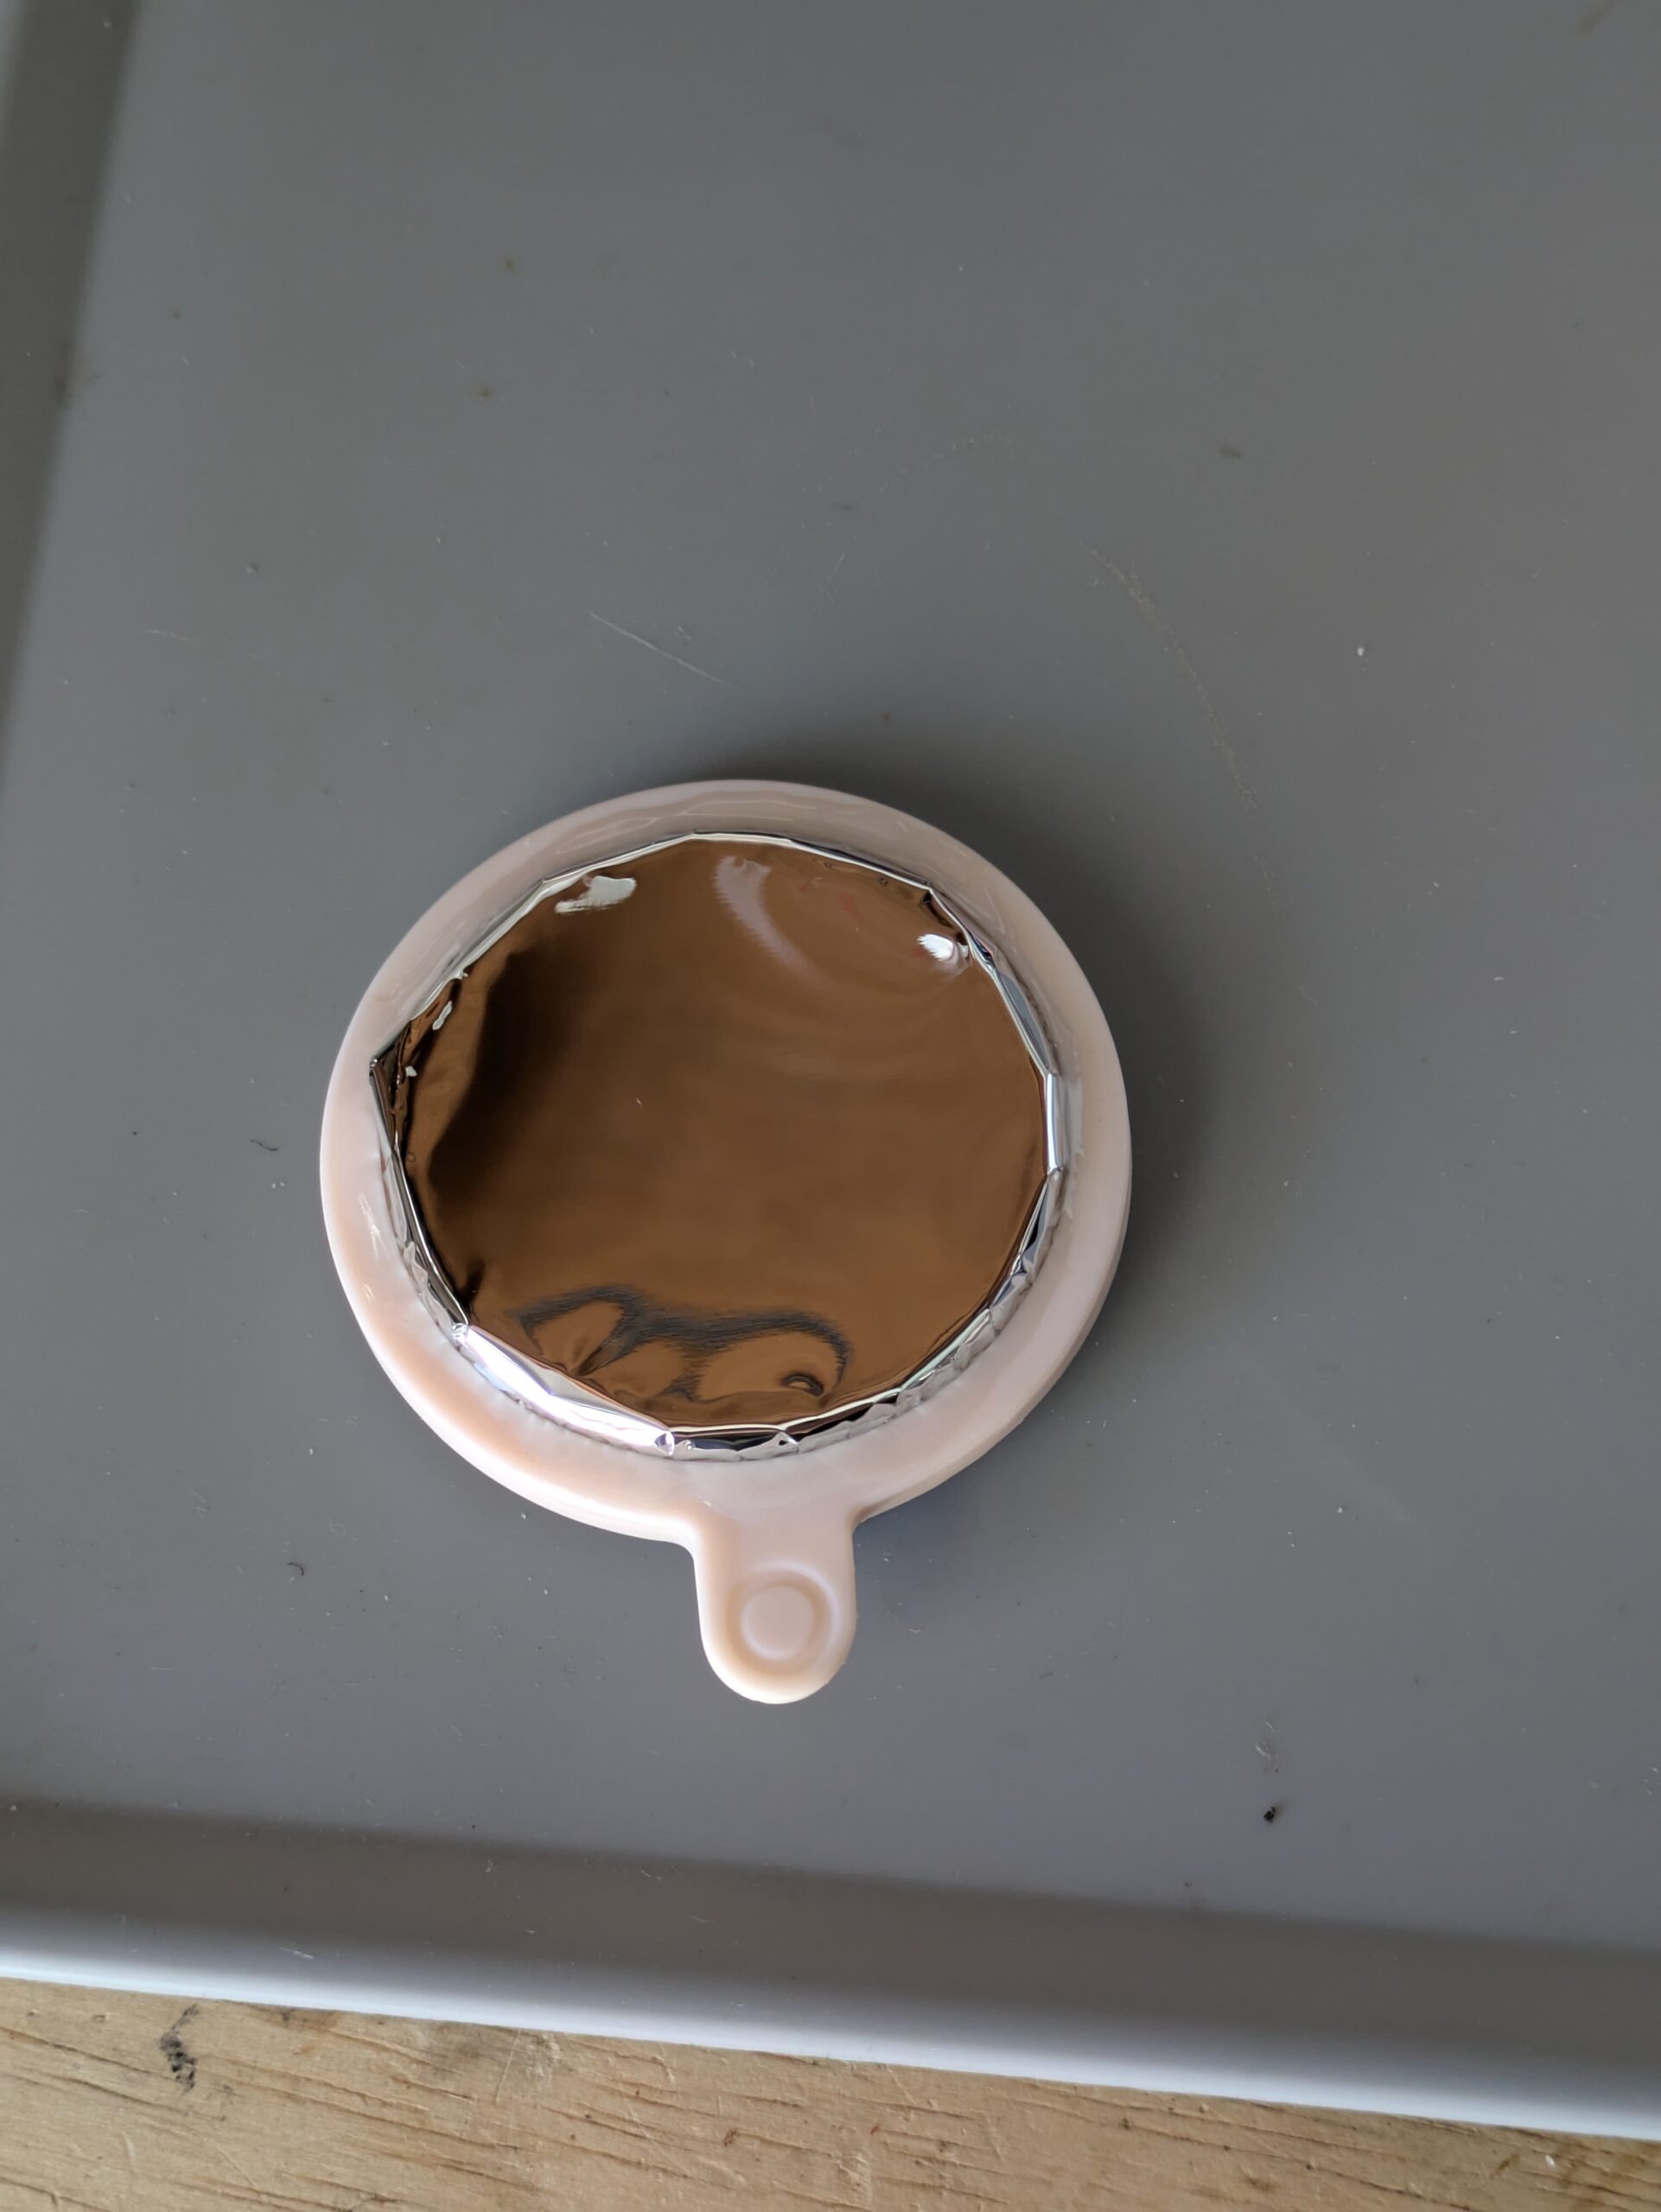
I was very tempted to use superglue on the ring before dropping it down onto the filter film (instead of small pieces of VHB double sided tape). I didn’t do that because I was worried it might not stick to the film, and I was also worried about CA glue offgassing when the filter was used in the sun. After I made this filter, I tested gluing the resin print to some cutoff film, and it appeared to work great. If I need to make another filter (or make one that looks a little smoother around the edges) I will try using CA glue instead, and make sure I put the whole filter out in the sun for a day before using it on my telescope to make sure the CA glue won’t offgas onto the lens.
However, even though the edges of the filter film look a little wrinkly, almost the entire surface of the optical path was very flat (but not overly tensioned) and the images through the solar filter look as good as any of my other smart telescopes produce, so I think functionally it worked great.
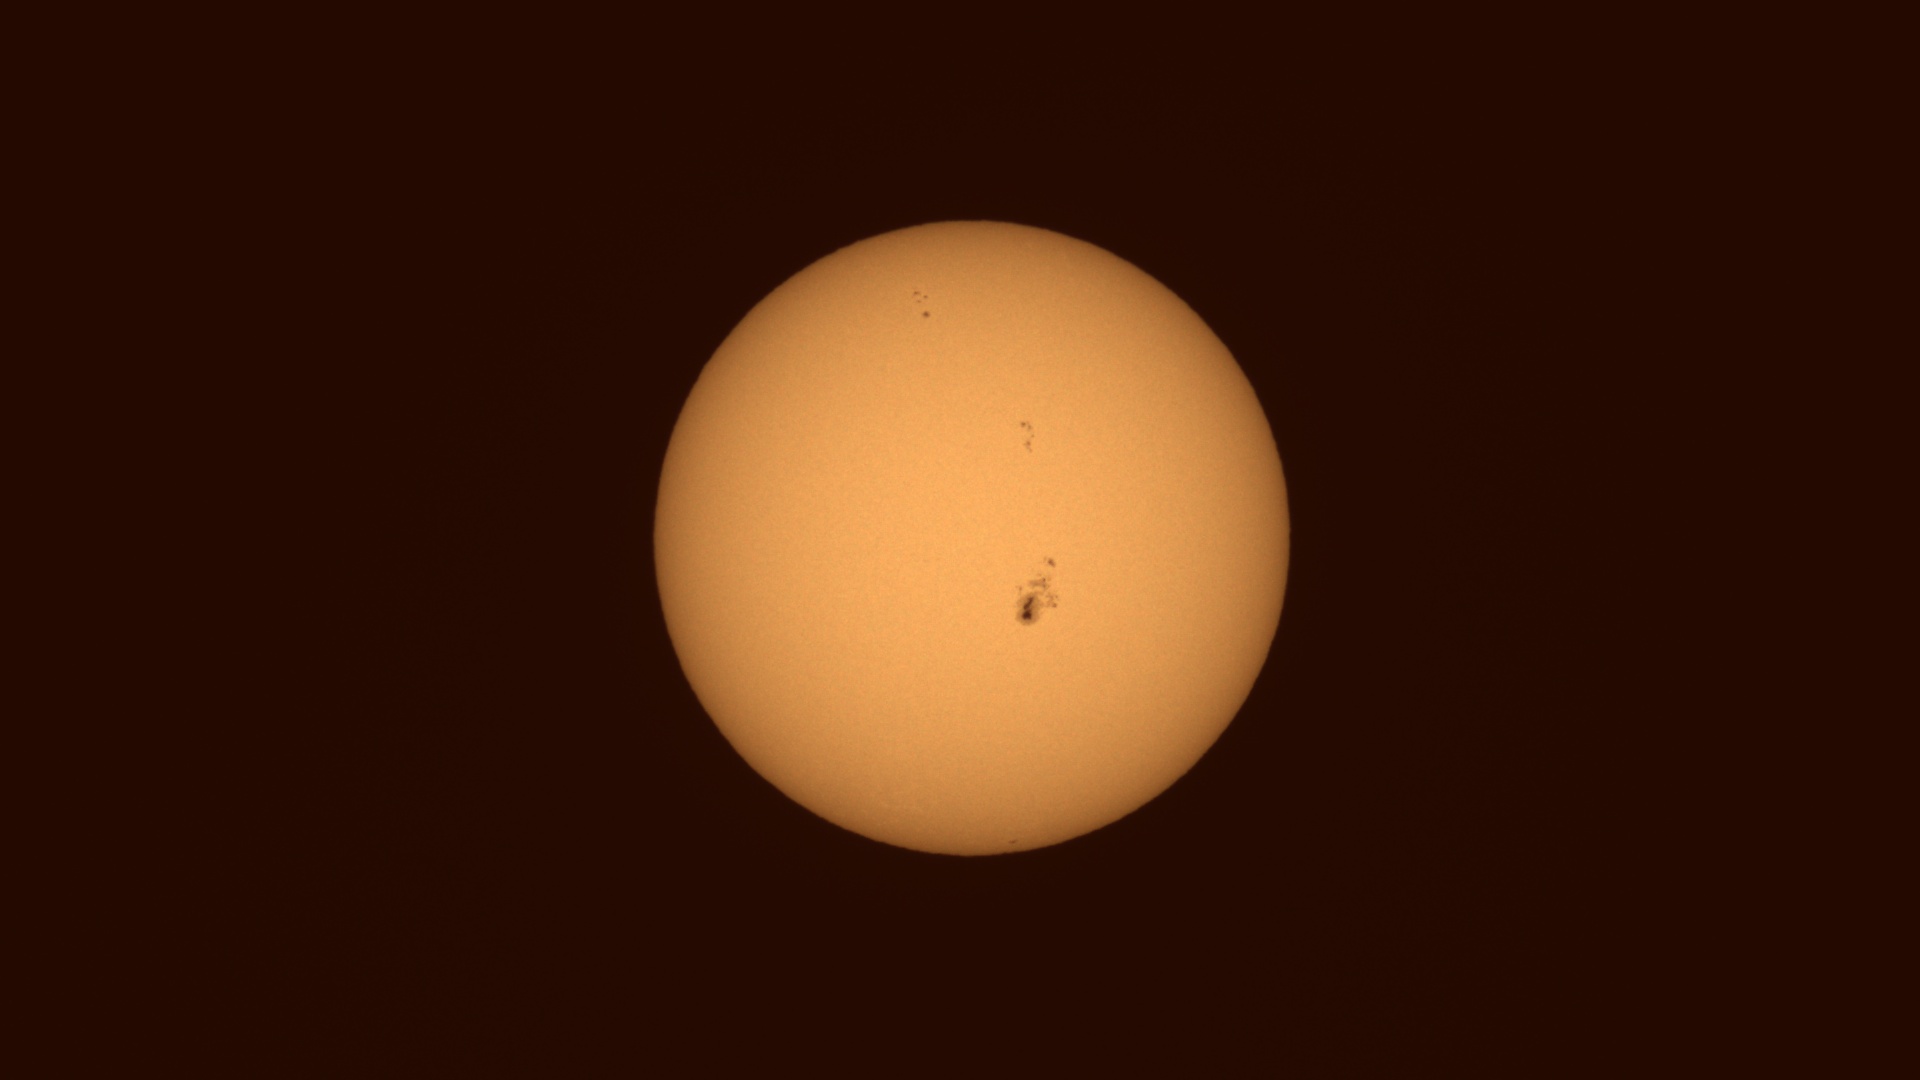
Sun stats: 0;0;0;0.003048, exposure: 300µs , gain: 0dB
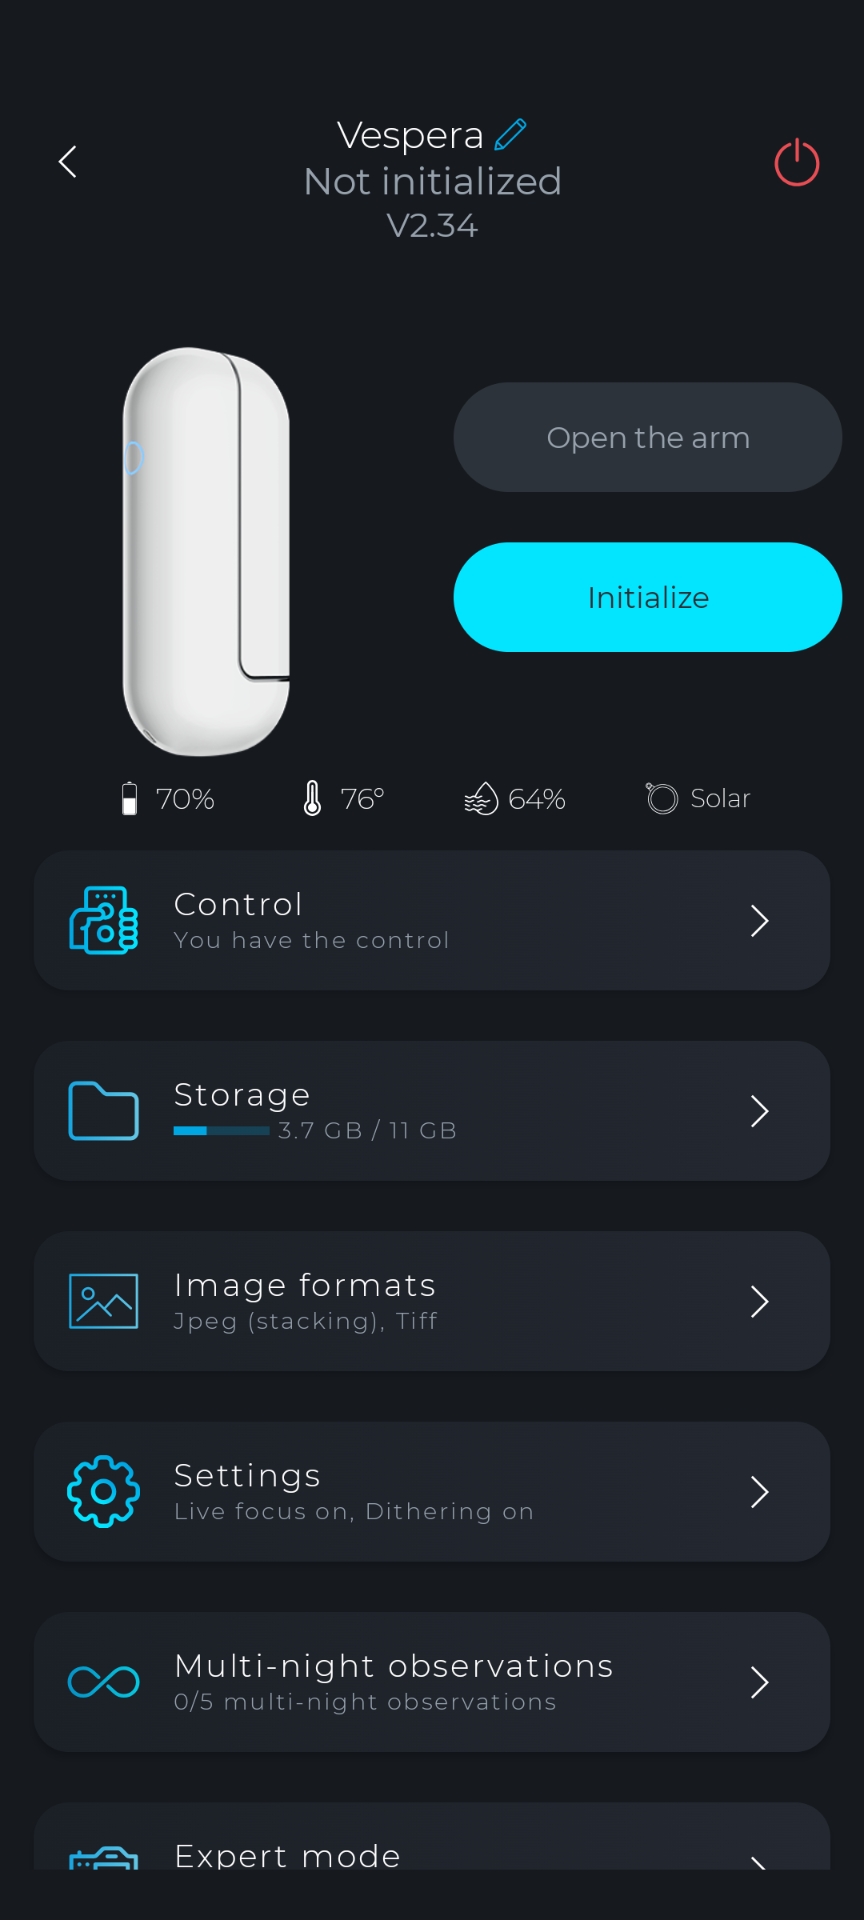
I used a 4.6 Kohm 1/8 watt resistor with the leads circled and soldered inside the filter holder to indicate to the Vespera that it had a solar filter installed, and it was detected correctly as soon as I plugged in into the telescope.
The OEM Vaonis Vespera solar filter costs $180. Given that the Vespera can not record videos of the sun (so not useful to record ISS solar transits) and I already have two other smart telescopes with solar filters that can, I certainly wasn’t going to pay the $180 price. [Although their filter does look a little more professional than mine.] But I’m happy at the $40 price point, if only to explore the solar viewing part of their application.
The solar viewing part of the Singularity phone app is relatively simple. You are prompted to level the telescope, it moves the arm up to almost the horizon, you are prompted to install the solar filter and then after the telescope detects the 4.5-4.6 kOhm resistor, it asks you to confirm that you installed the solar filter. Then it has you rotate the telescope in the AZ axis manually until the sun shines a thin line of light onto the telescope shadow between the main body and the arm (aligning it in the AZ axis to the sun). Then the telescope moves the Alt (arm) up to where the sun should be for your GPS location and date/time. After this, mine took about 5 minutes to do a search for the sun, to center the sun, and then autofocus on the sun. The process took longer than both of my other smart telescopes, but it didn’t fail and found the sun on the first try (I’m looking at you ZWO S50!). After that, you can see a raw image of the sun (which had a yellow tint from my solar filter) and save photos. You can pinch to zoom a bit.
The only other option is to hit a “solar system” icon, which will re-size the solar image to give you an idea of how the sun appears if viewed from other planets in the solar system. [e.g. very small from Neptune, larger from Mercury] The solar system view also removes the yellow tint, making it more white (I assume it’s the “true color” of the sun, although I kind of prefer the yellow tint given by the solar filter).
That’s it. For $40 in materials and a few hours of work, I can take a photo of the sun with sunspots, or visualize how it would look from elsewhere in the solar system. [Or $180 if you bought the OEM filter.]
The image looks to be at least as good in quality as from the ZWO S50 with it’s OEM solar filter. [I didn’t do a side by side shootout, but it is certainly not worse than the S50, perhaps a small bit sharper.]
Once again, the Vaonis Singularity software has made everything easy, but doesn’t offer the more advanced features you may want (like recoding a video).Of course, I’ll be using the S50 for solar imaging most of the time, as it can record videos of things like the ISS transiting in front of the sun.

 vs Seestar S50")

