When wiring up an electric vehicle traction pack battery, an off-grid battery backup bank, or other high current power systems, you sometimes need a cable capable of handling high-current with a custom length. If you have a few tools, it is easy to make your own by crimping terminals onto welding cable. This video shows a time-lapse overview of making such a cable:
Here is a set of links to the tools and materials I used:
- TEMCo Hydraulic Cable Lug Crimper TH0006 – 5 US TON 12 AWG to 00 (2/0) (to crimp the lugs)
- Razer knife (to cut the insulation)
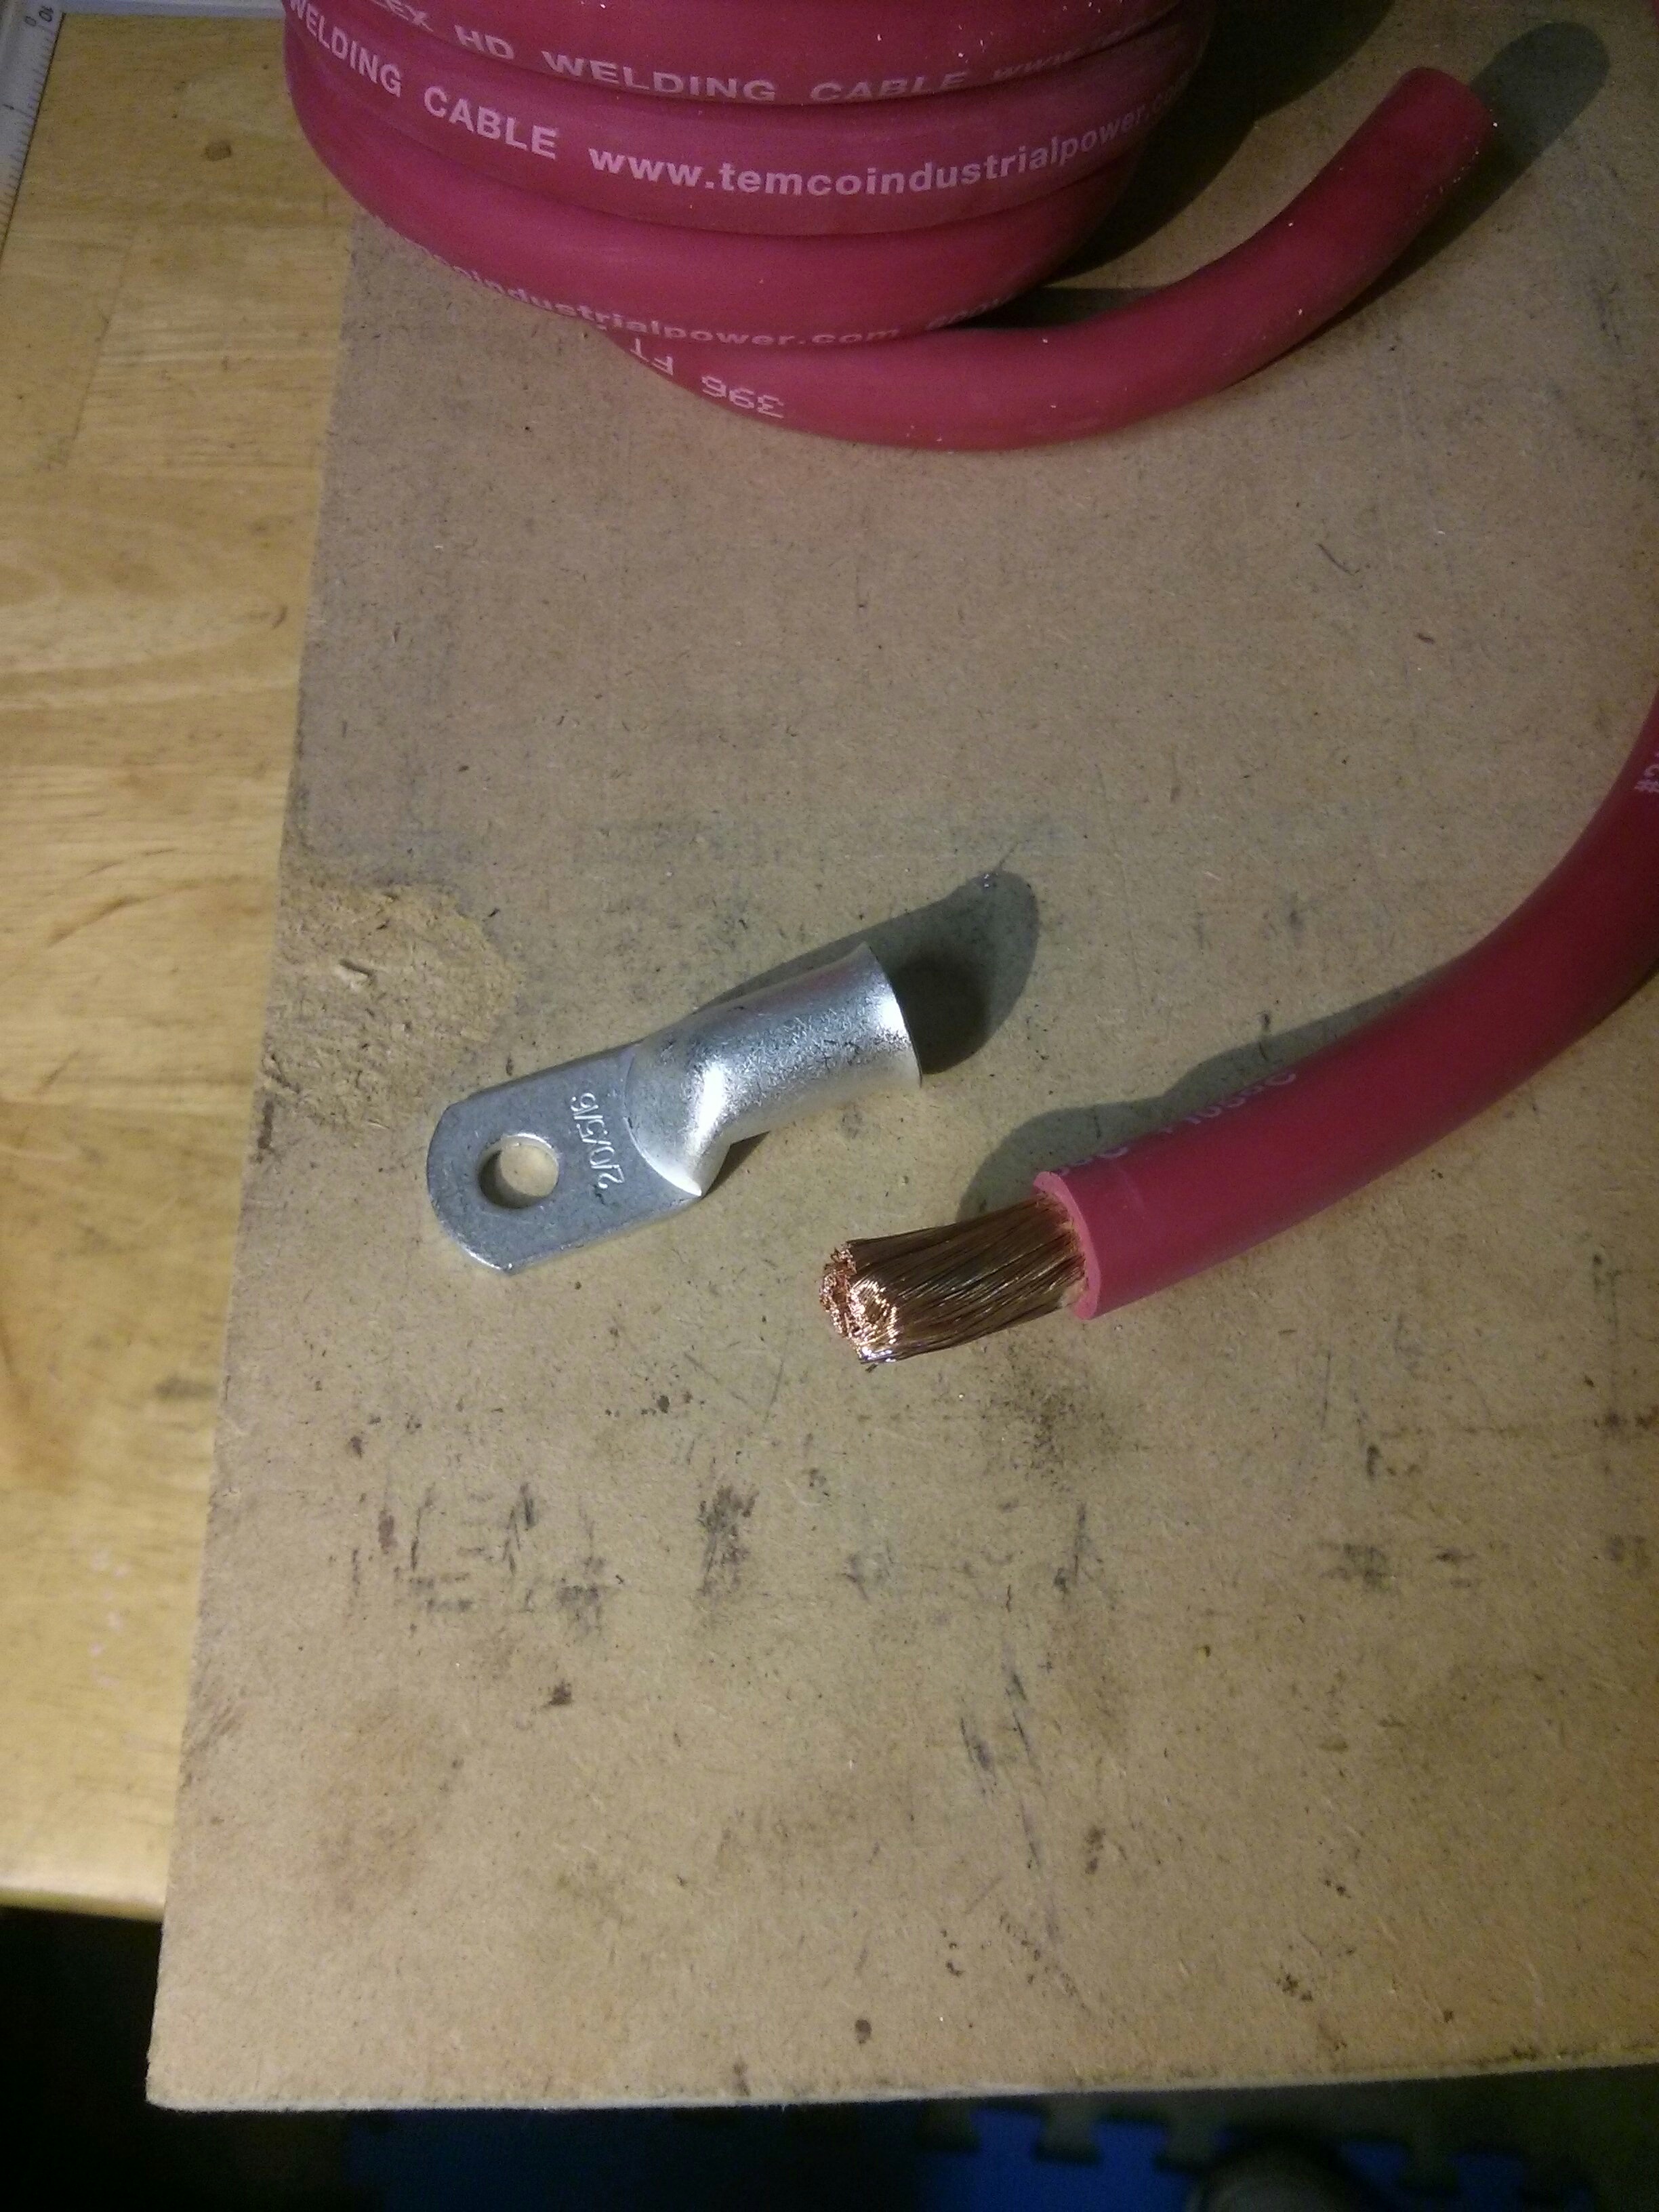
- TEMCo Welding Lead 20′ Black/Red (10′ Blk, 10′ Red) 2/0 Gauge AWG cable
- 2/0 AWG Ring 5/16″ Hole Terminal Lug Tin Plated Copper (purchase a lug size and ring size to match your cable and terminals)
- QUICK CABLE 5724-360-005R Terminal Protector, Plug-In, PVC (from ZoroTools on Ebay)
- Heavy Wall Adhesive Lined Marine Grade Heat Polyolefin Shrink Tubing 1″ ID – Black
With the exception of the Hydraulic crimper, most of these parts are relatively inexpensive (or at least, as inexpensive as heavy copper wire can be…). You could substitute a hammer crimper to save a few bucks, but seeing as how the hydraulic crimper is only $80 and it works a lot more reliably without any real skill involved it is worth the extra $40-60.
The steps are relatively easy. First, make sure you know the exact distance you need between your terminals. Add a few extra inches just in case unless having slack cable would be a problem. Cut your wire taking into account the distance the ring terminal is from the end of the cable in the lug. Strip enough insulation that the lug will fully fit onto the copper with a small gap to the remaining insulation.
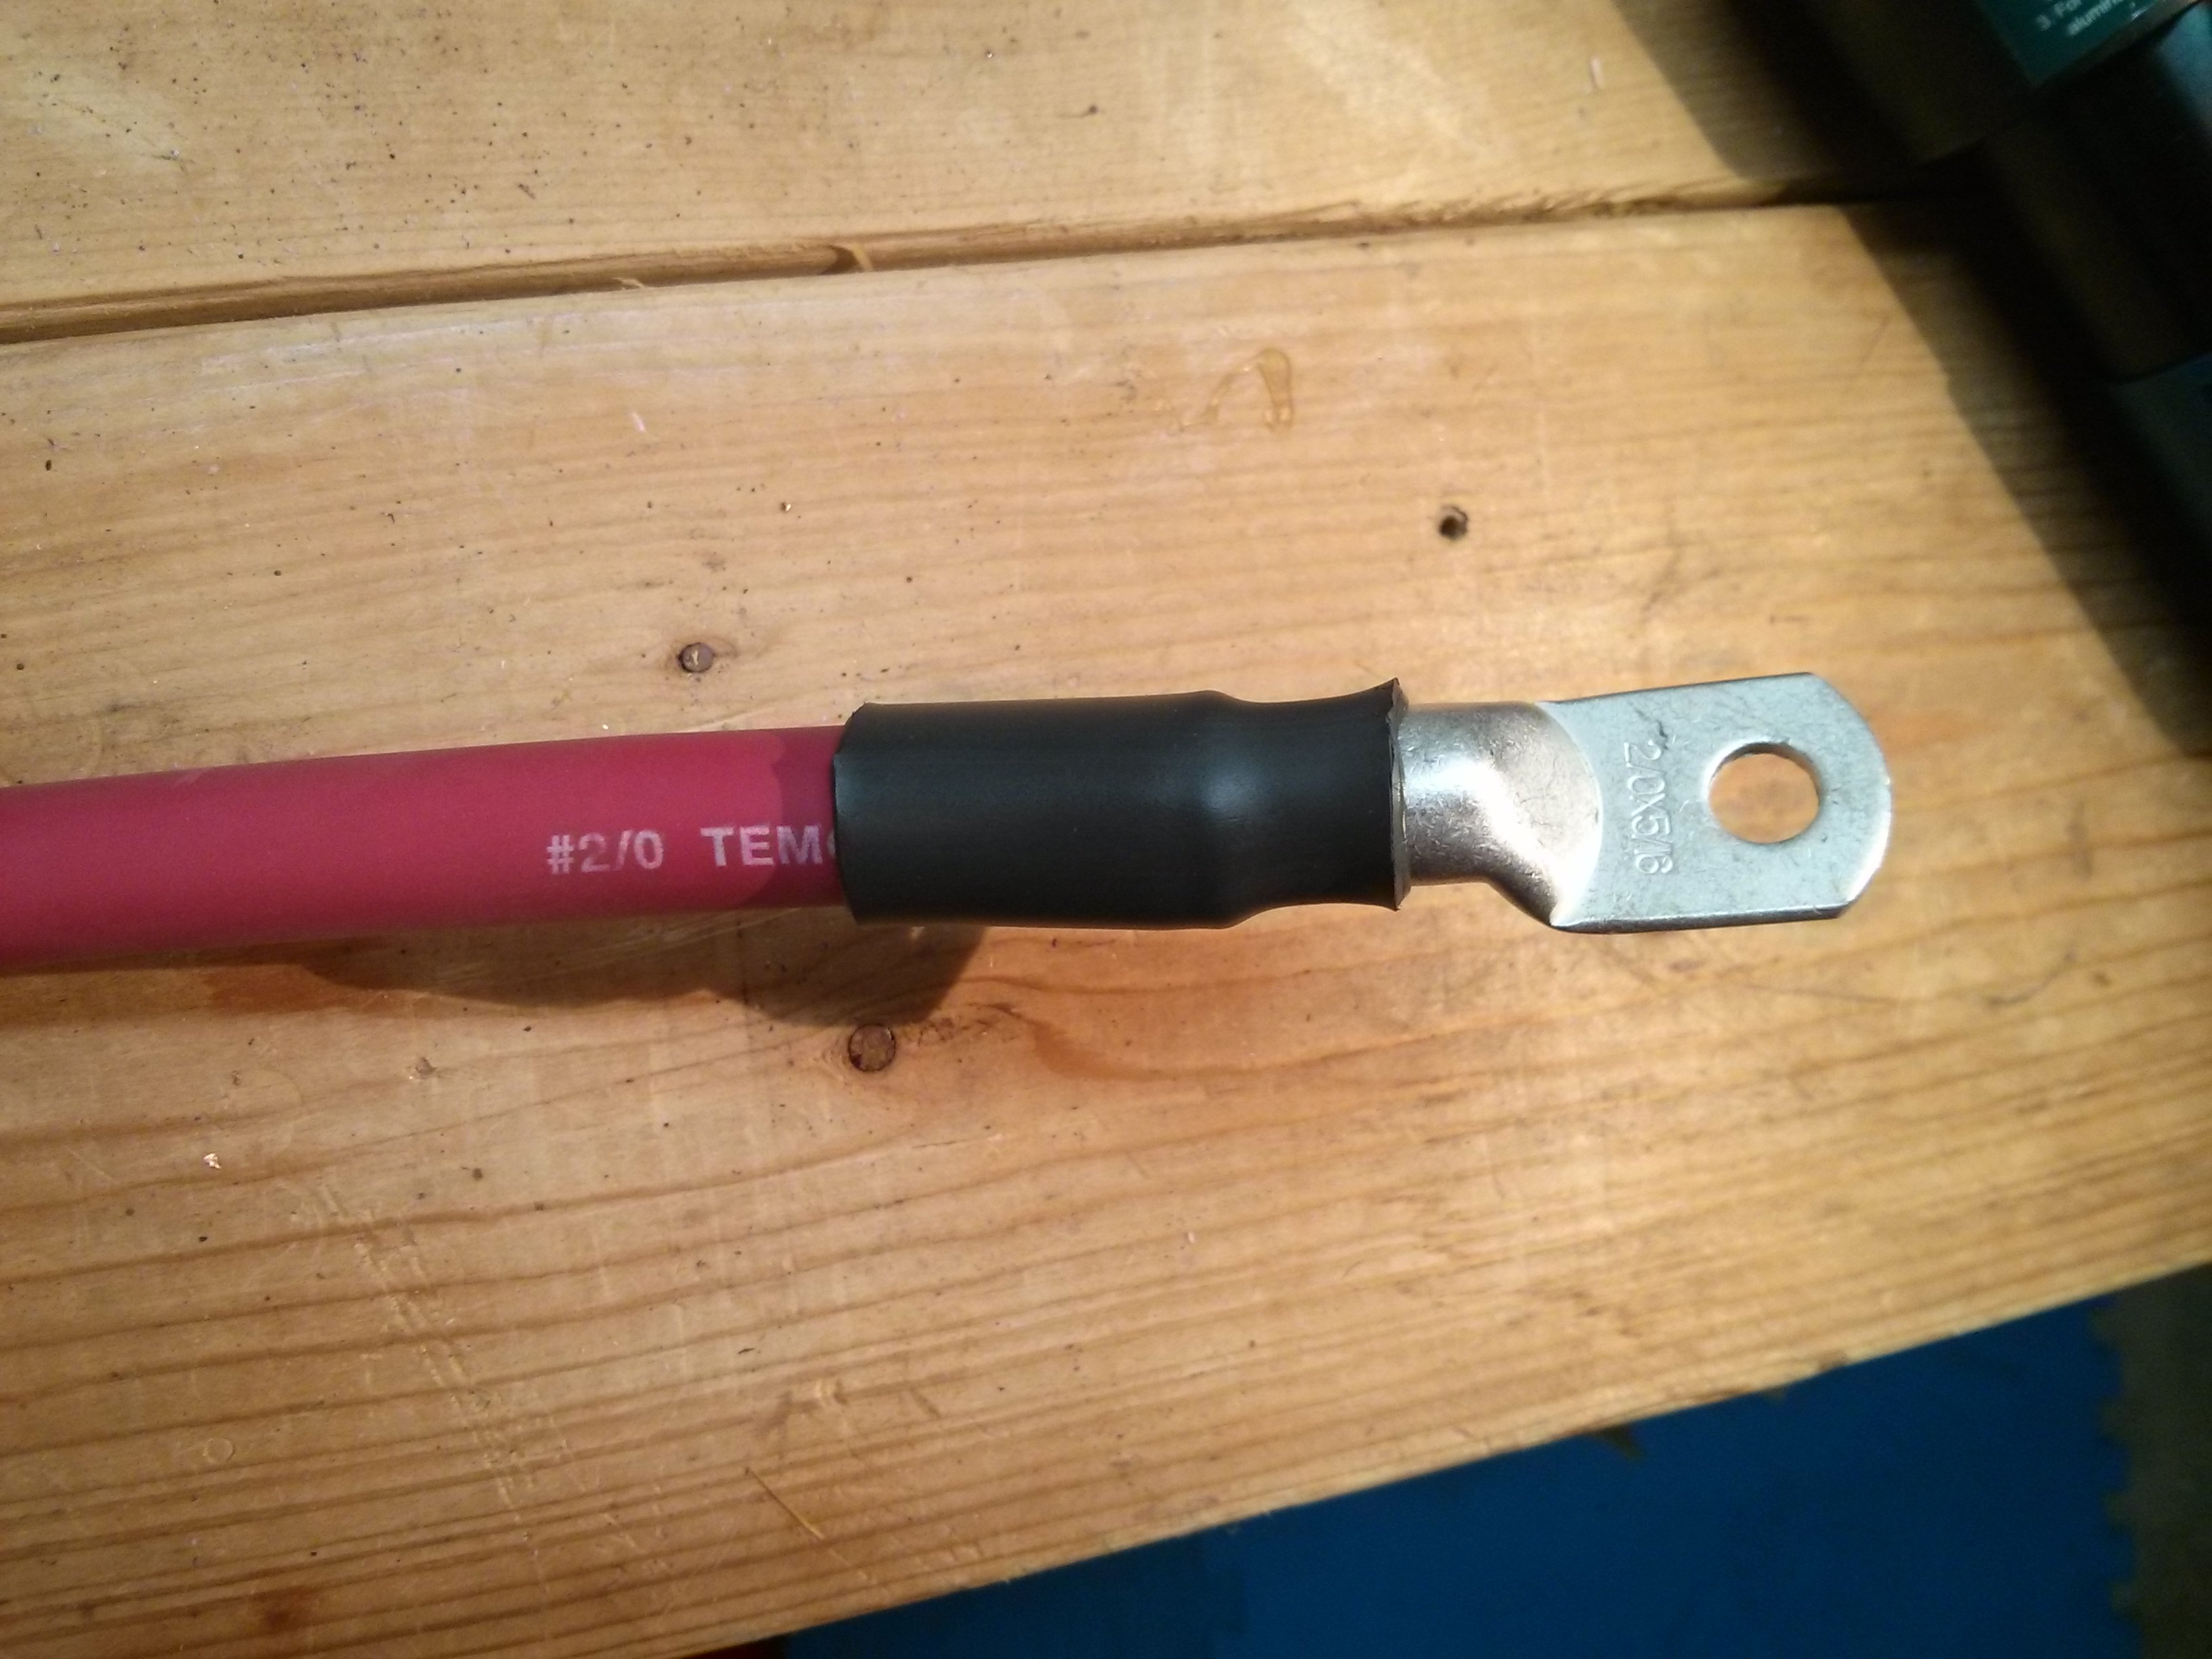
Hold the lug in place while you tighten up the crimper so that it doesn’t slip off the cable. After the lug is in place, seal the lug/cable with adhesive lined shrink tubing.
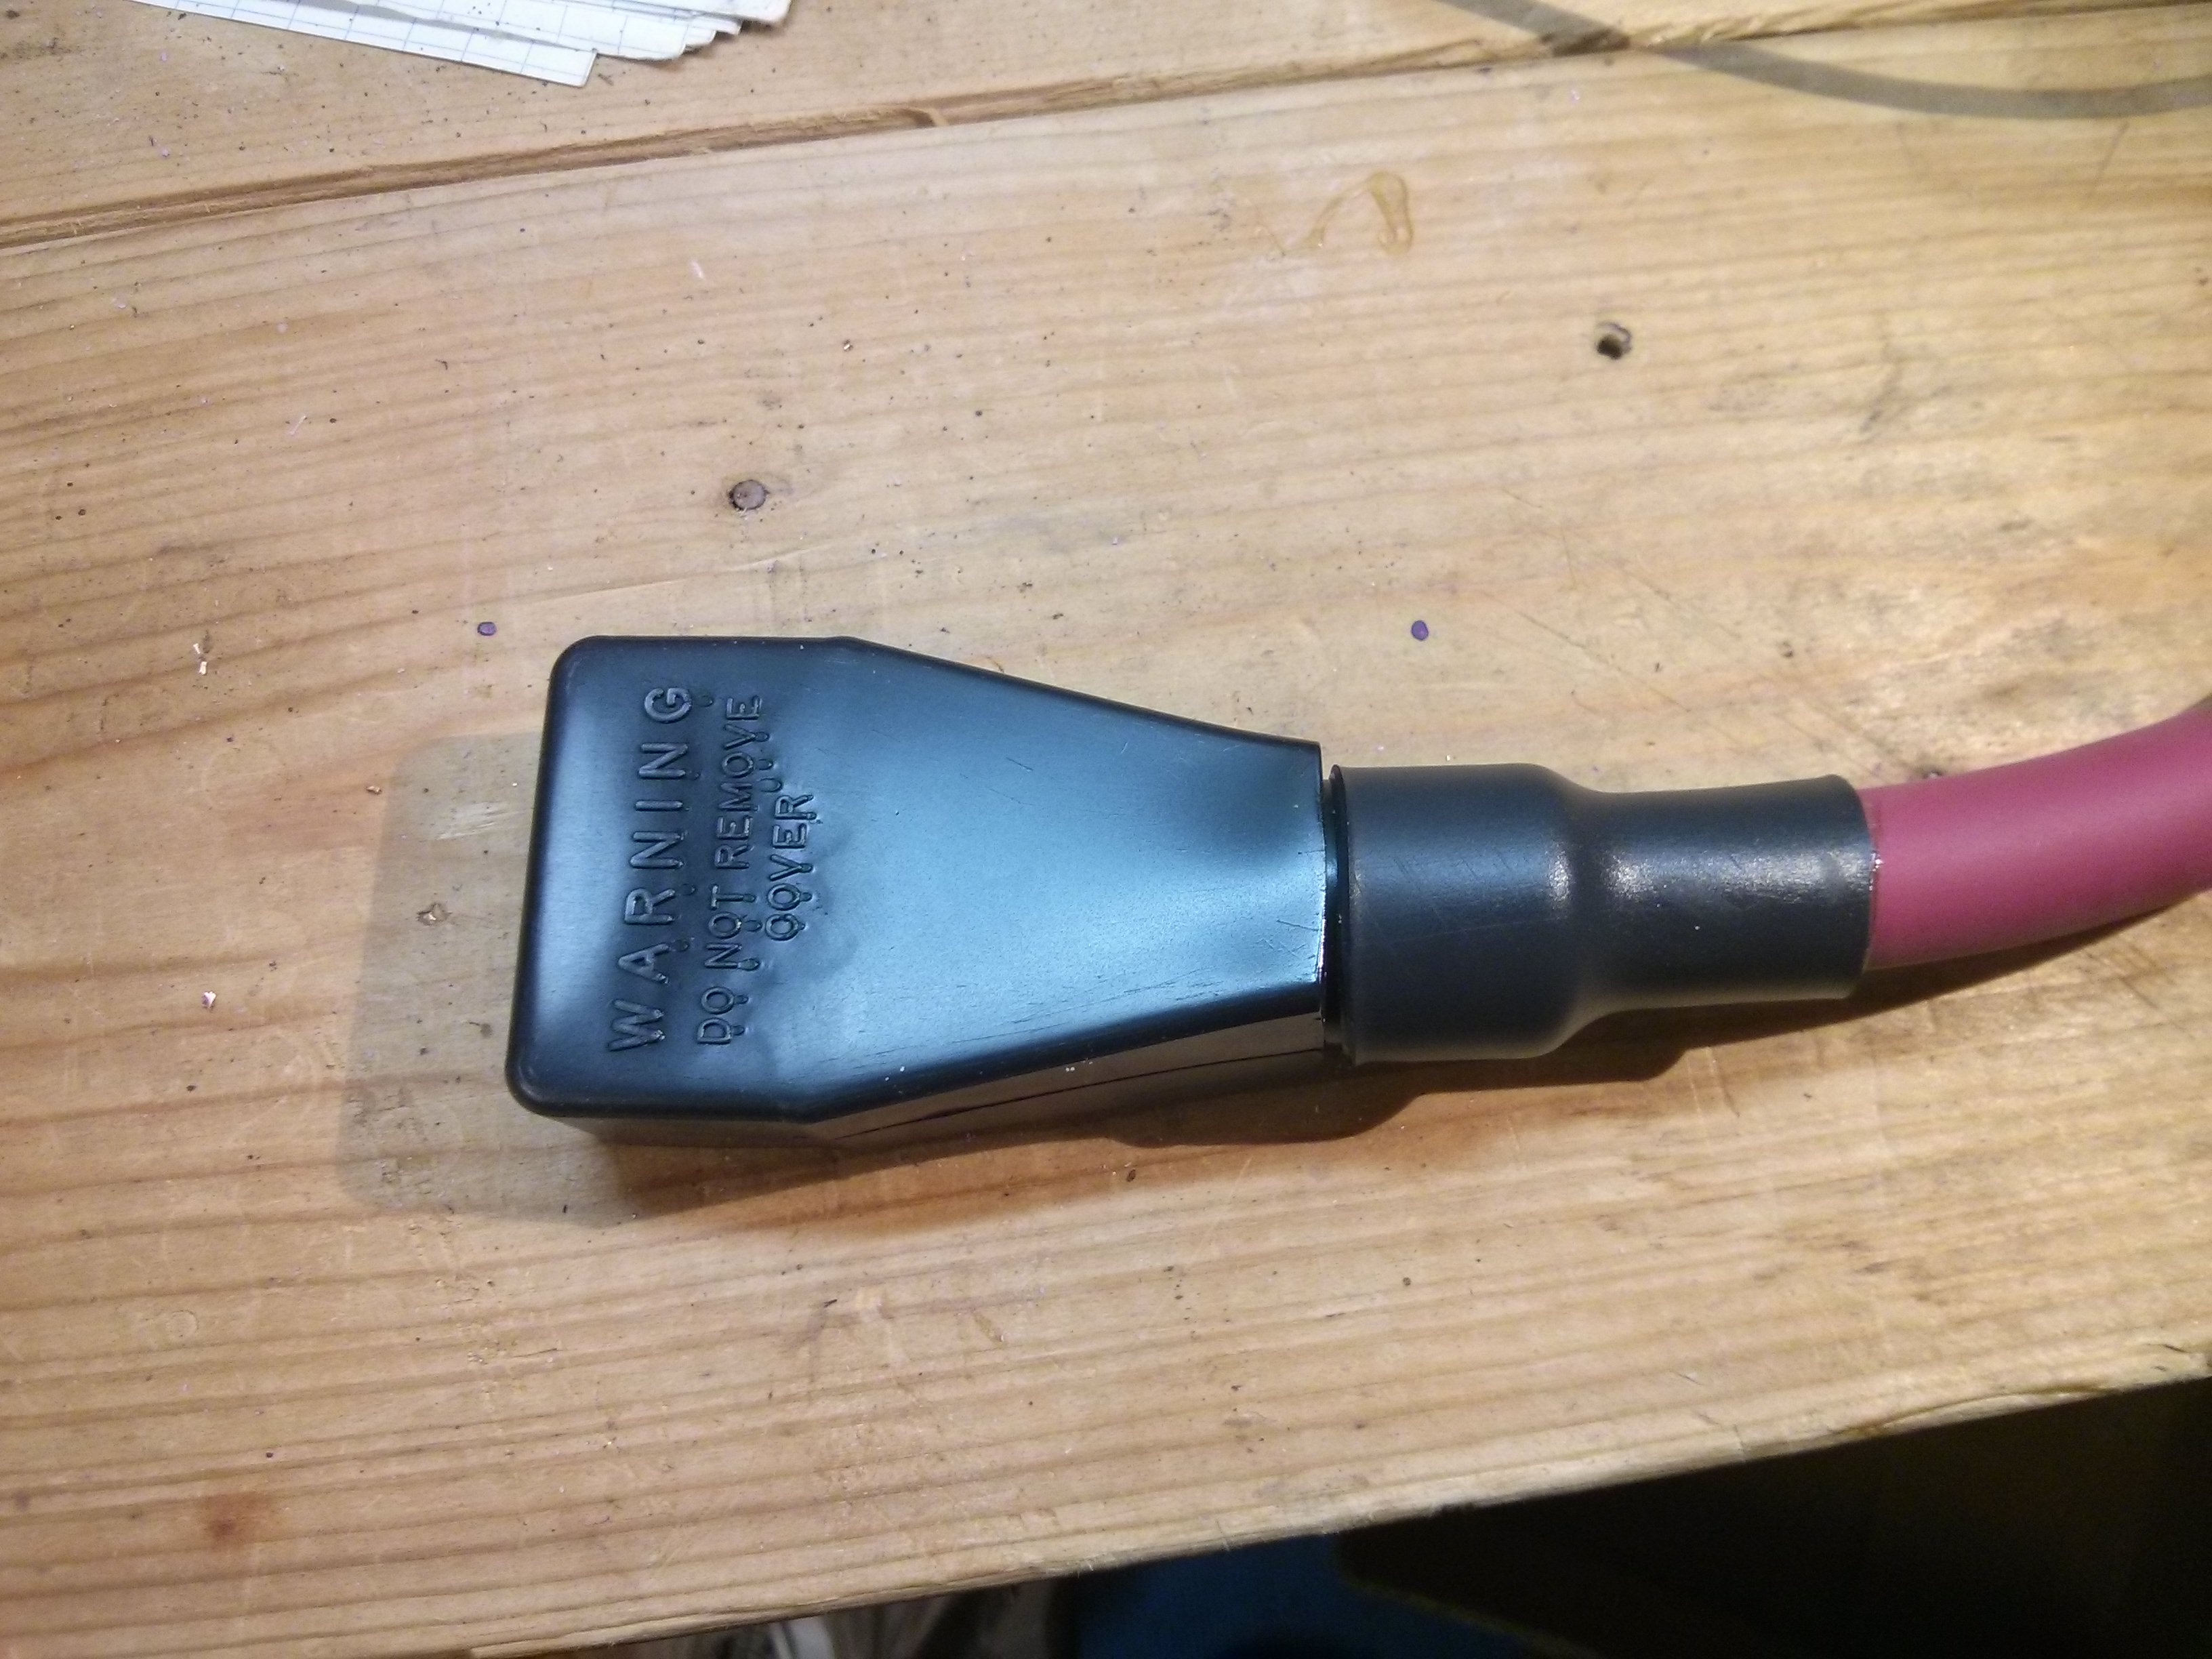
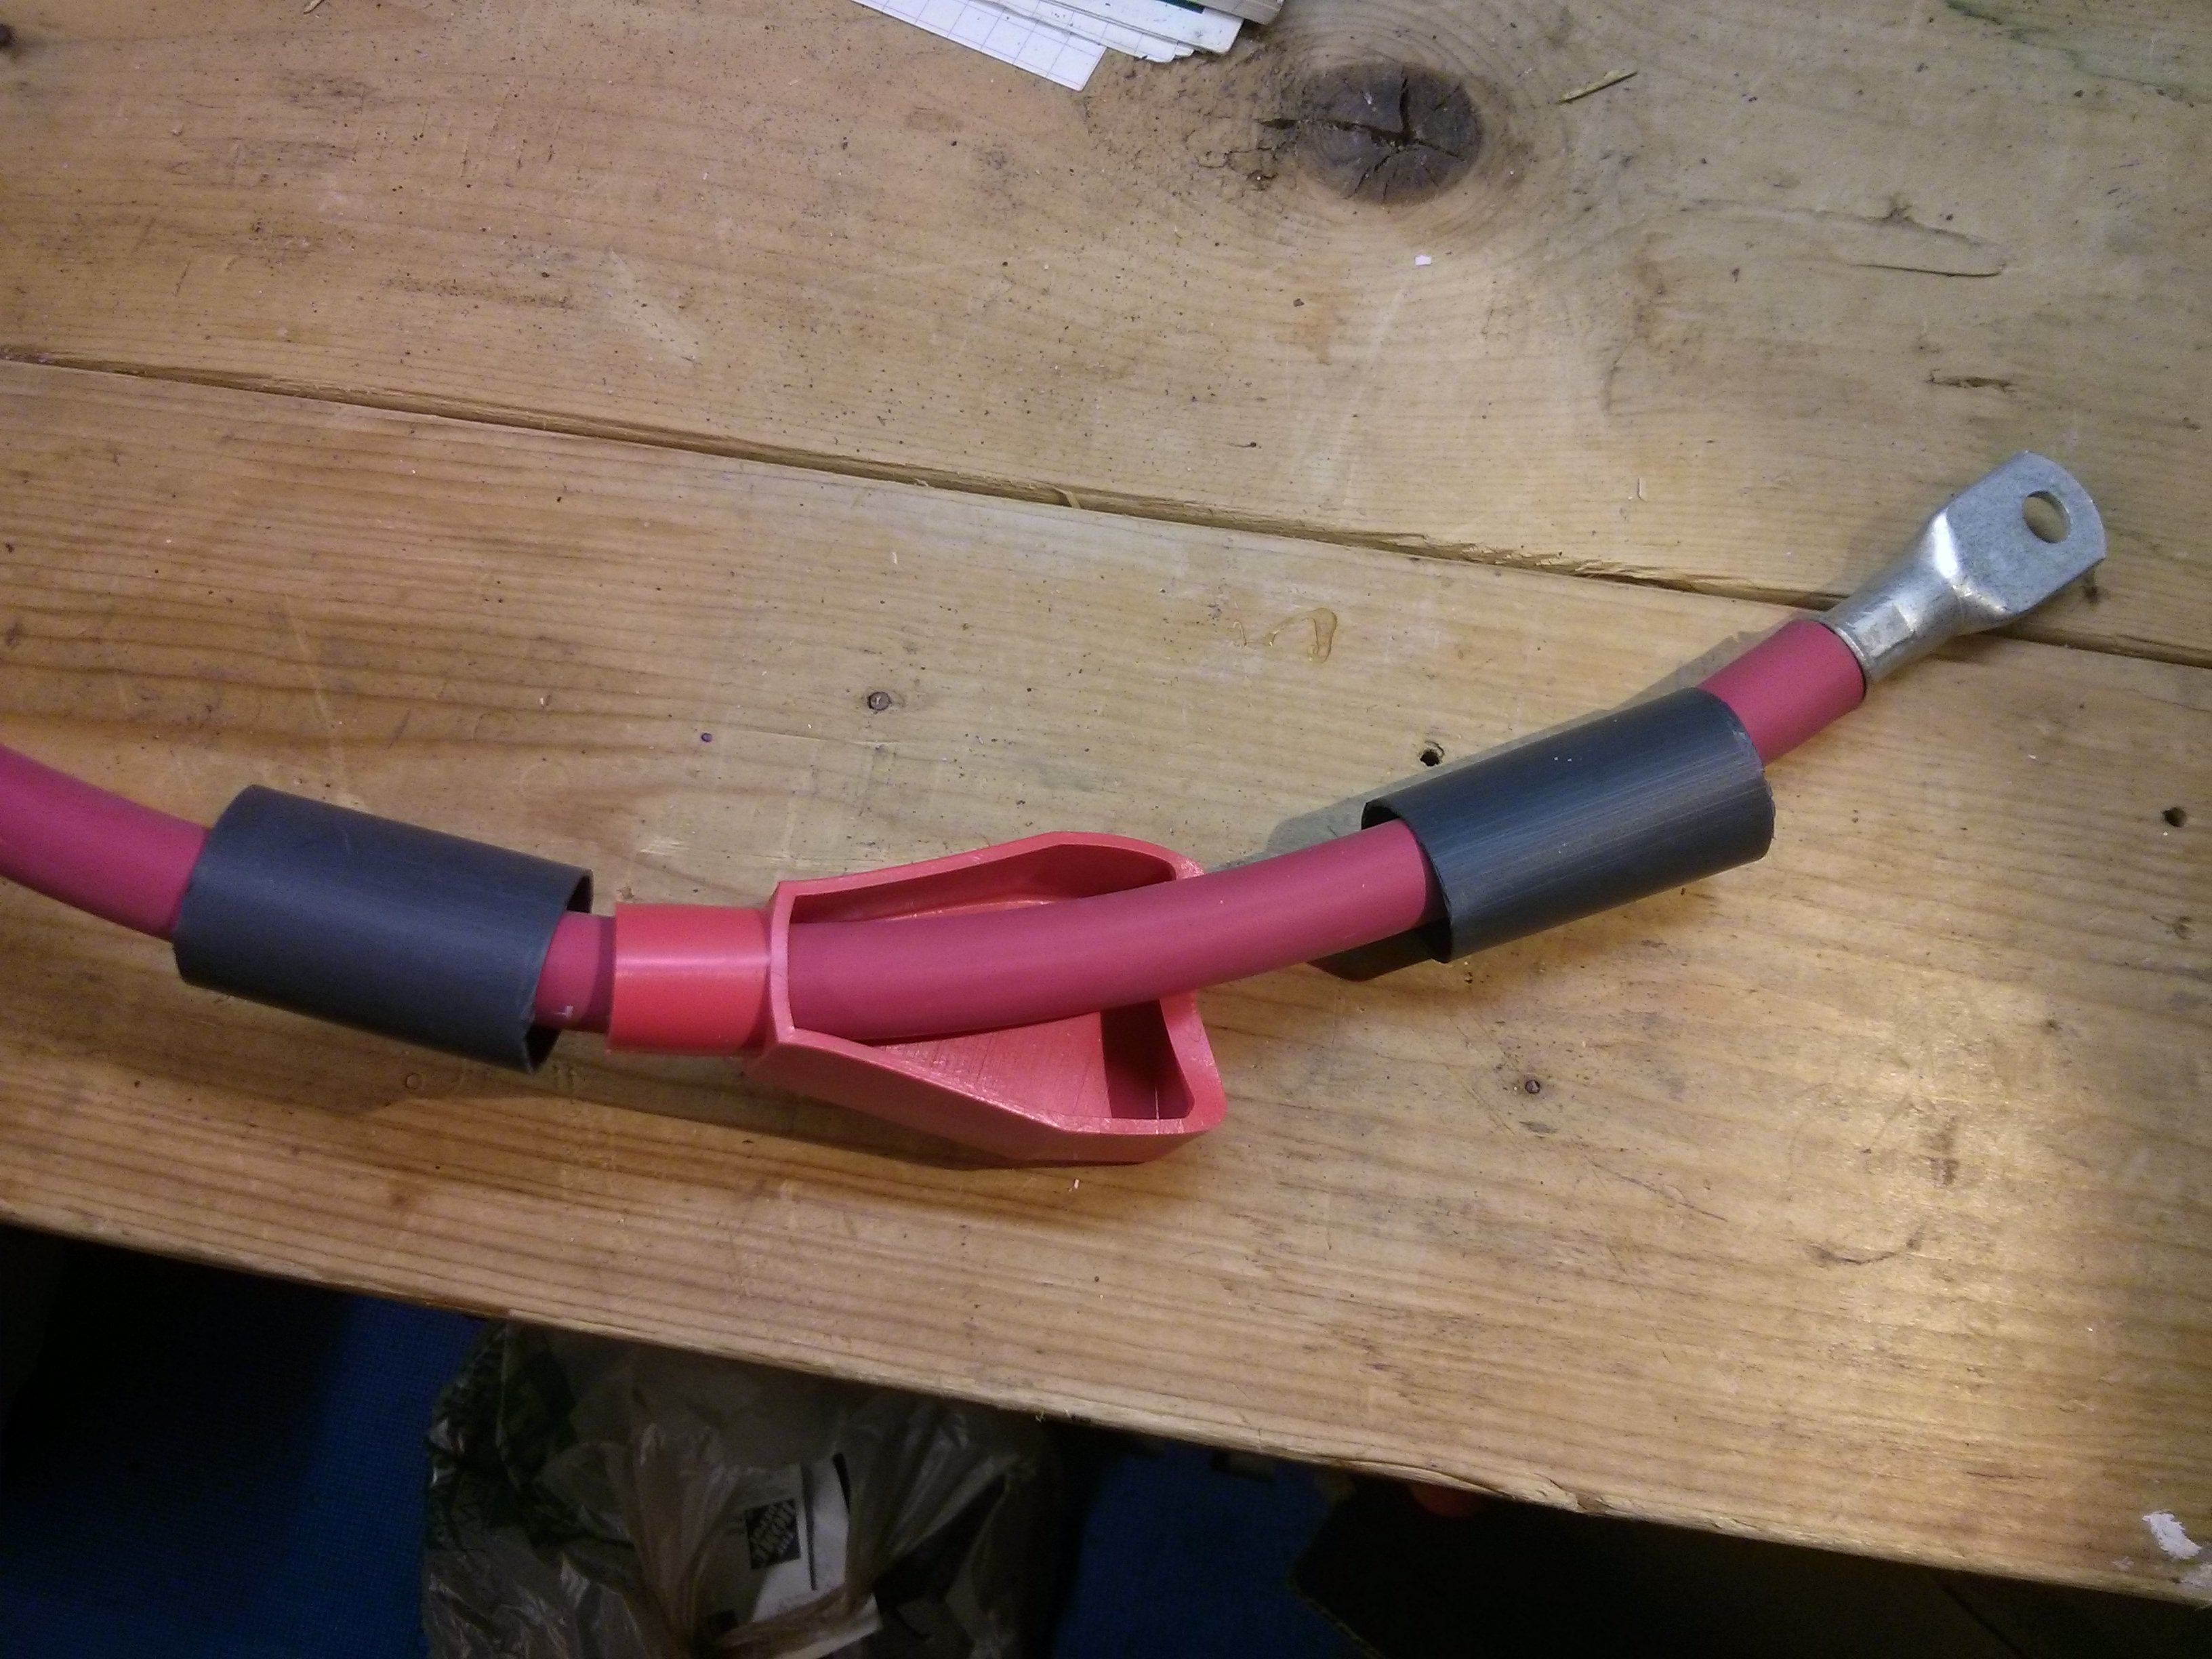
Then add a terminal protector (optional, but suggested) and use another piece of heat shrink tubing to hold it in place.
For the other end, I recommend placing the heat shrink tubing and terminal protector onto the wire BEFORE crimping the lug, just in case the head of your lug is too large to allow them to slip over it. (I didn’t have a problem with that in the video above, but it’s always better to have the heat shrink tubing and terminal protector on the wire before you permanently attach the lug.)
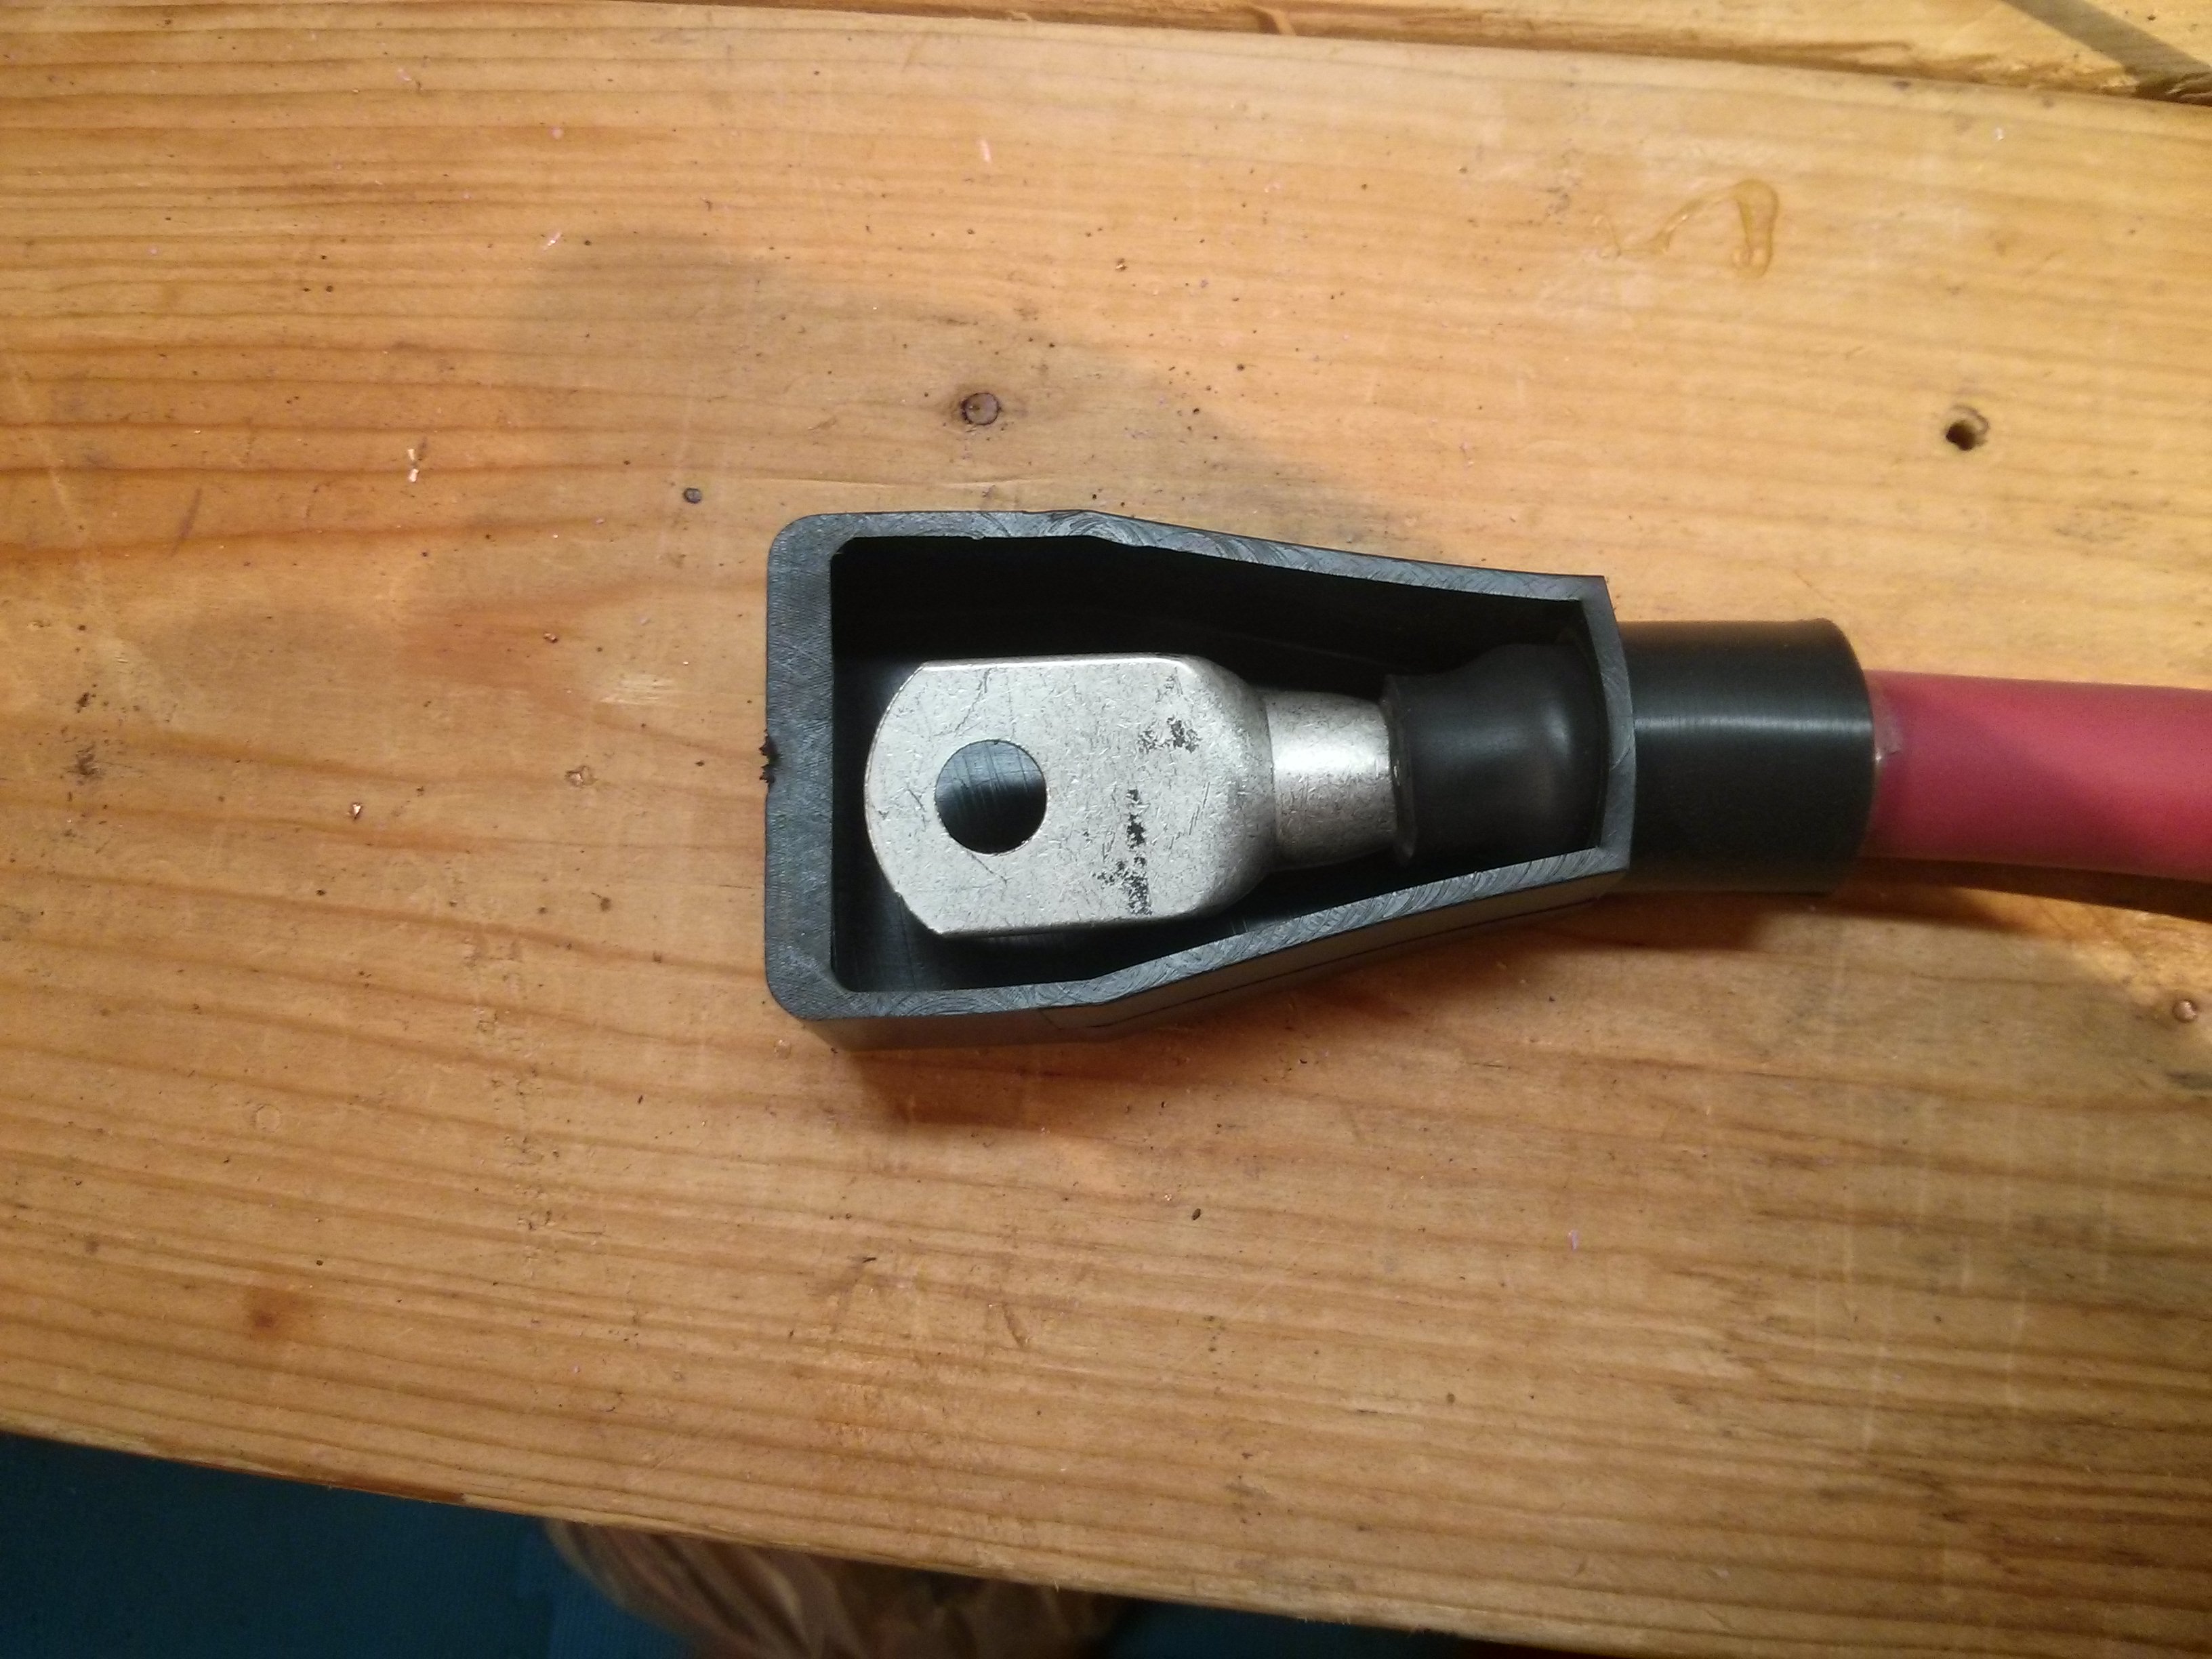
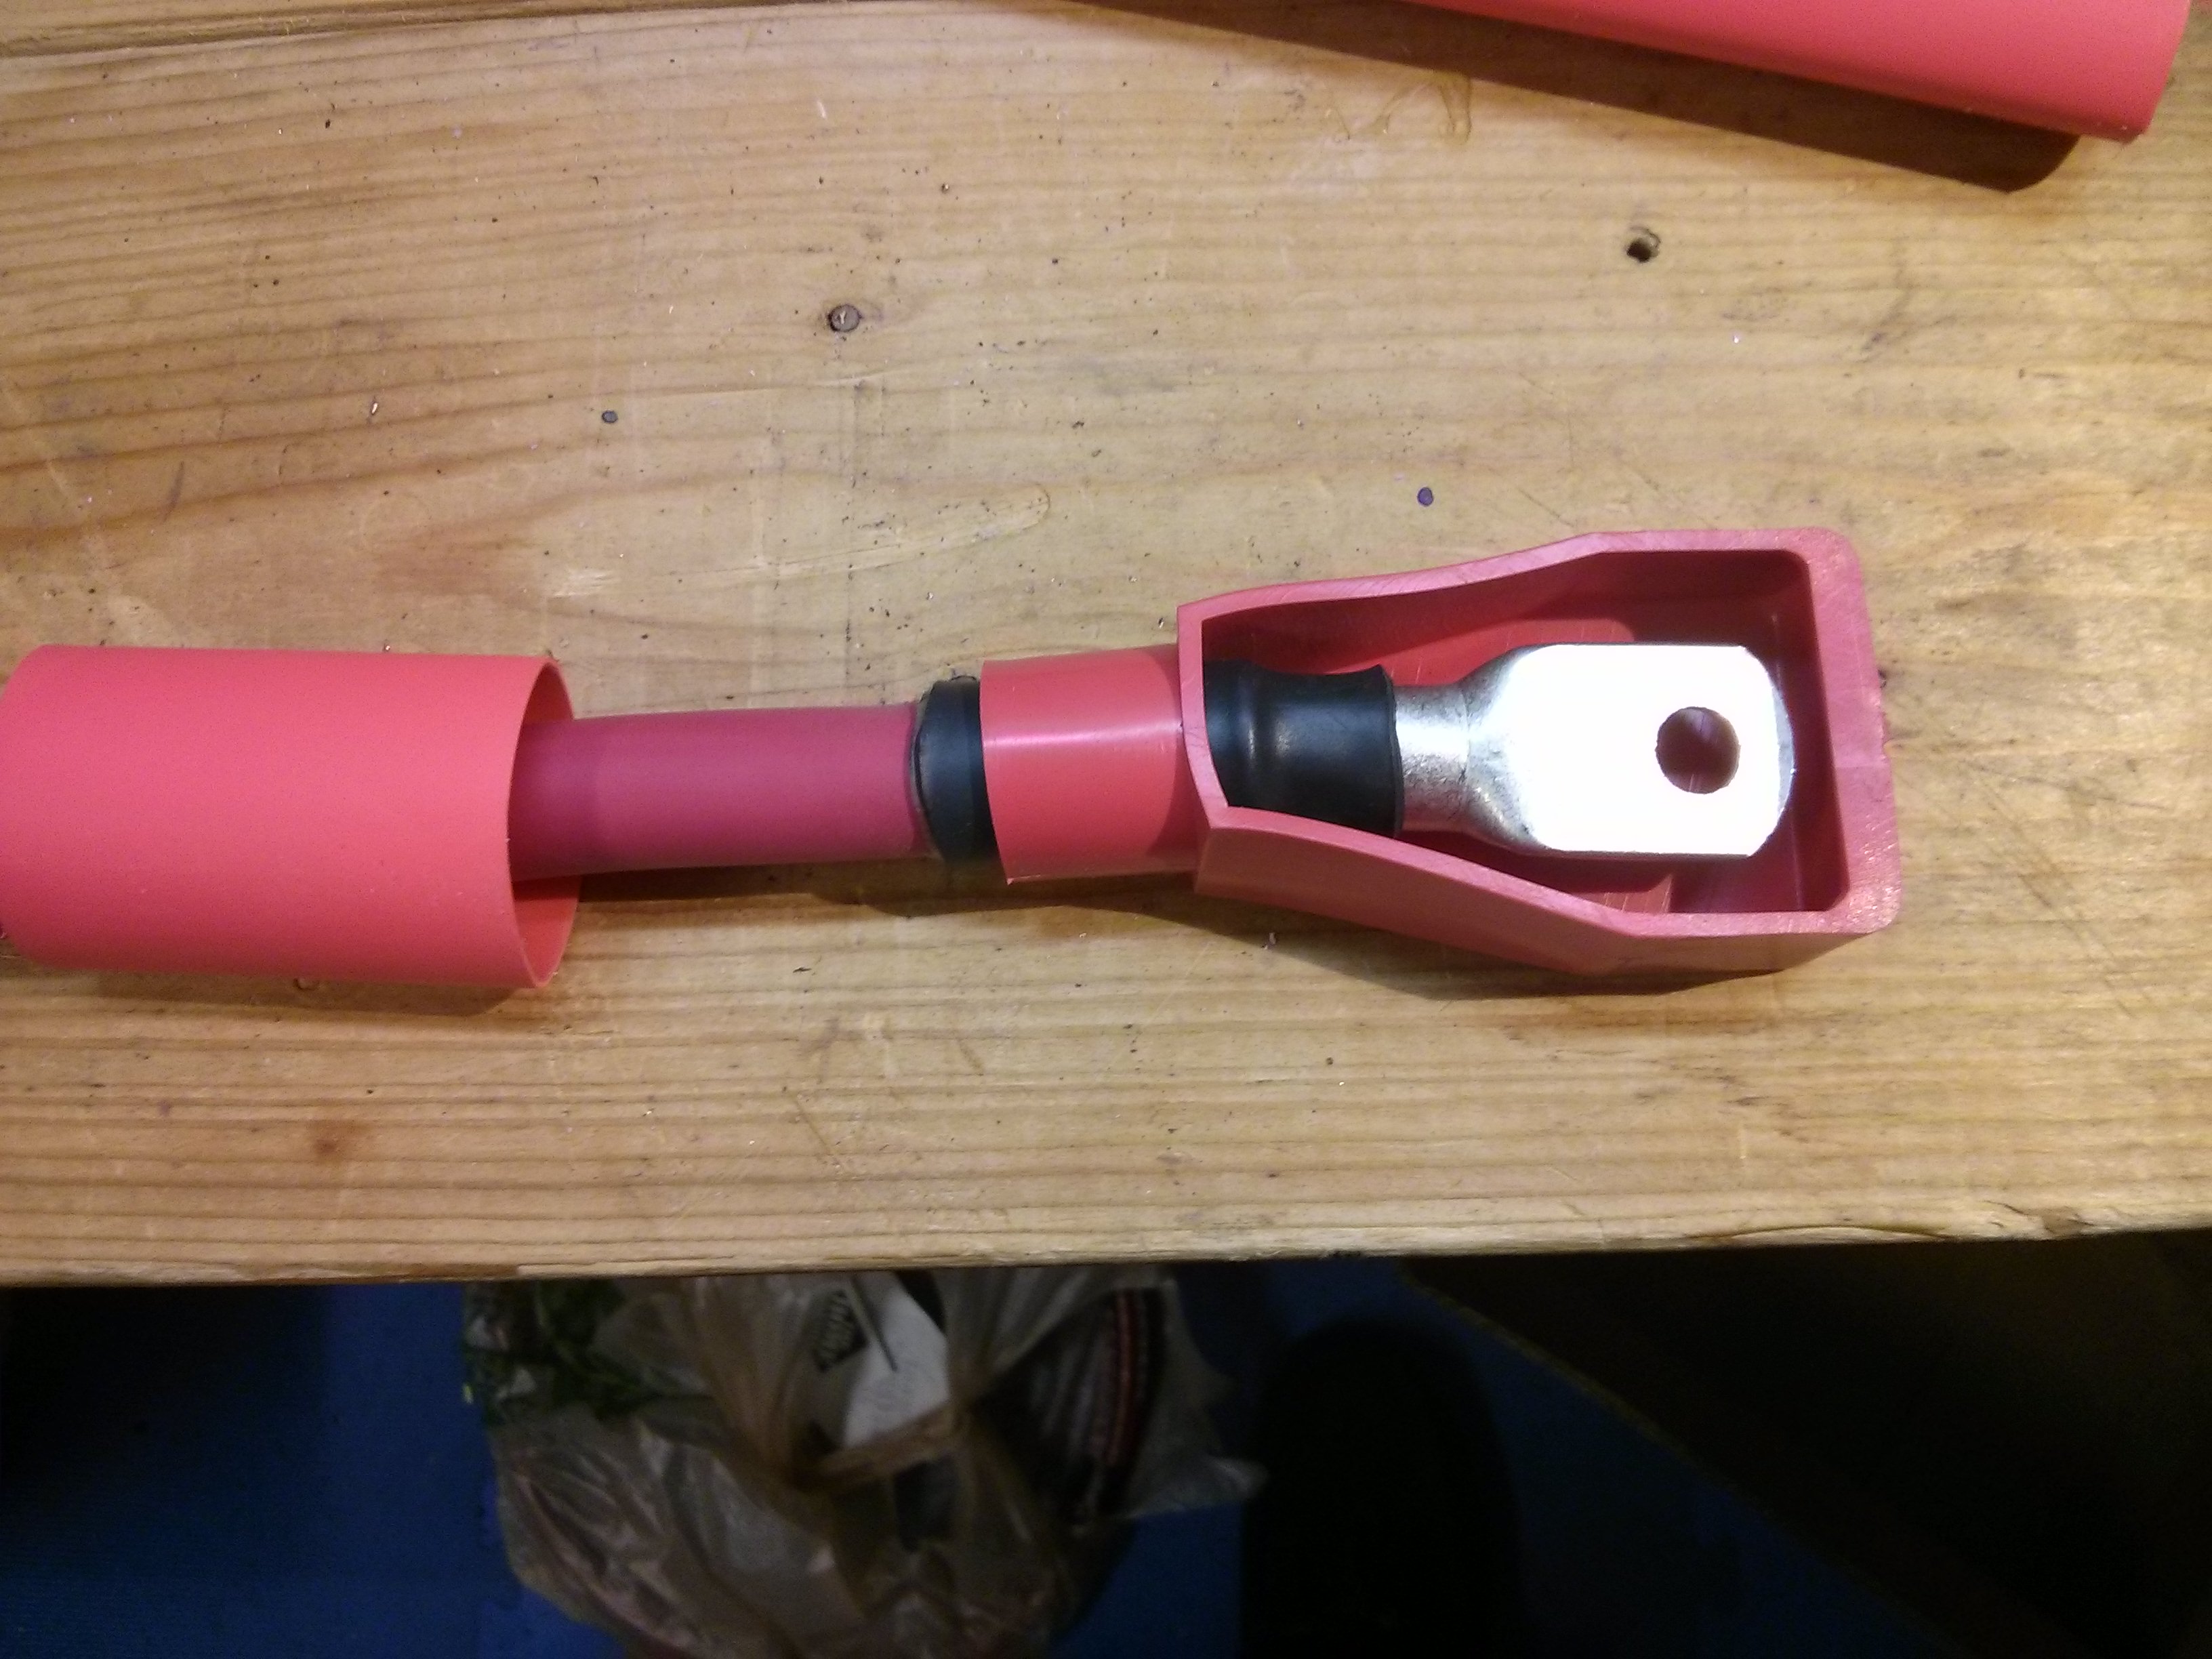
If you want to verify that your crimper is doing a good job, you can make a test crimp and then cut it in half with a metal cutting saw. It should look like a solid piece of copper inside the lug.
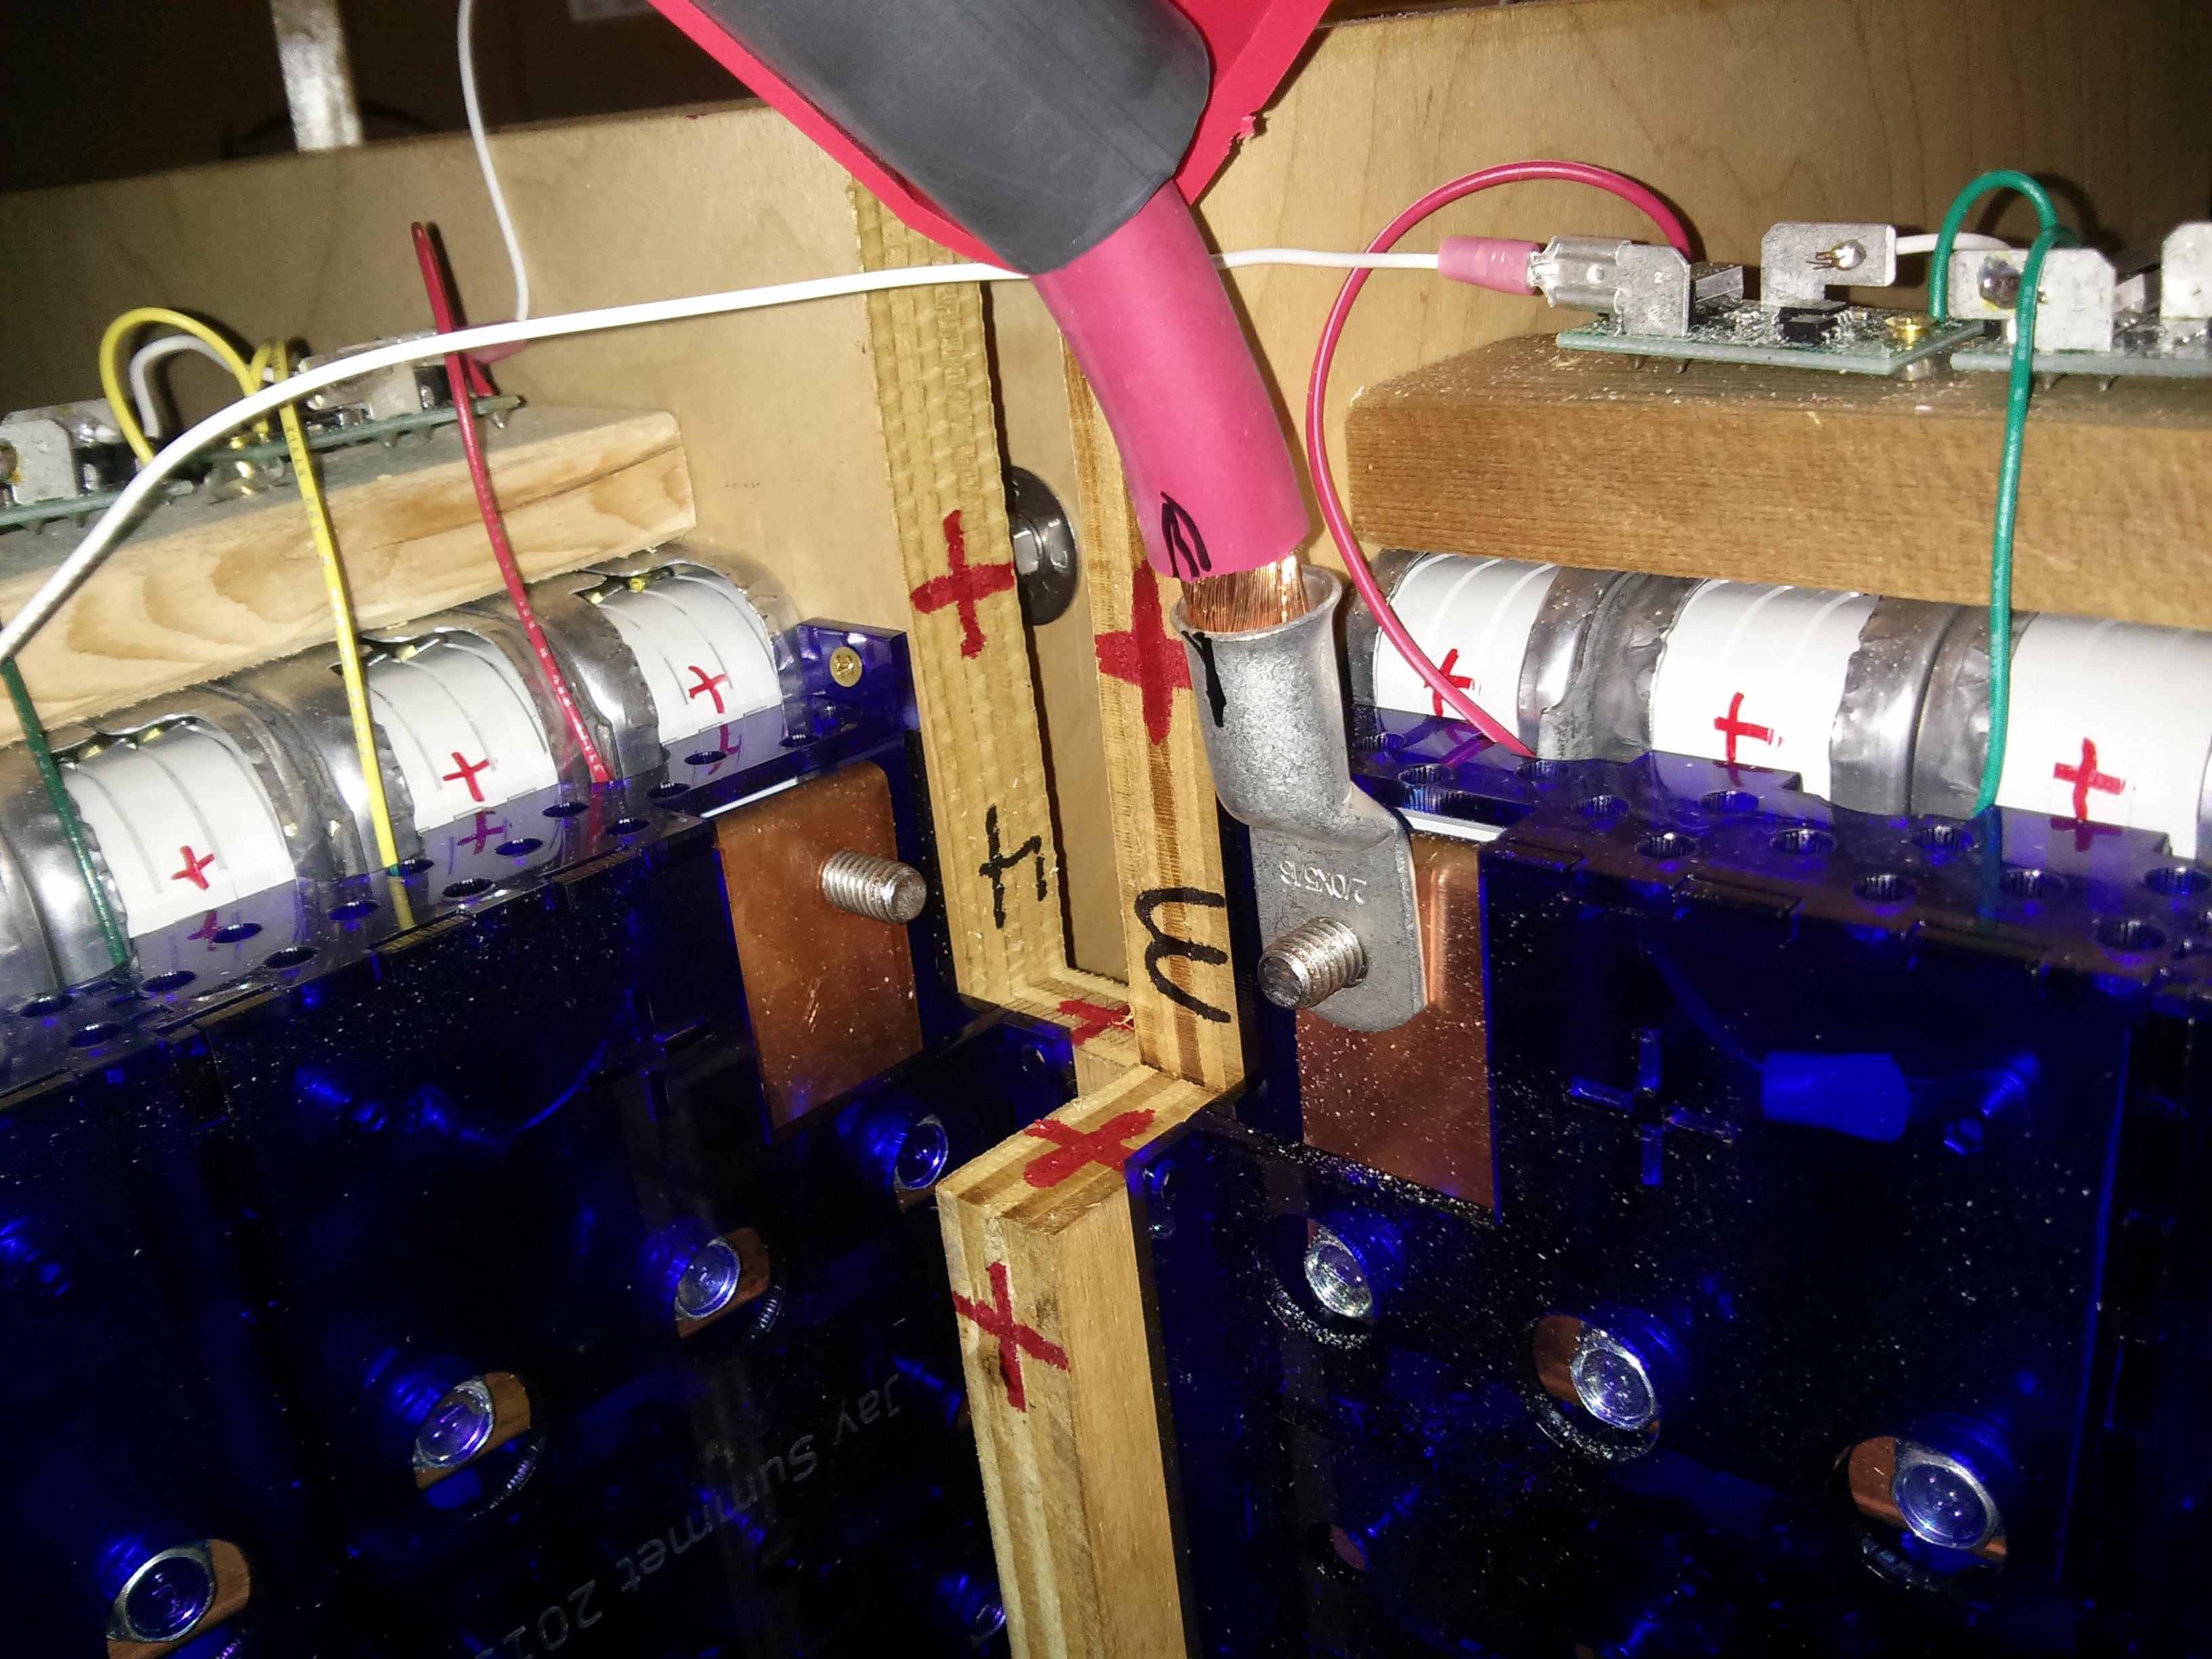
Pay attention to the orientation of the lugs. If you are dealing with golf cart batteries, which all have their terminals on the top facing the same direction, you probably want the lugs all “flat” so that cables don’t twist. However, in some situations you want the lugs to be 90 degrees “out of phase” with each other so that the cable twists correctly. The easiest thing to do here is to put the cable in place with at least one lug loose, and mark a line with sharpie showing how the lug should be oriented. (Note how I have all of the terminal covers and heat shrink tubing on the cable before crimping the lugs.)

This is a closeup of how the adhesive from inside the heat shrink tubing oozes out when you have it hot enough. (Click to zoom.)

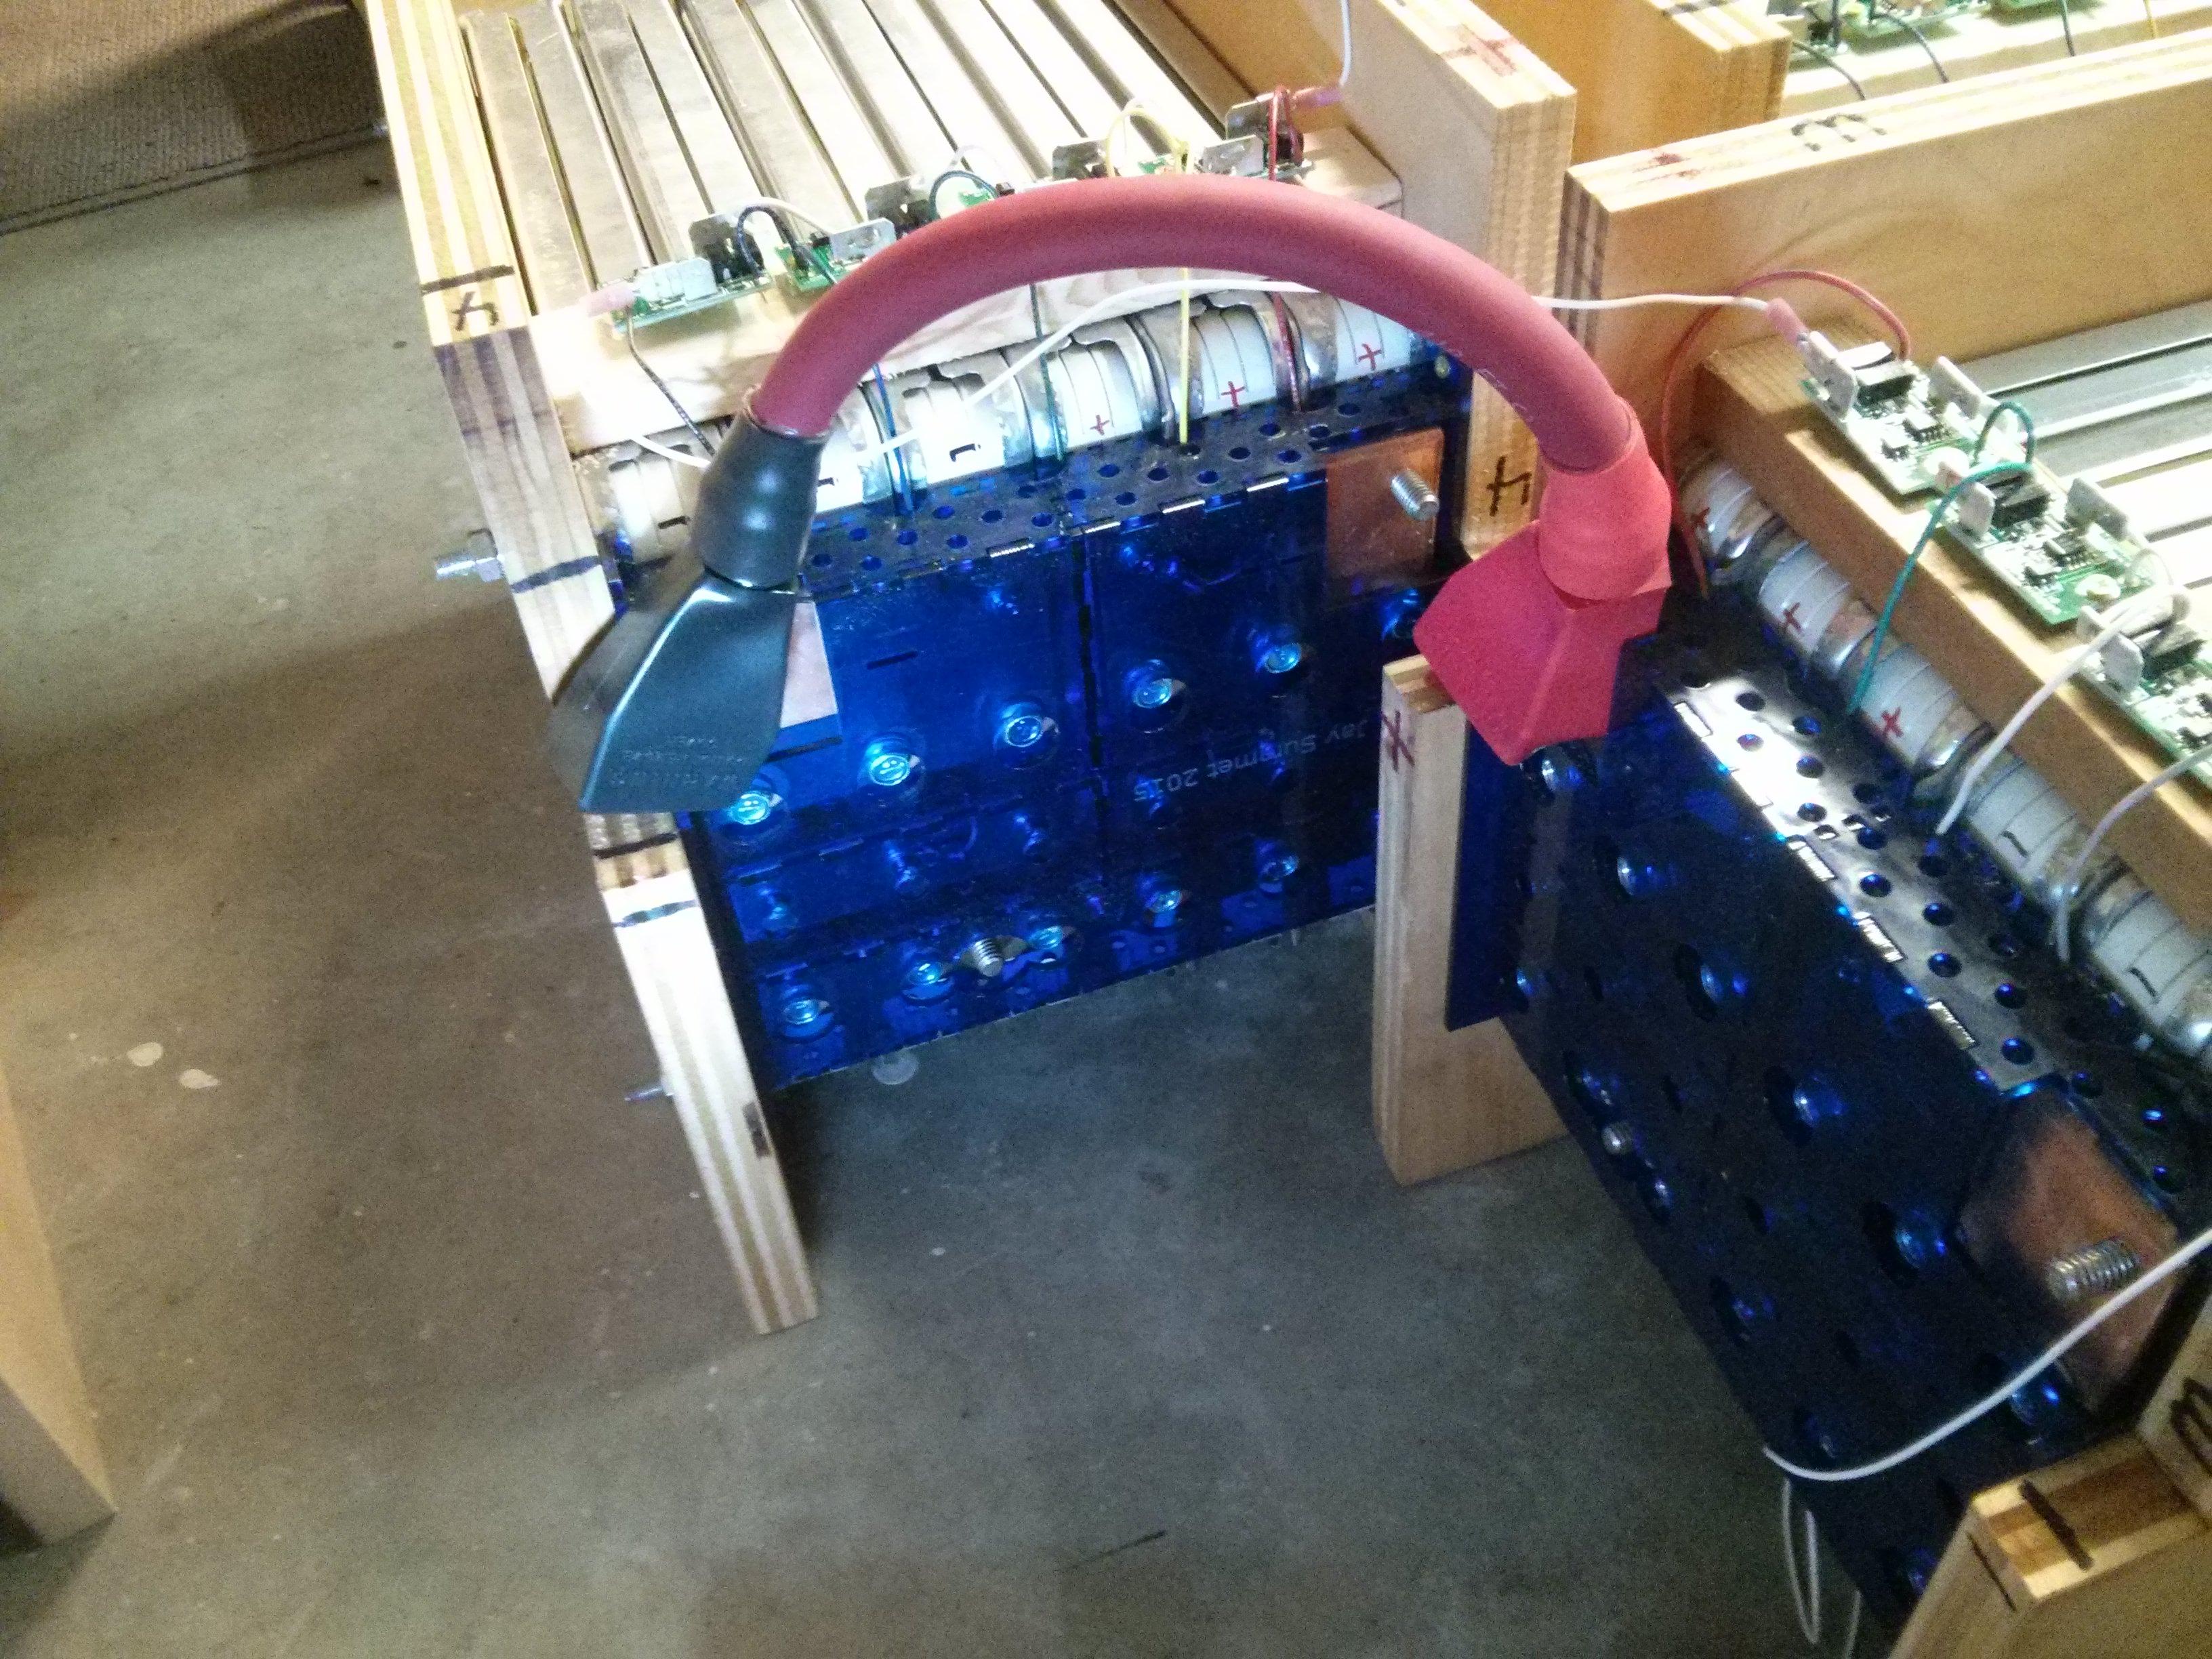
And here is the final cable placement with 90 degree turn on the lugs.


Do you find any benefit (or need) to flow a small amount of solder under the terminal and into the wire bundle…. or is the crimp sufficient?
Assuming you make the crimp well enough (i.e. enough pressure to “weld” the wire/lug together) extra solder is unnecessary, and may cause problems because it wicks up the wire under the insulation and makes it more likely to break under mechanical stresses.
You shouldn’t depend upon solder to improve the physical connection, because a poor connection (from lug to terminal) may result in a very hot lug which will melt the solder and then your joint is weaker because the solder is missing.
In the case of ring terminals on small wires crimped by hand with pliers, where the ends of the wire is visible, I do sometimes solder the tip of the wire to the ring terminal. I heat the terminal, not the wire, so that the majority of the solder stays on the terminal and just enough flows up the wire to improve the electrical connection, but hopefully not flow back past the end of the crimp, to prevent the copper strands from becoming brittle.
However, I can’t think of a good way to get the solder to wick only under a closed lug and not go up the wire in the other direction, so I rely only upon the crimps in this situation.
In the past I have worked in aircraft and auto service, never do you ever see a call out for solder regardless of the wire size or current. I am an electrician now and work in just about every area from low voltage 12V ac/dc to 12.8KV on private distribution networks. There is never a solder joint to be found in any of it. All connections are crimp or compression. People chose to solder because they lack the tools and understanding to do a proper termination. They are also to lazy to read a few of the “white papers” out by the likes of Burney or Amp or Ilsco or Tyco to name but a few. All high current connections are cold welded via crimp. They never fail when done to factory spec. I have also read in other sites that adding colder at the front of the crimp, as you suggest at times, reduces the junction resistance. This is pure BS and untrue. The only reason they read a lower resistance is due to the deoxidizing effect of the rosin on the surface of the lugs post solder. A 4 wire 4 1/2 digit meter lacks the precision to read the actual junction resistance. To get there you need a 6 1/2 digit precision meter like those by HP or Fluke bench meter with a good pair of Kelvin clips. I know because I have this setup. For most people a simple hammer strike crimper will provide a more the serviceable and long lasting junction. Best part is that they are cheap. Even hydraulic crimpers with a set of dies are cheap now days. Read, learn, do it correctly.
Yes, I did state this in my original comment. The smaller ring terminals I was talking about were for smaller wires, which were crimped by hand with a pair of pliers, not one of my high current cables where I used the hydraulic crimper. I’ve updated the comment to include the words “small wires” and “crimped with pliers”.
Great Work!
This is an awesome work and also you can call it a safety cables.