I have been playing around with building a DIY Thermo-Electric cooler. Yes, I know the TEC’s are horribly inefficient when compared to a compressor based refrigerator. And I know you can buy basic TEC micro-fridges for $20-$50 online. We have a camping van that has a small odd sized hole that doesn’t quite fit any of the commercially available car/van coolers, so I’m investigating building my own. This post will discuss prototype number 3.
Note that this prototype is NOT appropriately sized for the hole in our camping van, it’s more of a technology and construction methods testbed, and not the final usable product.
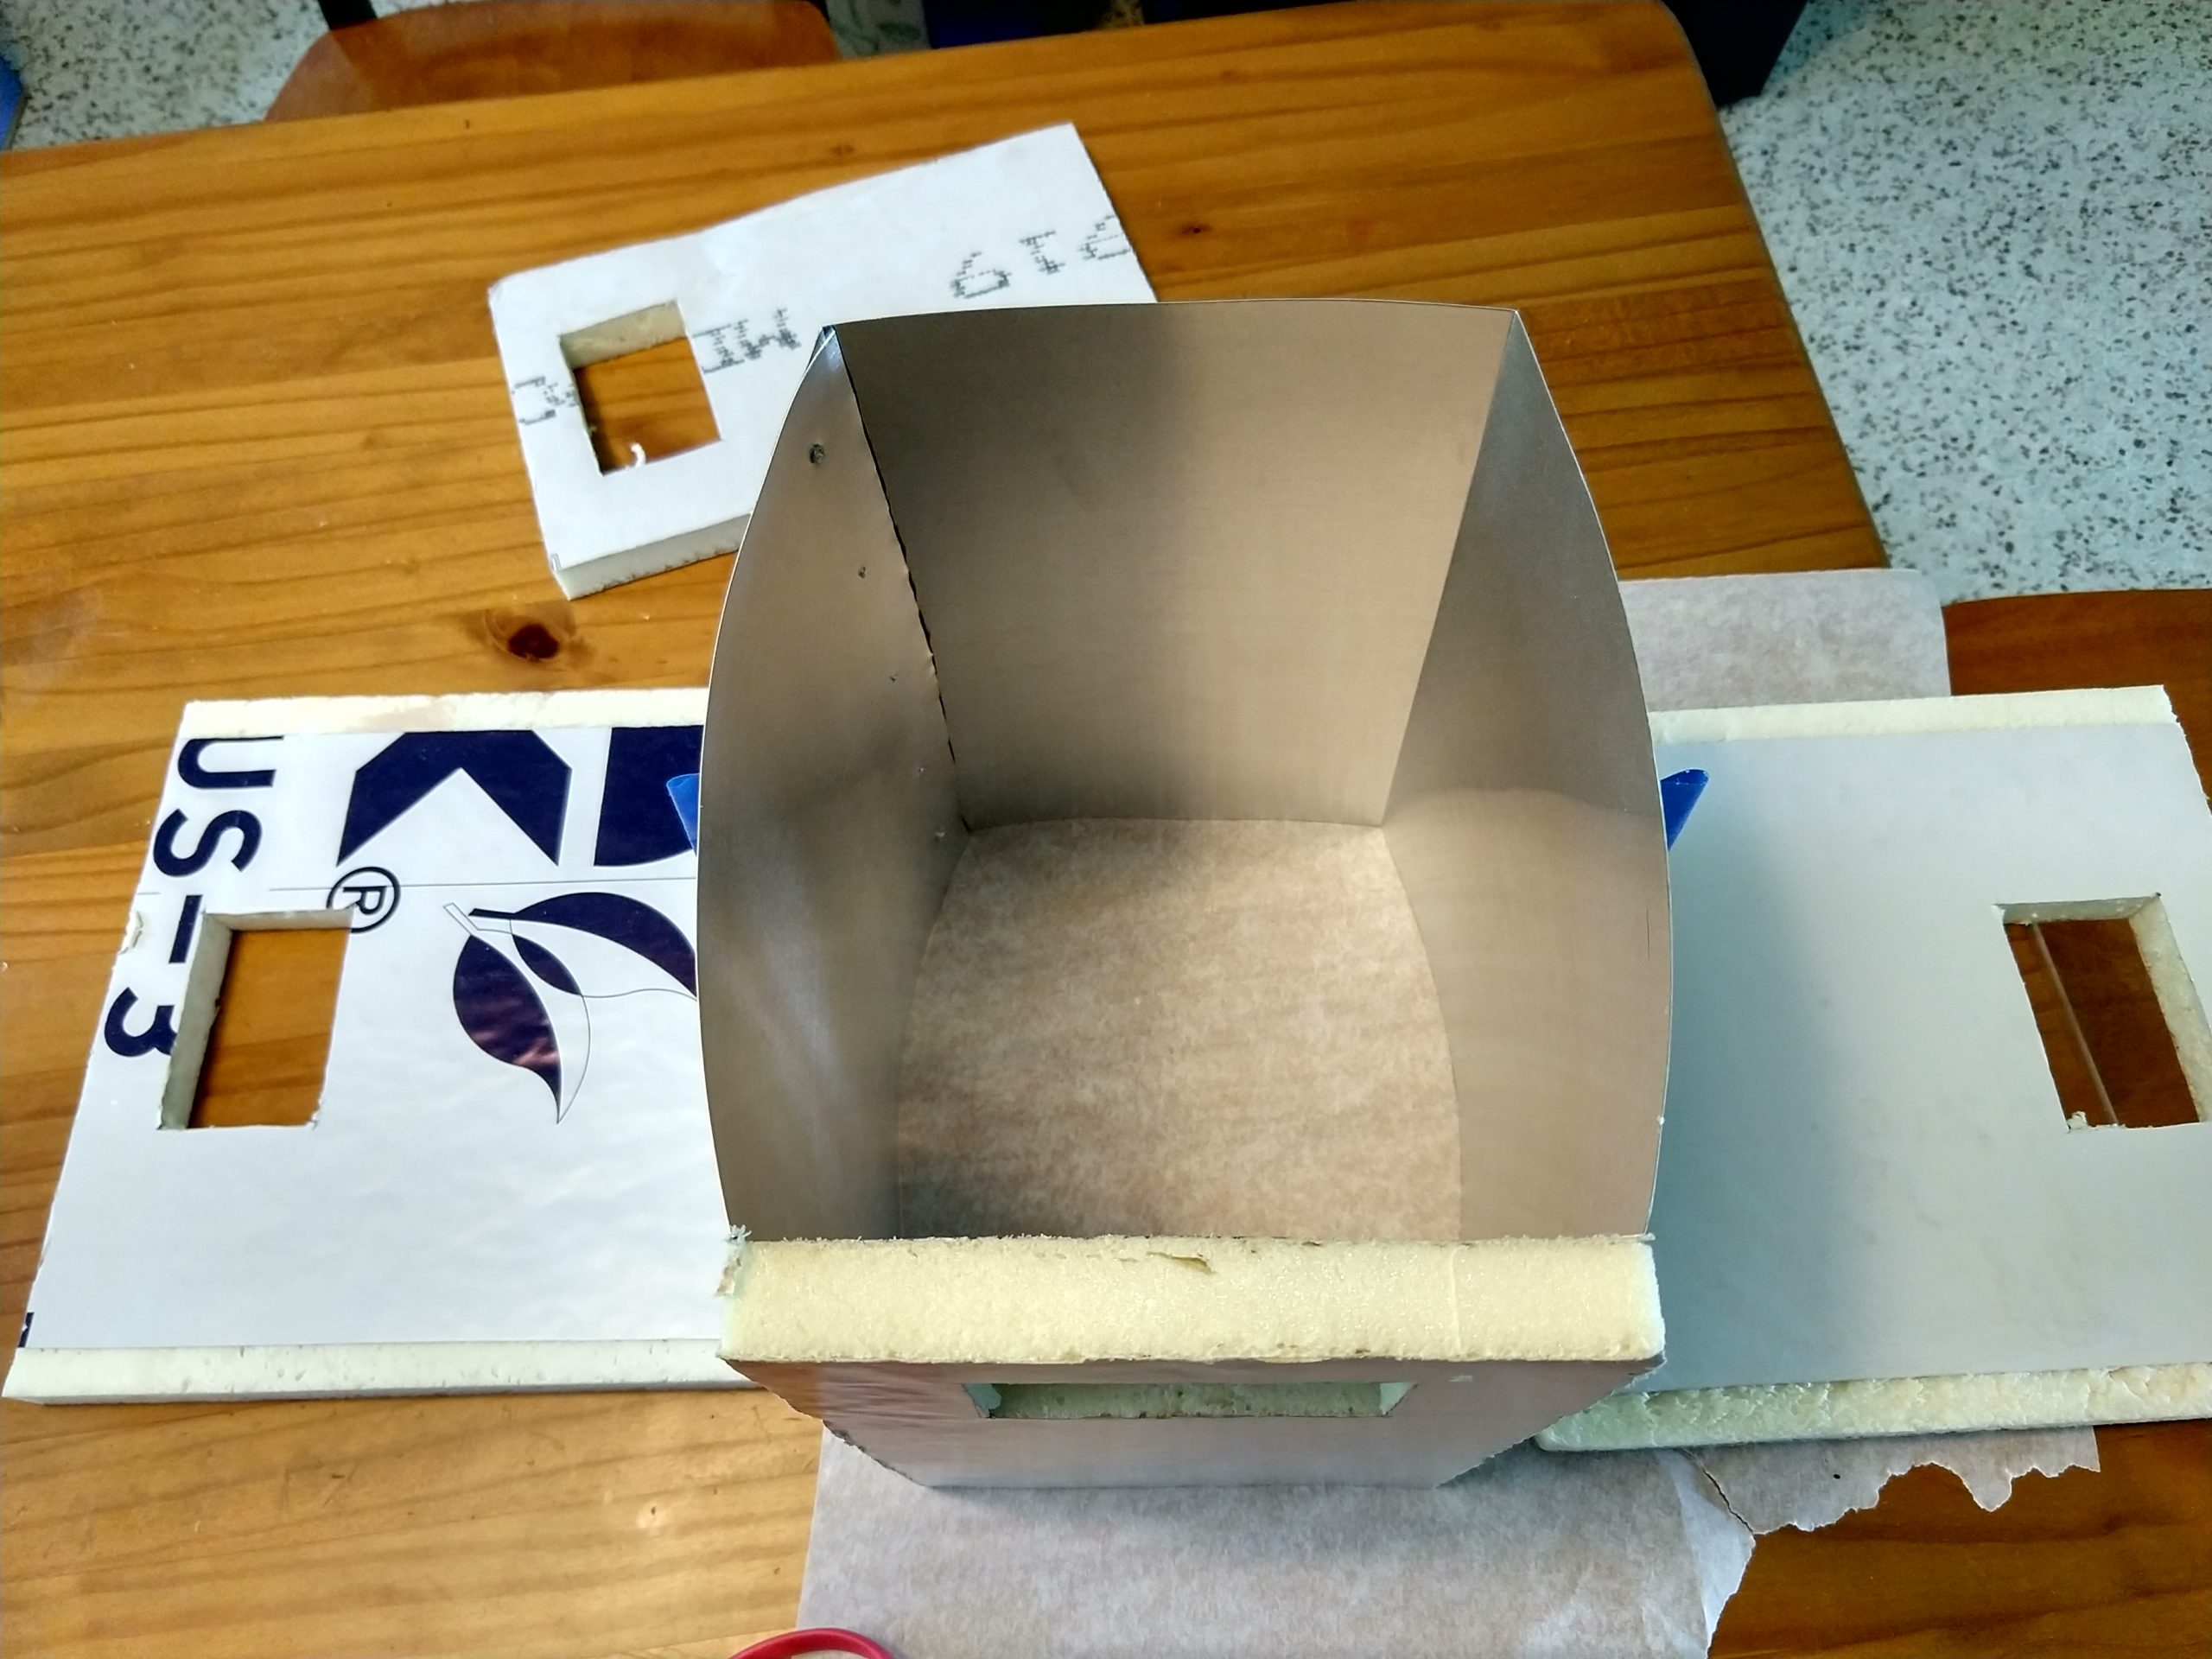
Since I’m going to be using an inefficient technology for my cooling, I overcompensated by using a lot of insulation around the cooling vessel. Specificlaly, I used 4 layers of R-5 3/4″ PolyIso insulation. (I live in Florida, so 3/4″ is the thickest PolyIso they stock, ideally I would have used one or two sheets of 2″ thick, but I would have had to pay to truck that in….)
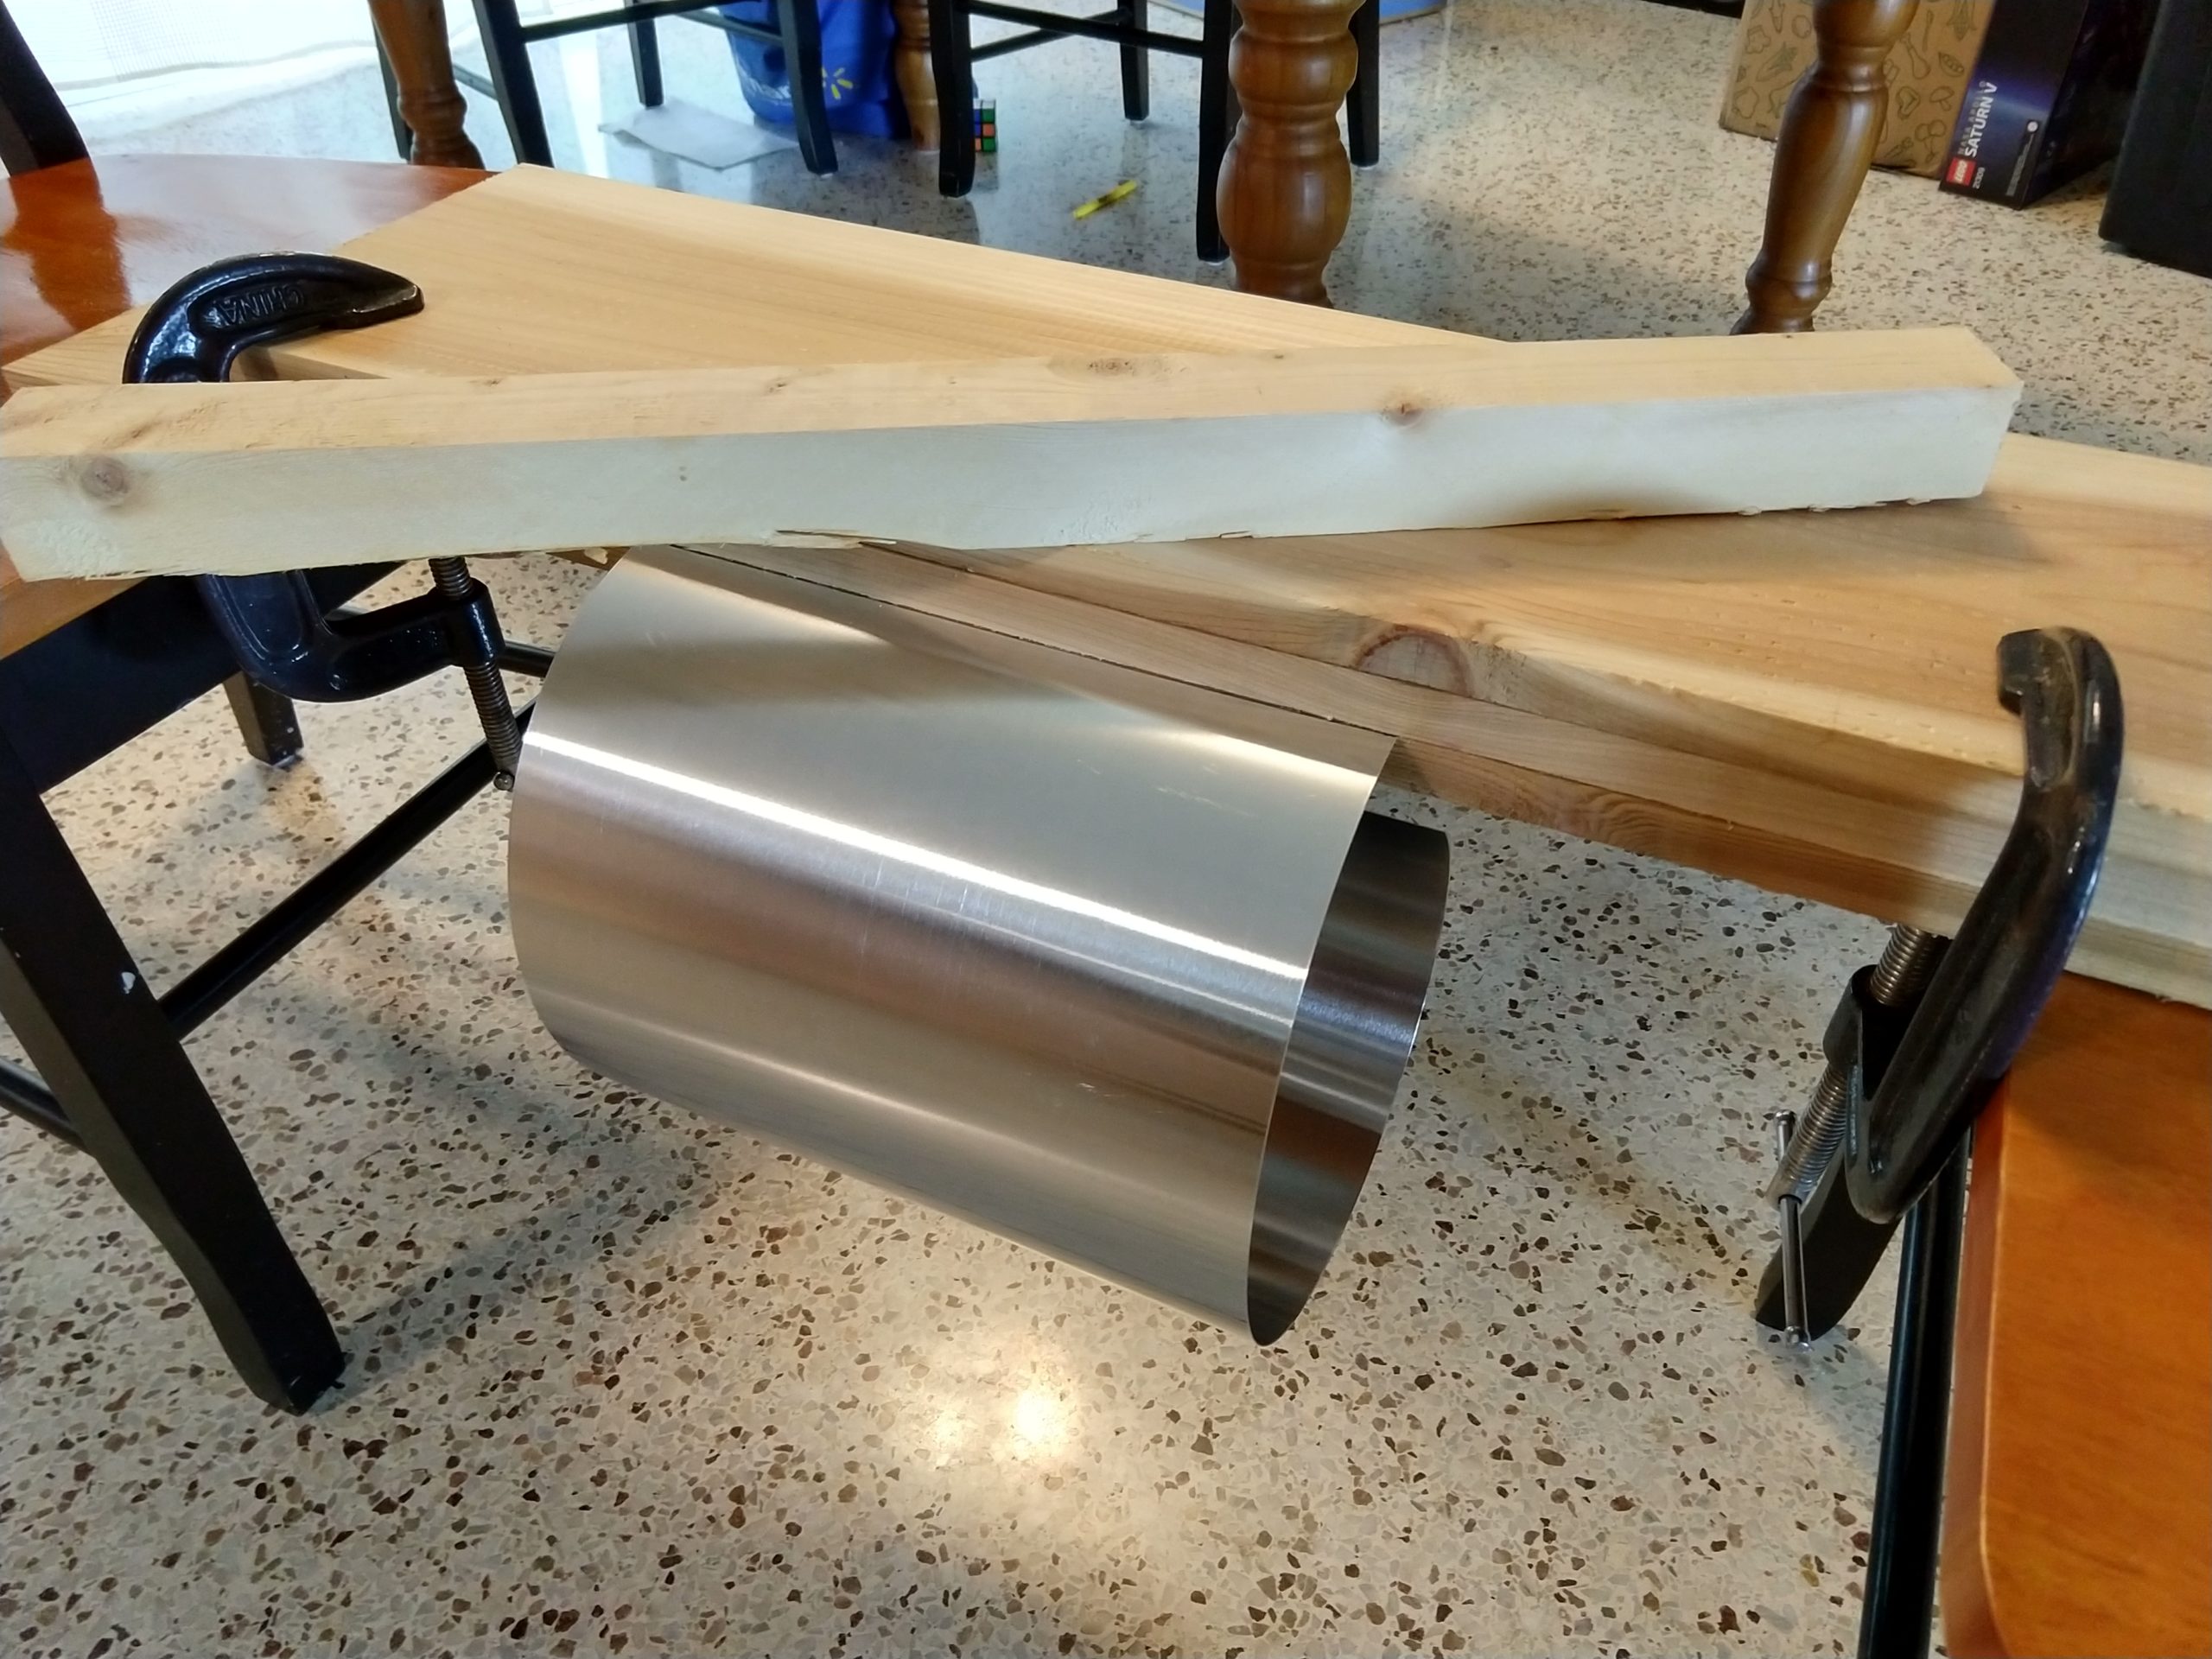
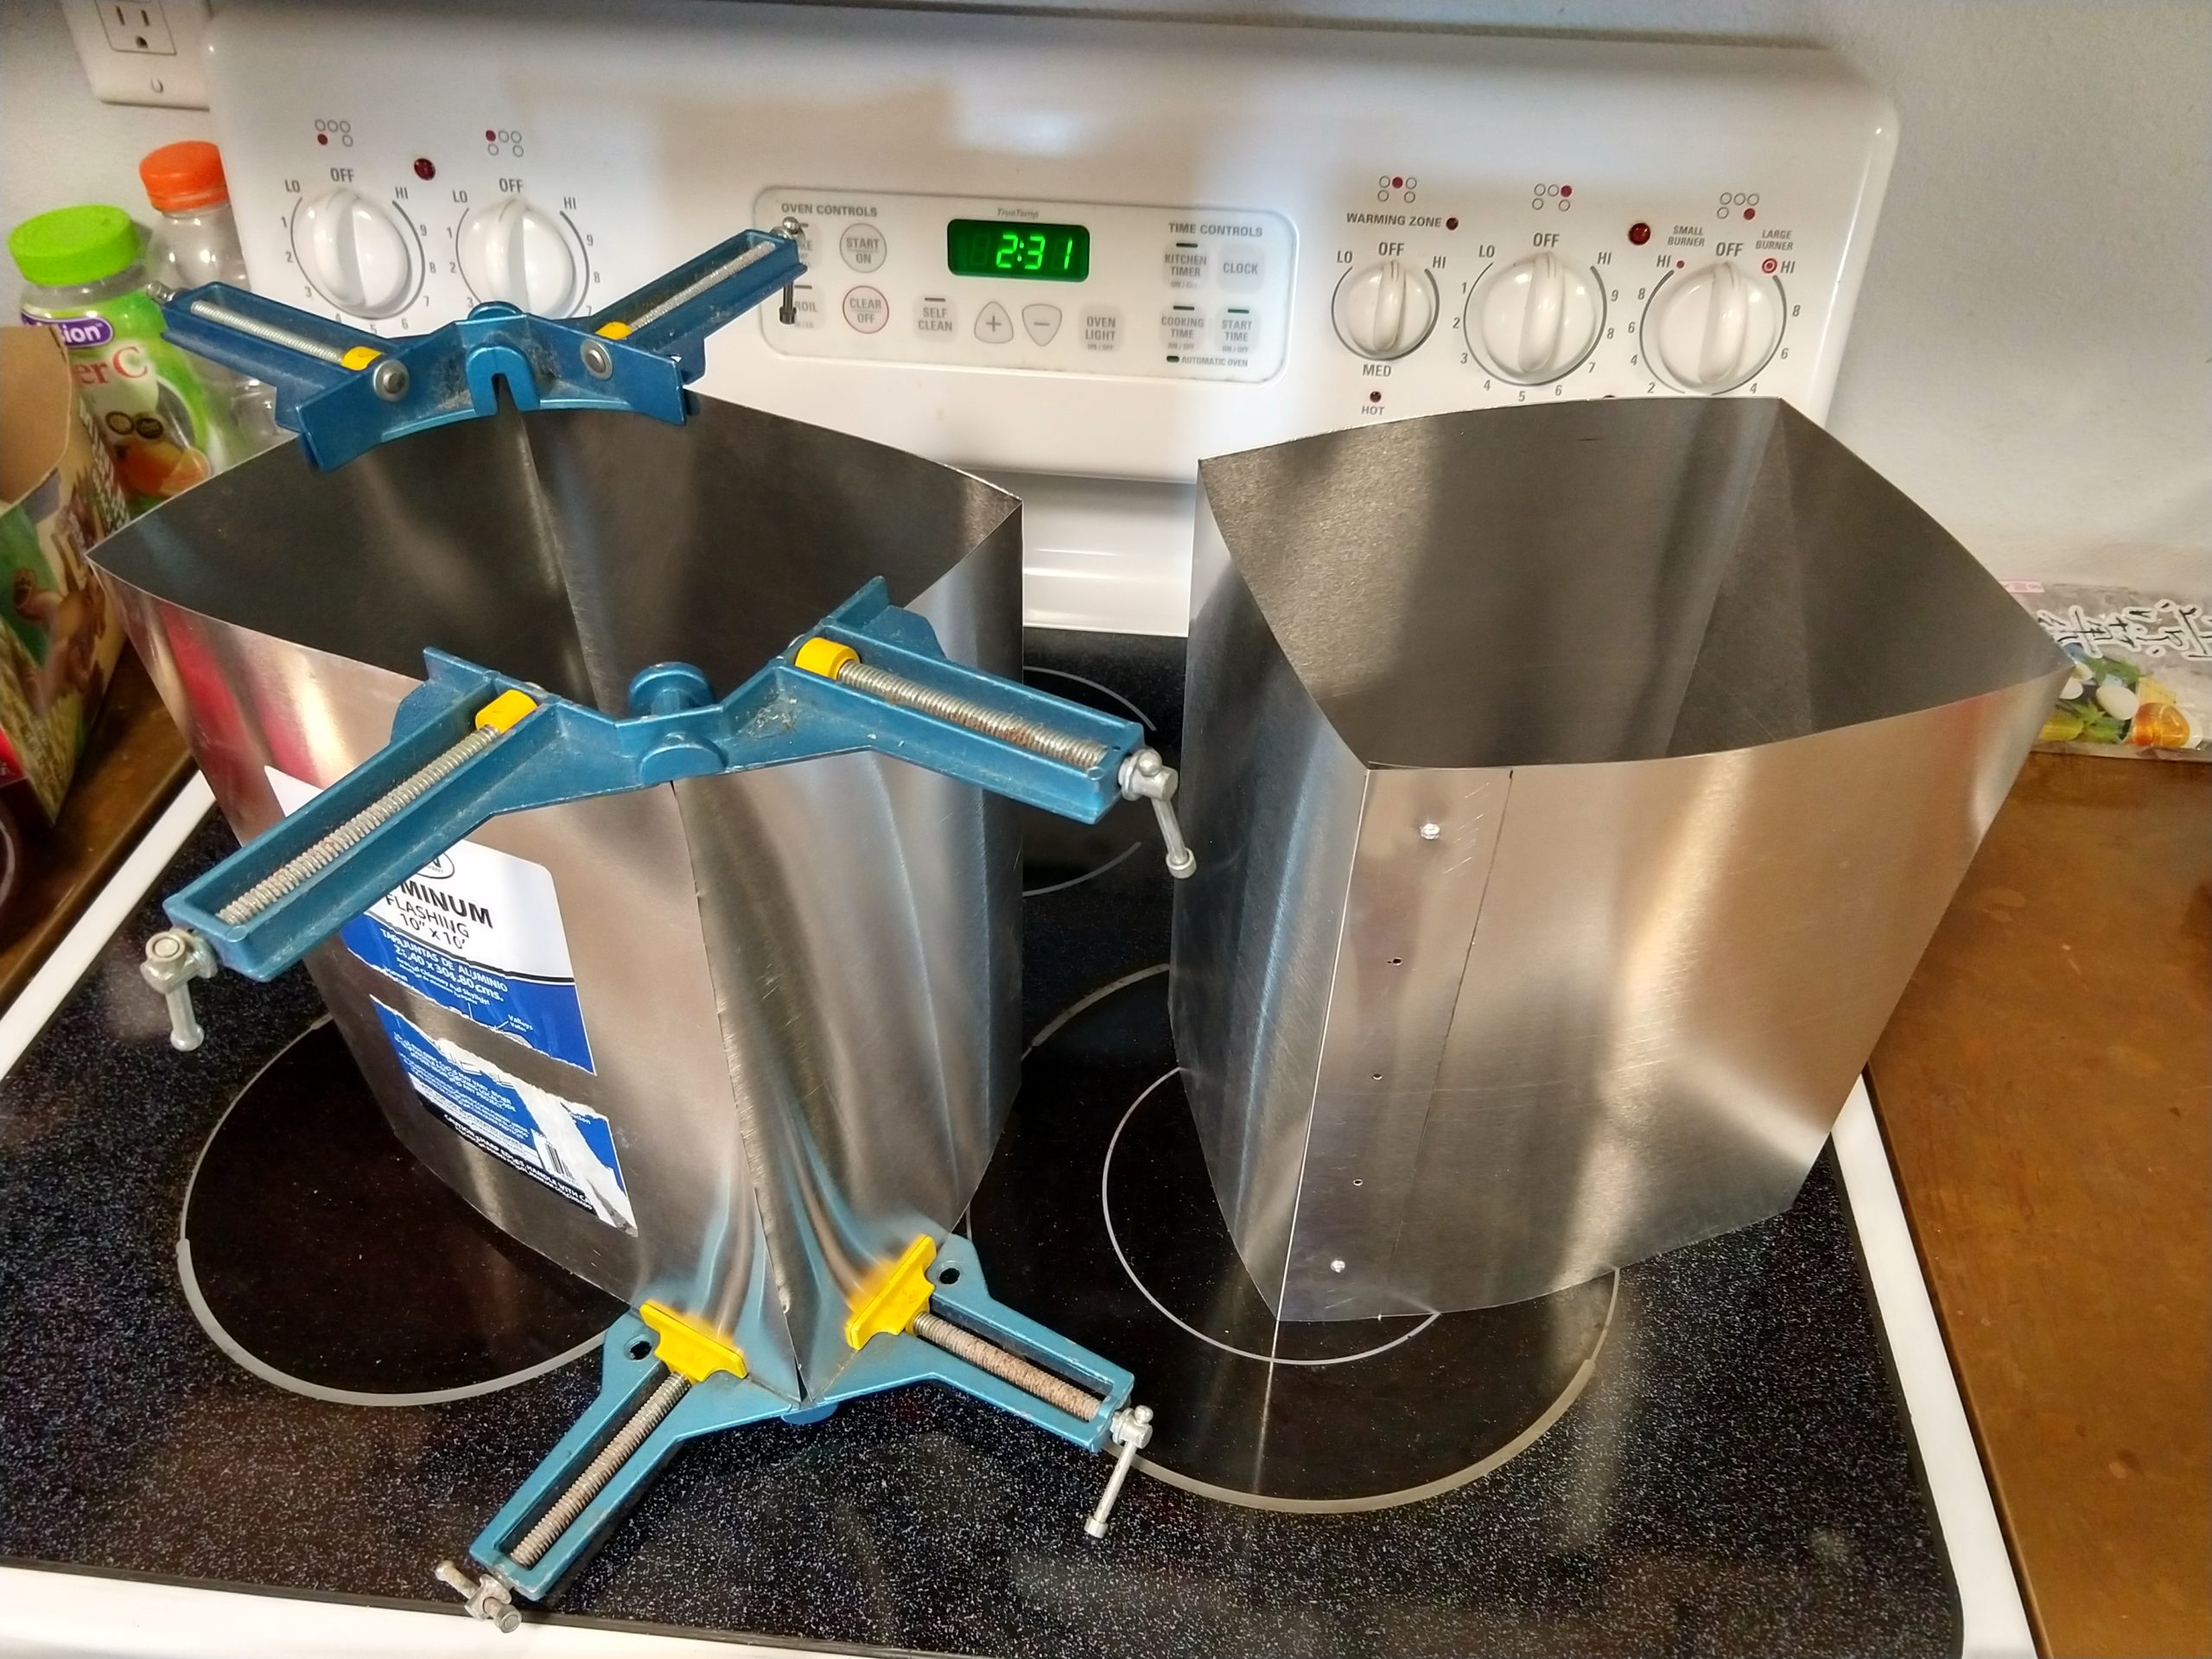
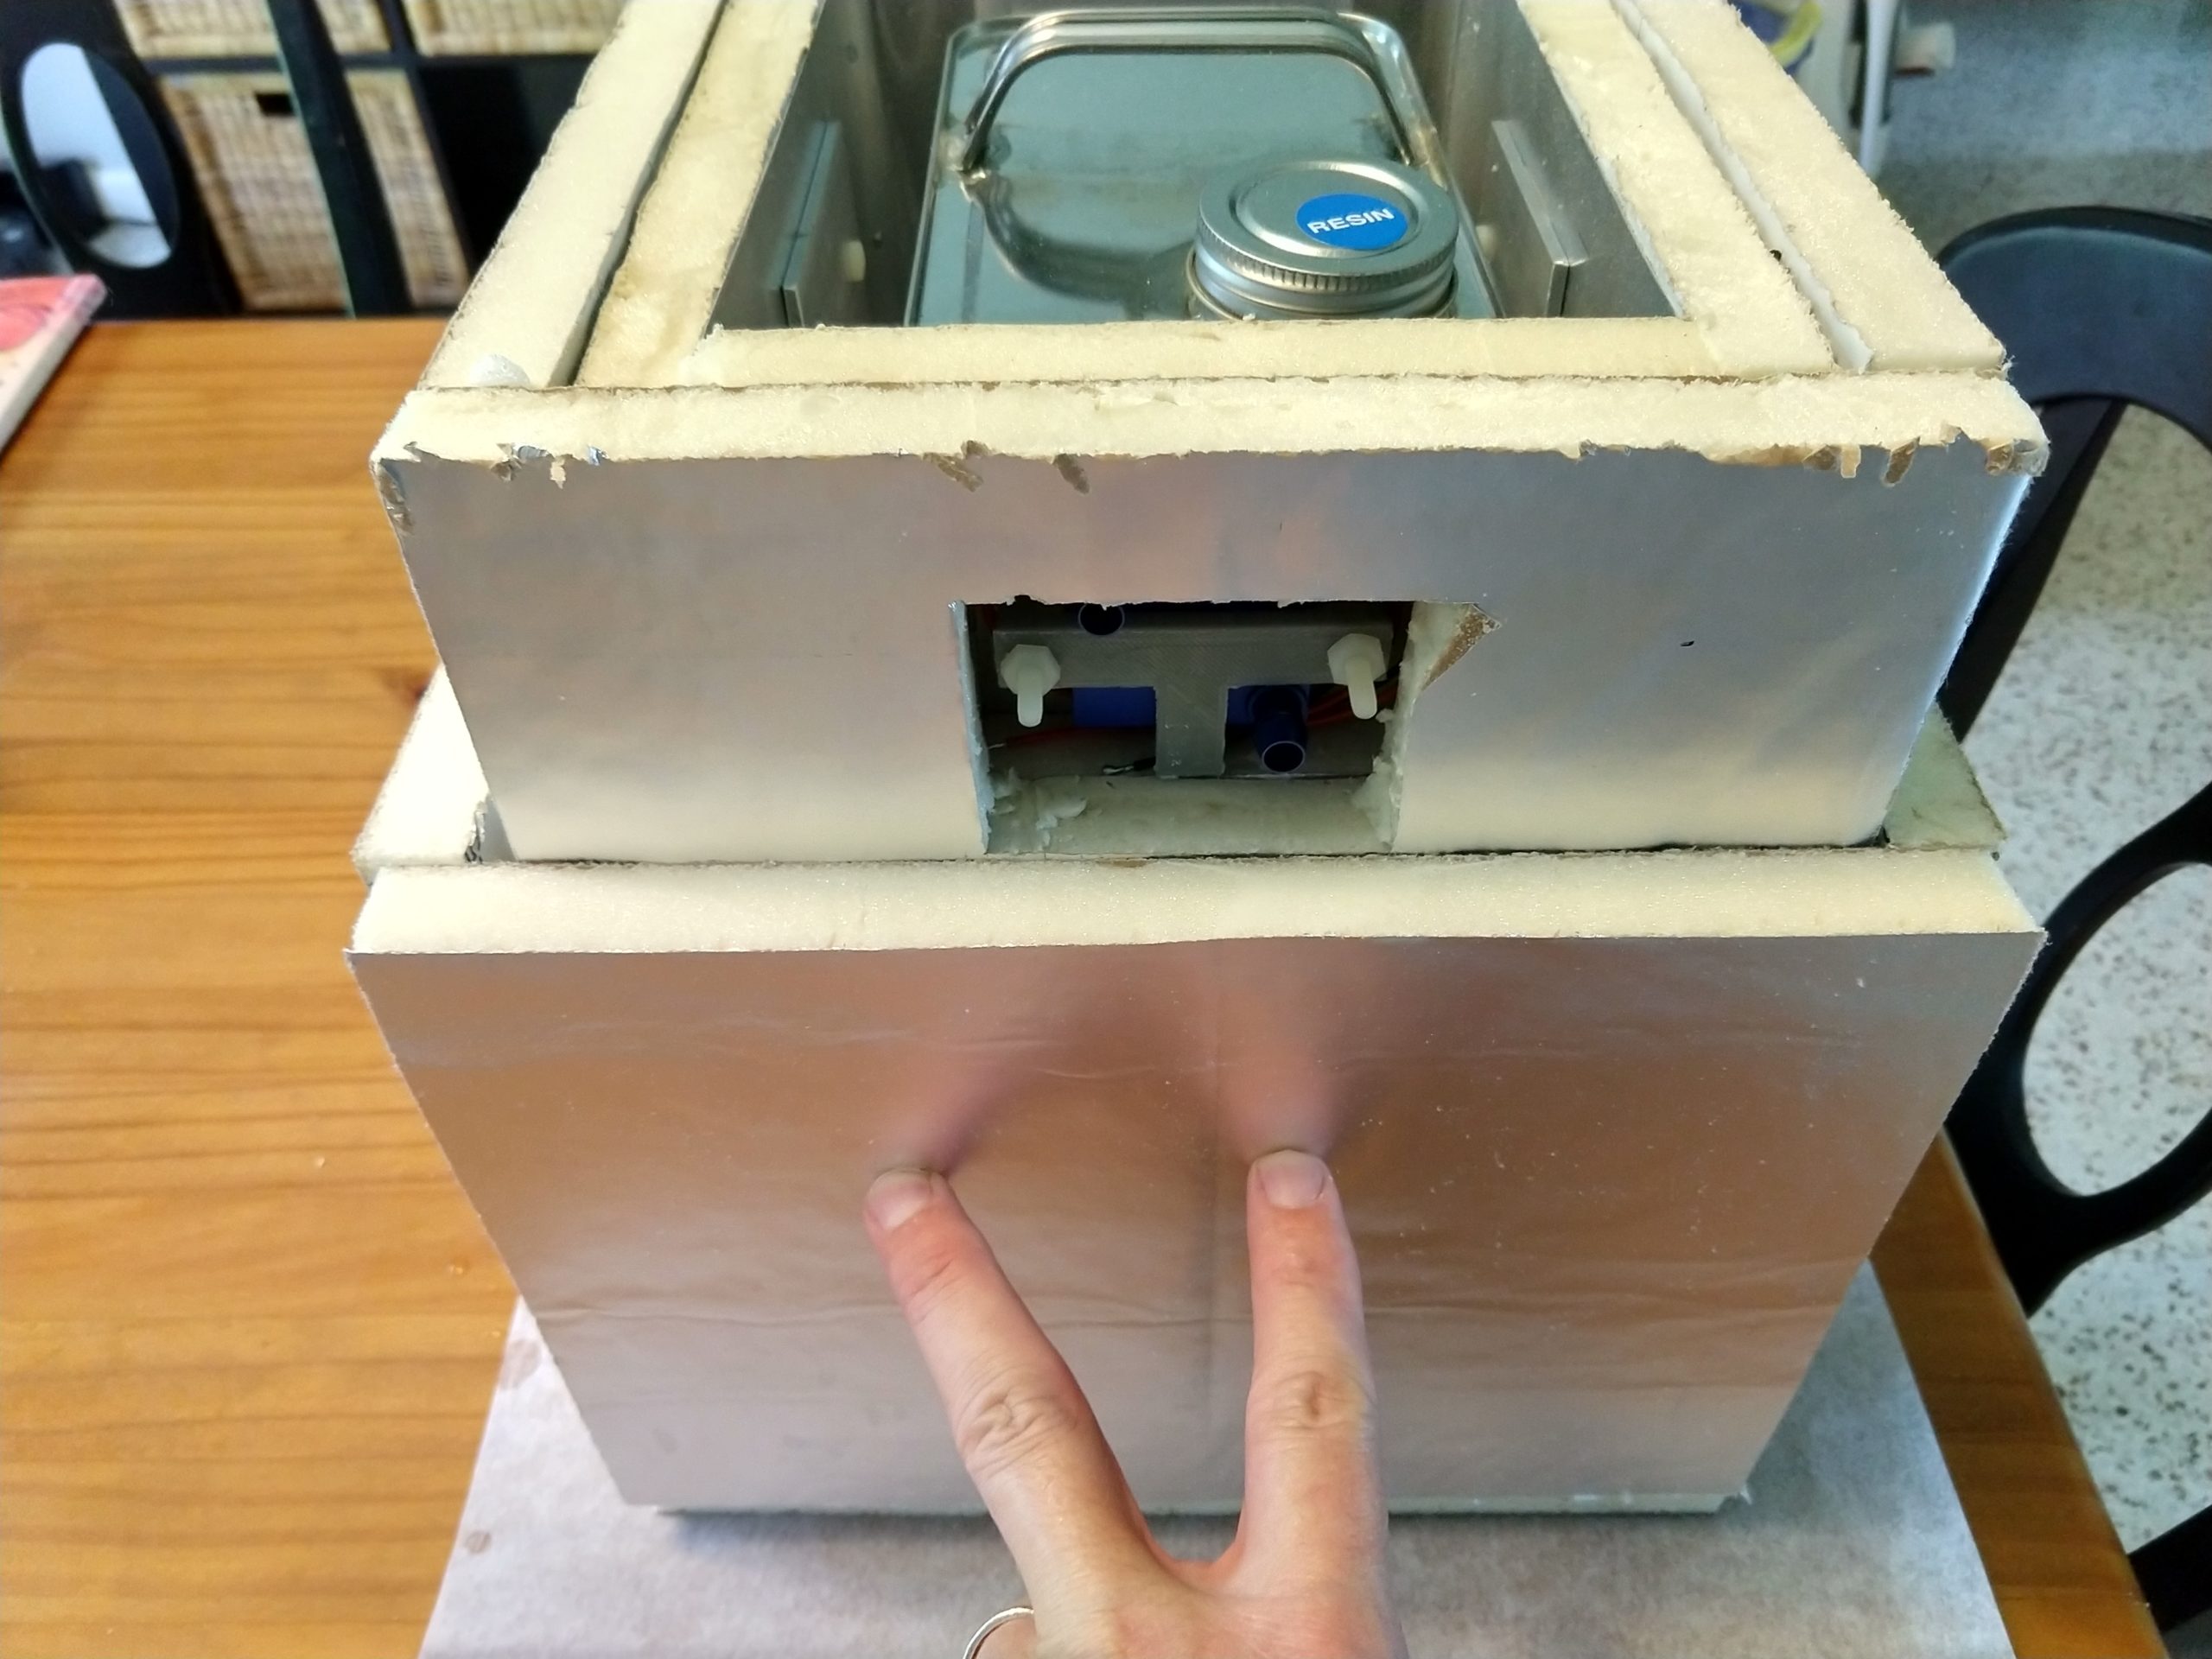
My interior cooling vessel is made out of 10″ aluminum roof flashing that I bent into a 8x6x10 square using an improved bending brake made out of boards. I used Aluminum pop rivets to hold it into a rectangular prism shape and 3M Super 77 spray adhesive to stick the first layer of PolyIso insulation to the outside of the cooling vessel. I used masking tape to mask off the small square where the TEC would be mounted later. I also used white gorilla glue to bond the foam edges and provide extra air sealing. I used butt joints on my first three layers, but got out the table saw to make a nicer 45 degree join box for the outer layer/lid assembly.
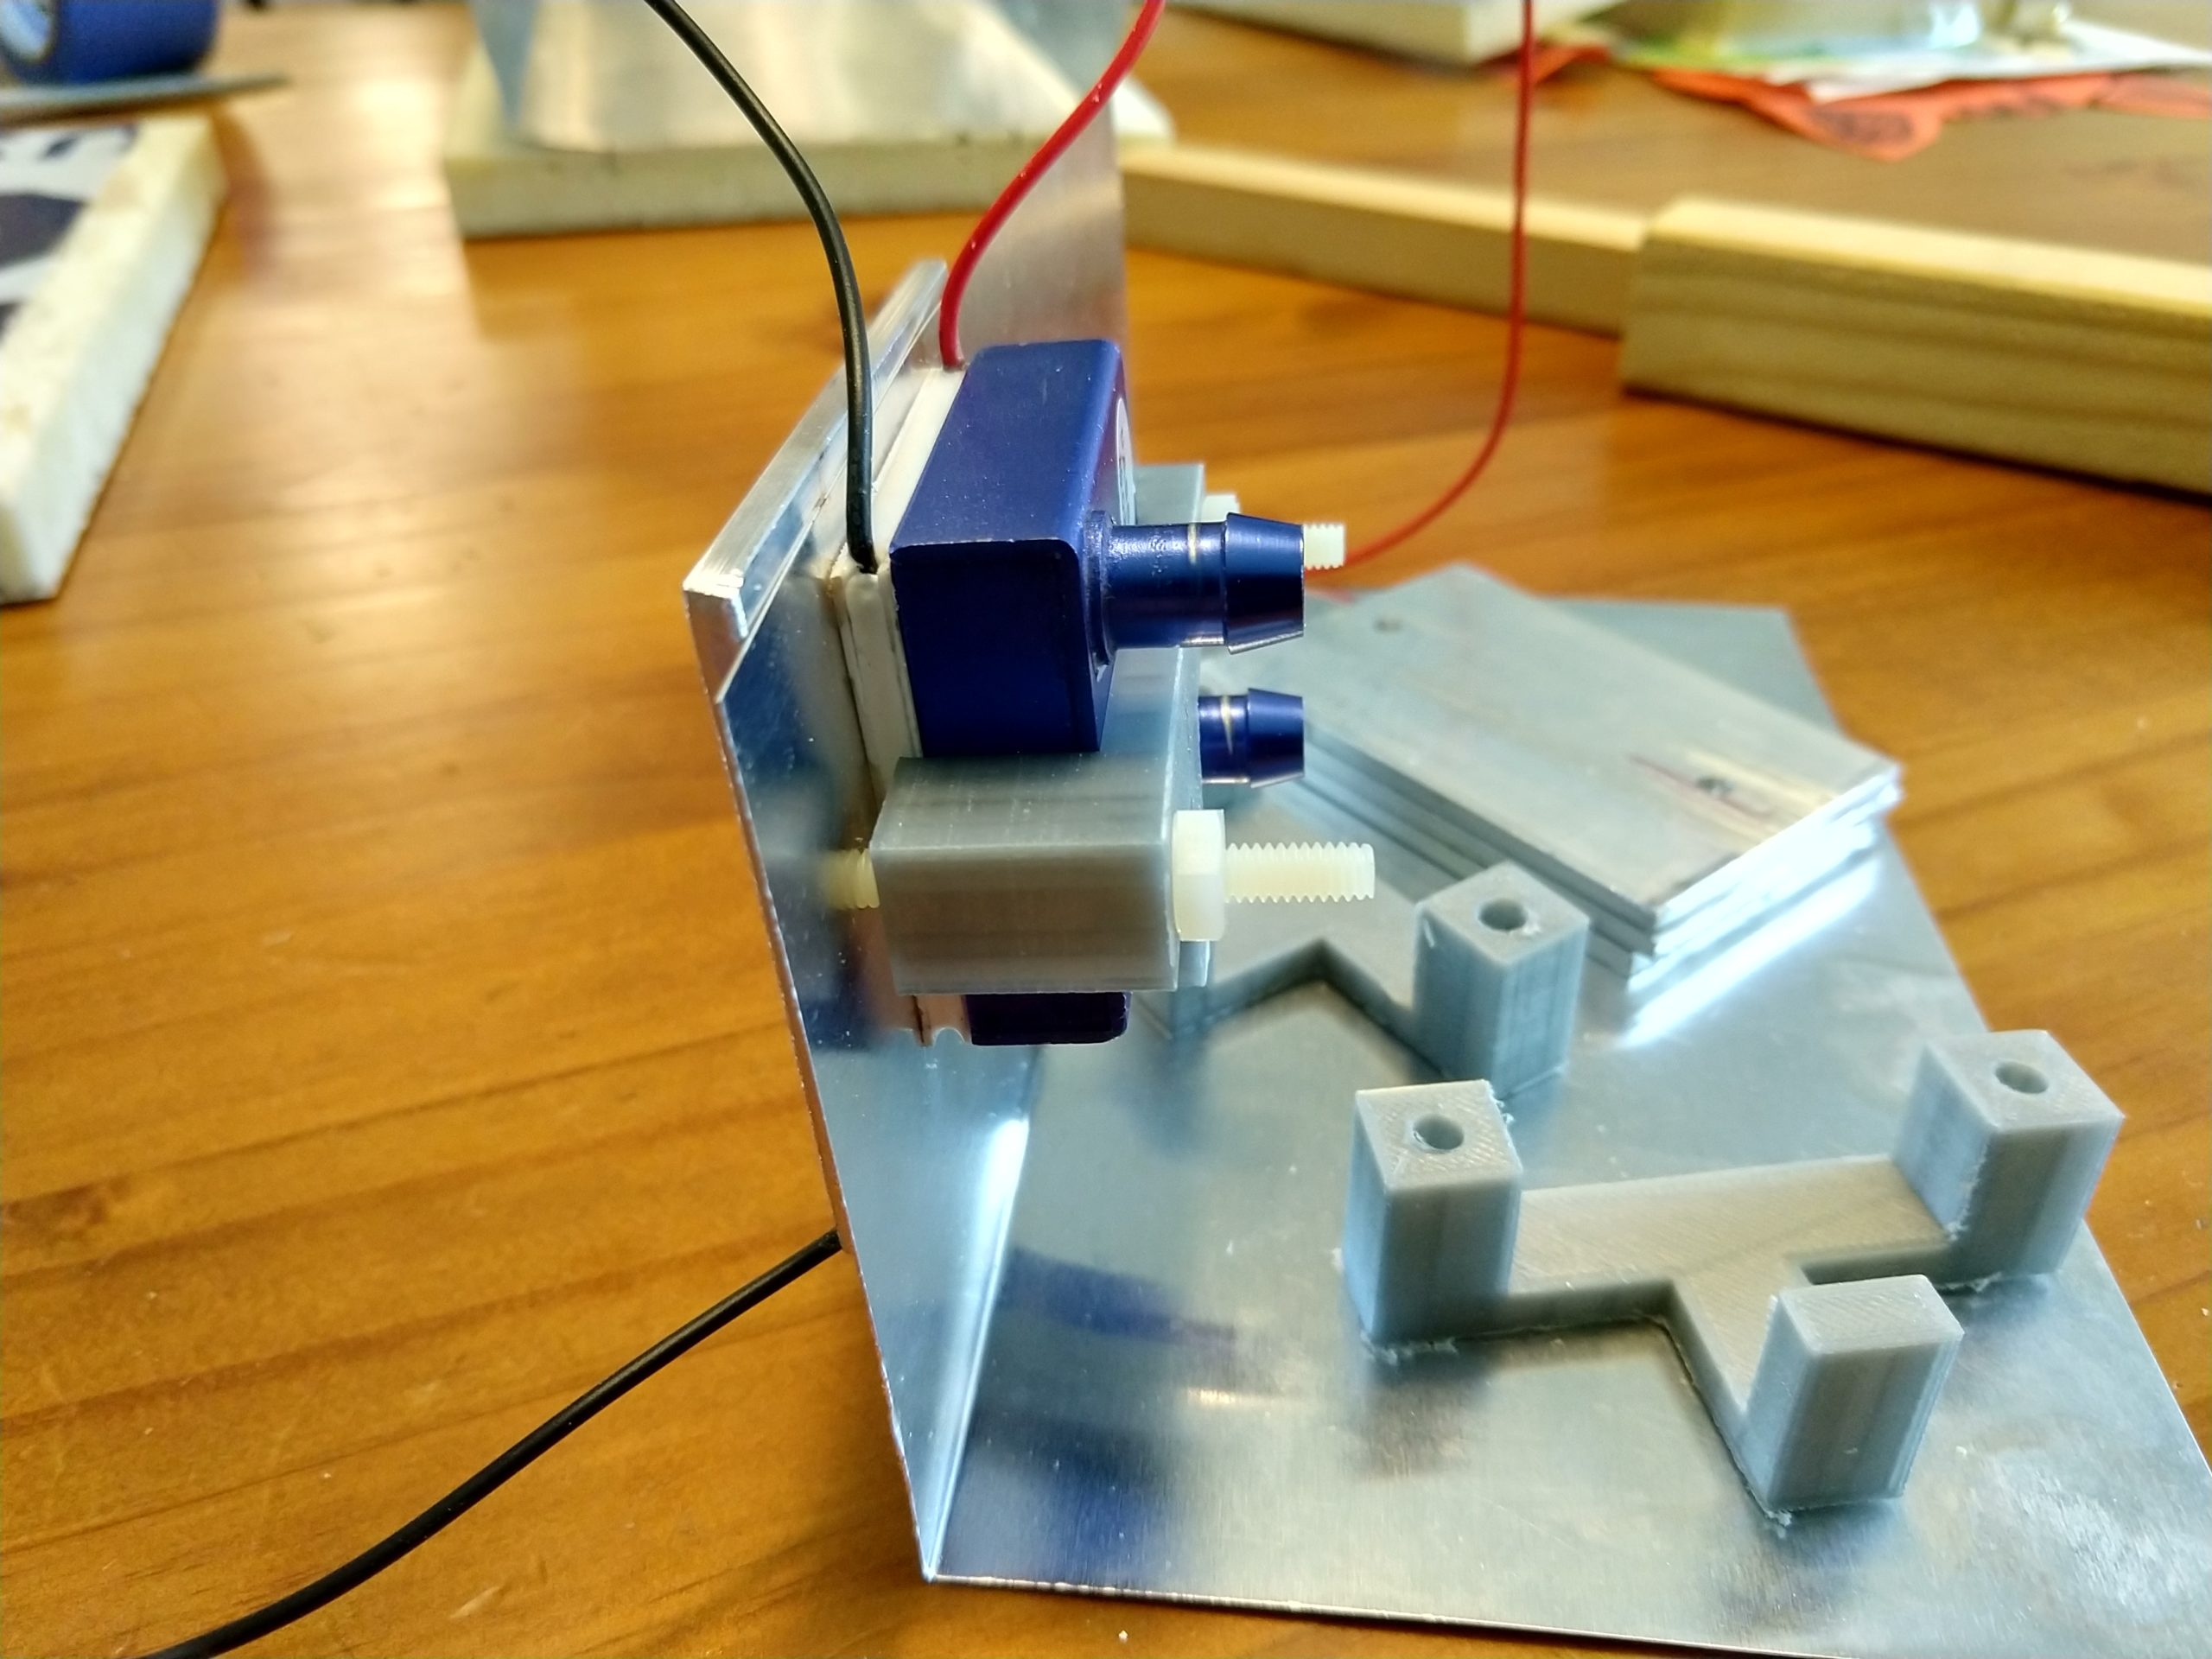
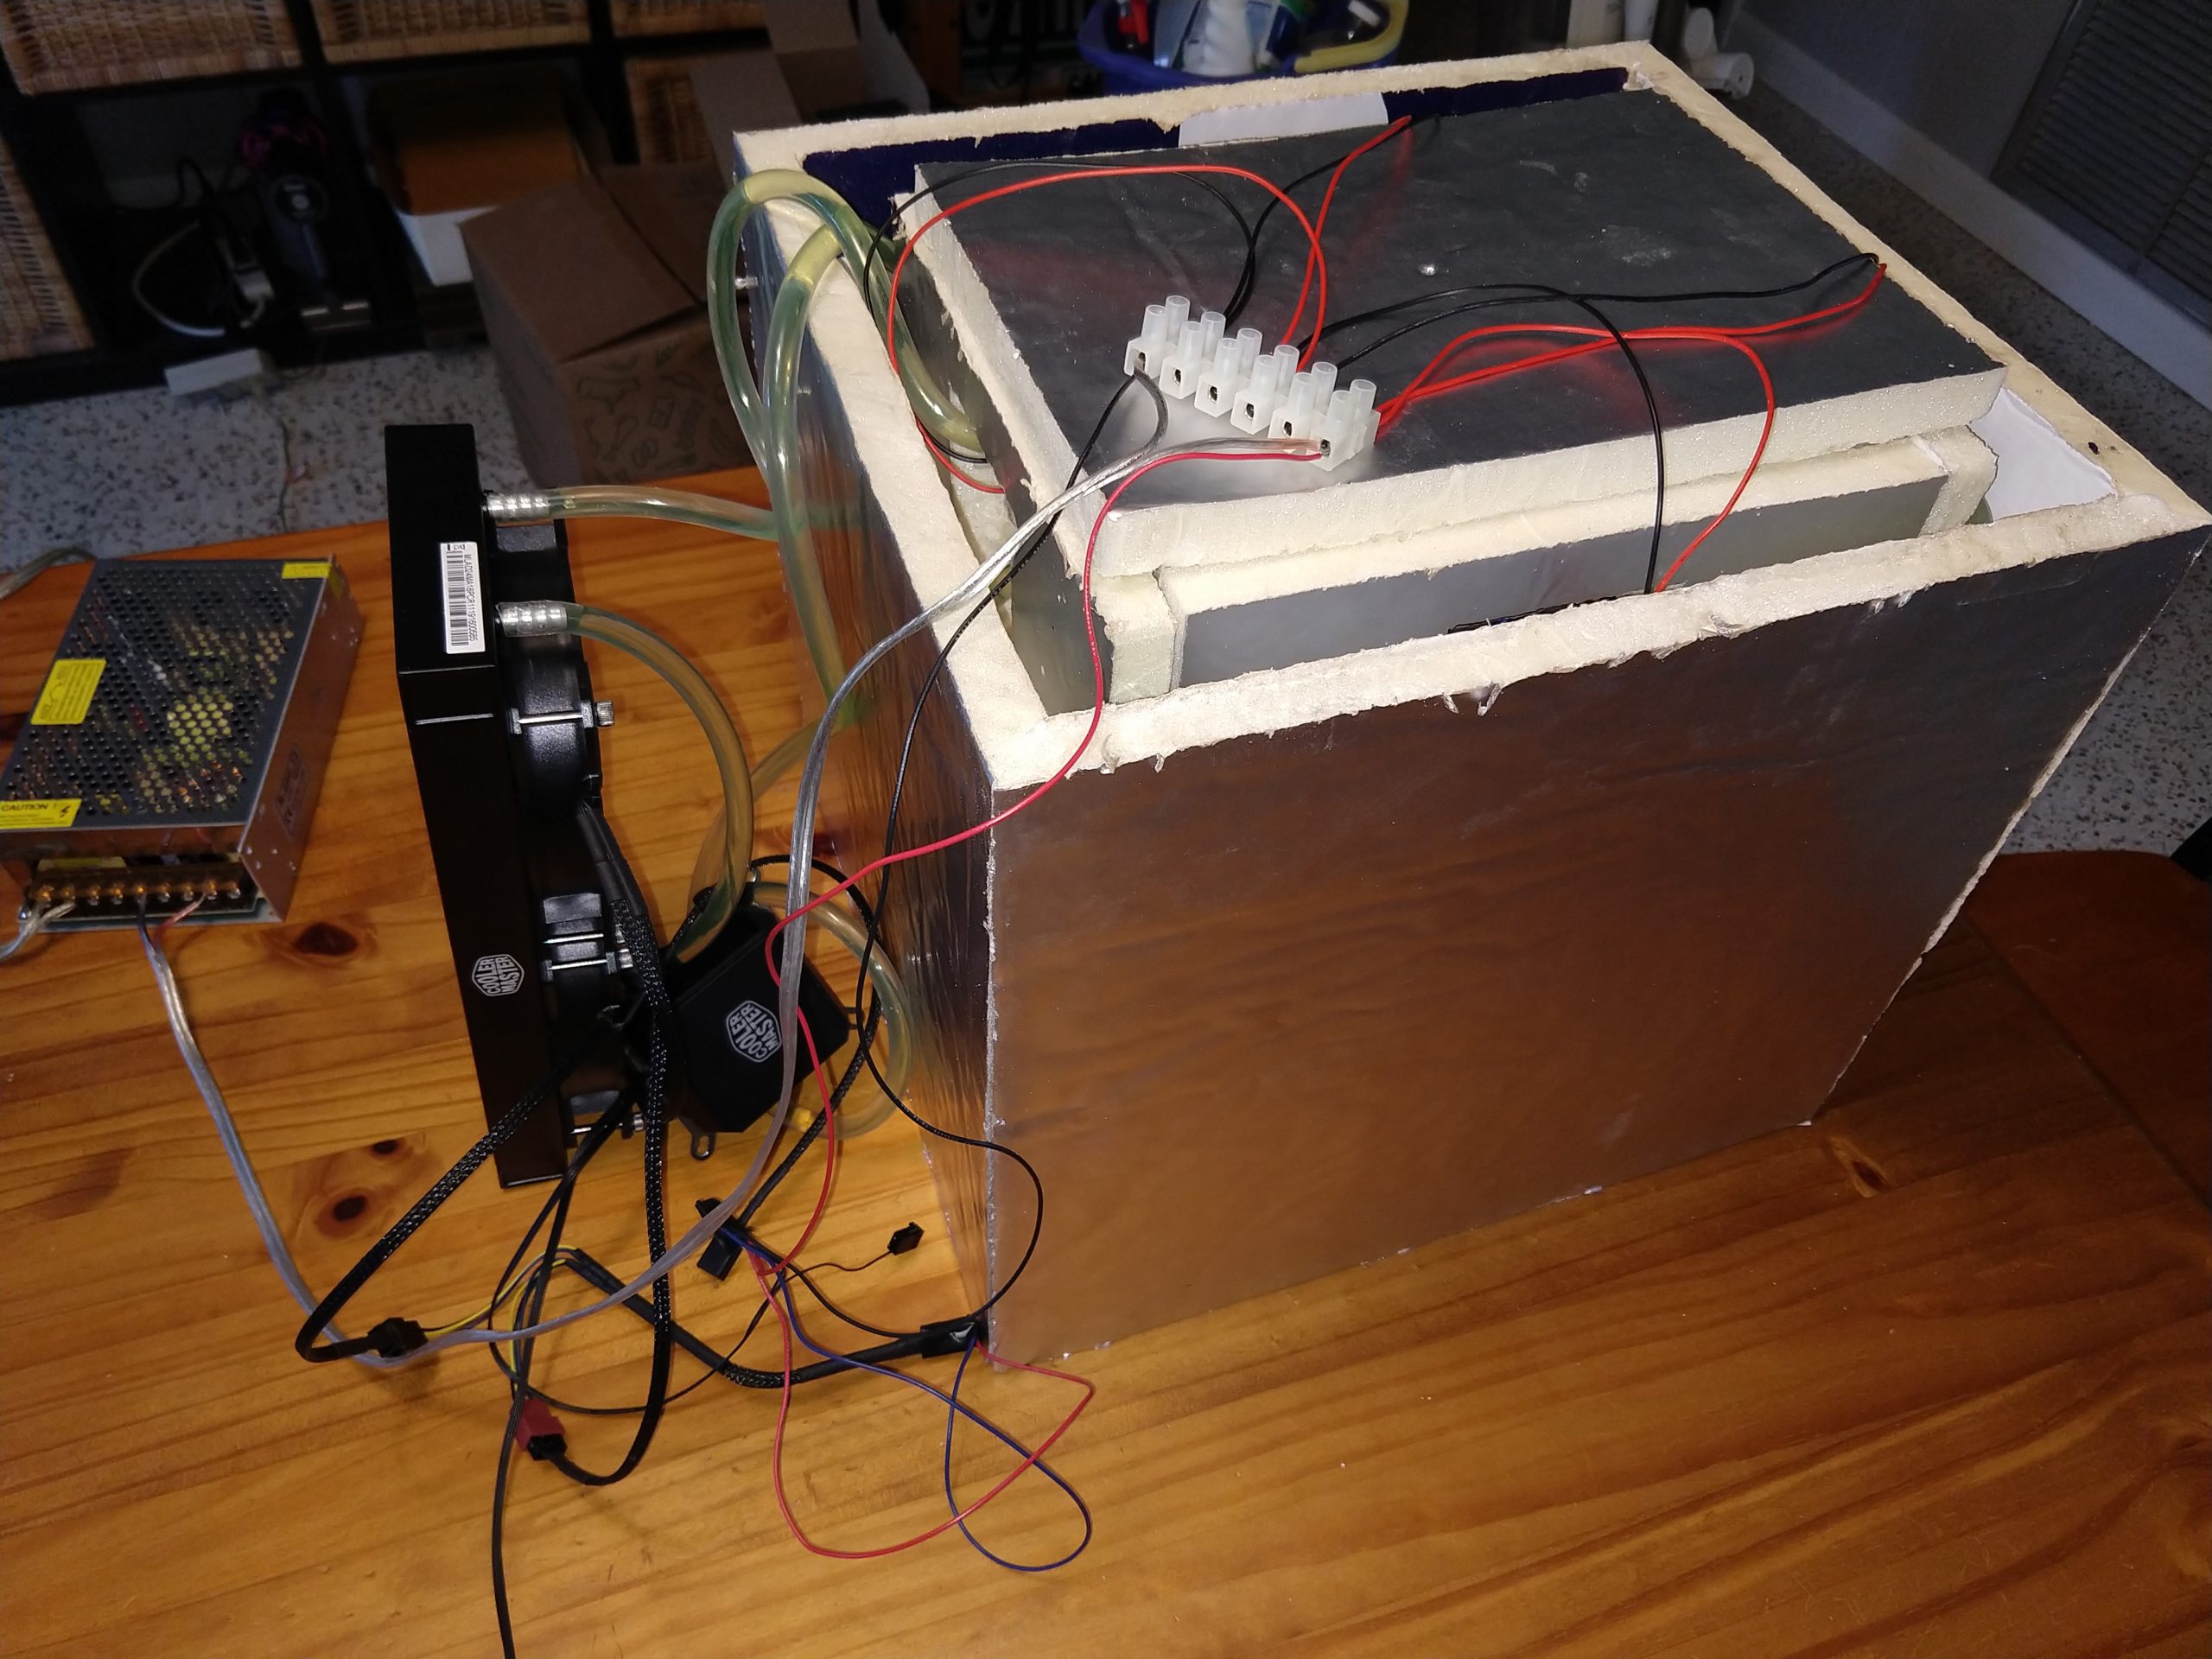
To get the most benefit from TEC’s, you have to keep the hot side as cold as possible (as the temperature on the cold side is directly related to the voltage (amperage/power) going through the TEC and the hot side temperature. So I used a liquid cooling loop built out of the cheapest all-in-one (AIO) liquid cpu cooler I could find on Amazon (I paid $65 for this one – Amazon Affiliate Link) with extra tubing and 40mm aluminum cooling blocks (I got a bunch of them from China on Ebay, like these overpriced ones on Amazon.) I 3D printed a bracket to use to hold the TEC and water cooling block to the inside of my cooler using nylon hardware. You can find the 3D printed bracket files on https://www.thingiverse.com/thing:3949052.
Performance Comparison
I compared my home built DIY TEC with two commercial cooler offerings. A $33 Chefman TEC “desktop” cooler with a 5L capacity, and a $170 Alpicool C15 compressor based refrigerator/freezer with a 15L capacity.
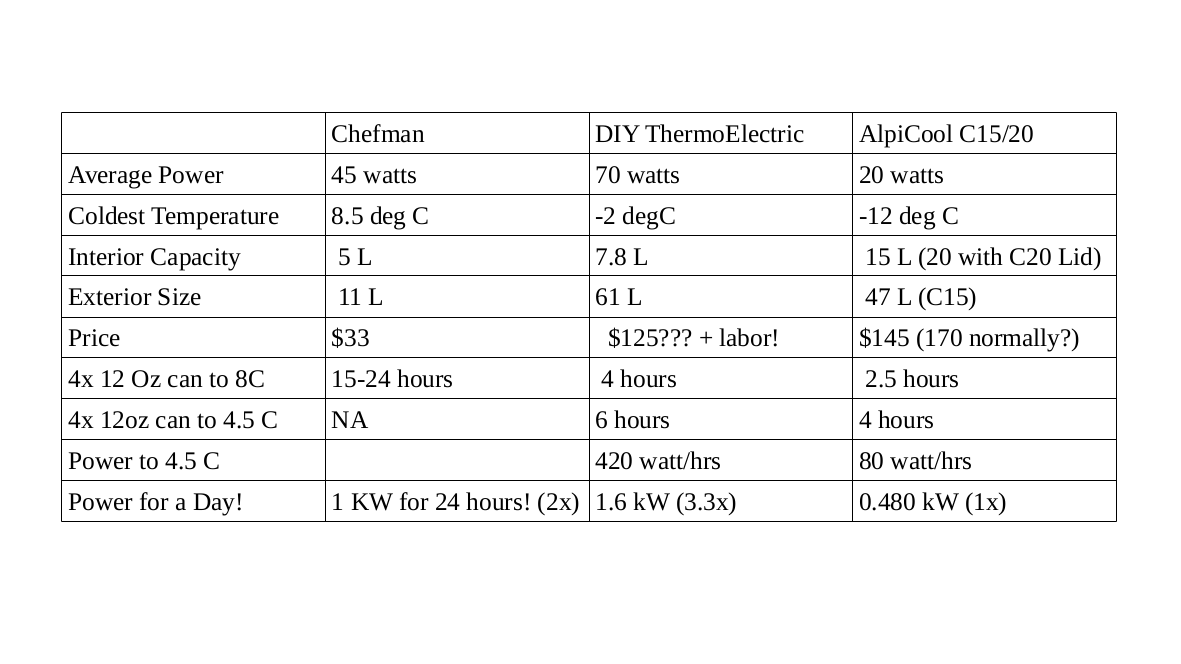
The takeaway is that by adding a lot of insulation, using a liquid cooling loop, and 4 TEC’s (vs a single TEC in the Chefman unit) I am able to get a lower temperature (-4.5 C vs 8 C) than a commercial TEC unit, but at a higher power draw (70 watts average vs 45). Both TEC units are blown away by the commercially available compressor/refrigerant model, which has more interior capacity and only draws an average of 20 watts. [Plus, it can get down to lower temperatures and freeze things a lot faster.]
After reviewing the Alpicool C15, I am excited about using a compressor based solution in the van, but unfortunately, the C15 unit is still 3 inches too long to fit in the space I have available, so I may need to hack it a lot to make it work.
I am also still interested in exploring a 2 TEC unit that would have a power draw of around 35 watts (close to the 20 watt from the Alpicool C15) to see if it could maintain 0 C temperatures for a 5-7 liter volume. I may rip out two of the four TEC’s in my current prototype to play with that option (which may allow me to slow the cooling fans on the radiator.) I also have some ideas about using thermosiphening to allow the TEC’s to cycle (turn off some of the time) without leaking as much heat back into the interior space when they are turned off, but that would require a different (taller) physical layout and a completely different prototype.


Great videos! I am coming up against the same challenge in my camper. Did you ever manage to successfully resize the apicool?
No, we sold the van before I got to that project, so I’ll probably ending up using the Apicool on my boat when I finish building it.