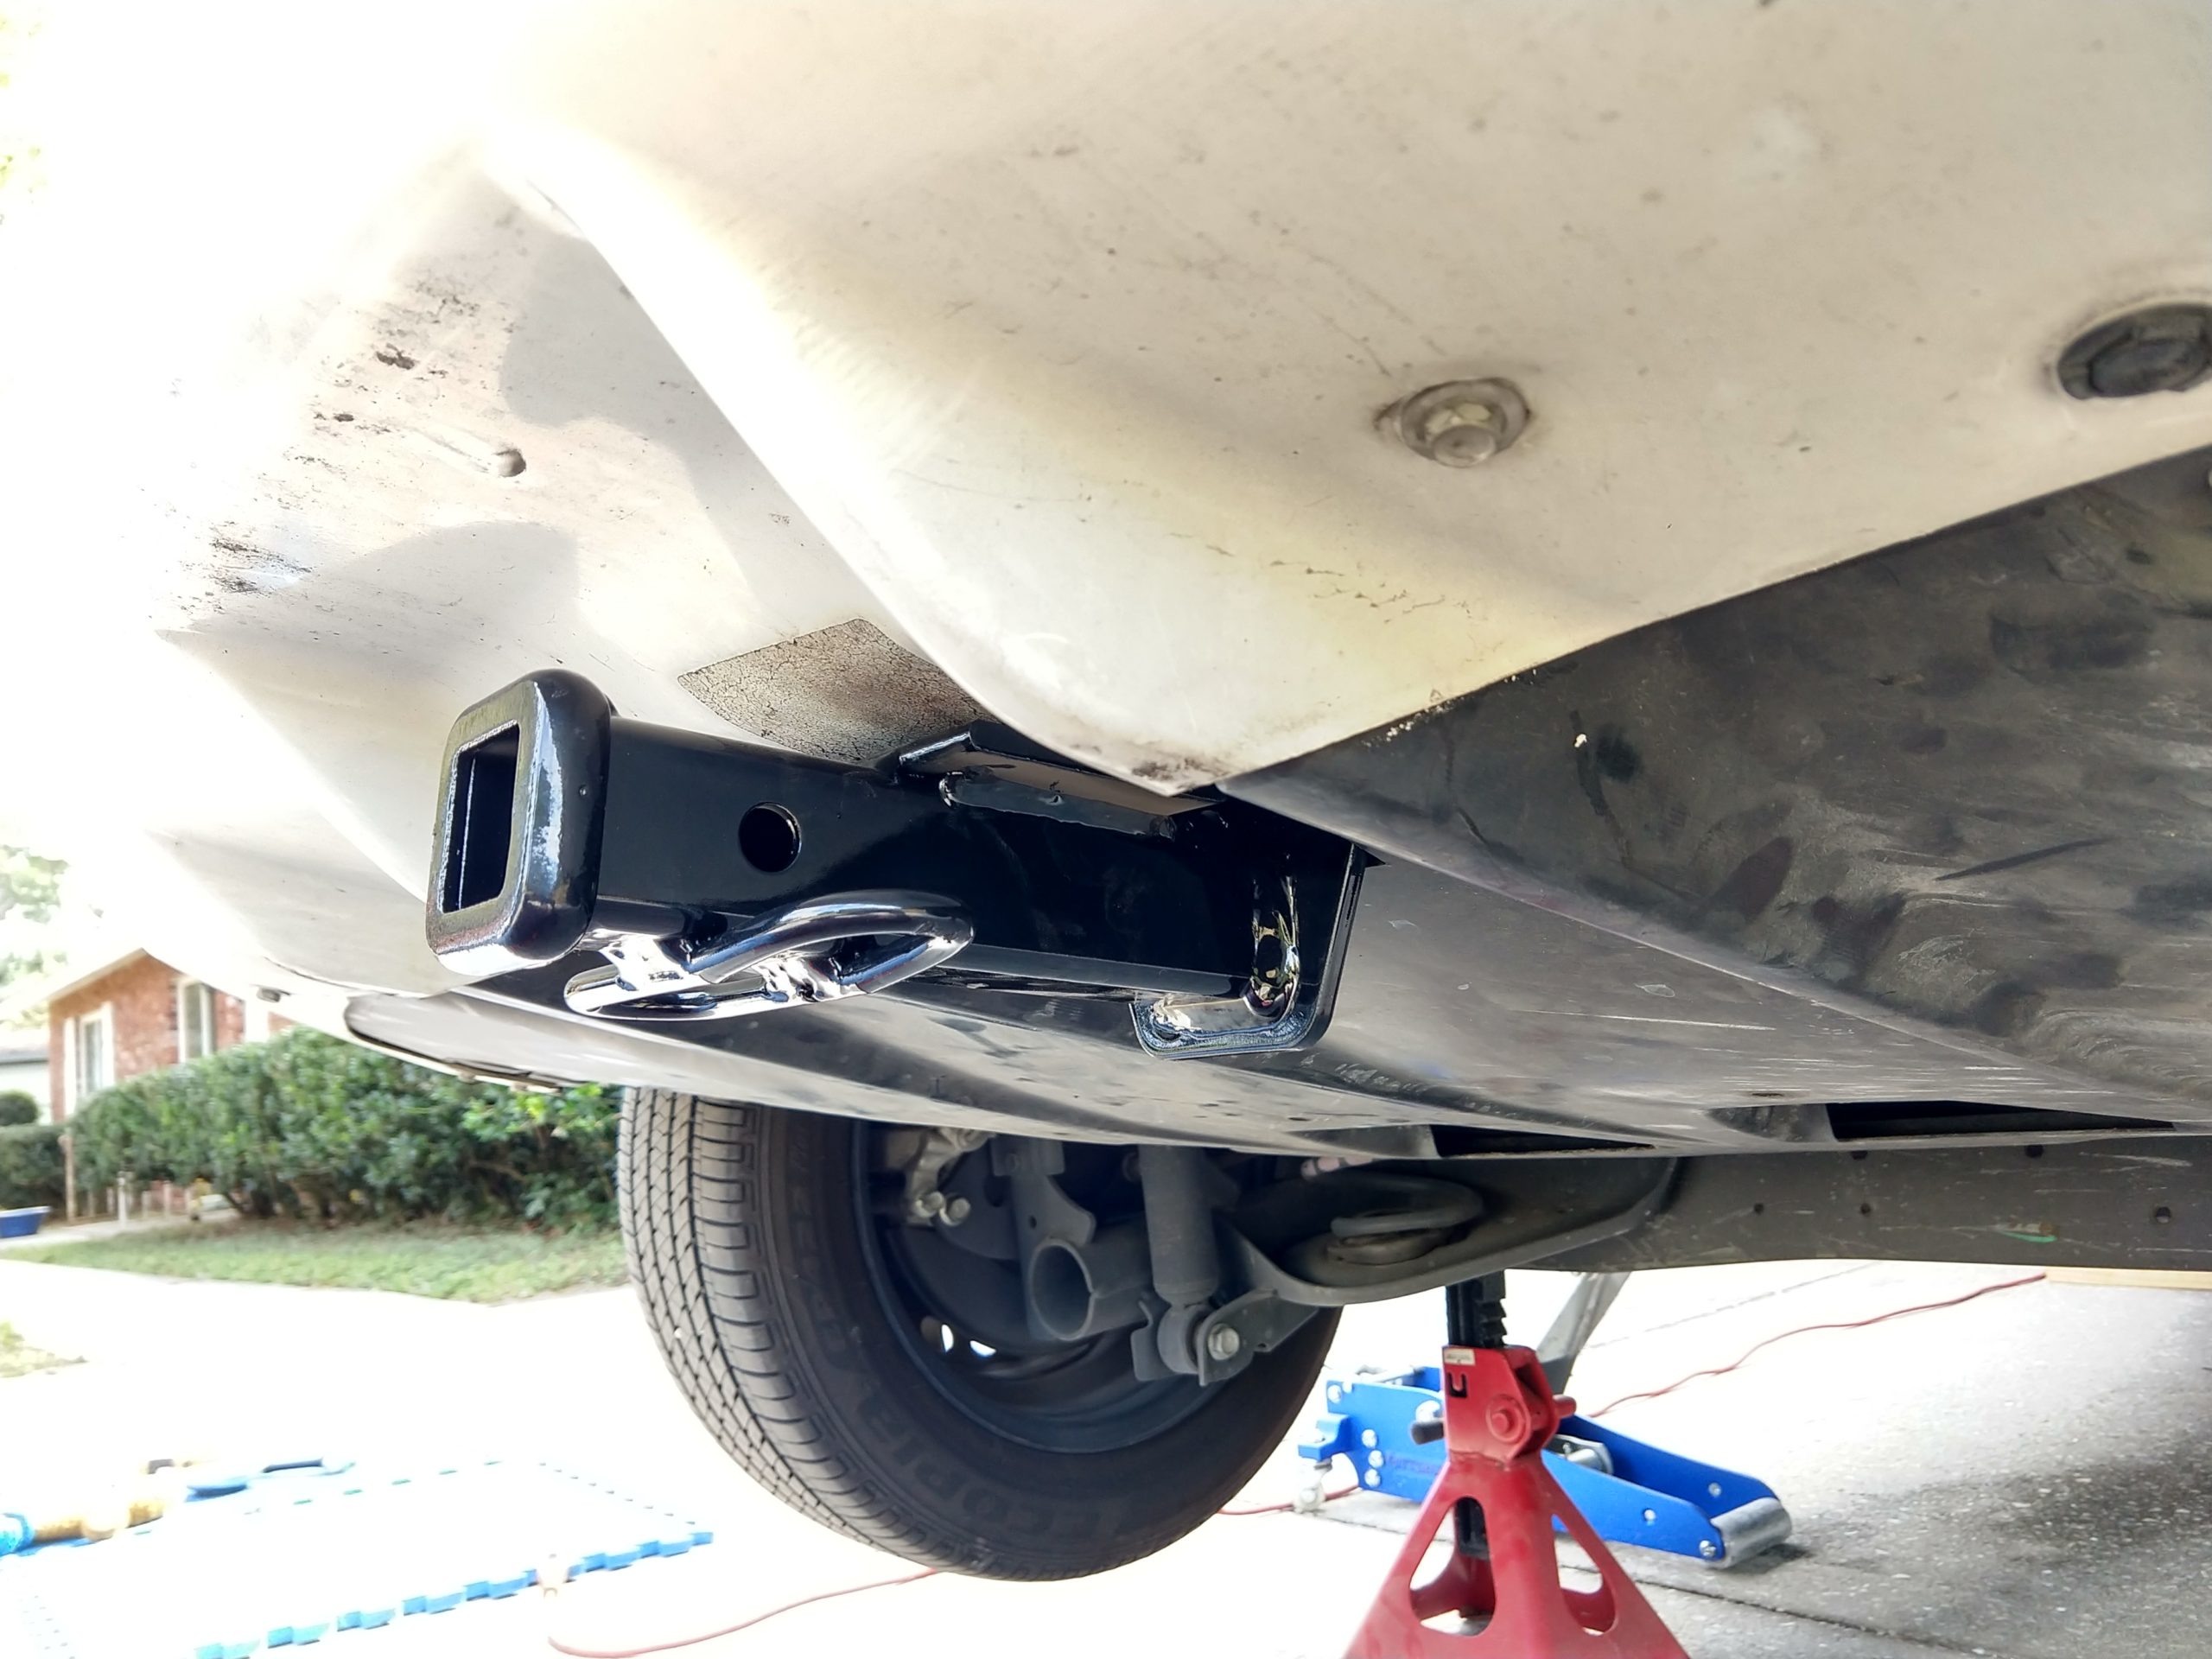
I installed a CURT 11396 Class 1 Trailer Hitch receiver onto our 2015 Nissan Leaf. The procedure was relatively straightforward, but took me around three hours (the instructions say the novice install time is 70 minutes). If you don’t already have a jack and set of jackstands, I’d recommend buying a set of auto ramps for this procedure, as it doesn’t involve the wheels/tires.
But since I already had a jack and four jackstands, I had to buy a Slotted Puck for my jack so that it wouldn’t bend the pinch weld at the jack points on the Leaf. I also bought a set of slotted rubber jackstand adapters, but found that I could support the vehicle by placing two jackstands under the trailing lever arms close to the hinge point without them. (But, since I had 4 jackstands, I used the extra ones under the pinch welds as a backup…)
If you have a vehicle lift, or a set of ramps it will take you a lot less time to get the rear end of the car up in the air. (I had to jack up one side, put it on a jackstand, jack up the other side, put it on a higher jackstand, and then move back to the first side to re-jack and raise the original jackstand.) Never work on a vehicle supported only by a jack!
Unless you have a vehicle lift, a concrete floor and wheeled creeper will make working under the car much easier.
Once it’s up in the air, I found this e-trailer youtube video to be the most helpful in understanding the overall procedure.
The most time consuming part was creating the extra access hole on the driver side frame rail. I used a drill to make four holes (three in a line and one above it like a short T), gradually enlarging them up to my maximum 1/2″ chuck size, then a set of hand files to enlarge the hole. This resulted in a hole that was no bigger than absolutely necessary to snake in the backing plates and carriage bolts. A die grinder or Dremel style rotary tool with a cutoff wheel would have made this easier (and a larger hole). I had an angle grinder with a 4″ cutoff wheel, but that was too large to be useful.
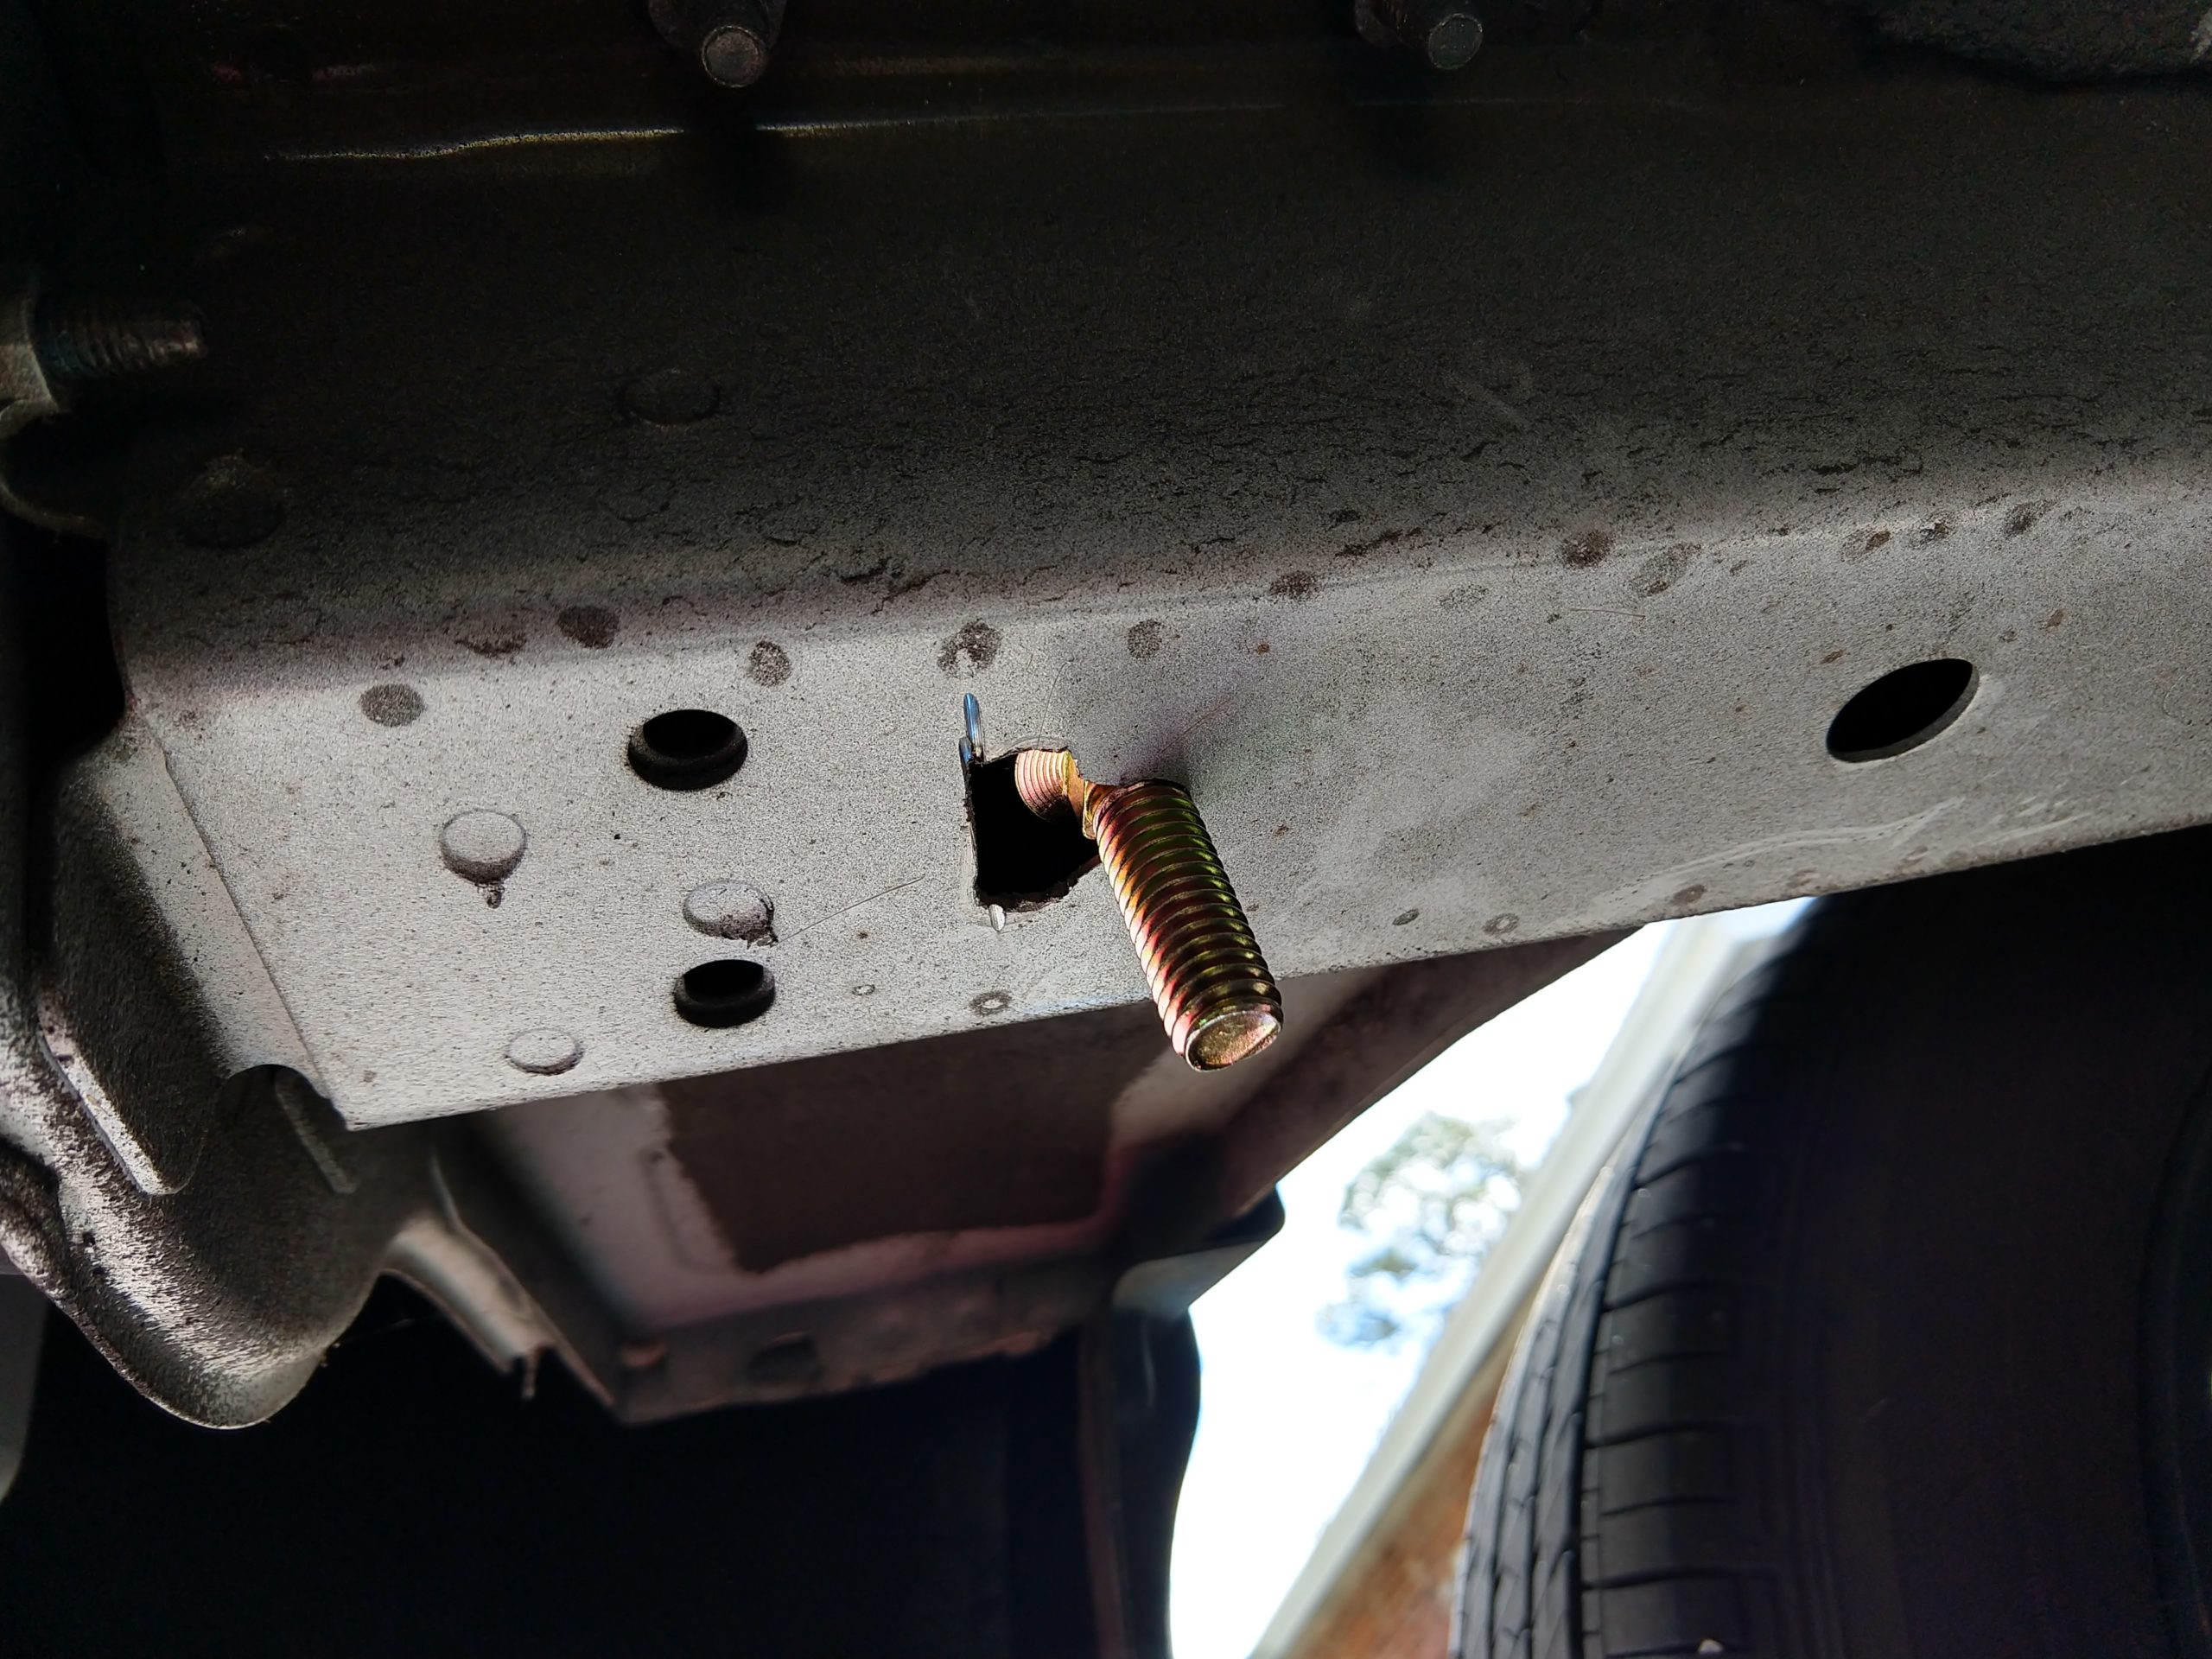
Once the access hole was in place, the provided spring fishing tools were invaluable in getting the bolts and backing plate positioned inside the frame rail. Then it was just a simple matter of bolting the hitch on, trimming a small square out of the air dam and re-installing the air dam around the hitch.
Be aware that you are likely to find a good collection of road dust inside the air dam and under the back bumper, so be sure to wear eye protection and be prepared to take a shower after the procedure.
This particular class 1 (1-1/4″ tube) hitch receiver is rated for a maximum 150 lb tongue weight and 1,500 lb trailer weight. They also recommend the Curt 18050 stabilizing strap for any non-trailer load (bike rack, cargo carrier, etc…)
Trailer Light kit
Because I’m only using mine for a bike rack so far, I didn’t actually install the wiring kit, but I did buy one (to have, in case I want to install/use it with a light trailer later on. It was the CURT 86227 No splicing required 4-way flat output Nissan Leaf kit).
The kit I bought has the correct adapter plugs so that you just plug it in-line with the tail lights (no need to cut wires). The only annoying bit is that it needs its own power supply (so it doesn’t suck power from your tail light wiring for the trailer lights). It gets “negative” or “ground” with a screw into the frame, BUT, you have to string a positive wire up to the front of the car and attach it to your 12v battery or into an “add a fuse” in the fuse box.
This requires you to either run the wire all the way up under the car (between the frame and the plastic wind guards on the bottom), or snake it all along the trim/carpet inside. [If I install it, I may just run a wire up through the middle of the passenger section of the car (out in the open) to a cigarette lighter plug, as I would only be using it very intermittently for a trailer here and there…]

")
