My two car garage has four single wide doors. Two in the front, and two in the back, and they had no insulation. If you ever buy a new garage door, pay extra to get the insulated panels, otherwise, somebody may have to retrofit insulation later on.
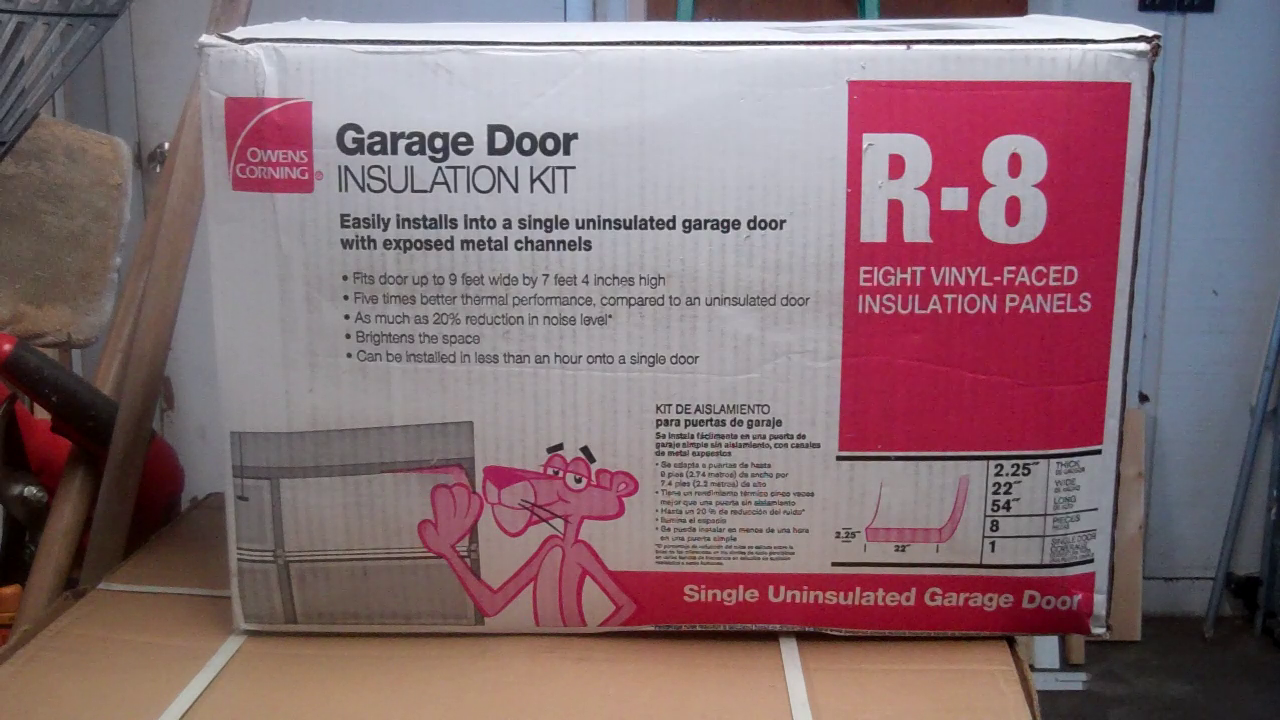
I used 3 kits from Owens Corning that comes with R-8 fiberglass bat and plastic mounting clips. Because I’m only using it on the windowless bottom 3/4 of each door, I was able to use 3 kits to insulate all 4 doors. I’ll be doing something different around the windows.
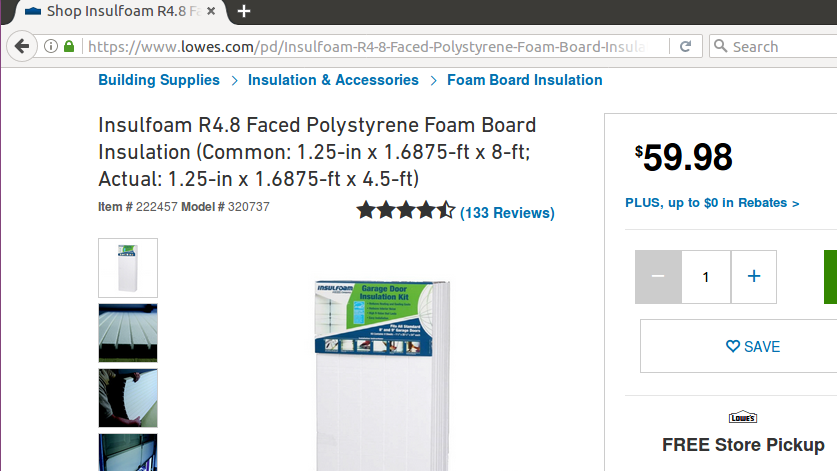
The other option is an R 4.8 Faced Polystyrene foam board kit, which is $20 cheaper per kit, but doesn’t offer as much insulation value, and would have required that I remove some support bars to install. Plus I hate cutting polystyrene as the beads get everywhere.
In addition to a pair of medium gloves, each kit came with two extra pieces of foam tape, 2 pairs of plastic clips, and a piece of vinyl repair tape.
I used acetone to remove the paint where I was going to be putting the foam stickers to mount the back half of the clips. I put up 12 foam squares at a time, and then put up 12 clips. You want to roughly center them in the openings. Where there were support bars, I centered into the remaining opening.

Then it’s just a matter of measuring each opening, and cutting your fiberglass batt’s about 1″ wider. The height comes pre-cut from the factory for standard garage door panels.
The kit includes a pair of medium plastic gloves, and you’ll also want a long sleeve shirt when handling the fiberglass. Then you just push the batt into the opening. After you are happy with how it is centered, you push down to find the end of the plastic clip, cut a small X in the vinyl with a razer knife, and push a mating clip onto it. The finished door is nice and white and puffy.
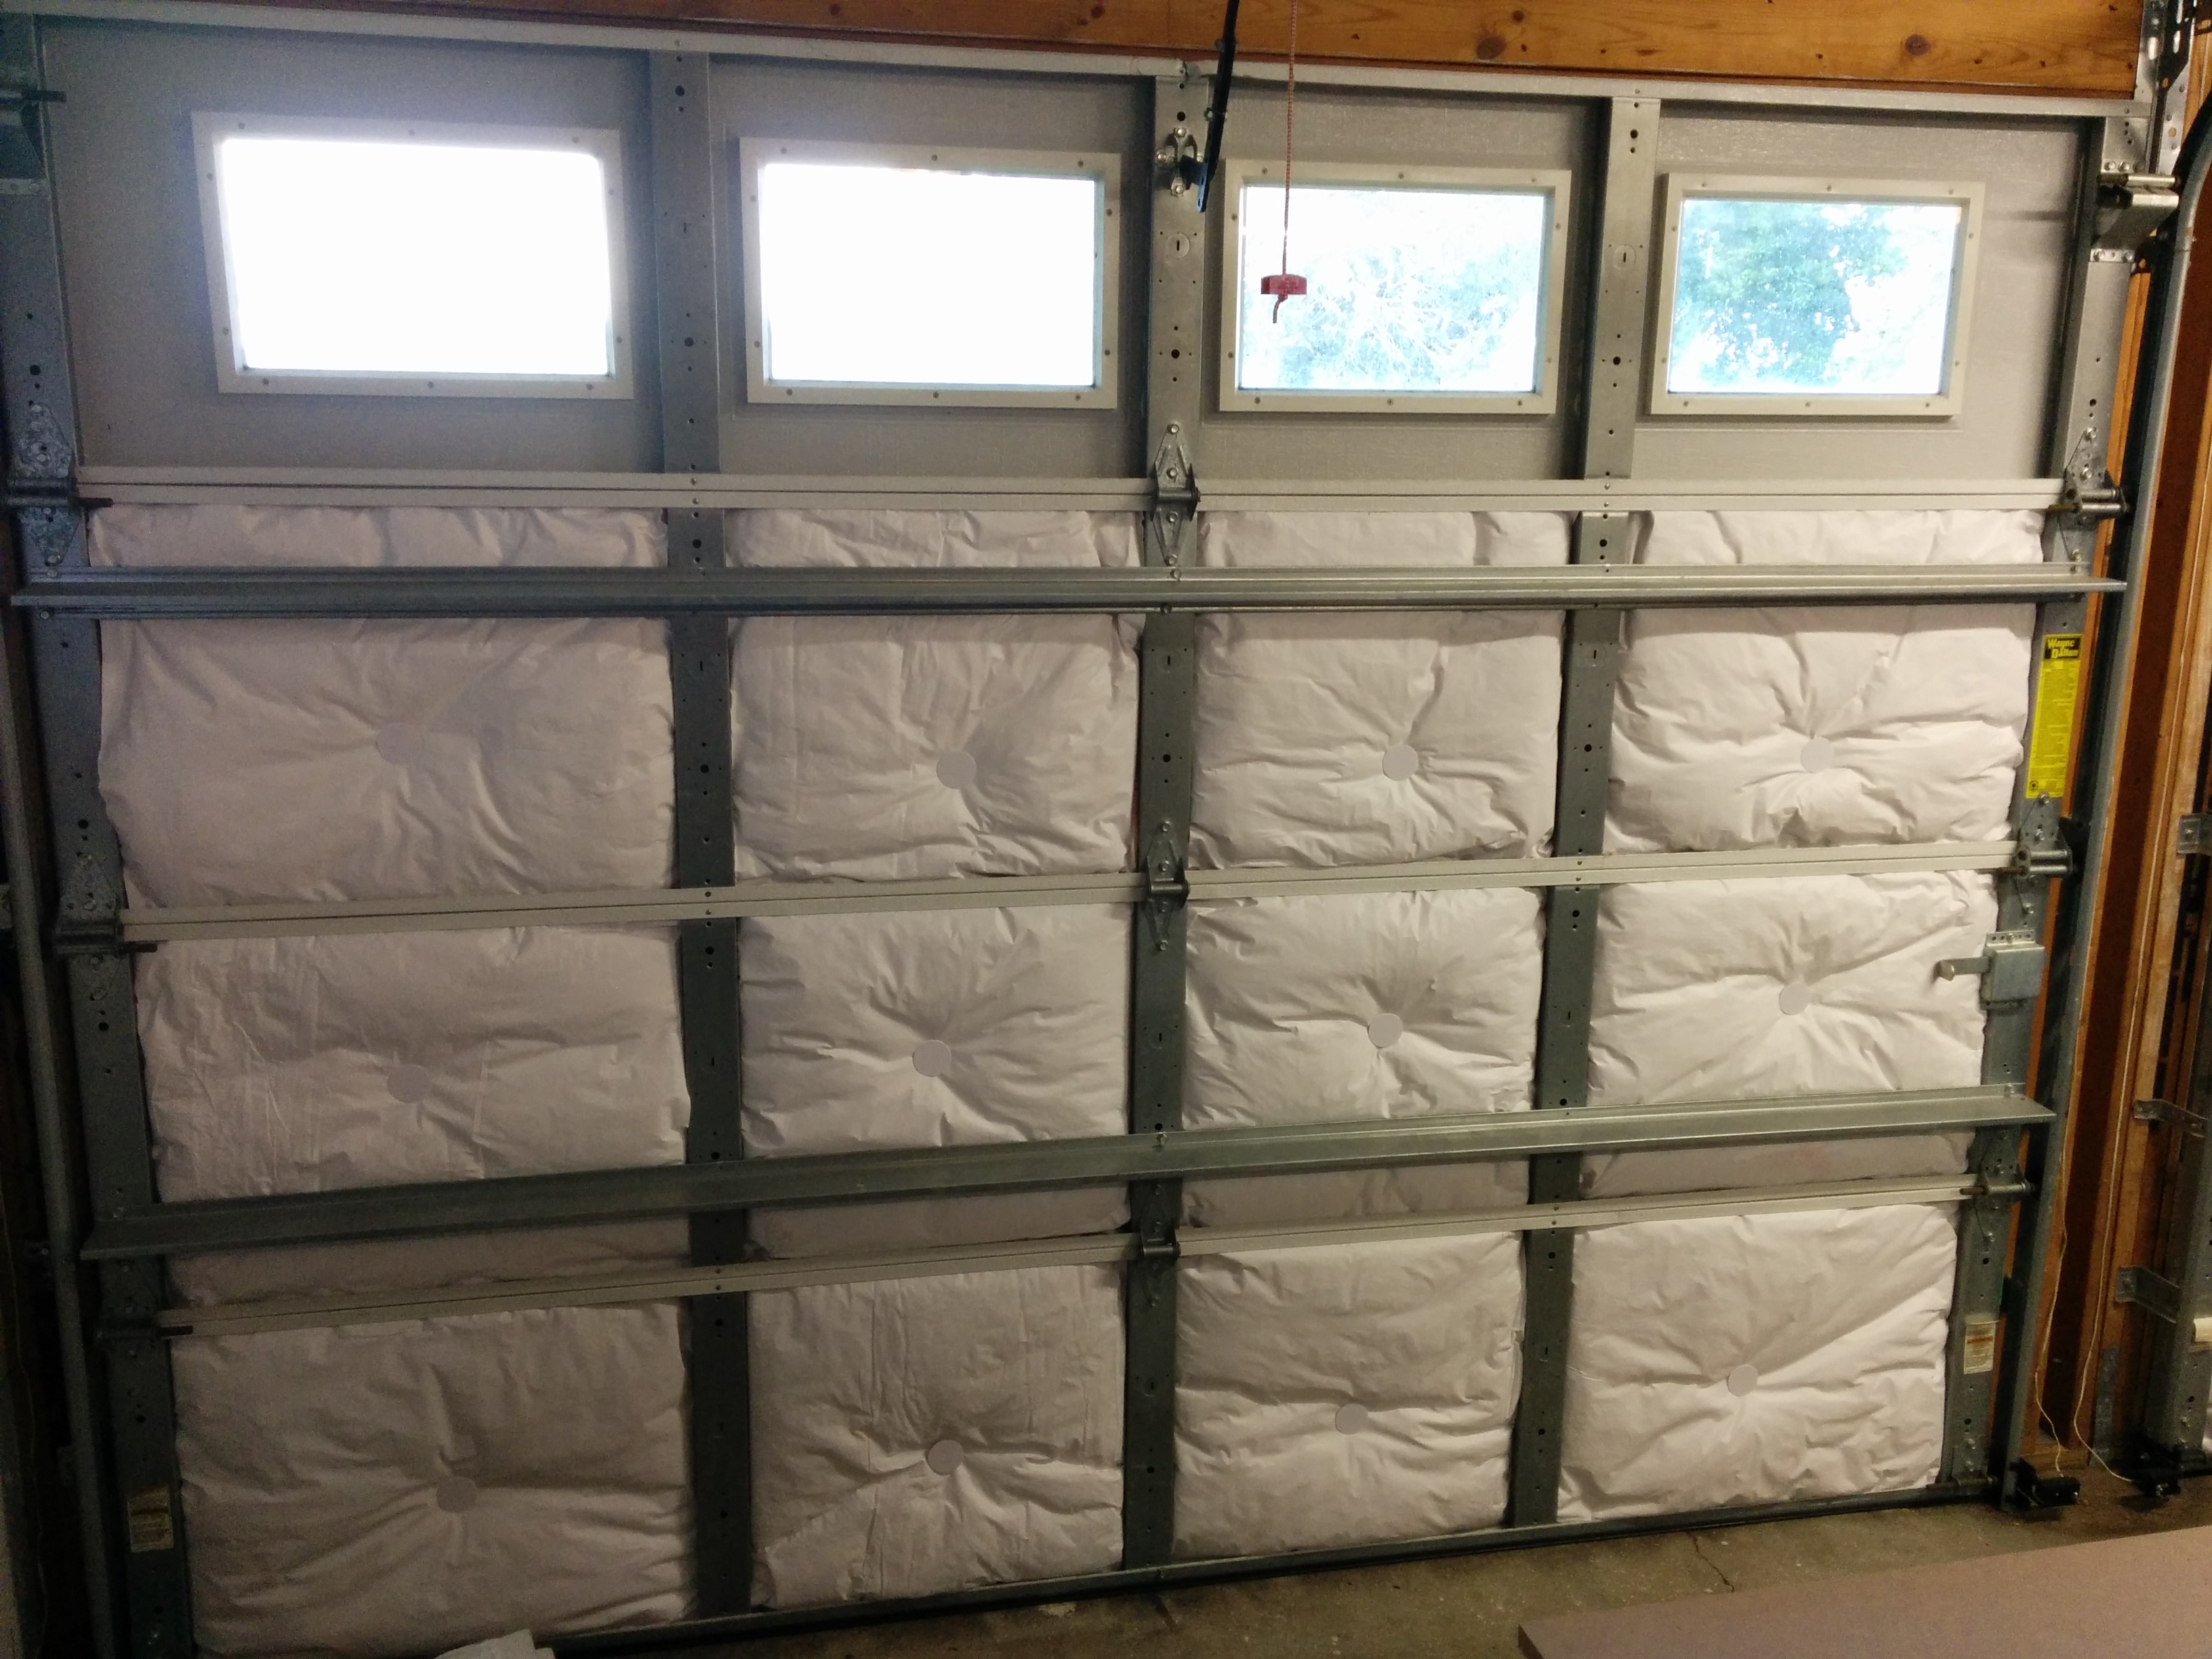
So far, friction and the plastic clips have held in all the fiberglass batts just fine. I’m probably going to be adding a layer of reflextix as a radiant barrier over the top of the fiberglass. [I also plan on using foam insulation around the windows.]
There is a definite temperature difference between the insulated and non-insulated (top window) panels. Outside in the shade, the insulated panels were 99 degrees, and the uninsulated panels were 95 degrees, as they were being cooled more by the inside of my garage. (A bad thing…) Inside, the uninsulated panels were 94 degrees (a one degree difference from the outside) while the insulated panels were 88 degrees (an 11 degree difference).
Next up, wall and attic insulation.


Pingback: Garage Insulation — Part 2 (Reflectix radiant heat barrier) | Jay's Technical Talk
I really like the idea you have to use the Owens Corning insulation kit and the reflective barrier on top of that. I was just wondering if you noticed a difference in the minor weigh that it added to your garage door spring? Did you have to get your garage spring re adjusted or replaced or was it fine with the additional weight?
I haven’t noticed any negative effects w.r.t. opening/closing the door. Didn’t touch the spring or motor and everything just kept working as normal.