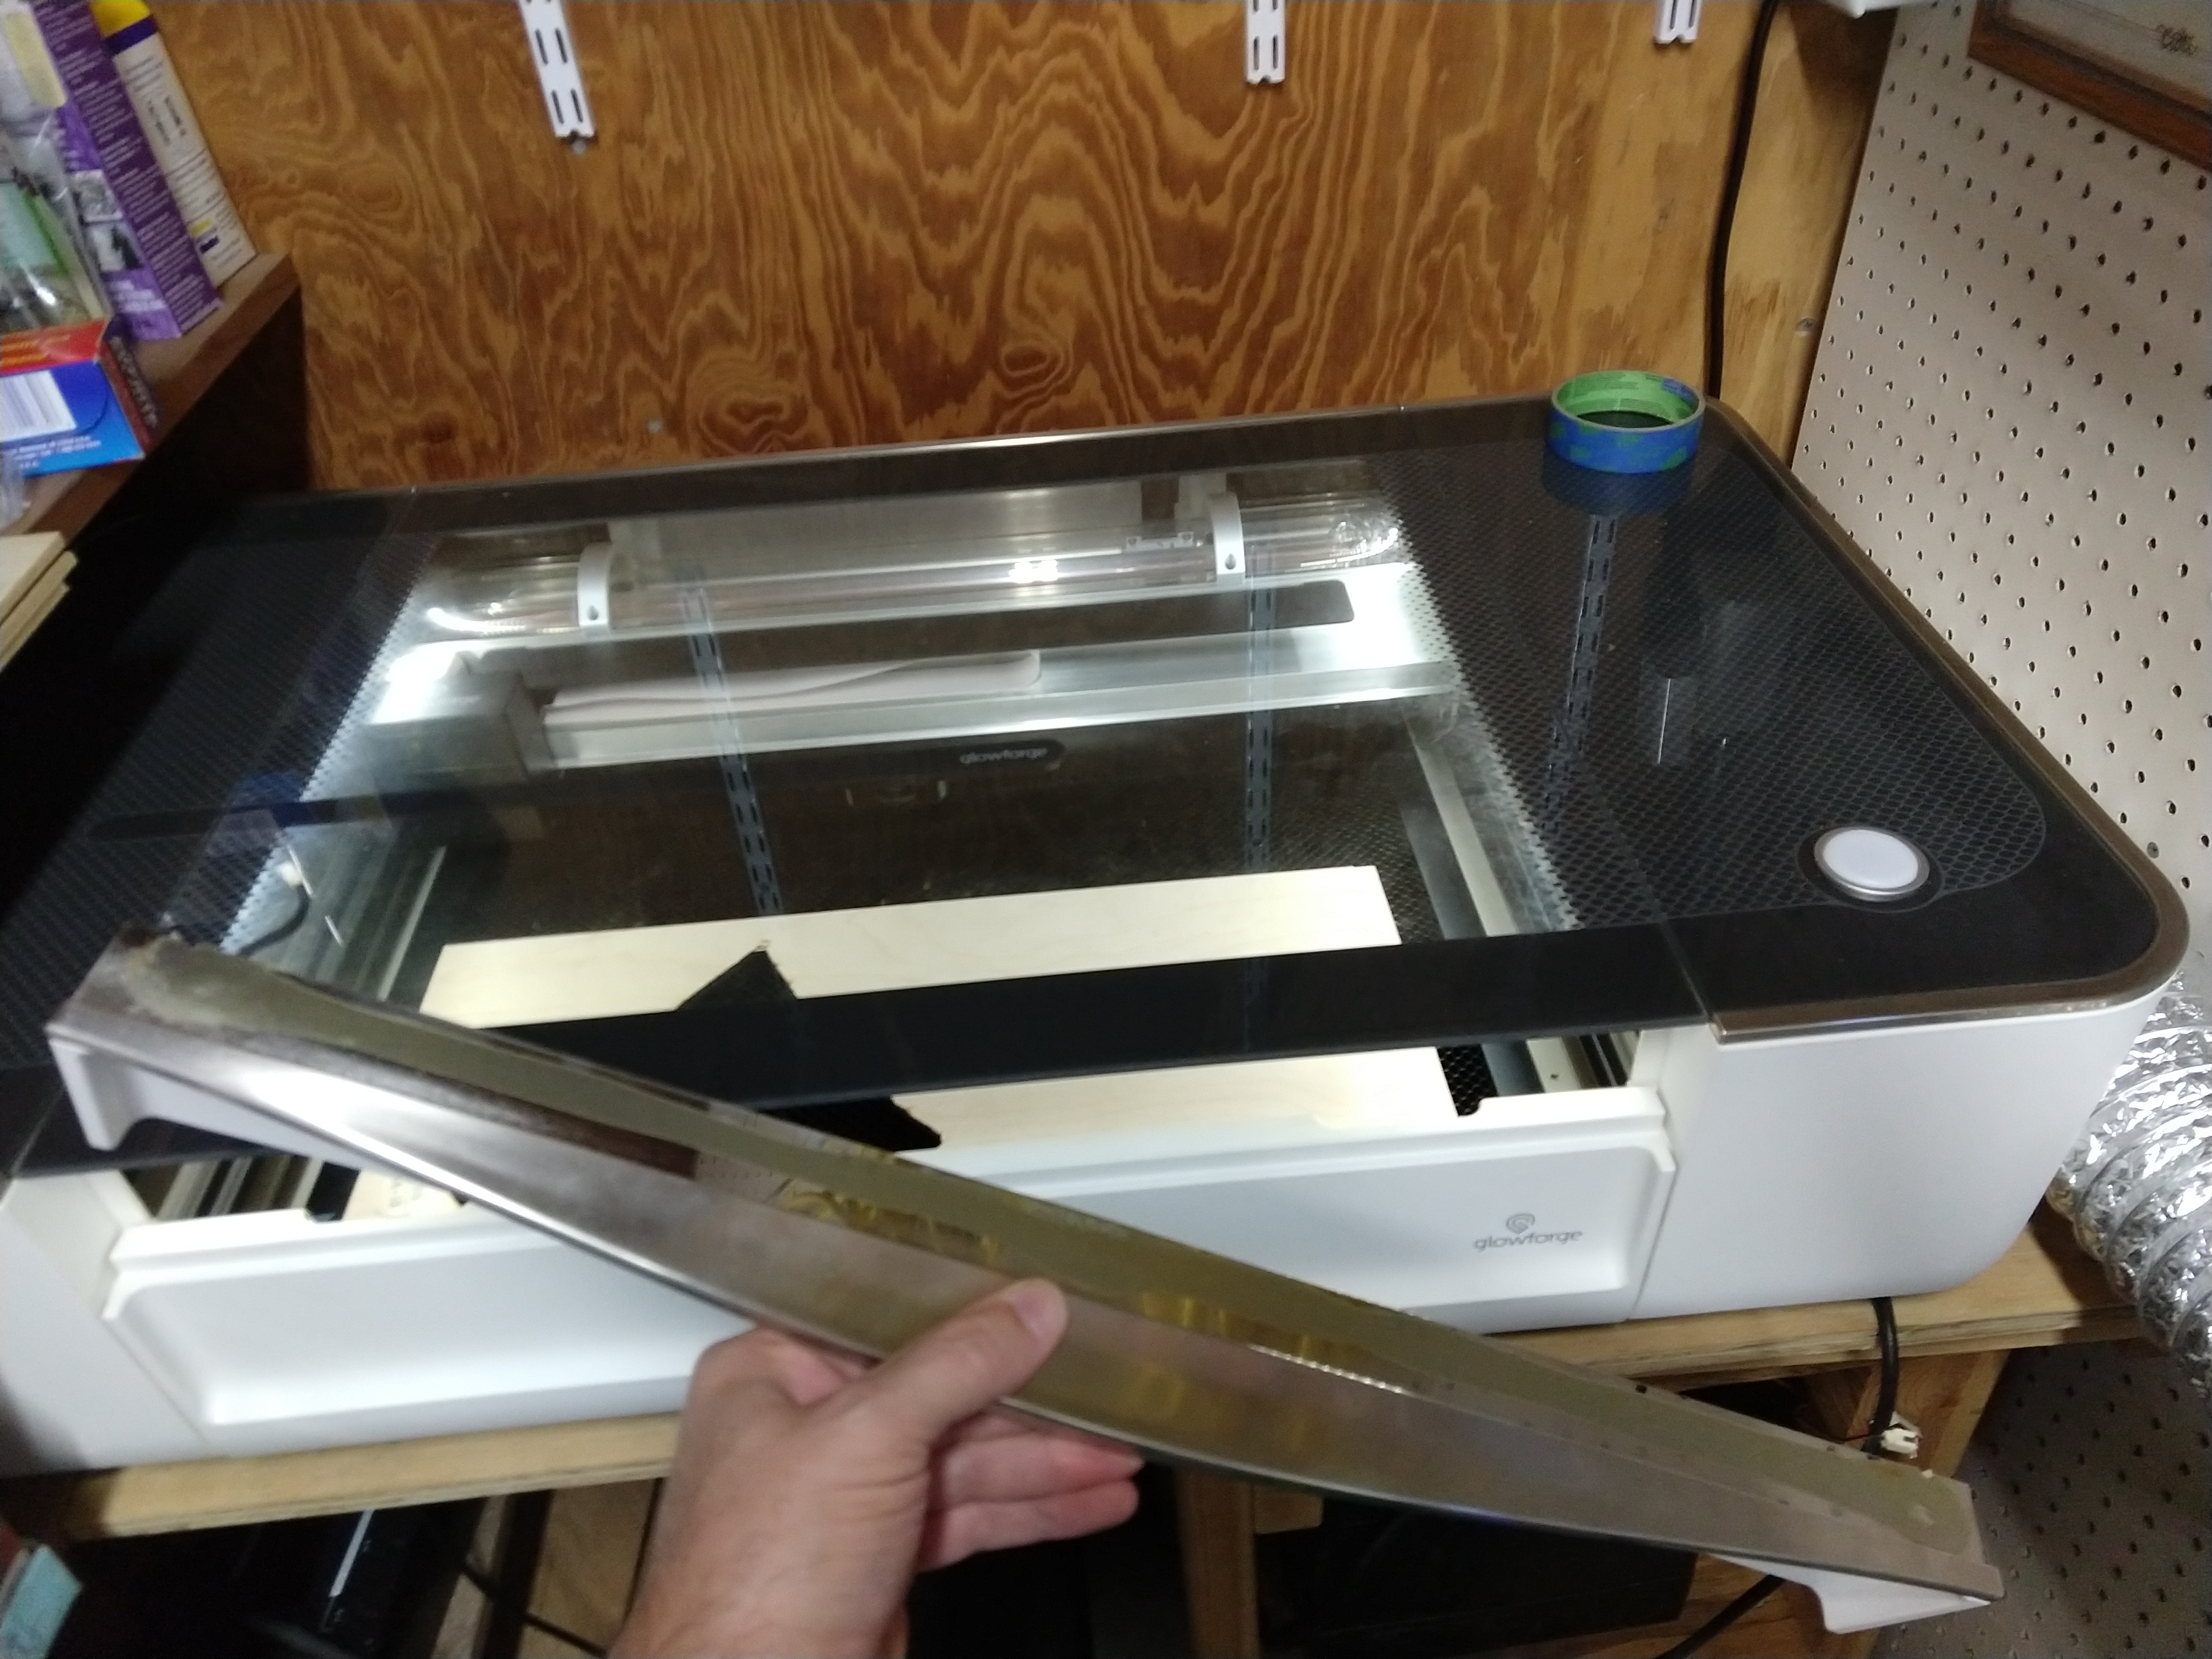
I went to use my Glowforge laser cutter today, and when I tried to open the lid the handle fell right off onto the floor! This wasn’t the first failure I was expecting from this device! (I figured the laser tube would die, or something to do with the electronics would fail…but no, the glue used to attach this metal and plastic handle piece to the safety glass that makes up the lid just let go!)
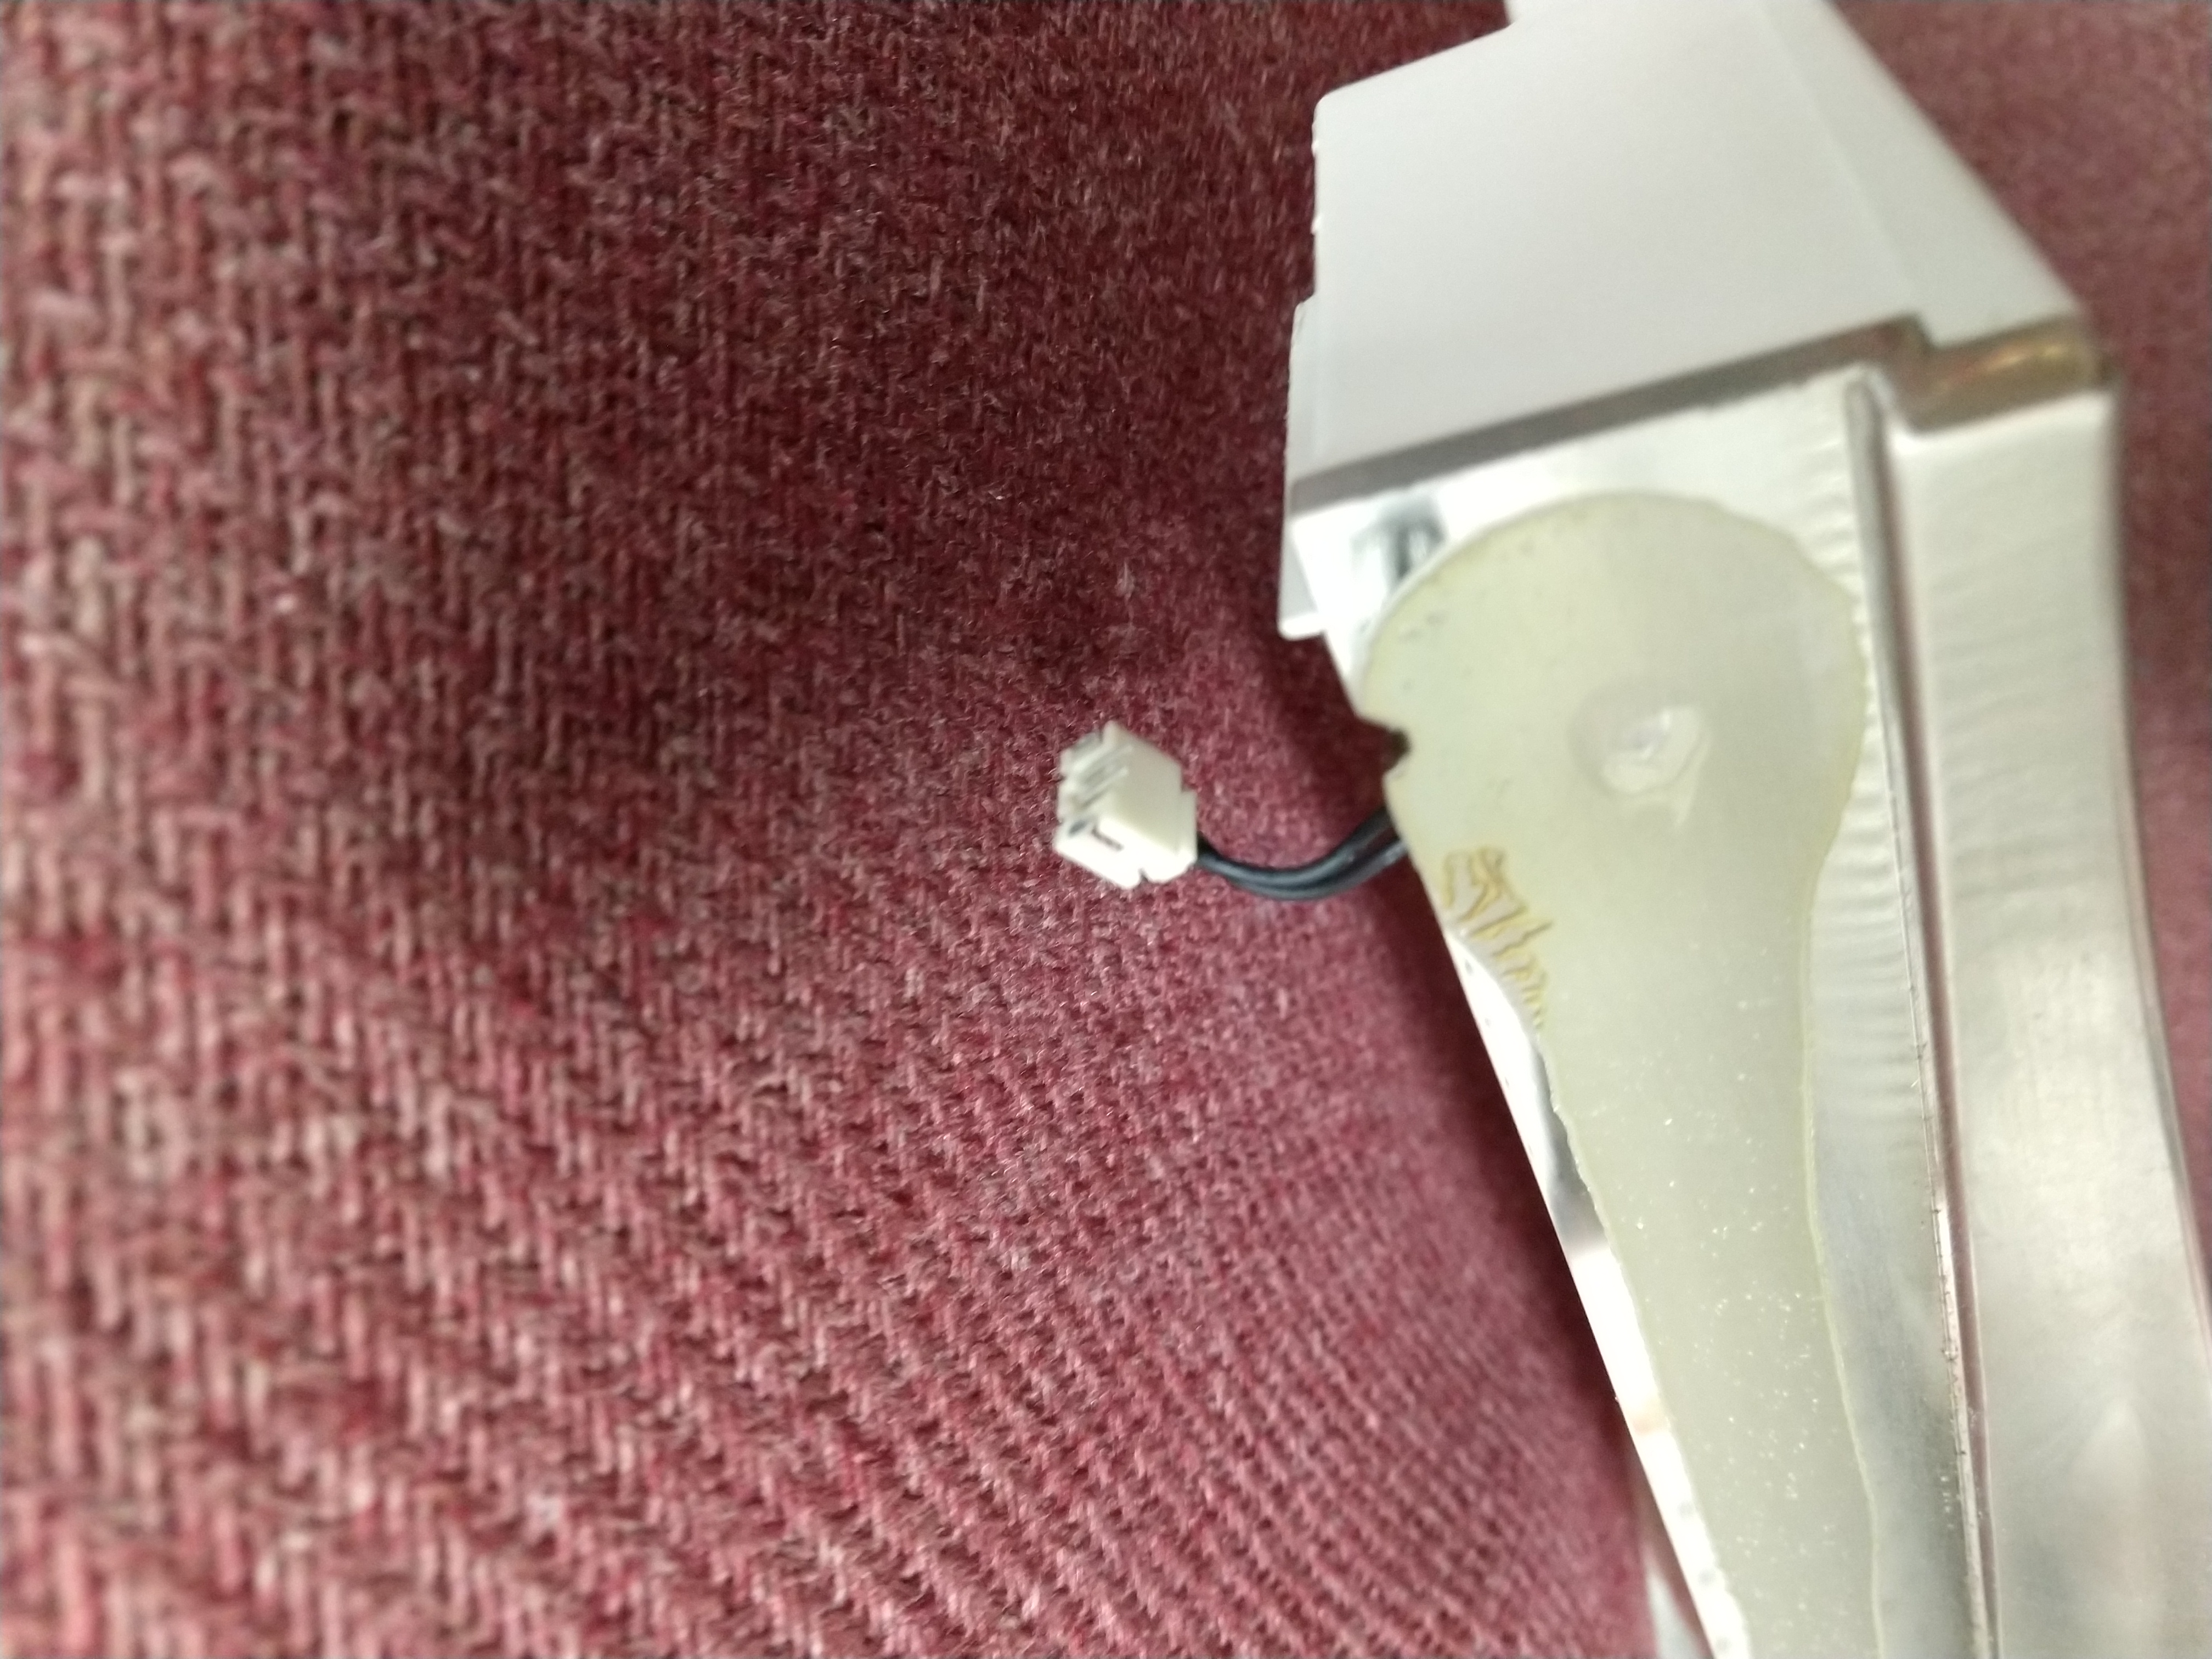
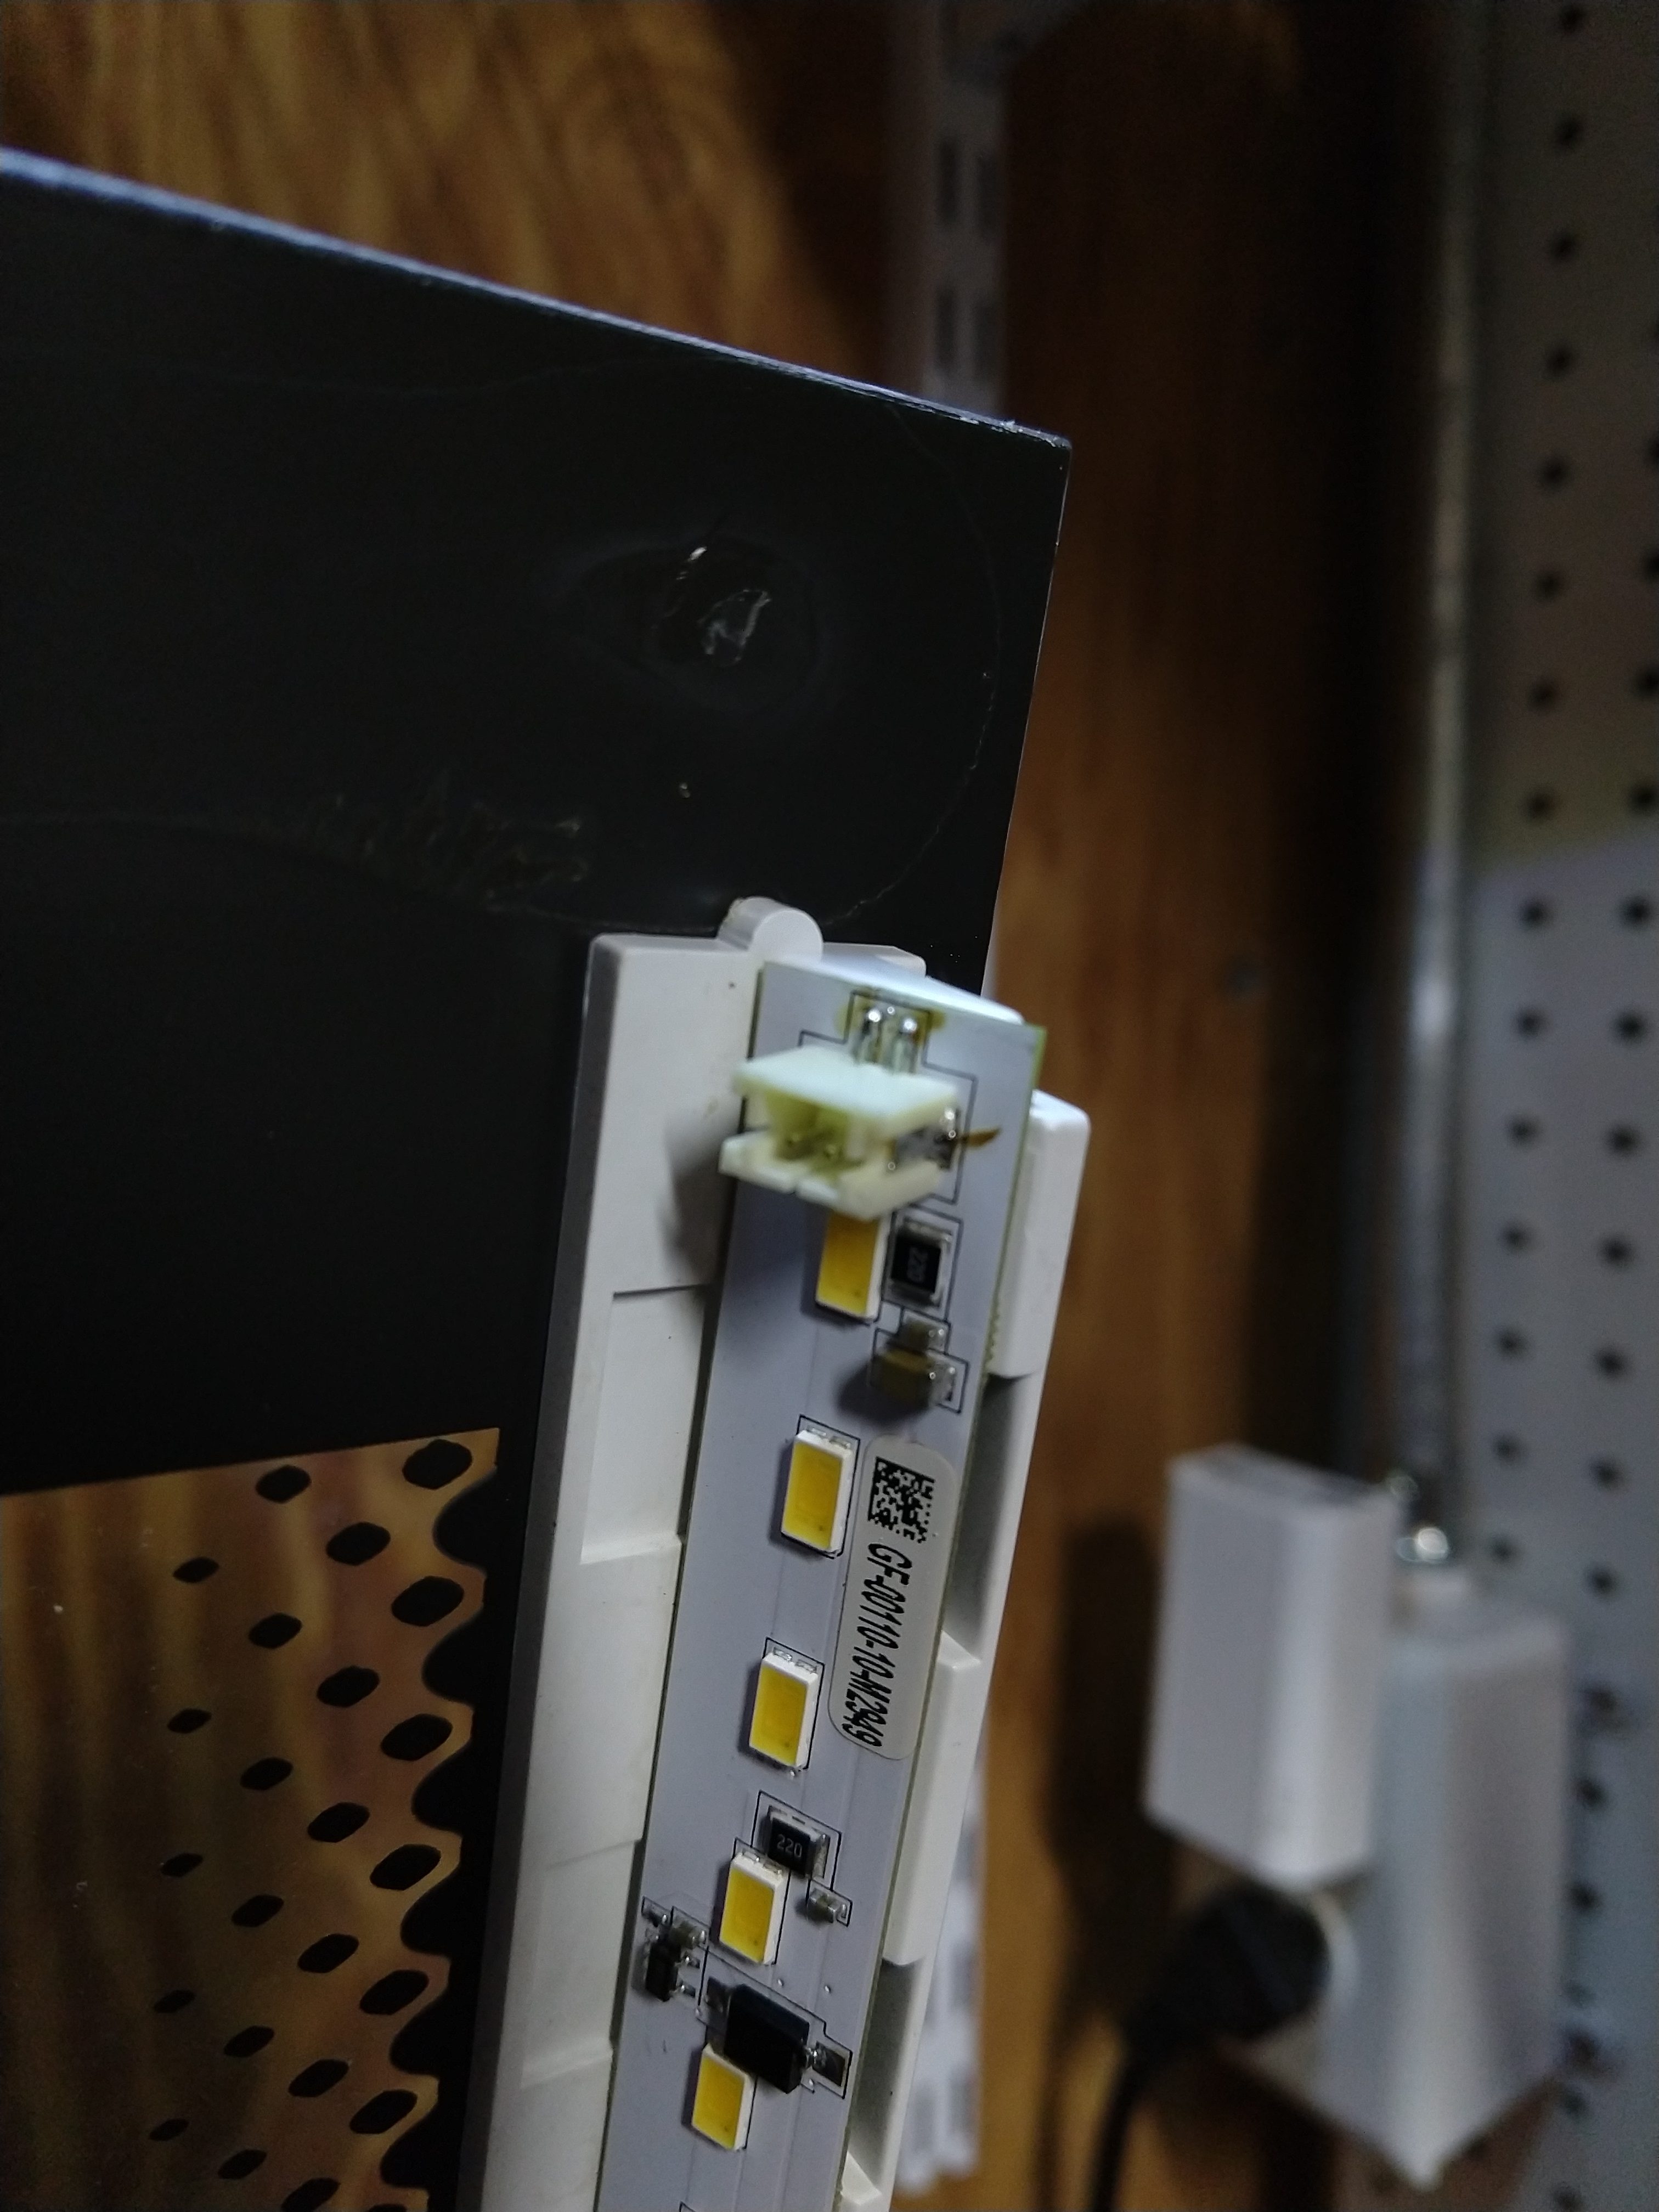
Unfortunately, the lid handle has some wires running to it (for the “lid closed” sensor I assume) and now my glowforge thinks the lid is open all the time and won’t do anything. The lid handle has two wires on each side that normally plug into sockets on the end of the LED light bars on the left and right side of the lid. The one on the left nicely unplugged itself when the lid fell, but the one on the right pulled the socket off of the lightbar, and would require at a minimum some soldering to reattach the socket to the light bar PCB.
As my warranty has expired, Glowforge offered to charge me $200 for round trip shipping of the unit to and from their repair location, and after they receive the unit they will tell me how much a repair would cost (if a repair is possible.) The customer service email said that they couldn’t repair the part in the field as some of the parts that would need to be replaced require calibration which they can’t do in the field. (I assume they were speaking about the camera mounted on the underside of the lid. They may have mistakenly thought that the lid had separated from the hinge in the back, but I guess if they replace the lid entirely instead of just attaching the handle again they would need to re-calibrate that camera to the rest of the laser cutter.)
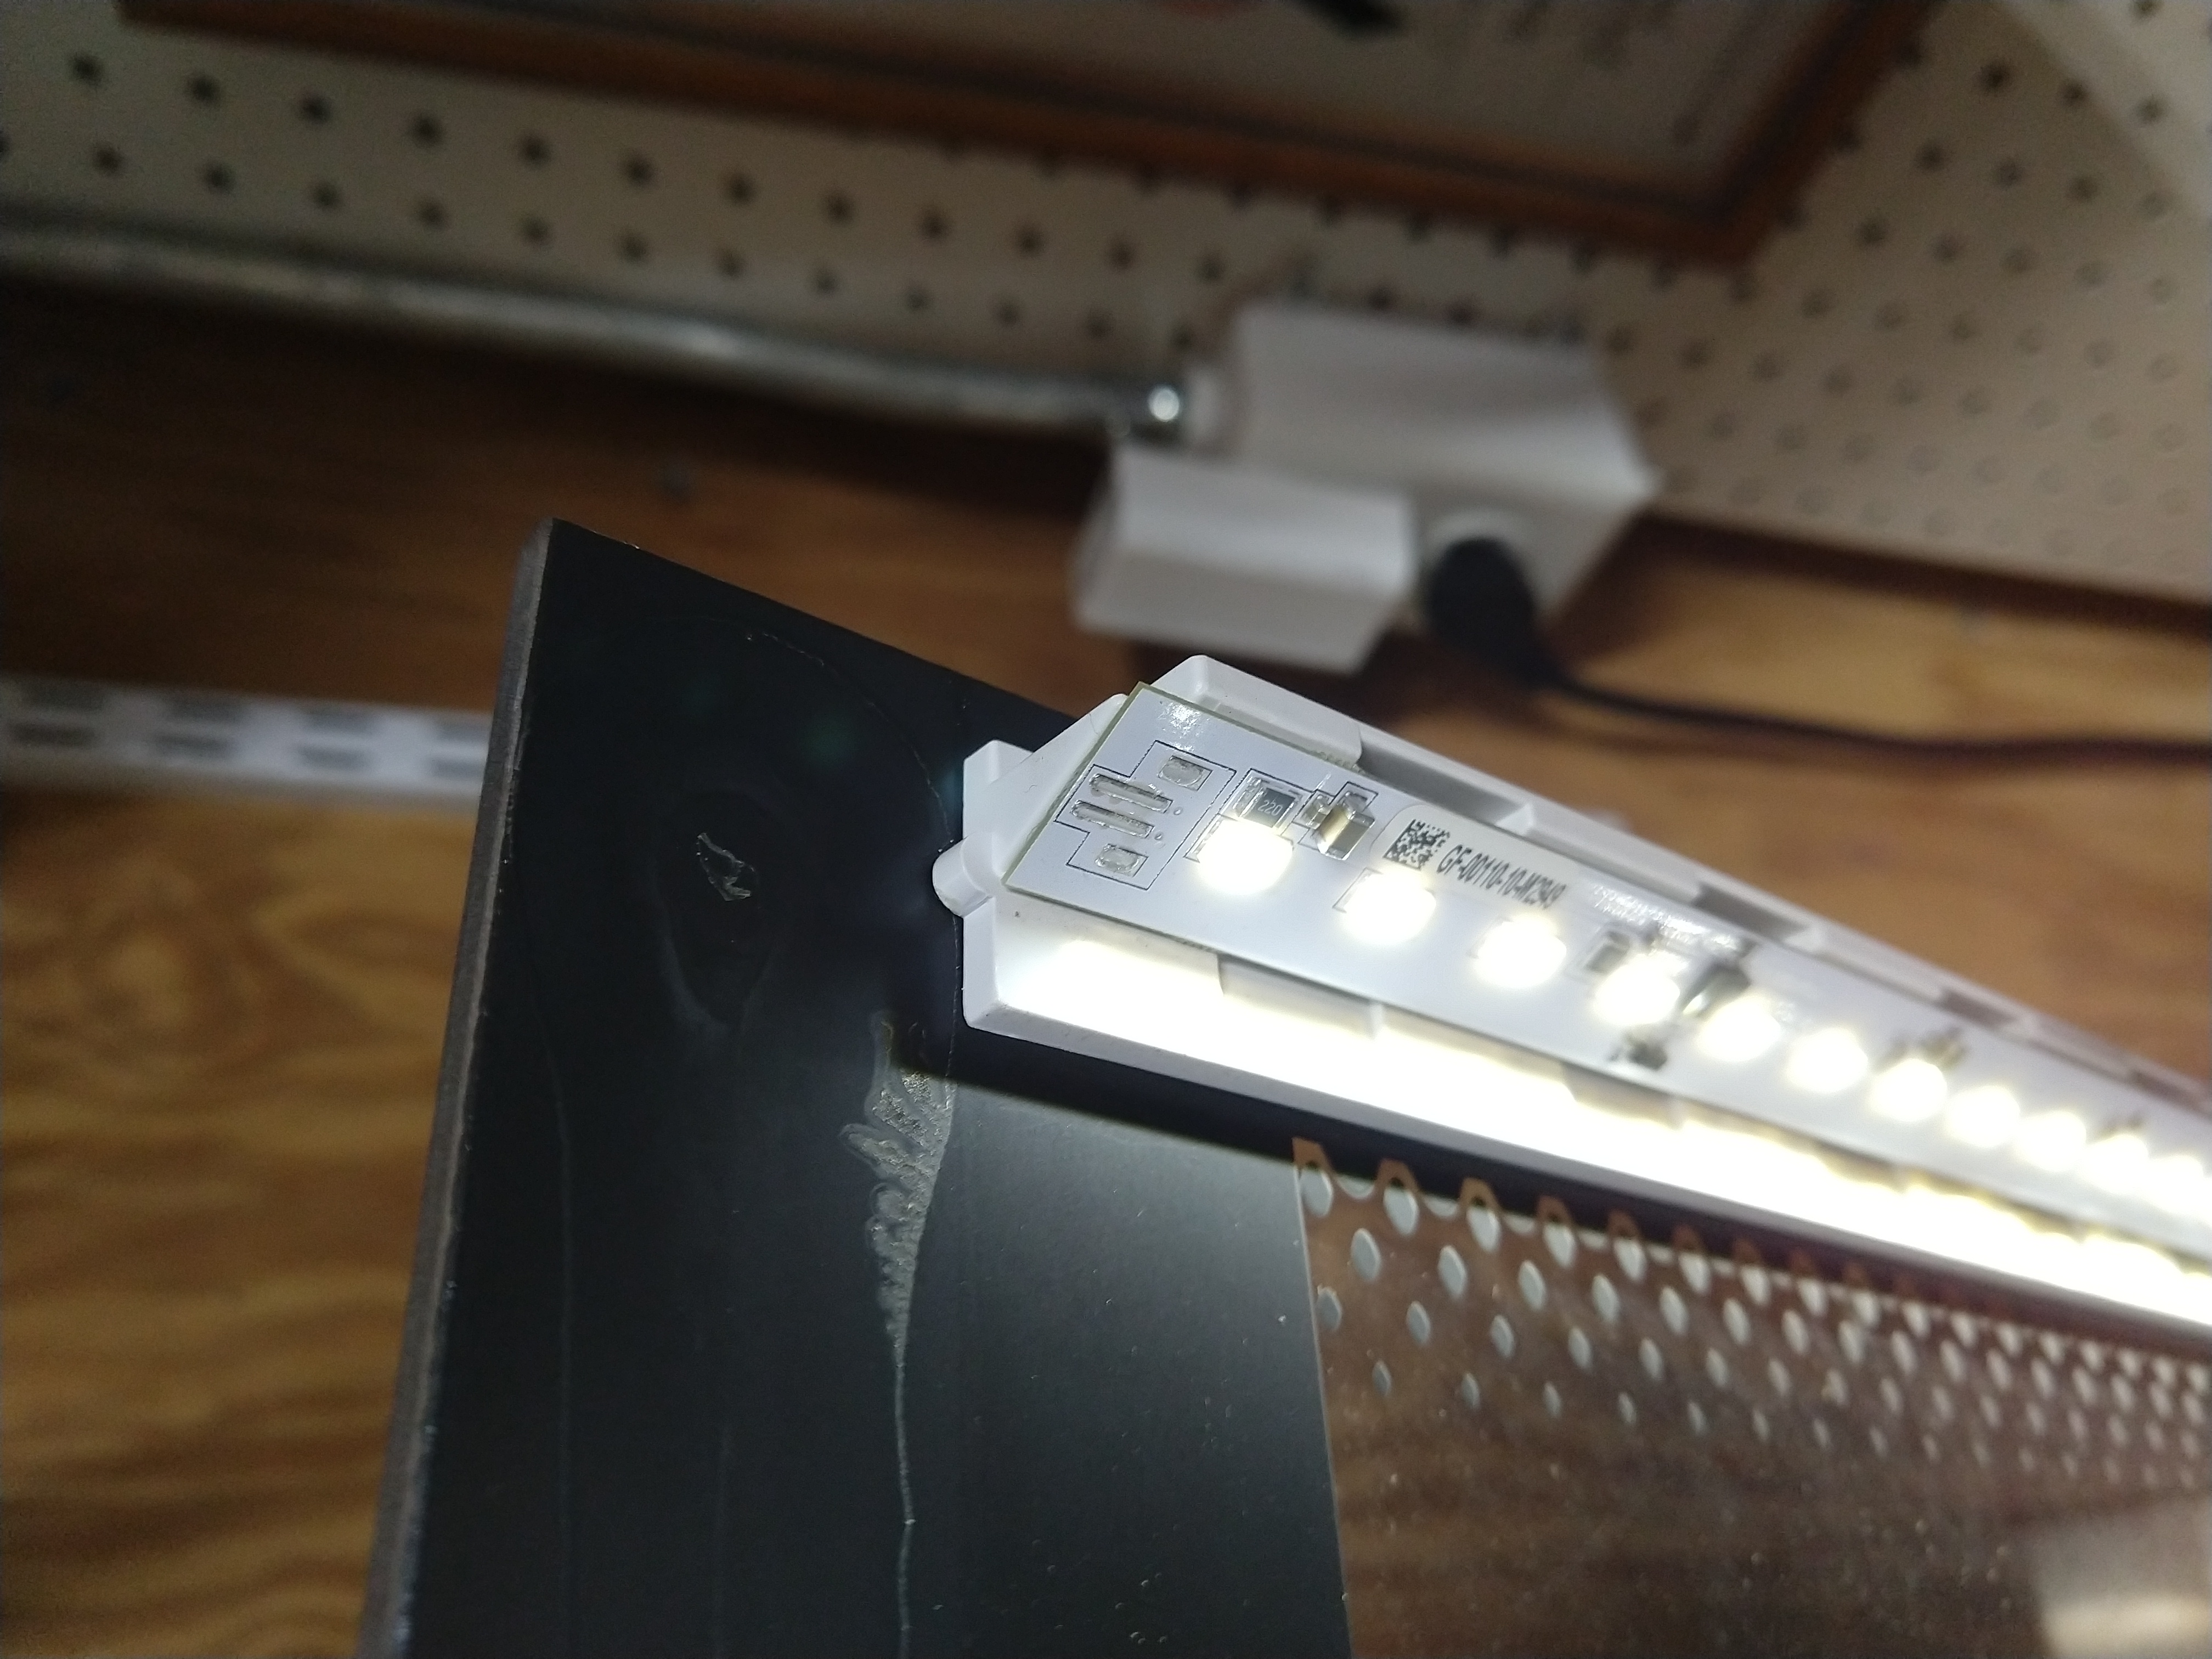
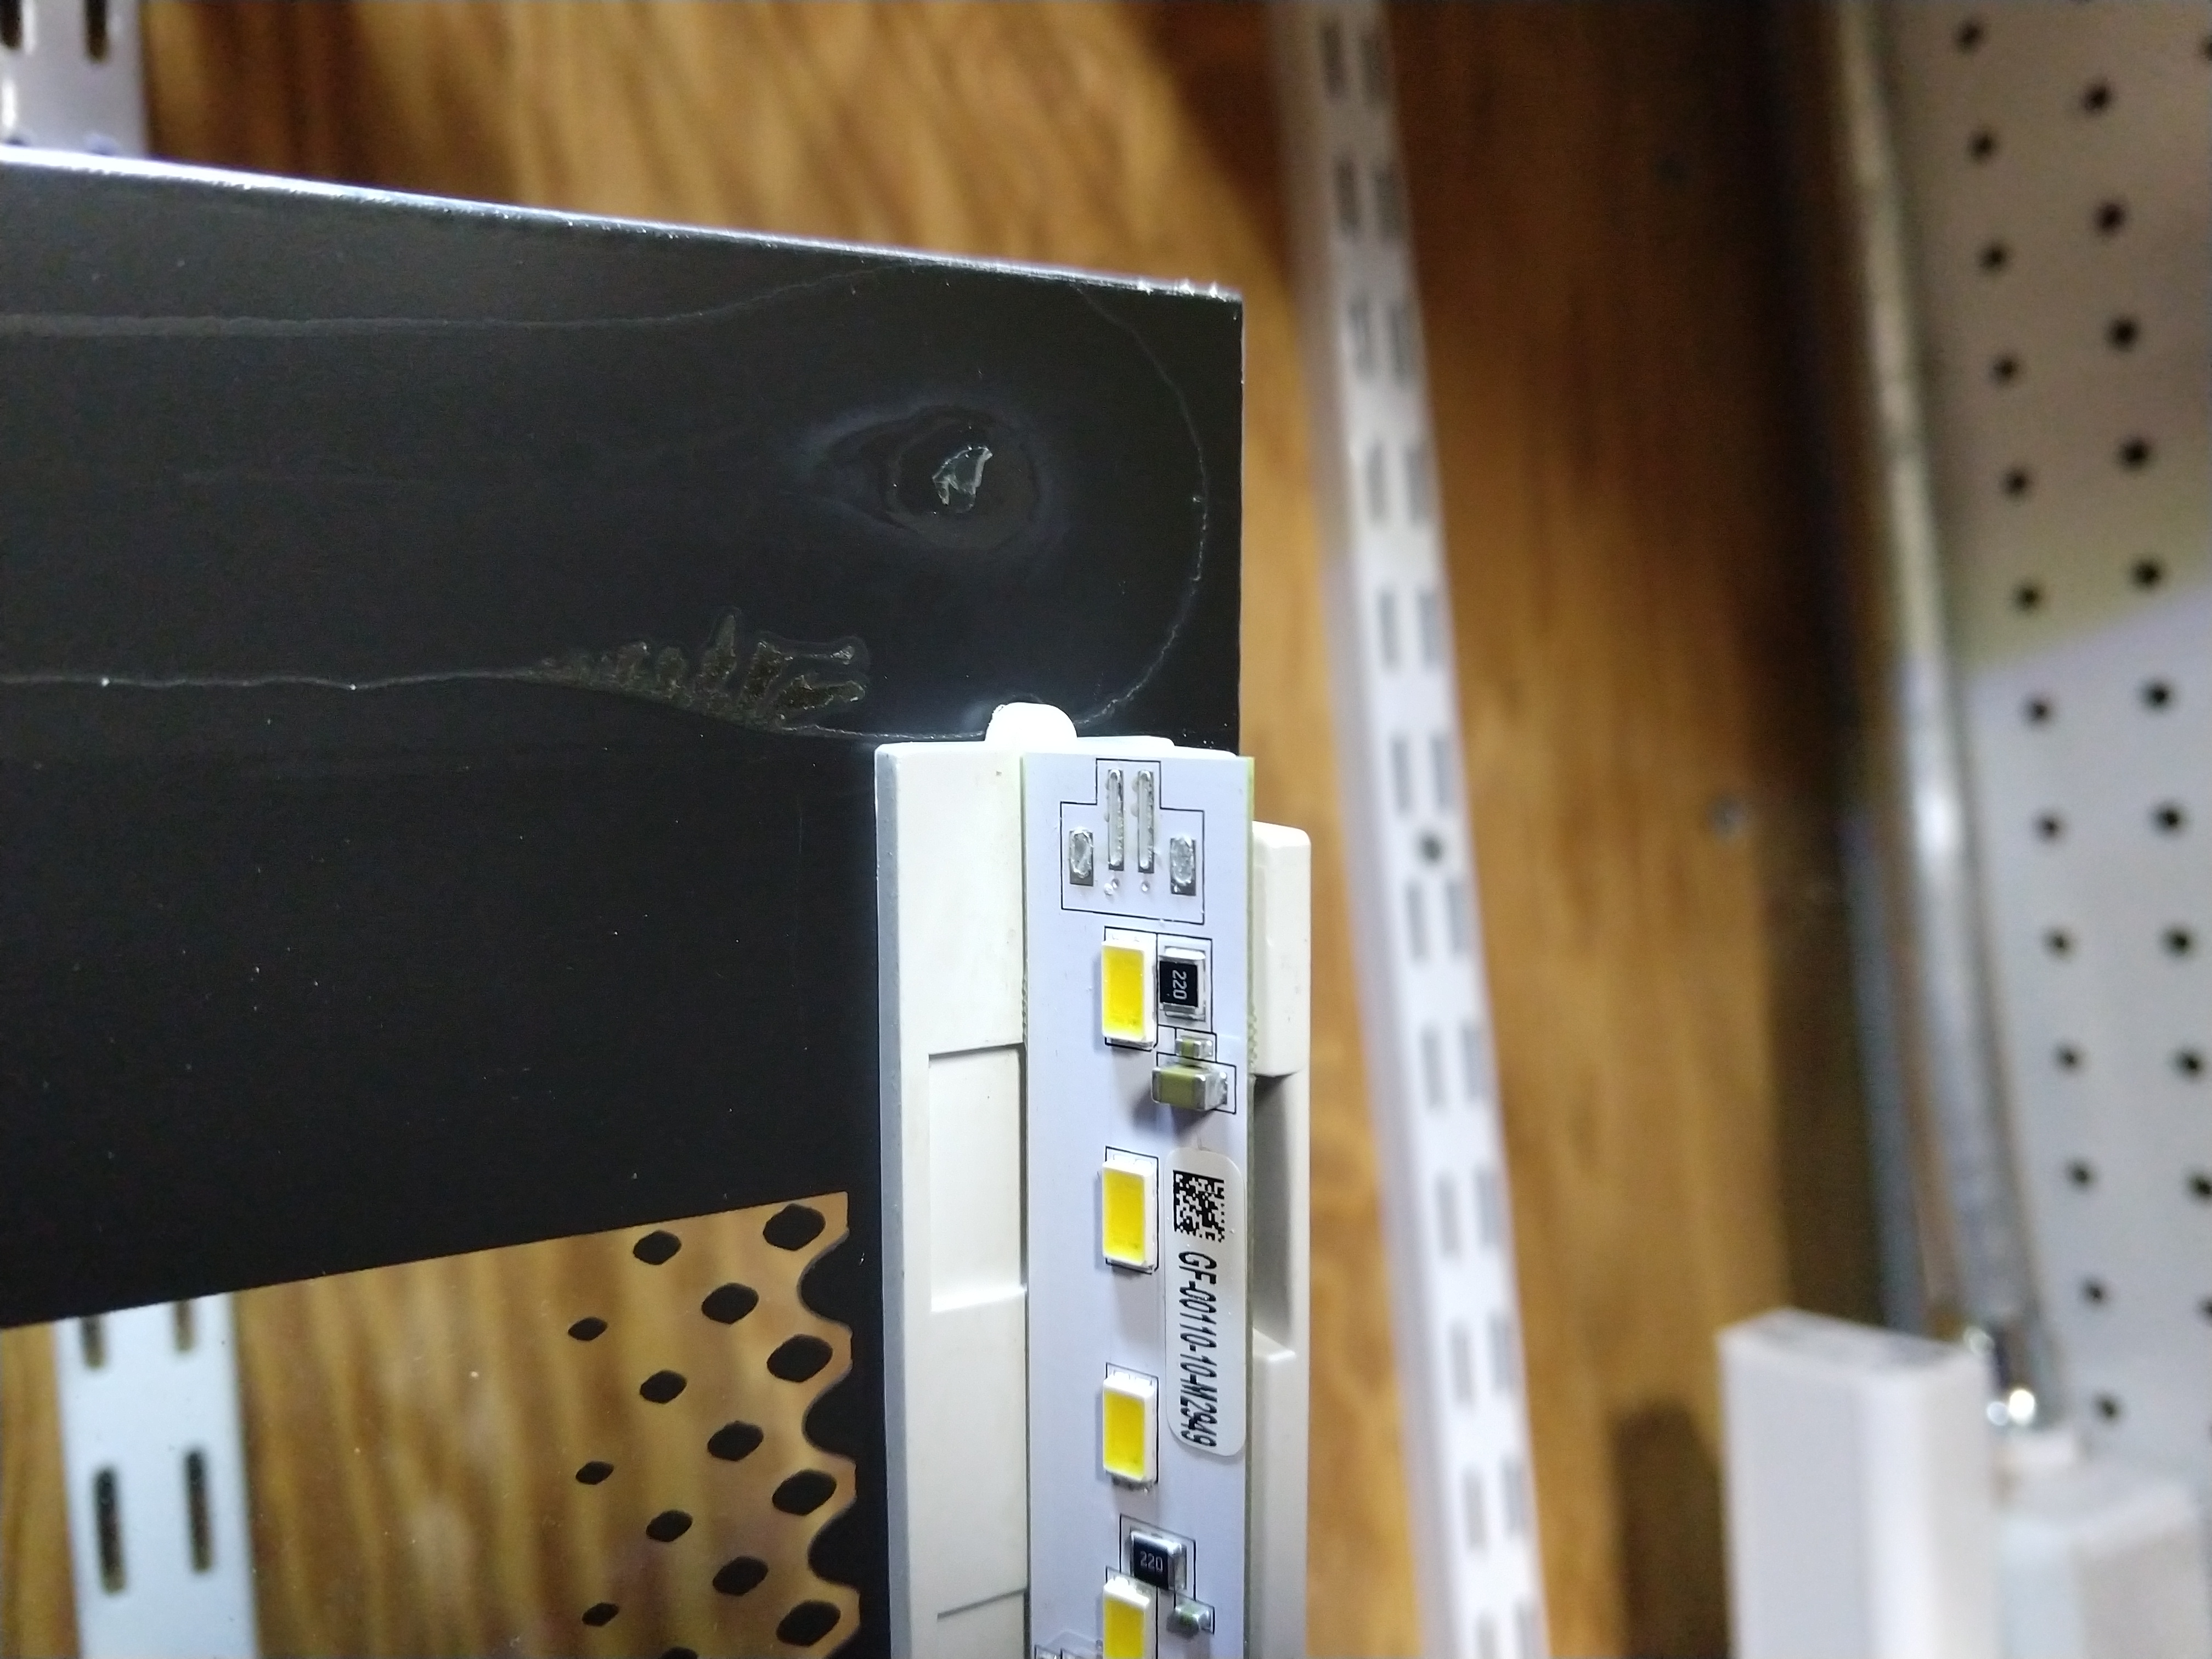
Since a brand new cheap Chinese K40 laser cutter only costs $400-500, I decided to attempt this repair on my own. After laying out a moving blanket to protect the laser tube from errant solder drops, I was able to solder the socket back in place with only a few scorch marks on the shiny white PCB.
I plugged the lid closed sensors back into the sockets, held the handle onto the lid while closing it (the weight of the lid keeps the handle in place when closed) and my Glowforge operated as normal! The only thing remaining is to determine the right type of adhesive to permanently re-attach the handle to the lid. Glowforge support understandably didn’t want to go on record with a specific recommendation for this unauthorized DIY repair, so I went with JB Weld (Clear) 2 part 5 minute epoxy. So far, the handle remains attached to the underside of the glass lid.
December 2020 Update: Handle still attached to glass lid. However, the other end of the lid detached from the hinge side of the Glowforge.


")

Interesting, both the front and back of my glowforge lid came off and Glowforge, so far, are not letting me know what glue I can use to fix it. Thats what led me here. I know some adhesives are not to be used in laser machines. Is the JB weld still holding & is your machine still working?
Yes, so far the epoxy has held just fine and I haven’t noticed any problem with the laser. (Once the glue dries, it shouldn’t have any vapors or off-gassing to worry about, and it’s never in the actual path of the laser.)
I was lucky, in that only the front (handle) came off, so the calibration of the glass mounted upper camera appears to still be factory solid. If you have to re-glue the back, you may need to re-calibrate the camera for it to line up well.
Luckily, I believe they have just released a new beta feature where you use the laser to carve a calibration pattern into a piece of proofgrade hardboard and then calibrate the camera using that. (It is designed to improve upon the factory calibration…but may be very helpful for your situation.)
Thank you so much Jay, I really appreciate it.
This happened to me too. The glue on the back of the lid came off a few days ago and now the handle fell off just now. I am so disappointed that this whole unit seems to be held together by glue. Thanks for posting this. I soldered it back together and it seems to be working now. Going to get some of this glue to try to fix it myself. My house isn’t on ground level so lugging a Glowforge up and down the stairs isn’t something I feel like doing again until I move!
The back hinge is more problematic, because if you don’t get the hinge glued back exactly where it was before, the under lid camera calibration will be off. (The handle on the front doesn’t affect the lid camera position, so gluing the handle back on isn’t quite as a precision operation as the back/hinge.) If you are under warranty I encourage you to let Glowforge do it for you (I wasn’t).
Hi Jay thanks for your advice earlier. Just want to ask if you needed to sandpaper the glass on the lid before applying the epoxy or is roughing up the bit on the handle that will have contact with the glue enough?
I didn’t rough up anything, just epoxied it as it was and so far it’s held. But now that you mention it, using a big of sandpaper on both the lid and the underside of the lid would probably not hurt anything and may help with the adhesion.
Great! Thank you so much.
Pingback: My Glowforge Glass Lid Detached! | Jay's Technical Talk
Pingback: New (Refurbished) Glowforge | Jay's Technical Talk
Hi! This just happened to my GF. Quick question, as I’m inept in these sort of things… how precisely did you have to solder the little socket back on? This is how mine currently looks: https://www.dropbox.com/s/r39mvmmv46x2l6o/9CF4C63E-2500-471A-AF1D-3BF93AF907F2.jpeg?dl=0
Thanks for the help!
Yes, that looks very much like what happened to mine. I unplugged the socket form the cord, and then soldered it onto the two small pads on the end of the LED light circuit board. I used a pencil soldering iron to do this. I melted a dab of solder on each pad first, and then held the socket down with the legs on top of the solder on the pads, and pressed the legs of the socket down into the solder with the soldering iron until the solder melted. Then I removed the soldering iron and held the socket in place until the solder cooled. After that, I could glue the handle back on and the plug the wire back in.
My front cover handle just broke off too. Mine broke both LED connectors. Out of warranty so looks like a DIY fix. Appreciate your advice given for the fix. Guess I’ll start paying more attention to the cover, as I have seen several of these reports. Did you remove the existing glue (or epoxy) that was there? Or just epoxy over it? Thanks!
I don’t remember scraping or removing any existing glue, so I guess I just epoxied over the top of it.
Pingback: Glowforge lid / hinge separation (2nd unit) | Jay's Technical Talk
Pingback: Gluing the glass lid back on my Glowforge | Jay's Technical Talk
Wow so many glowforges with same exact problem….class action anyone? Lol my email chrisvfuentes@yahoo.com….I’m just here Trina fix the sane problem for 3 time without the piece of of you know what draining me of another 800$