Building a solar filter for the Vaonis Vespera smart telescope

After my success with a Dual Band filter holder, I spent $38 on a sheet of BAADAR AstroSolar Safety Film (from ScopeStuff in Round Rock TX) and used some 3M VHB double sided tape (cut in very thin strips) to attach it to the 3D printed filter holder.  The filter holder is really designed for screwing in a 2″ (50.8mm) astro filter, so it didn’t have as much surface area on the “ring” as I would have liked, but it worked reasonably well, especially as I then sandwiched the outside film within the larger outside ring when I snapped them together.    [I cut one bit of film a little too short, so it didn’t go under the ring, you can see it in the bottom left in the photo below.] I put a ring of UV cured resin around the outside of the filter film just as added insurance it won’t pull up in the wind or something.

I was very tempted to use superglue on the ring before dropping it down onto the filter film (instead of small pieces of VHB double sided tape).  I didn’t do that because I was worried it might not stick to the film, and I was also worried about CA glue offgassing when the filter was used in the sun.   After I made this filter, I tested gluing the resin print to some cutoff film, and it appeared to work great. If I need to make another filter (or make one that looks a little smoother around the edges) I will try using CA glue instead, and make sure I put the whole filter out in the sun for a day before using it on my telescope to make sure the CA glue won’t offgas onto the lens.

However, even though the edges of the filter film look a little wrinkly, almost the entire surface of the optical path was very flat (but not overly tensioned) and the images through the solar filter look as good as any of my other smart telescopes produce, so I think functionally it worked great.

Sun stats: 0;0;0;0.003048, exposure: 300µs , gain: 0dB

I used a 4.6 Kohm 1/8 watt resistor with the leads circled and soldered inside the filter holder to indicate to the Vespera that it had a solar filter installed, and it was detected correctly as soon as I plugged in into the telescope.

Continue reading

DIY Dual Band Filter holder for the Vaonis Vespera Smart Telescope

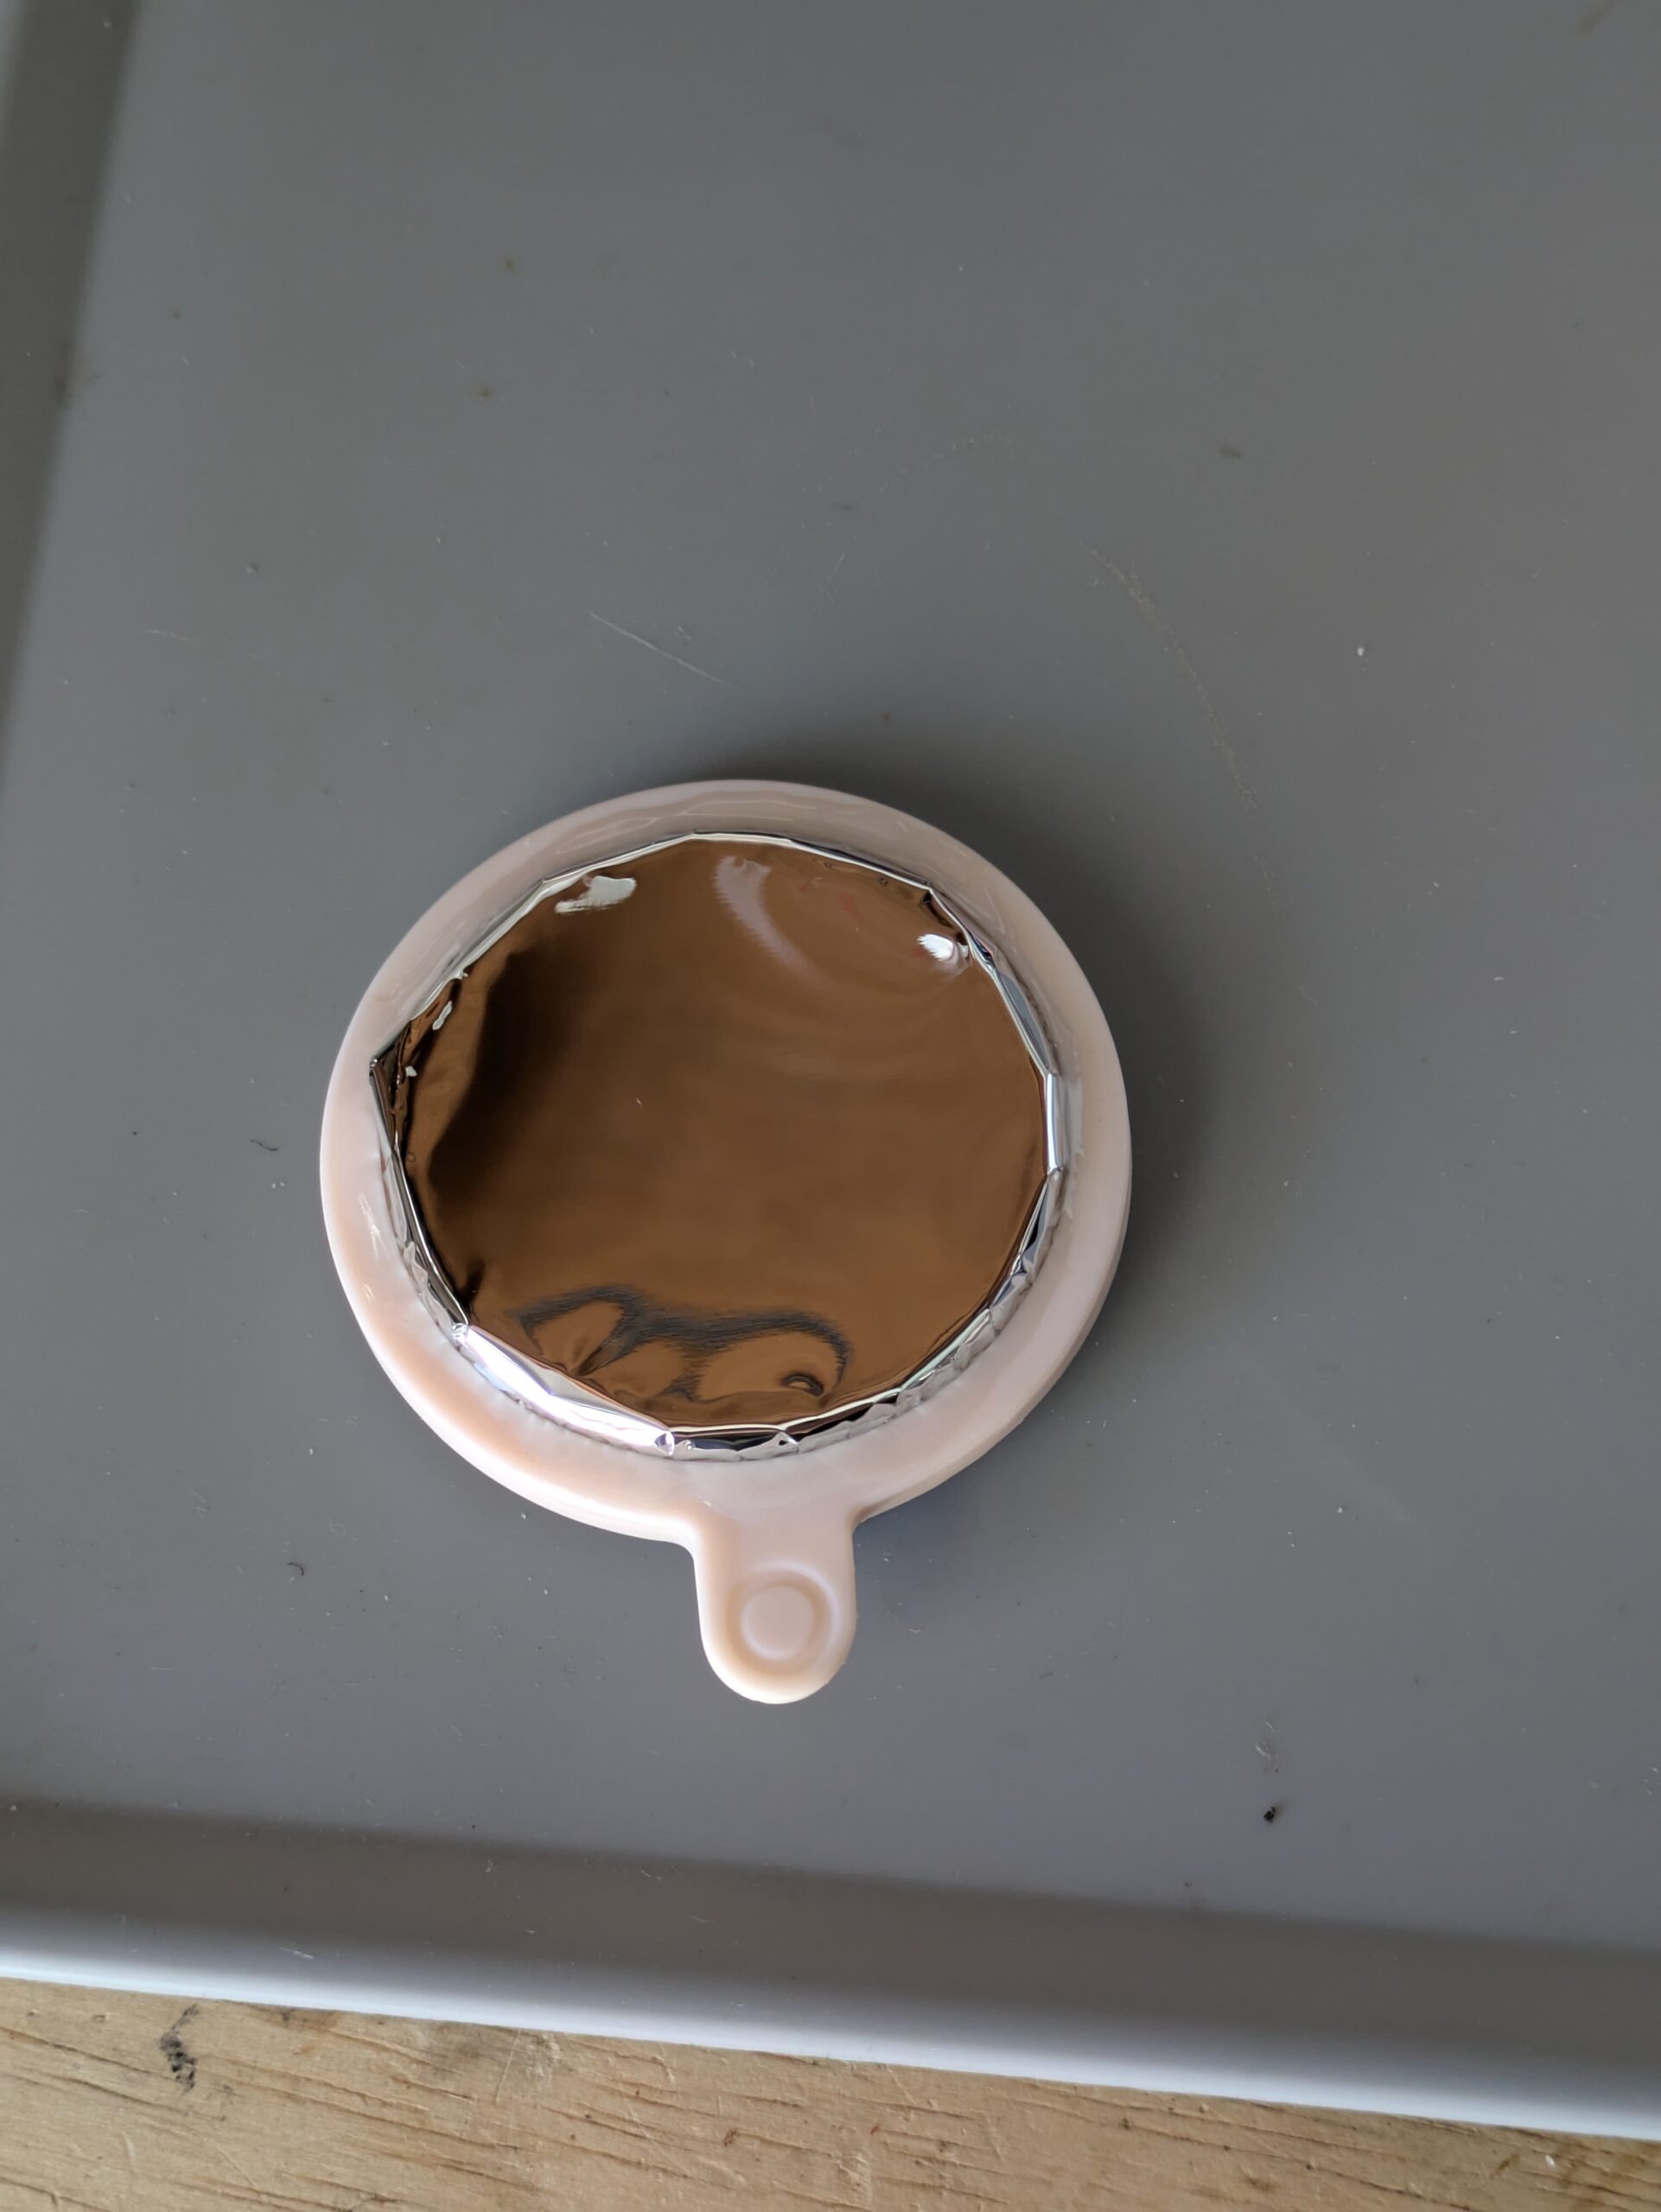
I purchased a used Vaonis Vespera smart telescope, but if I wanted to buy the “official” (and proprietary) Dual Band filter to use for imaging emission nebula, it would cost $400 USD!

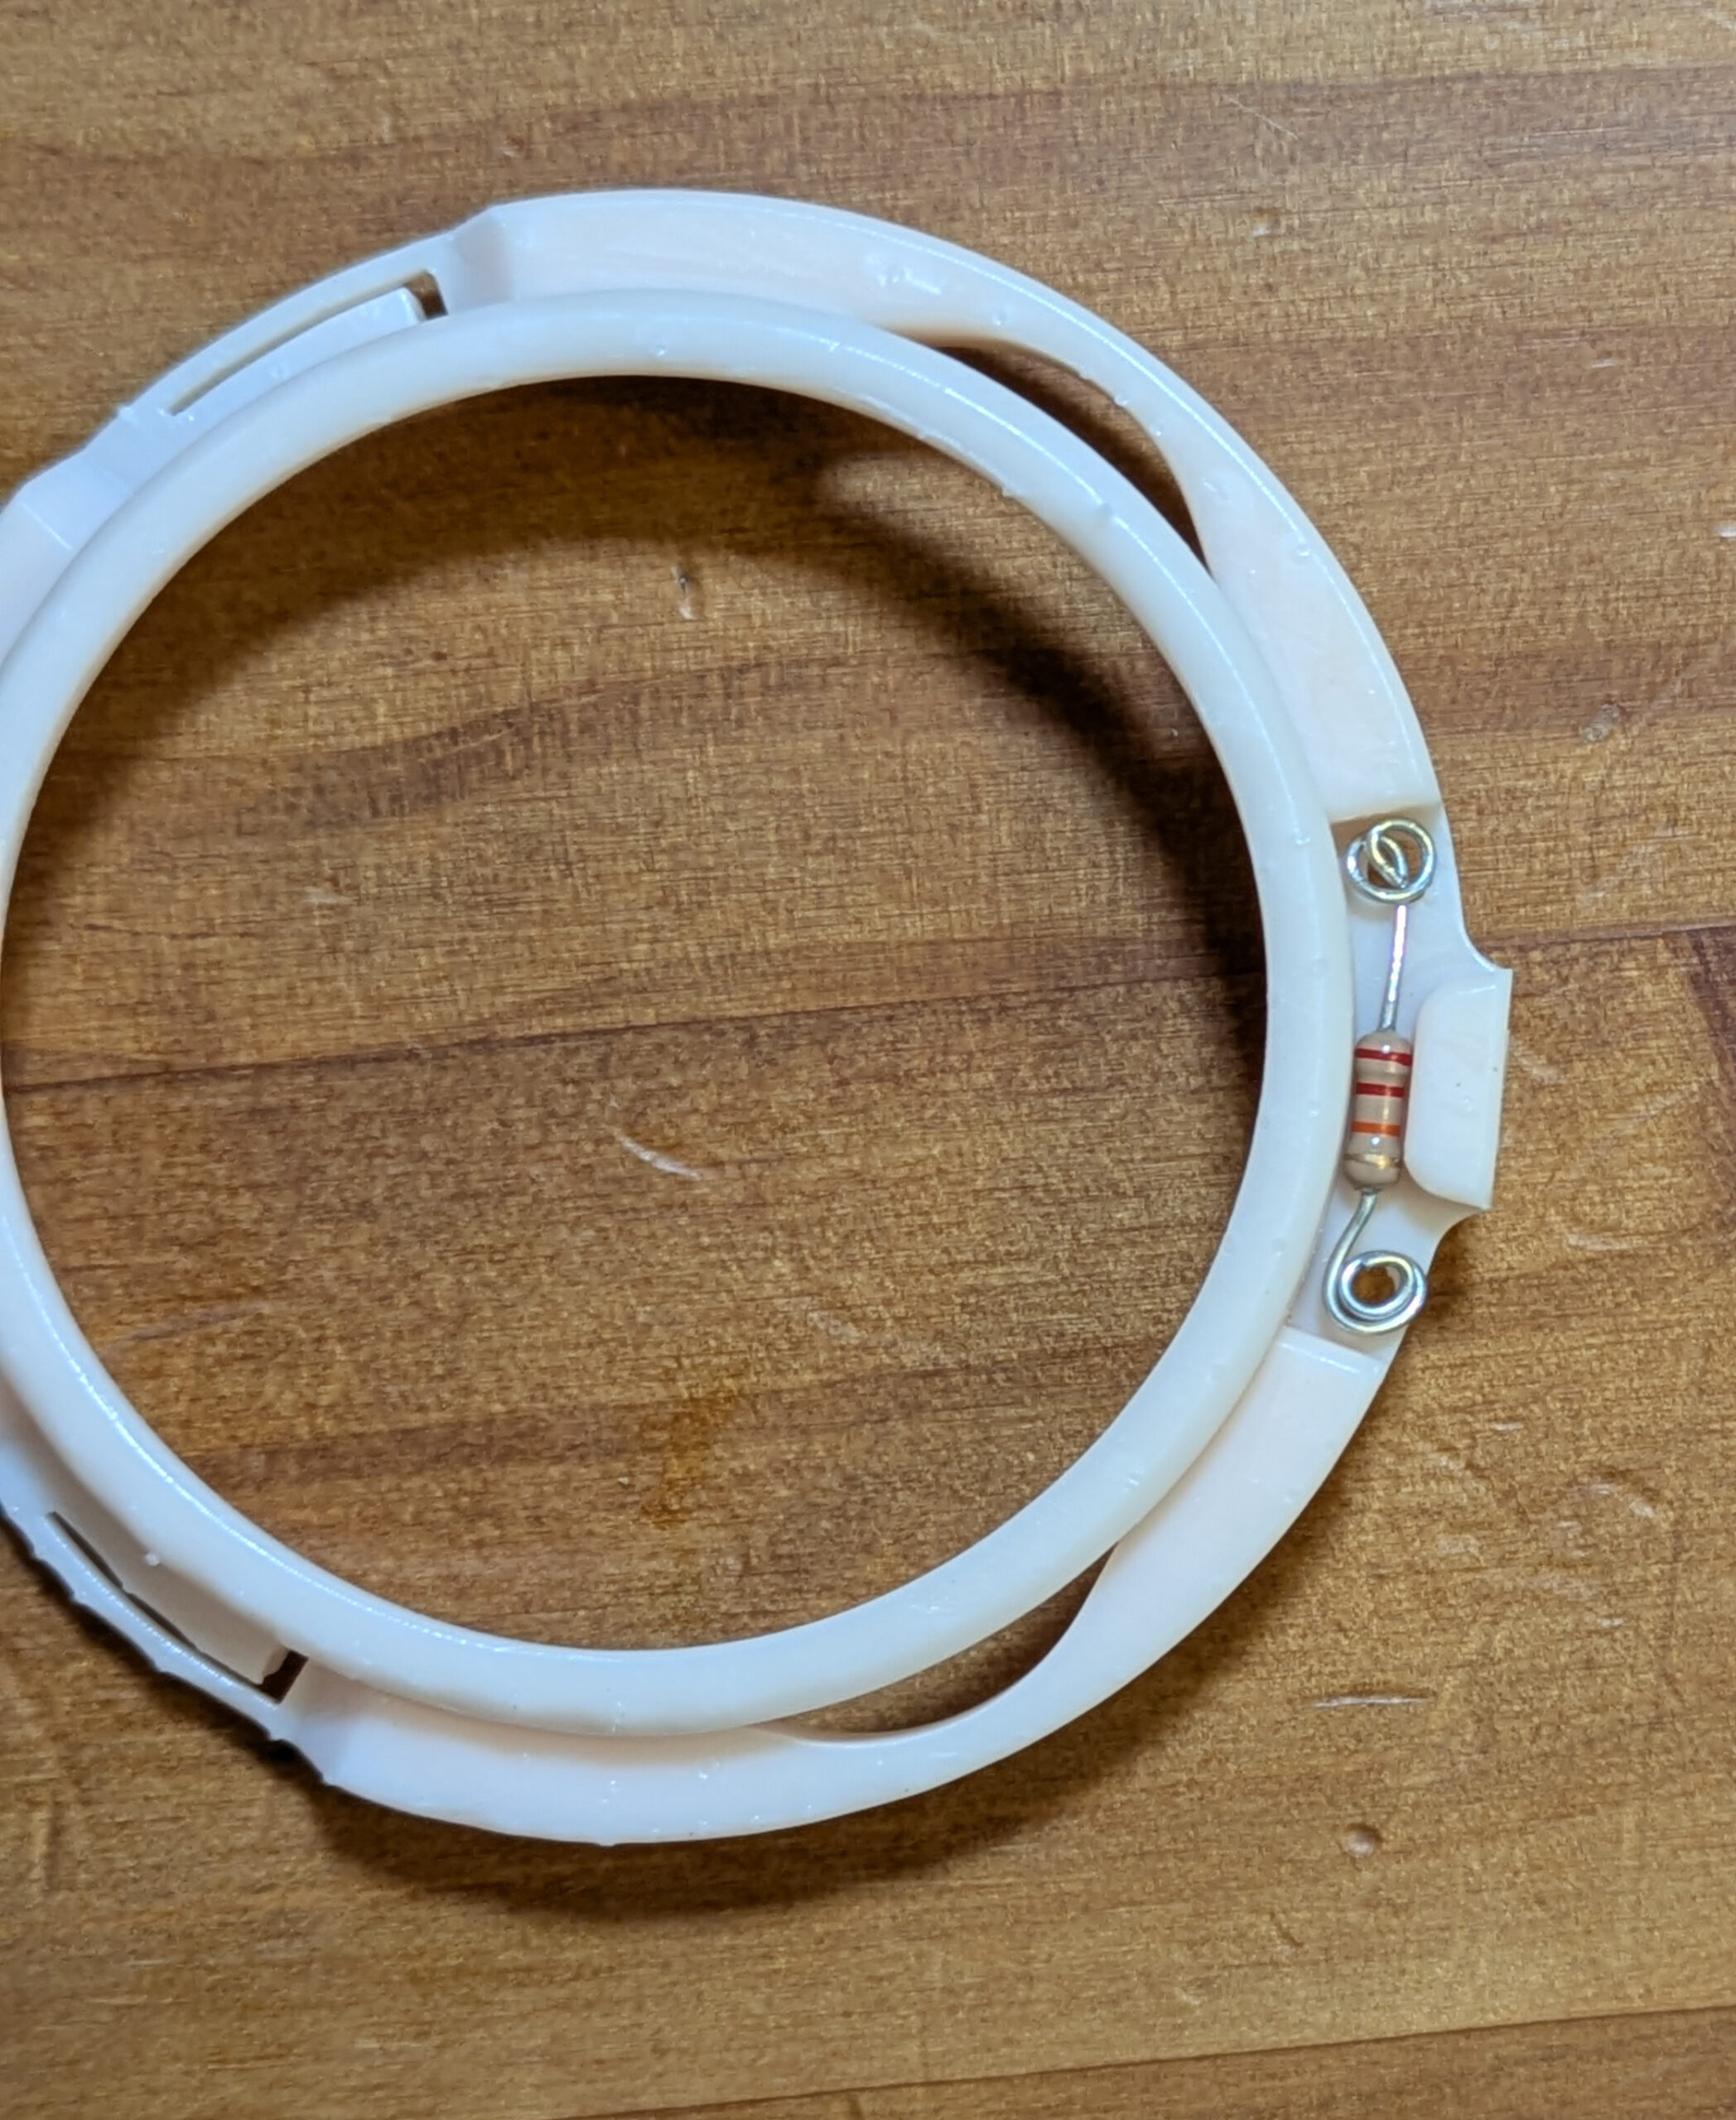
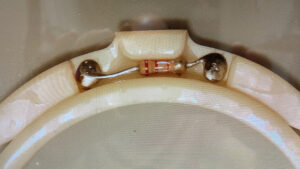
This especially smarts, as I already own a 2″ SVBony SV220 dual band filter that I use on my main telescope.  Luckily for me, aureliend2000 has posted a 3D model on Thingiverse that allows you to create your own ‘Vespera compatible’ filter by screwing in any standard 2″ optical filter.

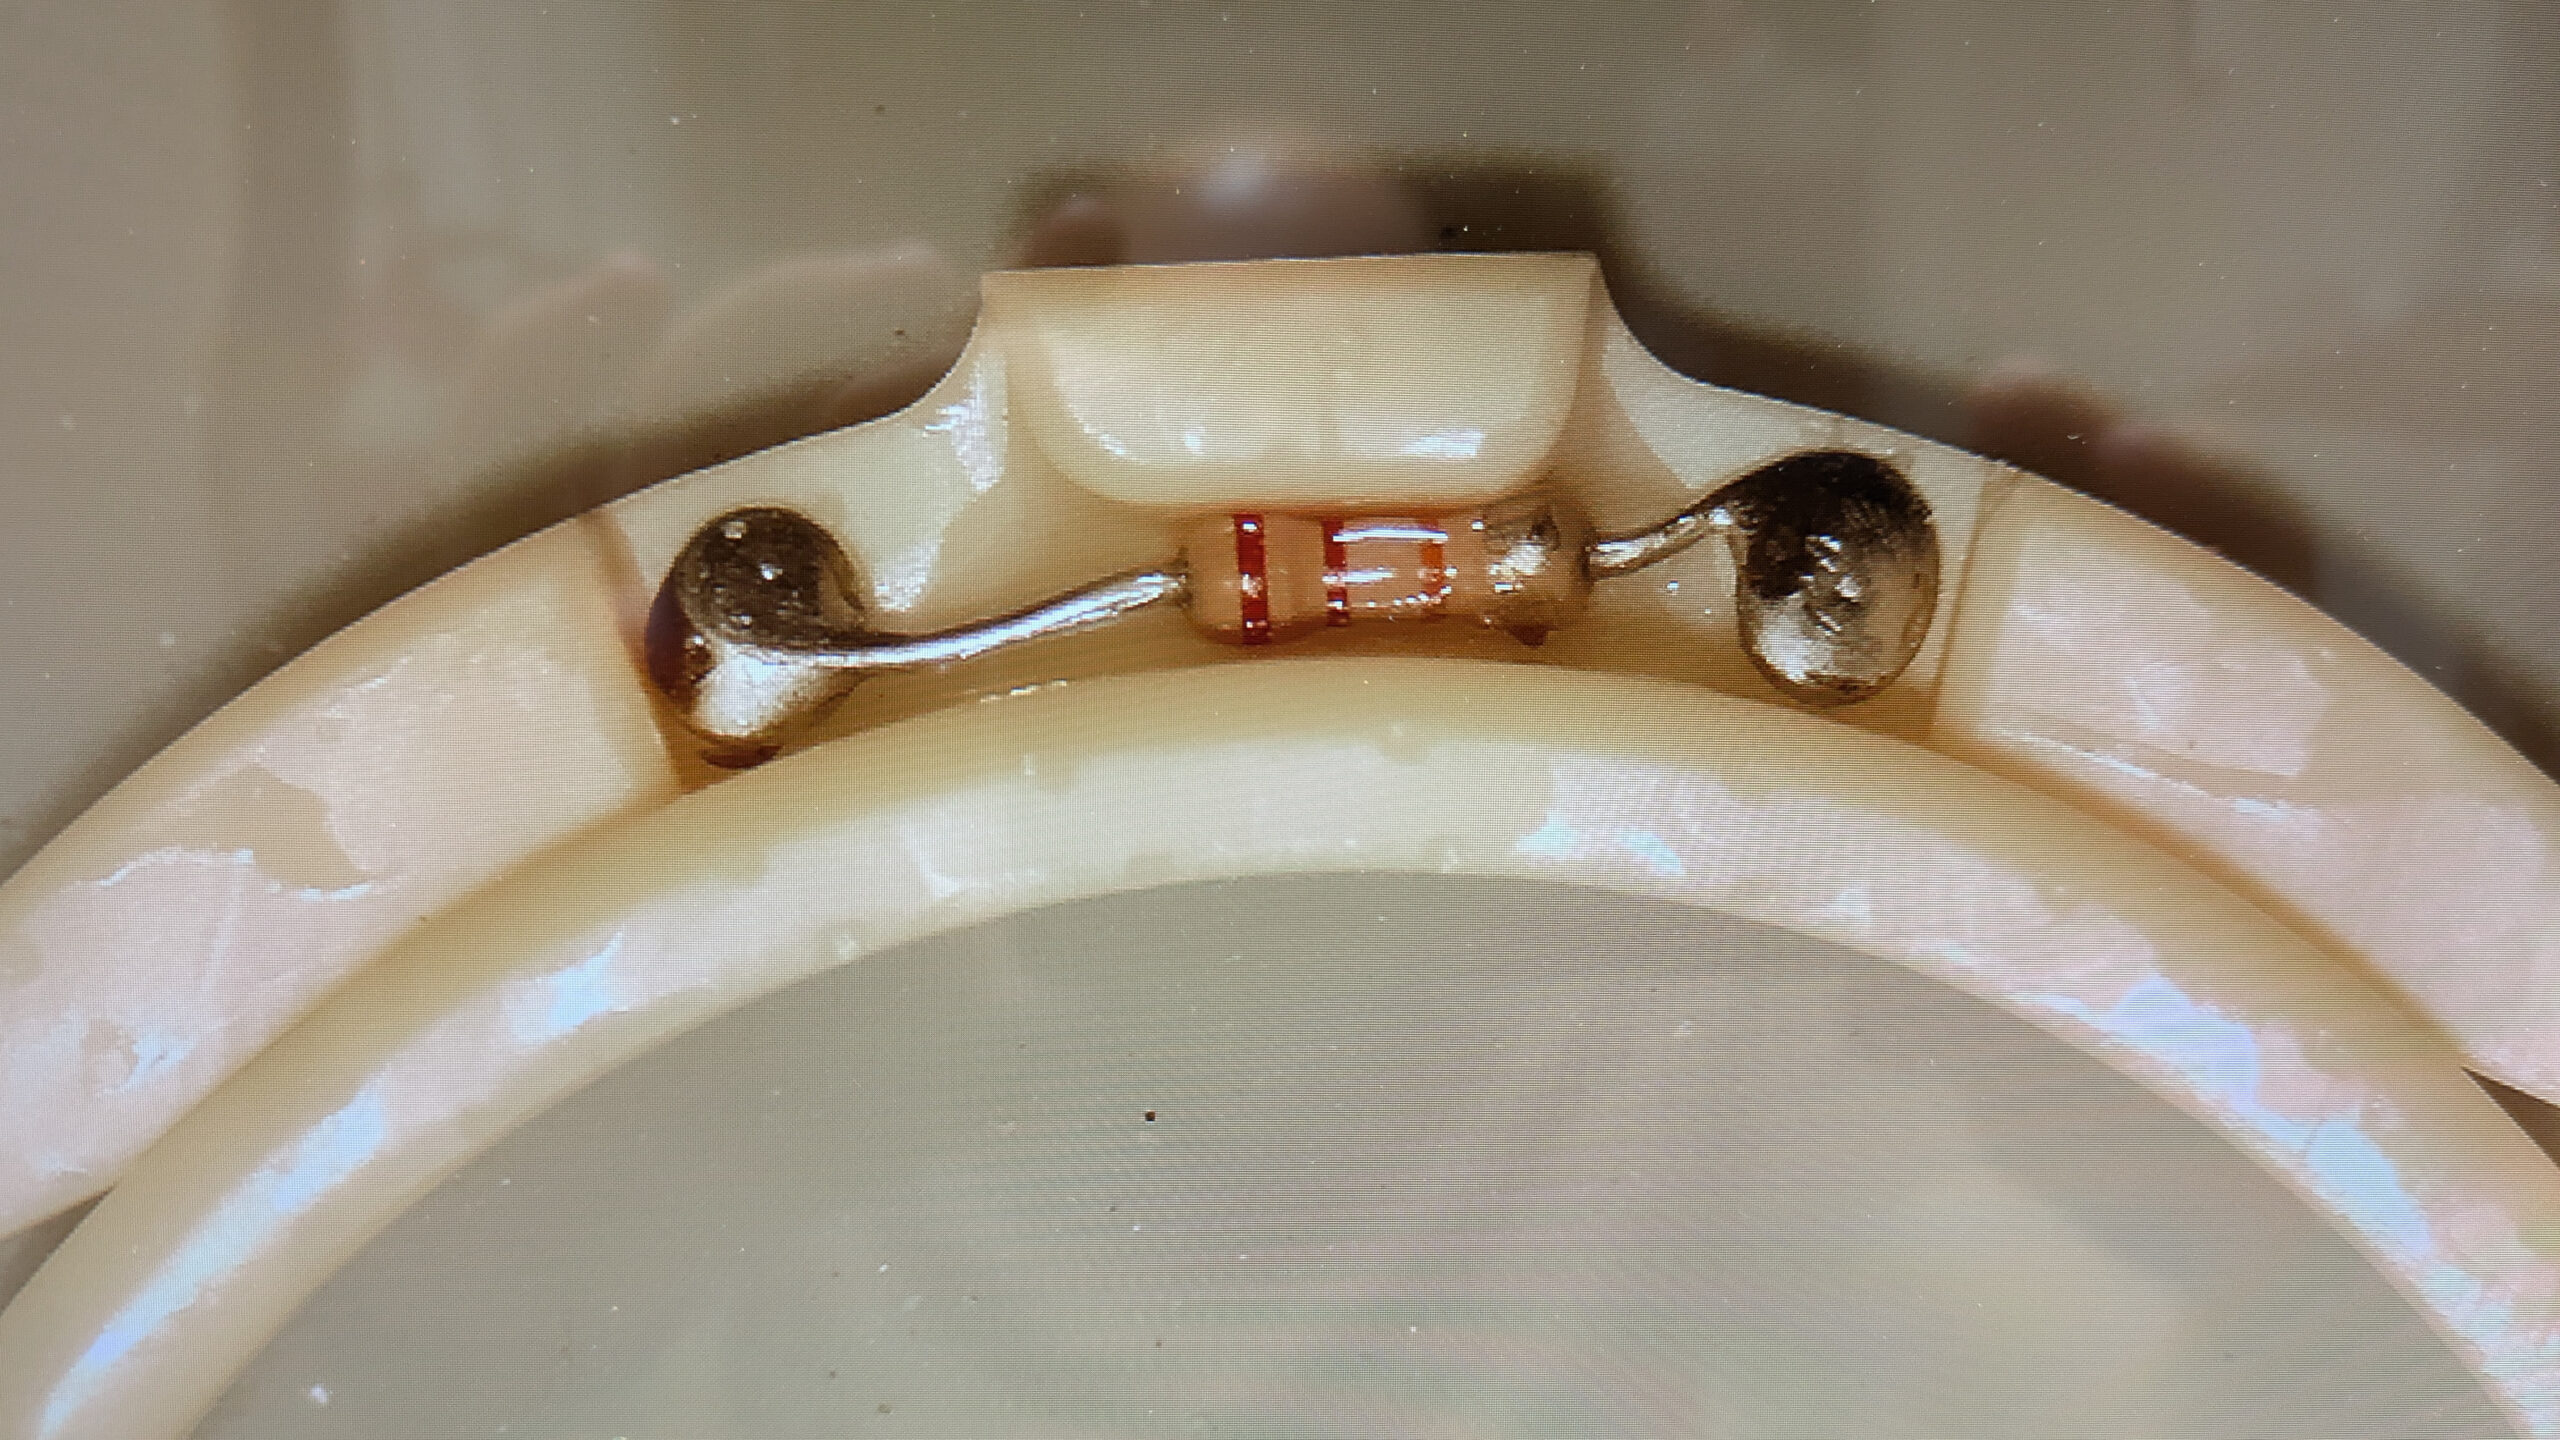
[And if you put a 24k Ohm resistor in the right spot, the Vespera automatically detects that a  “Dual” band filter is installed, setting the gain of the camera appropriately.]

Here is a video showing the full process of how I made mine:

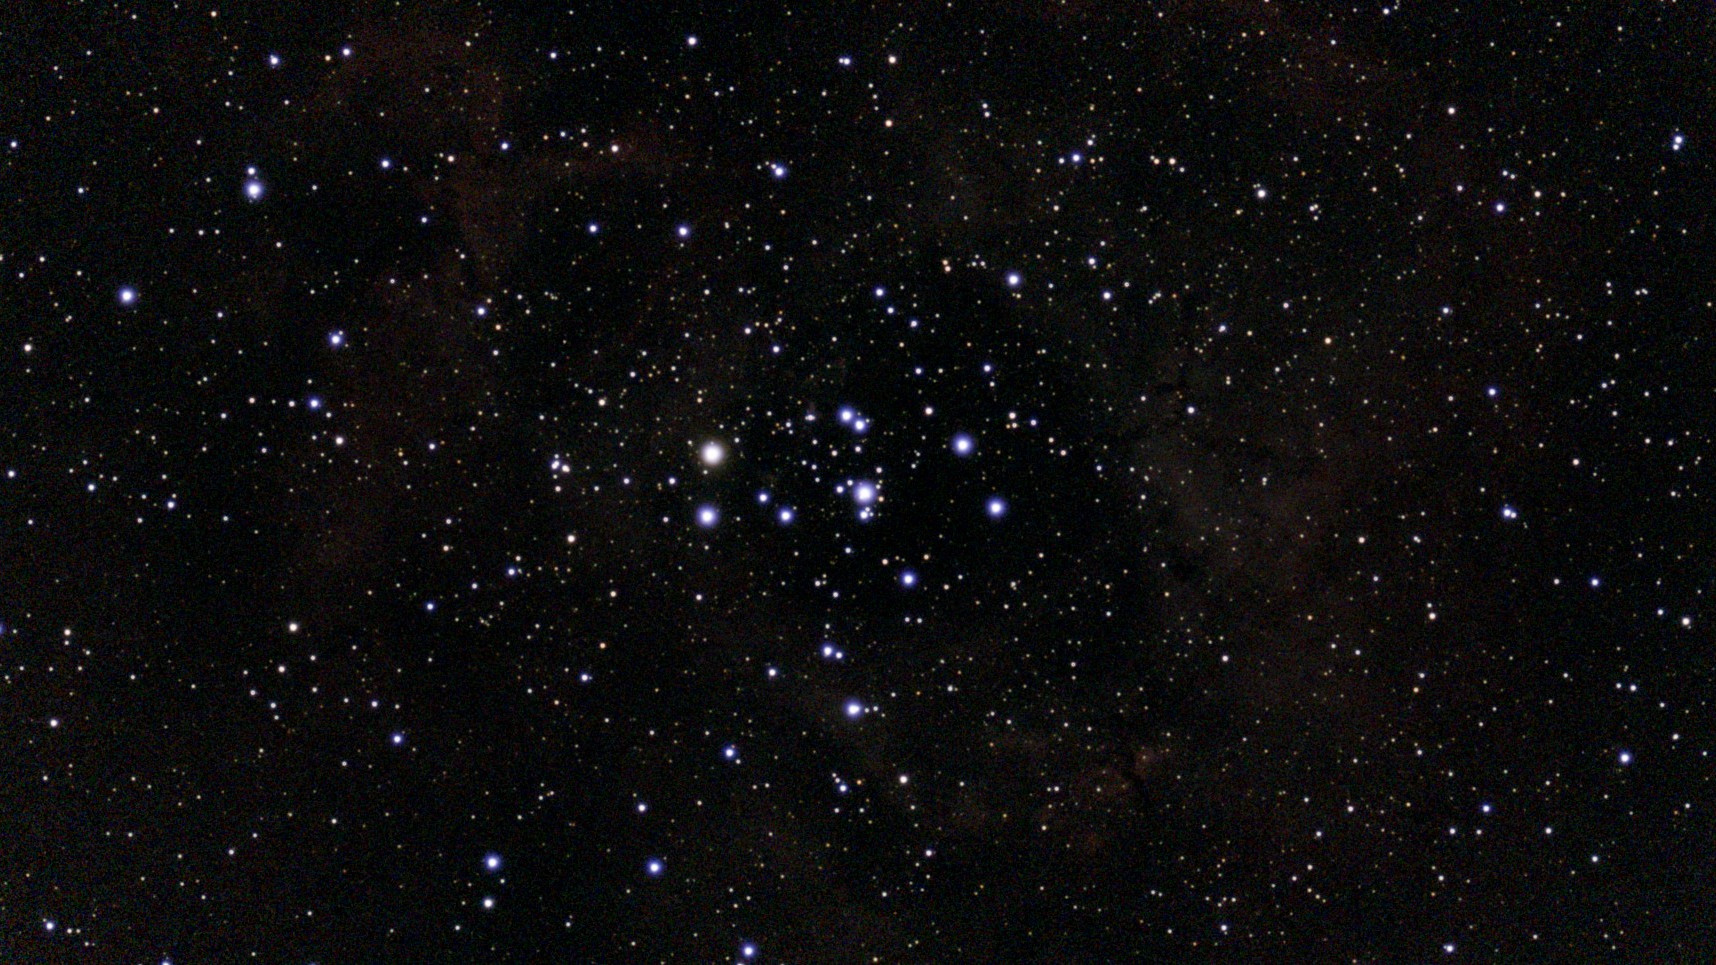
Here is a 48min exposure of the Rosette Nebula (from Bortle 7.5) without the Dual Band filter:

NGC2237_44 (290 exp)

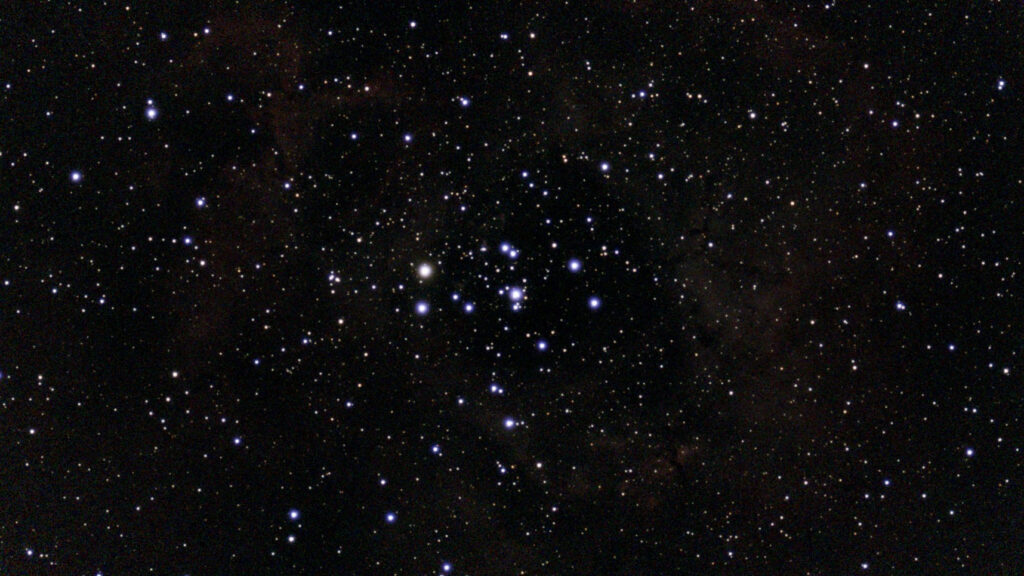
And for comparison, here is a  48 min exposure WITH the SvBony SV220 dual band filter:

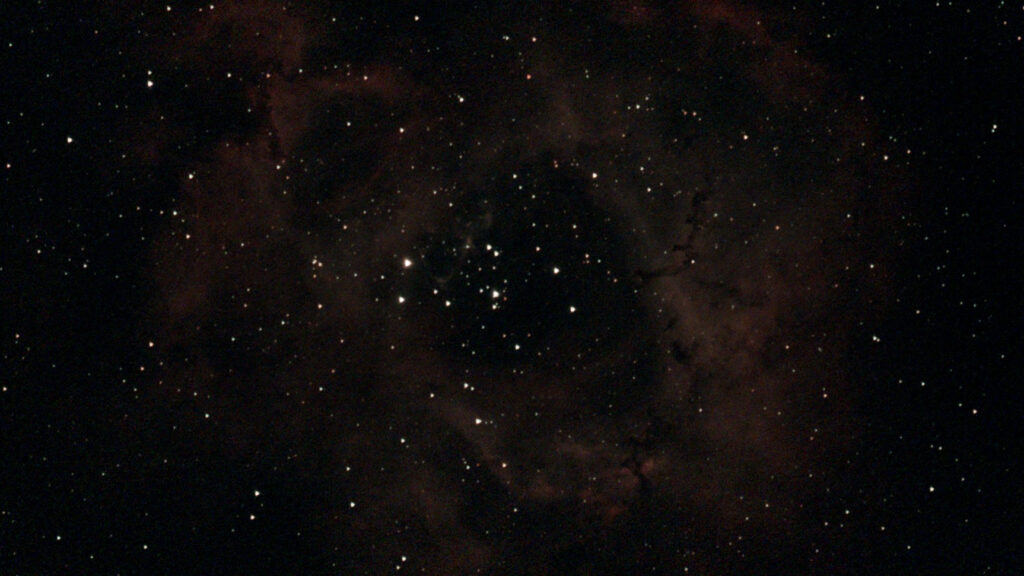
NGC2237_44 (287 exp)


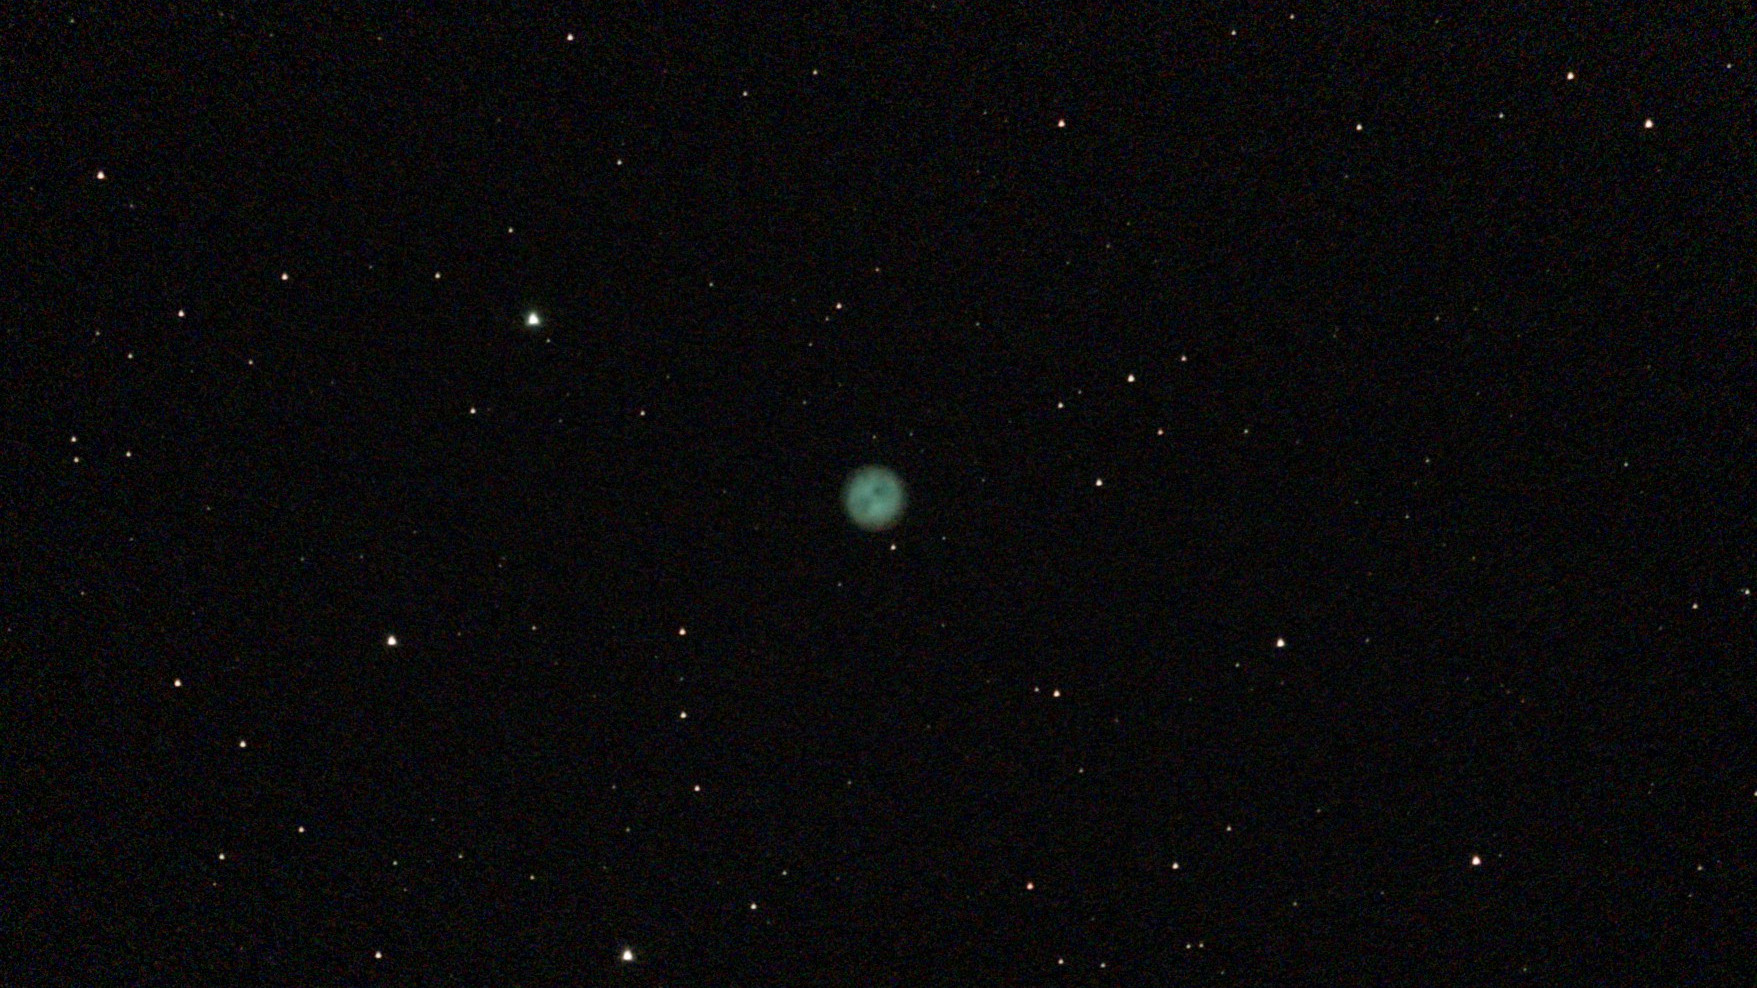
And here is a 57 minute exposure of the Owl Nebula using the SV220 dual band filter:
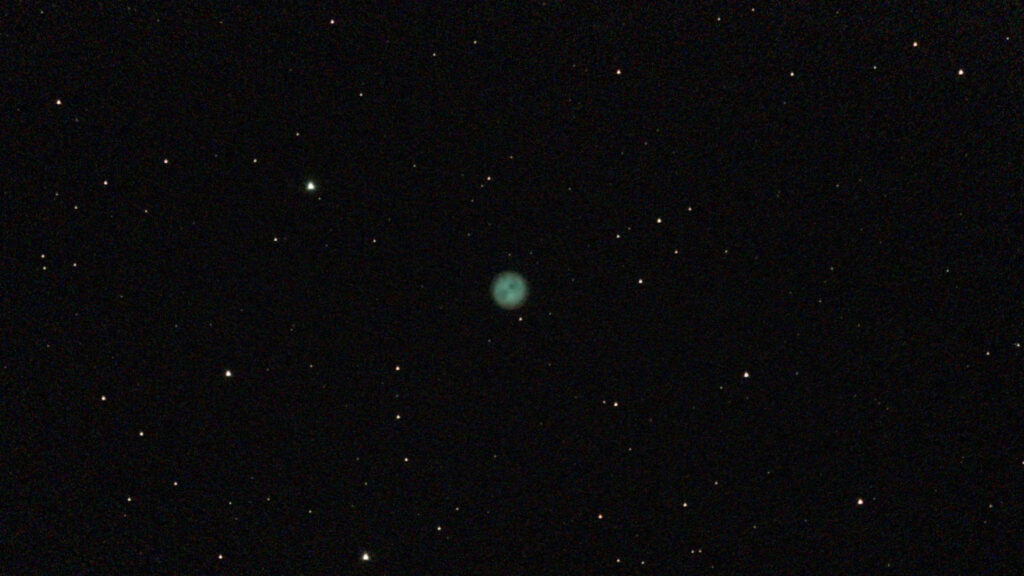
M97 (342 exp)

Considering I already had the SV220 filter, a 3D printer, and a 24k Ohm resistor “in stock” I’m very pleased with the ability to use a dual band on the Vespera without spending (any more) money.  I’m so happy with the result that I’ve ordered a sheet of solar film and plan on making my own Solar Filter so I can use the Vespera to image the sun.   [Yes, my Zwo Seestar S50 came with a solar filter and a built in light pollution / DB filter….but the optics, tracking, and software of the Vespera are all just slightly nicer, and since I got it used the cost wasn’t outrageous.]