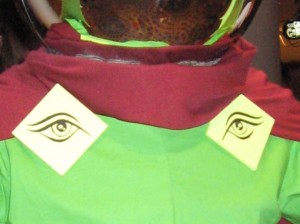
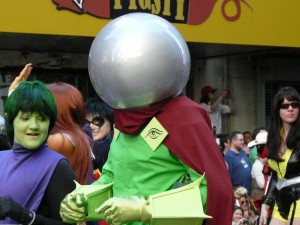
This picture shows the “eyes” for my Mysterio costume that I ended up using. Nothing fancy, Continue reading
Tag Archives: mysterio
DragonCon 2010 Mysterio Pictures
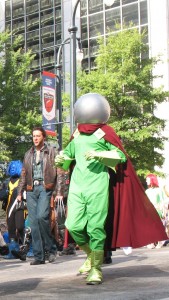
In the Parade, I was wearing the plastic “safety” globe. Visibility out of it was about 2%. I basically followed a succession of brightly colored costumes (Storm’s white hair, wonder woman’s bright red cape, Zoo Hercules’ gold reflective bandoleer, etc).
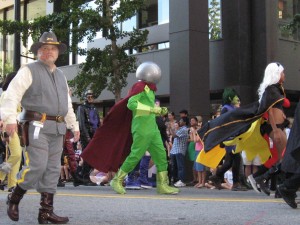
The photos below show the glass sphere which I wore in more static settings indoors and for photo-shoots. Thanks to Chris, Becky and the photographers named in the captions for sending me photos from Saturday and Sunday! Continue reading
Mysterio Strobe Effects
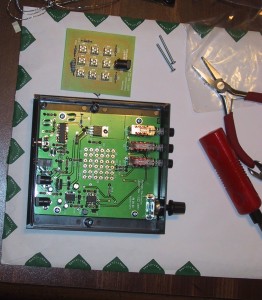
I soldered together my Ramsy Electronics LEDS1 LED strobe light kit today. The plan is to make the “eye” motif brooches (on the cloak’s shoulders) flash blue light.

Continue reading
Mysterio Business Cards
I’m in the process of making a business card to hand out at Dragon Con for Mysterio. I found the images at DragonHero.com but am having trouble contacting the site owner. (If anybody has an updated email address for dragonhero1@cox.net please let me know, it’s bouncing undeliverable.)
Mysterio Costume Update
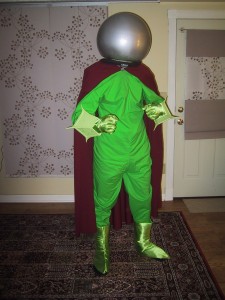
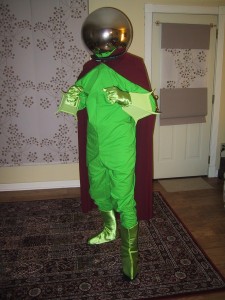
I have been working on the cloth portions of my costume, as well as purchasing an alternate (plastic) globe from a reader comment. Above are two photos of the jumpsuit, boot covers, bracers, gloves, cape, and sphere (glass and plastic) being worn together. The first picture is the plastic globe (harder to see out of, safer, more gray than silver) and the second picture is the glass sphere (very reflective, easier to see out of, made of glass).
Mysterio Fog Generator
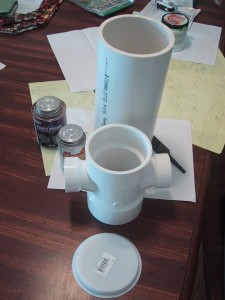
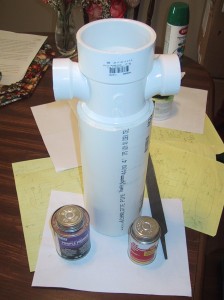
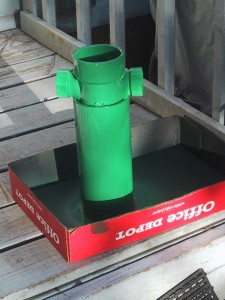 The grand plan for my Mysterio costume is to have a backpack worn fog generator using dry ice. (I’m not sure I’ll have time to get the fog generator or the strobe lights working, as I don’t even have the jumpsuit or boot covers finished yet, but I had the PVC parts so I started work on it.)
The Plan: Have warm water in the pipe–possibly with a loop of plastic tubing wrapped around my torso fed by a pump, which would have the dual effects of keeping my special effects water near body temperature, and cooling me off, which is important in Atlanta in the summer. I’ll have a basket of dry ice inside the tube that can be lowered using string, and a fan blowing air down the top of the pipe. The Dry-Ice Fog will billow out the sides of the T pipes and look really cool emerging from under my cloak. (How I wear the fog generator is not yet part of the plan, but I’m imagining something like a backpack, or suspending it from my cowboy collar.) It will be mostly hidden under my cloak, but since I had the emerald green spray paint left over from my color matching paint buying discovery, I decided it should be color coordinated.
Cost saving measures: I bought $5 worth of PVC parts (a 4″ piece of low pressure tube, a “knock-out” cap to seal the bottom, and a 3″ to 1 1/2″ 4-way adapter. By using the $1 knock out instead of a full 4″ PVC cap I saved several dollars and made the bottom of my fog generator “flat” instead of rounded. As it will not be under any pressure other than the weight of the water and dry ice, it should hold fine. [And if it doesn’t, I always have my “Uh oh, I think my water just broke” joke all lined up.]
I also saved money (and bulk) by using a 3″ 4-way adapter, instead of a 4″ one. A 3″ PVC pipe will fit perfectly inside of a 4″ PVC pipe if you rasp off the small protrusions. (The fact that I was informed of this by a “plumber” also shopping in the Home Depot plumbing aisle slightly scares me….but since I’m not actually running pressurized water through it, and it saved me another five dollars, I decided to follow his advice.)
Paint color matching for a costume / Painting the Bracers
I drove to Home Depot hoping to find some spray paint to somewhat match the color of my gloves. As it turns out, even with an entire wall of spray paint, the only color selections with a “green” hue are limited to neon green, emerald green (which I bought, as it was closest to what I want, and may be useful in the future) and a leaf green. None of them were quite right, but I also made a discovery about the house paint counter.
Home Depot will sell you “sample” pre-mixed paints in 7.5 oz bottles to “test” a color for $3! Continue reading
How to sew (costume) gloves (My Mysterio Glove)
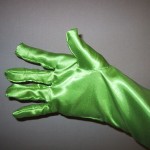
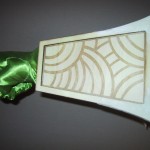
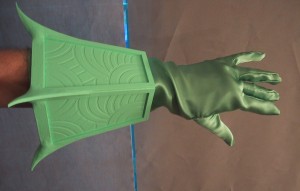
The pictures above show my right-hand Mysterio costume glove, on it’s own and with the bracer.
A note: I do not recommend that you sew your own costume gloves. It’s a lot of work, and takes a lot of time, which you can probably better spend on other aspects of your costume. However, if you have decided that your gloves NEED to be made out of specific fabric to match other aspects of your costume (such as Mystero’s boots), here is how to do it. Continue reading
Mysterio sphere, cape & bracers
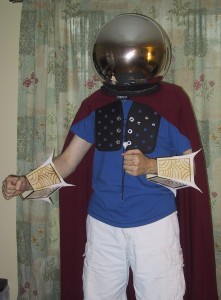
Here is a picture of the sphere, cape, and bracers put together. Obviously, I need to work on the green jumpsuit, gloves, and boots.
After a bit more work on the sphere, I am now able to see out of it relatively well. I used a standard green & yellow dish scrubbing sponge to buff/scratch away some of the reflective coating from the inside directly in front of my face when wearing it. I don’t have a lot of peripheral vision, and the view is slightly dimmed, but it’s much better than before. If you look very closely from the outside you can see that the “viewport” portion of the glass sphere is slightly less reflective than other areas, but because it’s dark inside the sphere I get the same effect as a one-way mirror. I have covered all of the rest of the interior of the sphere with packing tape as a poor-mans tempered glass substitute, but I will still be very careful walking or navigating steps while wearing the costume.
Sculpy Mysterio Hooks
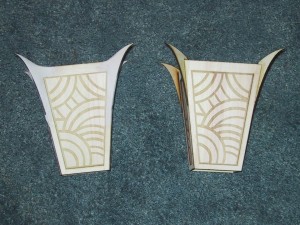
Today I sculpted some fillets onto my mysterio bracers using Sculpy (An oven baked modeling clay). This gives the “hooks” a more three dimensional appearance, a bit more strength, and smooths out the connections between the hooks and the bracer itself. I only used 35g of Sculpy per bracer, so the hooks are not extremely wide, but I’m glad I added them, even if it will end up taking me 5 extra hours of work.
In the picture, the bracer on the left has the Sculpy, and the one on the right is pre-Sculpy. Continue reading
