Replacing the S-Meter & LCD Backlights on an iCom IC-725 HAM Radio

Two of the three 12volt incandescent “grain of wheat” light bulbs in my 30 year old iCom IC-725 radio had burnt out, making it difficult to see the meter at night. (And one side of my LCD was much dimmer than the other, although it was still readable.)

Although they are soldered to the front panel circuit board, replacing them is relatively easy if you have a fine tip soldering iron and good magnifying glasses.

Access requires you remove the top and bottom covers, and then unscrew the screws holding the front cover in place (two on each side, and two on the top in the silver metal, not the two holding the plastic panel in place). This allows you to “fold” the front cover down without unplugging any wires to get just enough access to solder from the back of the circuit board.

Here is a photo of the rear of the circuit board with the locations of the three lights marked in yellow (the red dot is a 4th hole that is directly behind the LCD, and looks the same, but was unpopulated in my radio. It’s possible a light is supposed to go there in the original design, but it doesn’t look like there is any way for the light to get to the back of the LCD panel from that hole (i.e. no light guides as seen in the other two holes on the sides of the LCD).

I just held each leg of the bulbs with a pair of tweezers and pulled it out of the solder blob after heating it up with my micro tip soldering iron.  To install the new bulbs, I carefully clipped the legs to length, and then pressed them into the solder blob with the tweezers. [Only in one case did I have to add a drop of my own solder to help thermal conductivity to get the original solder to melt and flow around the bulb leg.]  Be careful to not drop any metallic leg clippings into your radio.

The original bulbs were very small incandescent bulbs surrounded by a yellow overlay that makes them look like LED’s, but they are NOT LED’s.   If you could find some 12 volt side throwing LED lights you could use those to replace them for longer lifespan, but given that the radio is 30 years old now and only 2 of the 3 original lights burnt out, I’m hoping these replacements will last a long time.

The ones I purchased were larger than the original lights, but fit the holes fine. I got them from e-bay seller: “Affinity For Artifacts” (About $12 shipped)
Qty 5 Light Bulbs Icom IC-720 IC-721 IC-725 IC-730 IC-735 S Meter Backlight Lamp
https://www.ebay.com/itm/126120391794

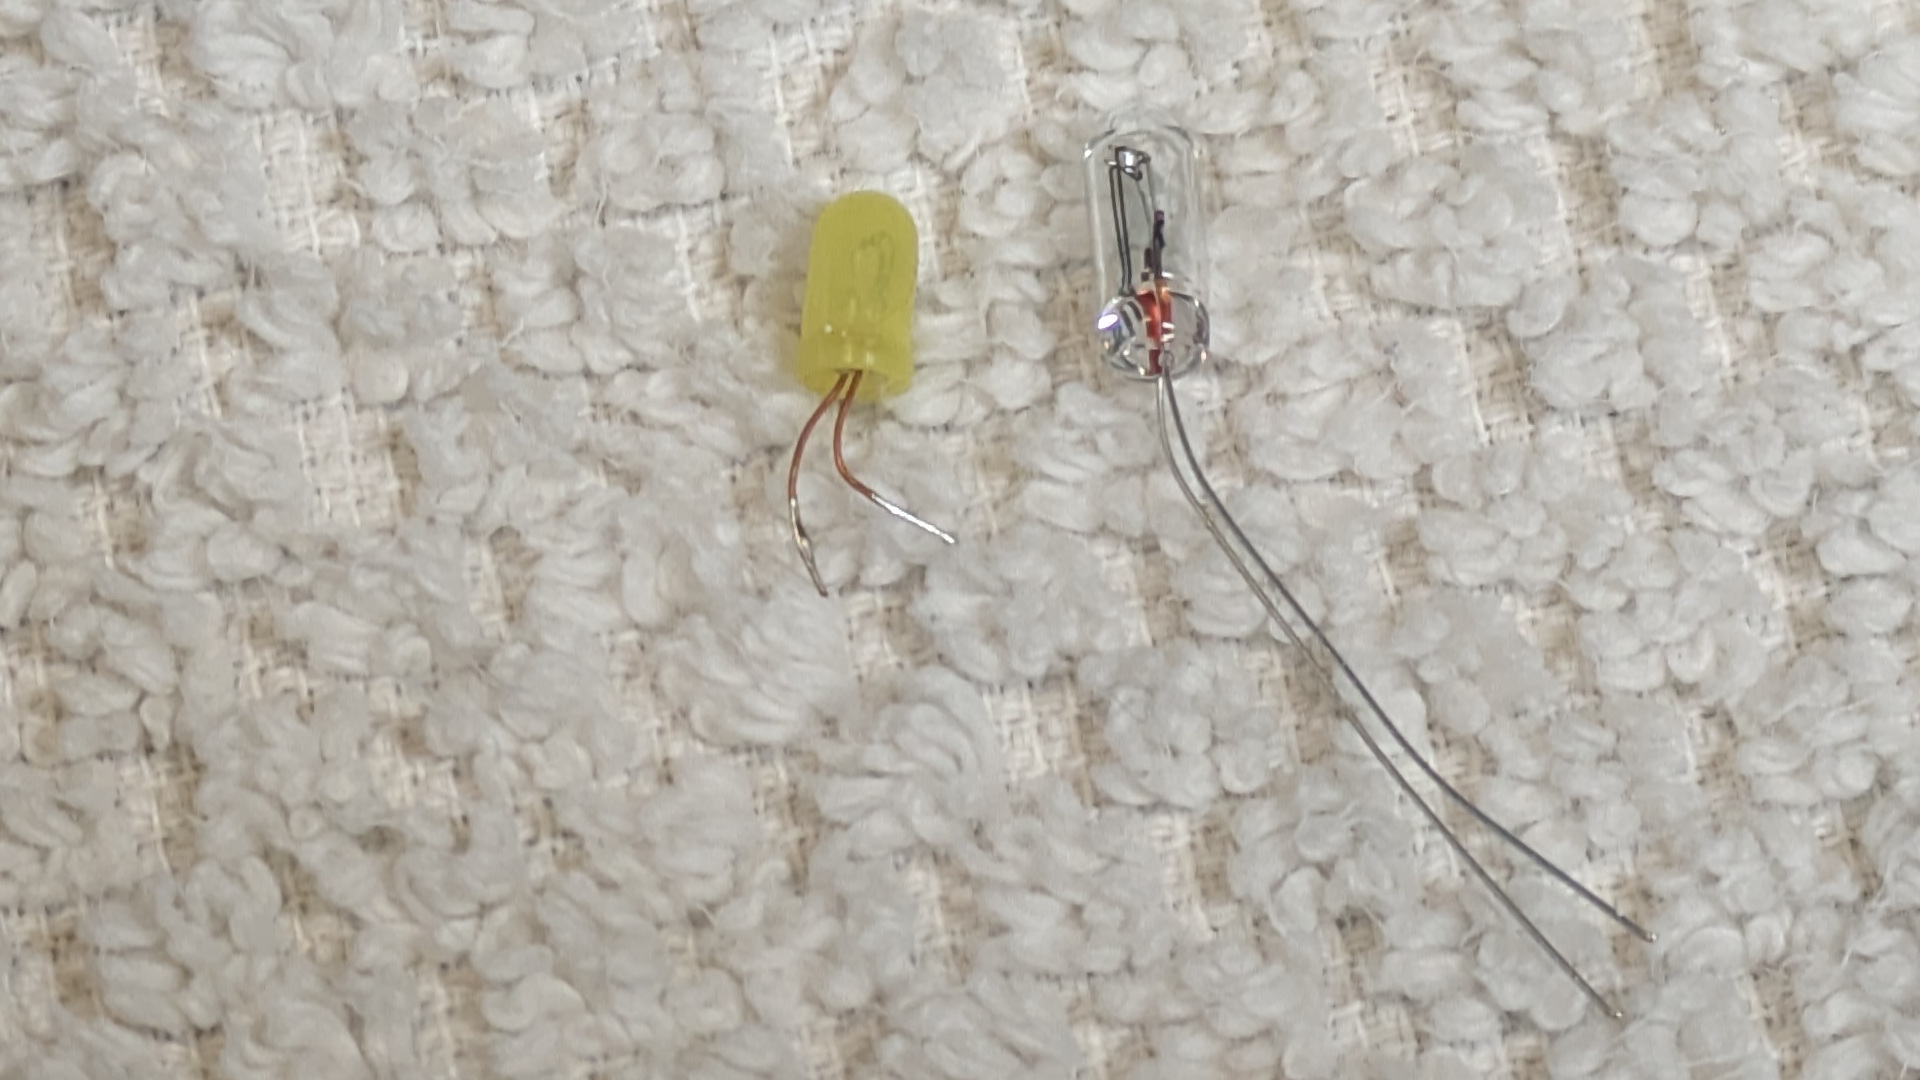
The original (yellow plastic cover) is on the left and measures:
3.35mm diameter, 6.25 mm length (plus wire leg length)

The replacements (on the right) measure:  3.74mm diameter, 10.15 mm length
(and stick out the back of the circuit board just slightly)

This photo makes the center of the LCD look darker than by eye (perhaps that mystery empty 4th hole was designed to counteract this?) but in person I didn’t find it very noticeable.
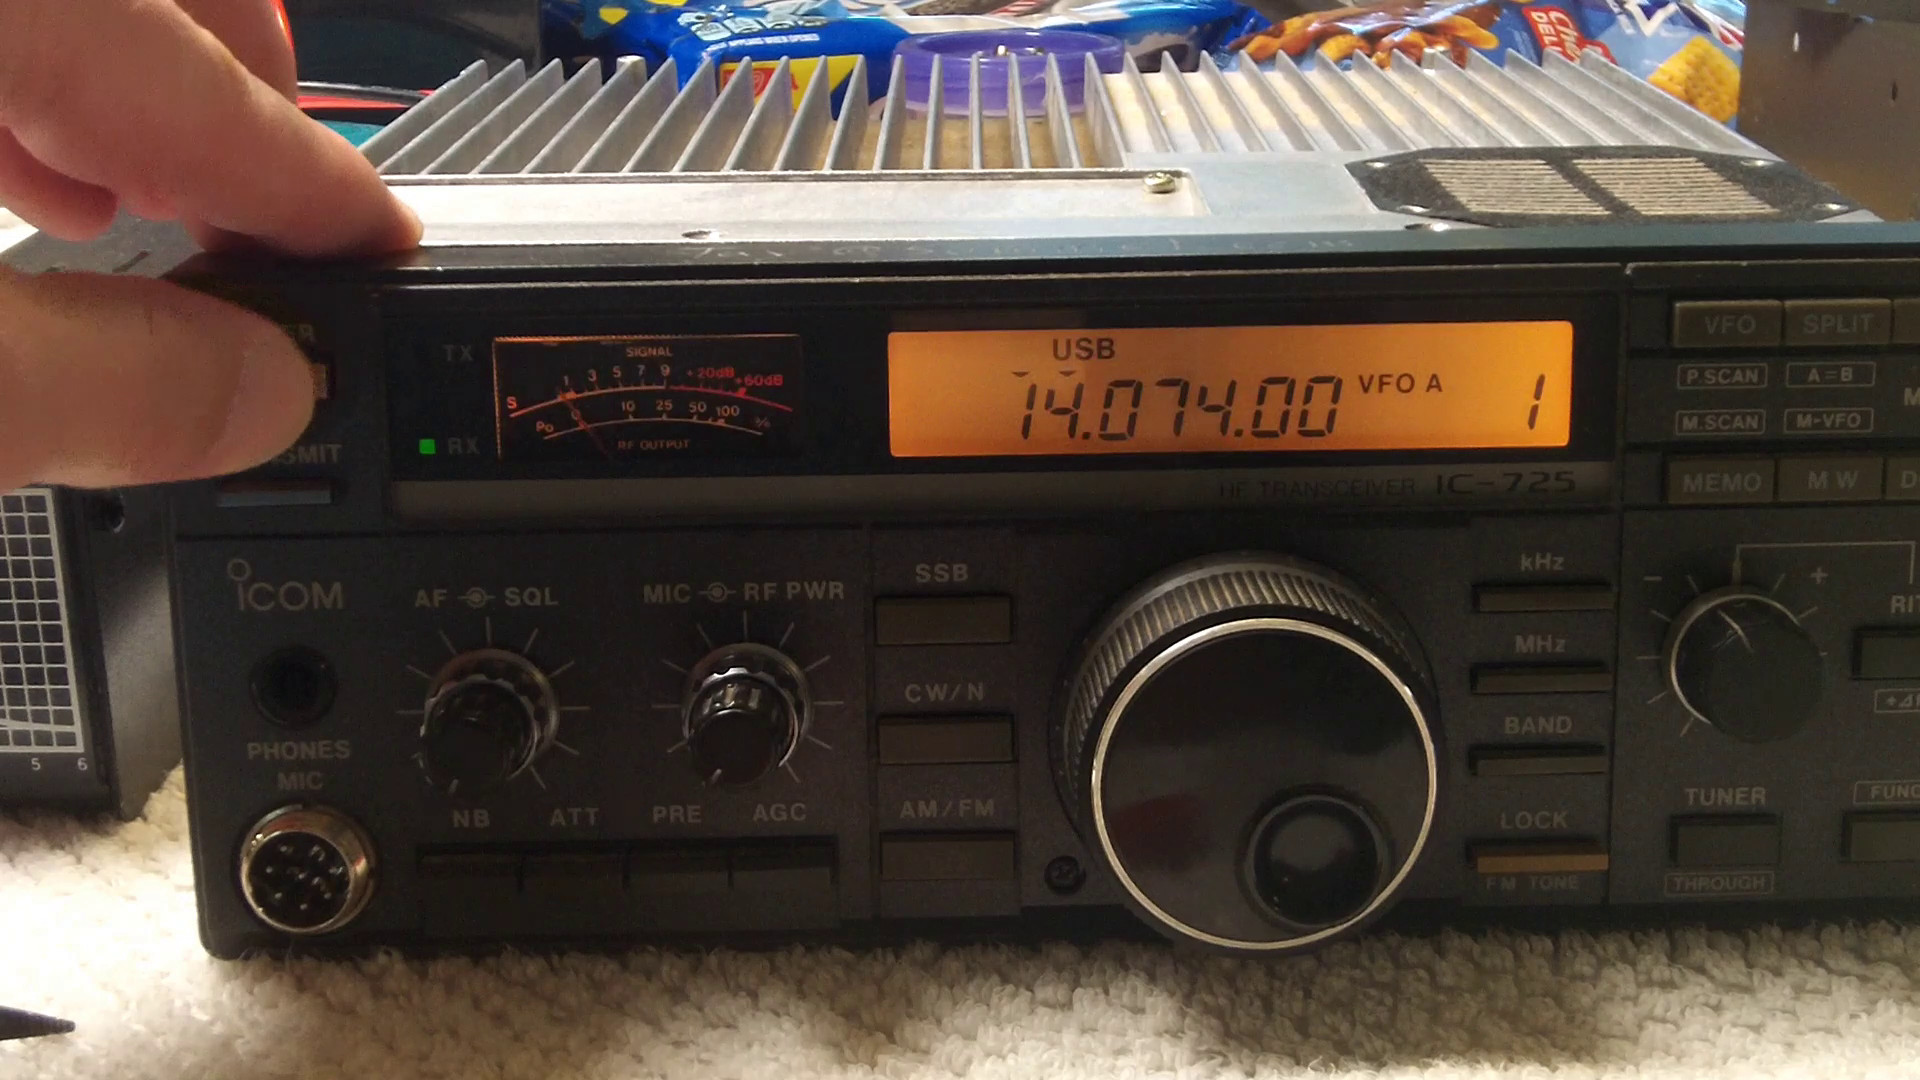
Final result


Flashing the One Time Programmable (OTP) eFlash fuses on an u-Blox M8Q GPS to default 4800 baud and GPS only mode

To issue an One-Time Programmable (OTP) eFlash message in u-blox u-center use the “Messages View” to send specific binary commands to configure or flash the device.
This is done by opening the message view, selecting the CUSTOM type, pasting the command string, and sending it.

WARNING: This is a one time only, non-reversible procedure. After you blow the eFuses with these commands, the M8Q device will ALWAYS default to 4800 baud and GPS only mode on startup. (You can connect to it at 4800 baud and issue configuration messages to change this, but the next time the device is powered down without backup memory power, it will revert to the 4800 / GPS mode only defaults.)

To program 4800 baud default:
B5 62 06 41 09 00 01 01 30 81 00 00 00 00 FC FF 20

To program GPS only mode (disables GSV messages about individual satellites, reducing the total amount of data sent each second):
B5 62 06 41 09 00 01 01 31 81 00 00 00 00 01 05 2C

The above eFlash commands are not published by uBlox (they probably don’t want random people permanently changing the startup default behavior of their GPS units without understanding the irreversible nature of the command) but were provided by u-Blox technical support upon request.

WARNING to LX200GPS users: The uBlox M8Q can ONLY handle 3.3 volt TTL signaling. The Meade LX-200 holds the GPS TX pin high to 5 volts (but uses a level shifter to 3.3v for the GPS RX pin???), which has killed my TX pin (latch up) on a SAM-M8Q unit. So I’m switching over to using a Beitian BN-220 module.

Easy Setup for RTL-SDR (v3) on Ubuntu Linux


Quick HOWTO on how to configure Ubuntu / Lubuntu (24.04 or later) to work with the RTL-SDL Blog $50  hardware kit (that includes a dipole antenna)

The RTL2832U chip in the v3 dongle is designed for DVB-T (European digital TV standard) and not for the ATSC standard used in North America. While these dongles are excellent for general-purpose software-defined radio, they lack the necessary bandwidth to capture the 6 MHz ATSC channel width, as they are limited to approximately 2.4–2.8 MHz of bandwidth.


If you want to go more in depth and download / install some more software, I highly recommend the “Intercept” package which makes it relatively easy to switch between a LOT of cool things to receive:  https://github.com/smittix/intercept


The following commands were used to get the hardware up and running using only “repository” sources, no downloading software from github and compiling and installing anything yourself.   (If you are willing to go that route, look at Intercept linked above, as its install script makes things as painless as possible.)
Continue reading

Vespera 1 (VE50) vs Seestar S50


This test is both very unfair, and also fair:
First, I just placed the two telescopes outside and set them to image the same three objects for the same amount of time, and I didn’t try super hard to keep the imaging area the same. Both telescopes have mosaic modes, and if I used them, I used the android app for each telescope to “eyeball” them to be about the same general size around the target.

Continue reading

The $650 budget HF Ham Radio setup for Voice & Digital Modes

Ham Radio can be a very inexpensive hobby if you are using a $30 Baofeng handy talky on the 2m or 70cm bands. But when you get into the lower HF bands (160-10m) costs start to mount (in both the core radio as well as the larger antennas and mounting hardware).  I was able to put together a budget ham radio setup for $650, and I don’t see a lot of room to go lower than that without getting parts donated or using a much lower quality radio.

I have a listing of the model/part numbers and links to sources below.

With this IC-725 radio and a 20m Dipole (mounted only 20′ up in the air) I’m able to easily make good voice contacts 1000-1,500 miles away (New York & Colombia).

Using FT8 digital mode at 100 watts, I can reliably reach most of North and South America and parts of Africa. (If I re-oriented my antenna to face Europe, I’m sure I could also easily make contacts there).

My longest contact to date (at a -19 reception level) was to Chongqing, China, but this was during exceptionally good atmospheric conditions (lots of bouncing through the F layer of the ionosphere) and it’s not something that happens regularly.

PSK reporter shows all of the remote stations have have heard my callsign (just because the can hear me, doesn’t necessarily mean I can hear/work them, as my IC-725 probably isn’t as sensitive as many newer transceivers).

Note that I’m using my “fair weather” radio outdoors on the patio, so I don’t have any lightning suppressors, grounding rods or wall penetration hardware/boxes, which will probably eventually add another $100-200 to make a permanent “ham shack” install.

I’m also planning on upgrading to a RadioWavz 40m DX off center fed (OFC) Windom dipole that will be resonate at 40m, 20m, and 10m, allowing me to try out two other bands without buying a separate antenna tuner (I’ll probably upgrade to a newer radio with a built in tuner before buying an external antenna tuner).

Parts list with costs and source links:

Icom IC-725 Ham Radio – 30 years old, 100 watt transmitter that covers 160-10m bands (but only if your antenna is resonate at the frequency, as it doesn’t include a built in Antenna tuner). $300 used  (The Icom IC-7300 (not Mk2) can be purchased new for $1,000 right now on discount because ICom released the IC-7300Mk2, and is a direct replacement for this radio that is better in every way except price.)

Icom HM-36 hand mic (with Up/Down buttons) $40 used (+$10 s/h)
(I really appreciate the up/down buttons on the hand mic for searching the band at 1kHz increments….)

RadioWavz 20M “Double Bazooka” Dipole antenna ($40 used, $80 new w/ shipping)

DigiRig Mobile (CI-V configured) with ICOM CI-V Din 8 cables: $87.93 shipped
(I also recommend their shielded USB cables to prevent any RF/EMI from messing with your computer.)

Surplus LiIon “12 volt” (really 13.5 volts) 28 Ah battery: $60
(You could also buy an AC 13.8 volt 30 amp power adapter for under $100)

~ $100 of rope, pulleys, and coax to hang and connect the antenna (Note that I’m using my “fair weather” radio outdoors on the patio, so I don’t have any lightning suppressors, grounding rods or wall penetration hardware/boxes, which will probably add another $100-200 to make a permanent “ham shack” install).

50′ RG58 coax with PL259 connectors: $30

500′ 3/16 inch Black Dacron Polyester Rope $40
(I had some left over…)

2x U-Type Swivel Pulley 304 Stainless Steel $20

40 lb Neon Fire fishing line – 370 Yds (used to pull ropes and pulleys into trees) $13

I also used my son’s 20lb draw bow and arrow (for free!) but you’ll need something to launch the monofilament fishing line over tree limbs. I’d recommend a “Tree throw weight” thrown by hand as your least expensive option at $15 You can also buy a complete kit that includes 3mm rope instead of fishing line and a bag for $22.

Copilot vs ChatGTP for Meme Image remixing


Finding this meme on the internet, I decided to use AI to re-mix it to feature a family dogs’ face instead.

I gave the above two images to both CoPilot and ChatGPT with the following prompt:
“I have uploaded a picture that has words at the top and a picture of a red glass reflective Christmas ornament that has a reflection of a black cat looking out of it. I will next upload a photo of the face of a dog and I want you to replace the reflection of the cat with a reflection of the dogs face. Make the output image as high resolution as you can without modifying the text.”

Here are the results:

Generated by CoPilot

Generated by ChatGPT

Both AI tools performed well in this simple image merging task. I feel like CoPilot ingested the details of both images and generated a new image using a “generic” version of the dog photo, while ChatGPT generated a much closer match to the second source image (However, this gives a bit of a two images photoshopped together vibe, probably because the dog face isn’t tinted quite red enough.)

Configuring a Baofeng 5RH-Pro radio to beacon your GPS position via APRS

I can’t really recommend the Baofeng 5RP-Pro radio, as the out of the box experience is annoying (having to delve into the depths of the internet to upgrade the firmware, and configure lots of things “just right” to get APRS position beaconing working).   It also isn’t supported by the open source CHIRP radio programmer (yet).  BUT, it is a $34 radio that CAN support GPS position beaconing via ARPS with a little work, so it has that going for it.  [If you want a nice inexpensive HT that “just works” (and is supported by CHIRP) and don’t care about GPS/APRS, I recommend the K6 instead.]

So, here is how to configure it to beacon your GPS position via APRS ( assuming you have upgraded it to at least firmware version 2.0.9) from the factory “reset” settings:

  1. Hit the green bar menu button (above the 1 key) to pull up the menu, and navigate to the GNSS section.  Go into “1. GNSS On/Off” and turn the GPS receiver to “ON”.  [If at any point you want to stop broadcasting your location, you can just turn the GPS off, as the APRS system won’t send out beacons if the GPS doesn’t have a position lock.]Note that while the GPS receiver on the radio is “good” it’s not “great” and you may need to go outside for it to get / keep a GPS fix.  You can navigate to the “2. GPS Info” section and then “1. my position” to see if it has a fix and how many satellites it can see. If your Lat/Long are all zeros, it doesn’t have a fix yet.
  2. Go back to the main menu, and navigate to the very bottom where the “APRS” section is.
    1. Under “1 APRS Ctrl” turn it to “ON”
    2. Under “2 Ana APRS” set “3. Source CallSign” to your licensed amateur radio callsign (I mean, you do have one, right?). Under “4. Source SSID” you COULD use the default -8 which is for “boats, sailboats, RV’s or second main mobile”, but I recommend using -7 instead, which is for “walkie talkies, HT’s or other human portable” unless you have it on your boat or RV.
    3. Under “2 Ana APRS” go into “8 Upload Freq”, and then “1 Upload Freq 1” and select “2 Edit” and change it to the APRS frequency you want to use. I’m using the 2m standard of 144.390 Mhz. Then use the “1 select” option to make sure that “upload freq 1” will be used.  If you commonly switch between frequencies, you can save others under the 2,3,4 etc… slots.
    4. I DO NOT recommend that you muck with the “Signal Path” variable, as I couldn’t get it to work correctly with firmware 2.0.9.  The default is “WIDE1 -1,_”  (note the space between WIDE1 and the -1…and I have no idea what the underscore means).  Also of note is that even with this default setting, the actual packets that come out of the radio say “WIDE1-6” when received by my direwolf digipeter.  I tried changing this path to something ‘normal’ and direwolf just complained about the packet format until I reset the radio to factory defaults.
    5. Under the main “APRS menu” navigate down to “5 Intervals Set” and pick your beaconing interval. (I’d use 1 min for testing, 5 min for walking around, or 30 seconds for driving fast…)
    6. Go to the “6 Upload Beacon” and change it to “GPS Beacon”
  3. Wait for the radio to get a GPS fix (you may need to go outside) and it will automatically start sending out APRS beacons. [Hint: If you tune the VFO on your radio to the same 144.390 frequency, you can hear the machine like “modem beep” when it goes out.] It’s very helpful to be running your own digipeter with a 2nd radio locally to look at the packets to make sure everything is working, but if you are close enough to an APRS internet gateway (igate), you can just look up your packets online at the https://aprs.fi website.

Halfway optional settings that you probably SHOULD change (but won’t prevent APRS Position beaconing if you don’t):

  1. “GNSS” -> “3. Time Zone”  If you want the time from the GPS to be correct, set this to your UTC offset. Note that it doesn’t automatically handle daylight savings time, so if you are on the US East coast, you need to pick -05 for EST and -04 for EDT.
  2. By default the radio is sending out “MIC-E” status of “emergency”. So under “APRS” go to “2. Ana APRS” “14. Encode type” and change it from “MIC-E” to “Position”.  [Alternatively, if you WANT to be sending out MIC-E status messages, I suggest you go into “13. MIC-E type” and change it from the default Emergency to something else like “En Route”.


Red Herring settings that LOOK like you should be messing with them, but are actually not involved with APRS position beaconing:

  1. GNSS->GPS Info-> Share Position (or Request Position) – These guys are used with other Baofeng 5RH radios to share/request positions between radios (which is a cool feature if everybody in your group is using the same radio) but does NOT interact with or affect the APRS settings / performance of the radio.  [It’s also not APRS packet compatible, but uses a similar encoding.]


Other optional settings you may want to change:

  • “APRS” -> “2 Ana APRS” -> “6 Upload Power” you might want middle or high instead of the default “low” depending upon how far away you are from digipeters.

Interesting information that you probably don’t need to worry about:

  • “APRS” -> “2 Ana APRS” -> “1. Target Callsign” – Because of the way APRS operates (broadcasting packets, and not directing them directly to a specific target) the AX.25 “target” part of the header does NOT have to be set to any specific callsign, and instead is typically used to “identify” the type of radio/device that is SENDING the packet. [VS the Source CallSign, which uses your Ham Radio callsign to identify the responsible party]. By default this is set to “APAT81” which is impersonating an “Anytone 878 HT”.  This isn’t strictly speaking correct, but does give people a good idea of your device capabilities (e.g. TX APRS packets) so they don’t try to send you text messages.   You can read the full list of “officially asigned” TOCALL codes here: https://www.aprs.org/aprs11/tocalls.txt
    As of 2021, Baofeng radios don’t have an officially assigned TOCALL from ARRL, but a github for aprsorg has a few here: https://github.com/aprsorg/aprs-deviceid/blob/main/tocalls.yaml  specifically for the BTECH UV-PRO and DMR 6×2, so you could use something like “APBTUV” to pretend to be a UV-Pro.


Focal Reducers f/3.3 and f/6.6 with native Meade f/10 LX200 telescope

I have a Meade LX200GPS – 12″ SCT telescope, which has a focal length of 3048mm (305mm aperture) and a focal ration of f/10.  This telescope is great for planetary imaging (what I’m mostly limited to, living in a Bortle 7-8 light pollution area, but there exist optical accessories called Focal Reducers which allow you to get this telescope down to a quick f/6.3 or an incredibly fast f/3.3.

I’ve purchased both an Anteries f/6.3 and a Meade series 4000 CCD f/3.3 focal reducer for my telescope, and have been playing around with them and my Sony A6300 crop sensor camera.

f/3.3 Meade Series 4000 Focal Reducer, 10 second exposure, ISO 400


Antares f/6.3 focal reducer, 20 second exposure (unknown ISO, possibly 400)


Native LX200GPS – 12 inch f/10, 20 second exposure

Continue reading

Firmware / Software update on a Meade #497 AutoStar hand controller (ETX-125 telescope)

Meade Autostar hand controller displaying the red text: "FLASH LOAD 3.0 READY"

I recently purchased a used Meade ETX-125 (EC) Telescope that at some point in the past had been upgraded with a #497 Autostar hand controller (handbox).  This controller was running firmware/software version 22E (released in 2001), so I decided it was worth the time (and expense of purchasing a substitute for the Meade #505 serial cable) to upgrade the firmware.

I purchased a 3rd party USB to RS232 (rj11? rj10?) replacement cable that does the same job as a Mead #505 DB9 serial cable. The one I got had a CP2101 USB->UART chip inside, which required me to manually download and install drivers from Silicon Labs on Windows 11.  If I had it to do over again, I’d pay a little bit extra for the cable based on the FTDI chip, which is natively supported by Windows. Continue reading

Generic WiFi Adapter (SDHC) using the WIFI@SDCF app [Dxingtek/Keytech]

I purchased this (very) generic “WiFi adapter”. (Model AD_wifi_SD) It accepts a Micro SD card, and when powered by a host, generates a wifi network (Default SSID: WiFi@SD, default password: 99999999 [eight nines] ).  I was hopeful that it would expose a webserver that I could access from my linux desktop to download files from the camera’s SD card, but no such luck.

The server resides at 192.168.100.1, and assigns IP addresses starting at 192.168.100.100, however it uses a proprietary (UDP packet) protocol that only works with the provided android or iOS app (Called WiFi@SDCF on the Google Play Store com.keytech.wifisd).

Although it may be technically possible to run this app in an emulated android environment on Linux, I didn’t want to put in that much effort. Especially as it appears that the android app (and likely the SD card server) are buggy, and the protocol does not support error detection or correction.  See the class project paper here in the wifi-sdcf repo by David Buchanan for more details.

In short, unless you only want to transfer files to a phone/tablet and are willing to run the provided app (which is of questionable quality) on your device, probably steer clear of this device. [For Sale: One at the cost of shipping….comment if interested.]