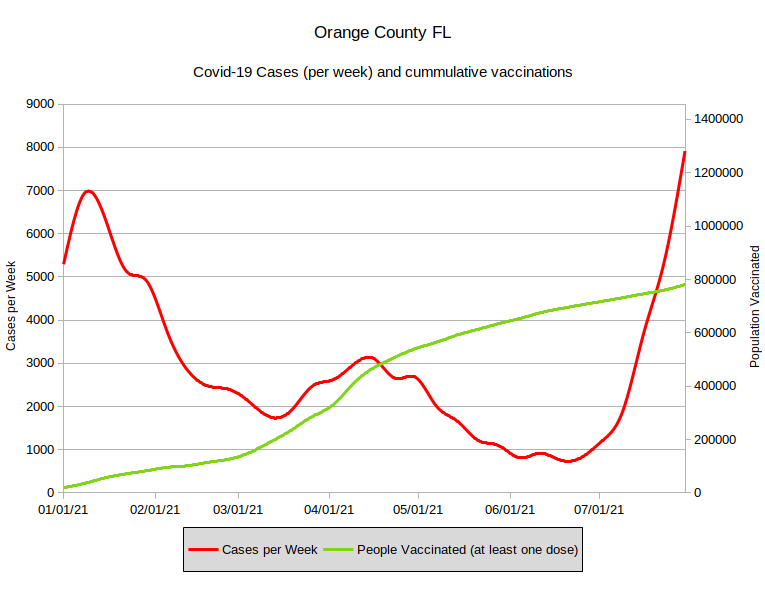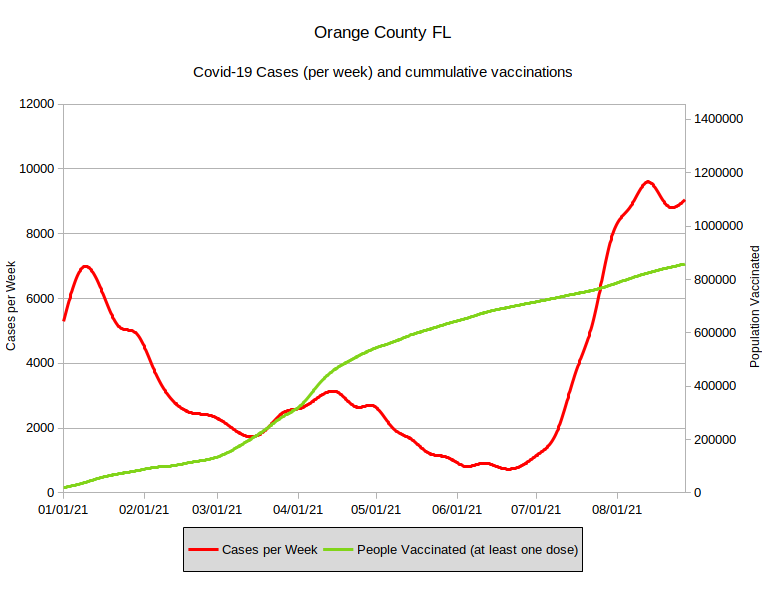
For the week ending August 27th, 2021, Orange County Florida had an average of 1,292 new cases per day. This is worse than the highest previous peak in January. The exponential growth can be blamed on the Delta Variant and the relaxing of masking and social distancing.
However, the number of new cases each week appears to have plateaued, and the test positivity rate, at 14.9%, while still very high, has gone down from a peak of 20%, so it appears that we may have reached the peak of this delta variant surge.
Historically, Orange County has had a case fatality rate of near 1%, so that would indicate we are due to see about 12-13 deaths per day in the near future, but as death numbers are no longer part of the FDOH weekly reports for counties I have no way of knowing if the case fatality rate has started to drop due to vaccinations of high-risk groups or has increased due to the Delta variant.
We have vaccinated (at least a first dose) 858,281 people (out of a population of 1,457,445), or 59% of the total. If you discount children 12 and under who are not yet eligible for vaccination, Orange County has vaccinated 69% of the eligible population. We vaccinated 77,829 people in August (Compared to 62,349 people in July, 65,206 in June, 88,482 in May and 151,176 in April.)
Hospitalizations
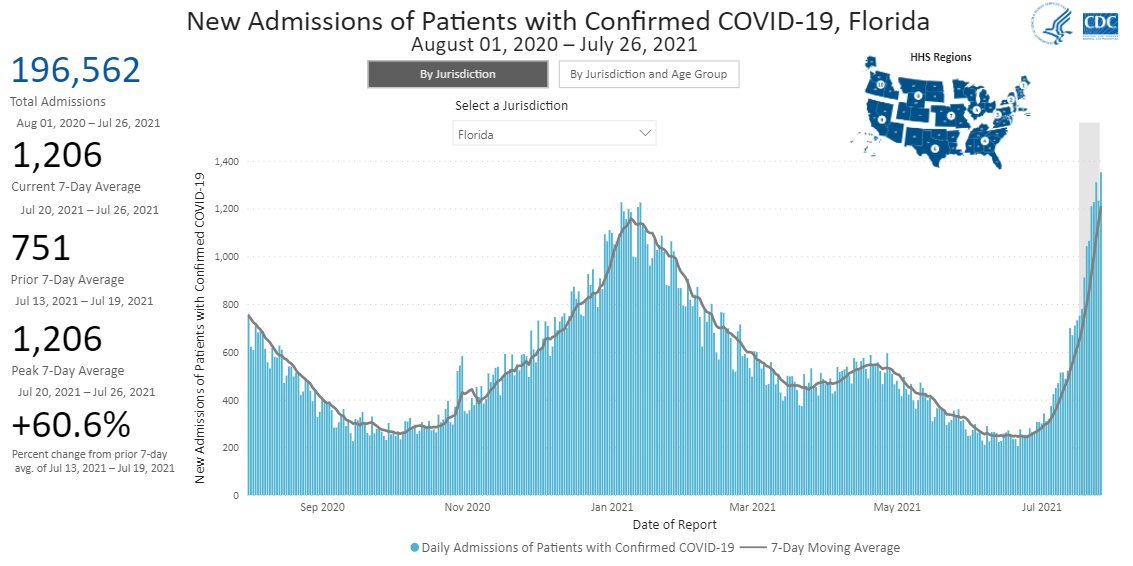
Although the FDOH is not reporting county level hospitalization numbers, we can assume that the admissions curves for Orange County are similar to the entire state of Florida. We currently have more people hospitalized with confirmed covid-19 cases than ever before. Elective surgeries are postponed, hospital morgues are full and portable morgue units are being deployed.
 Deaths
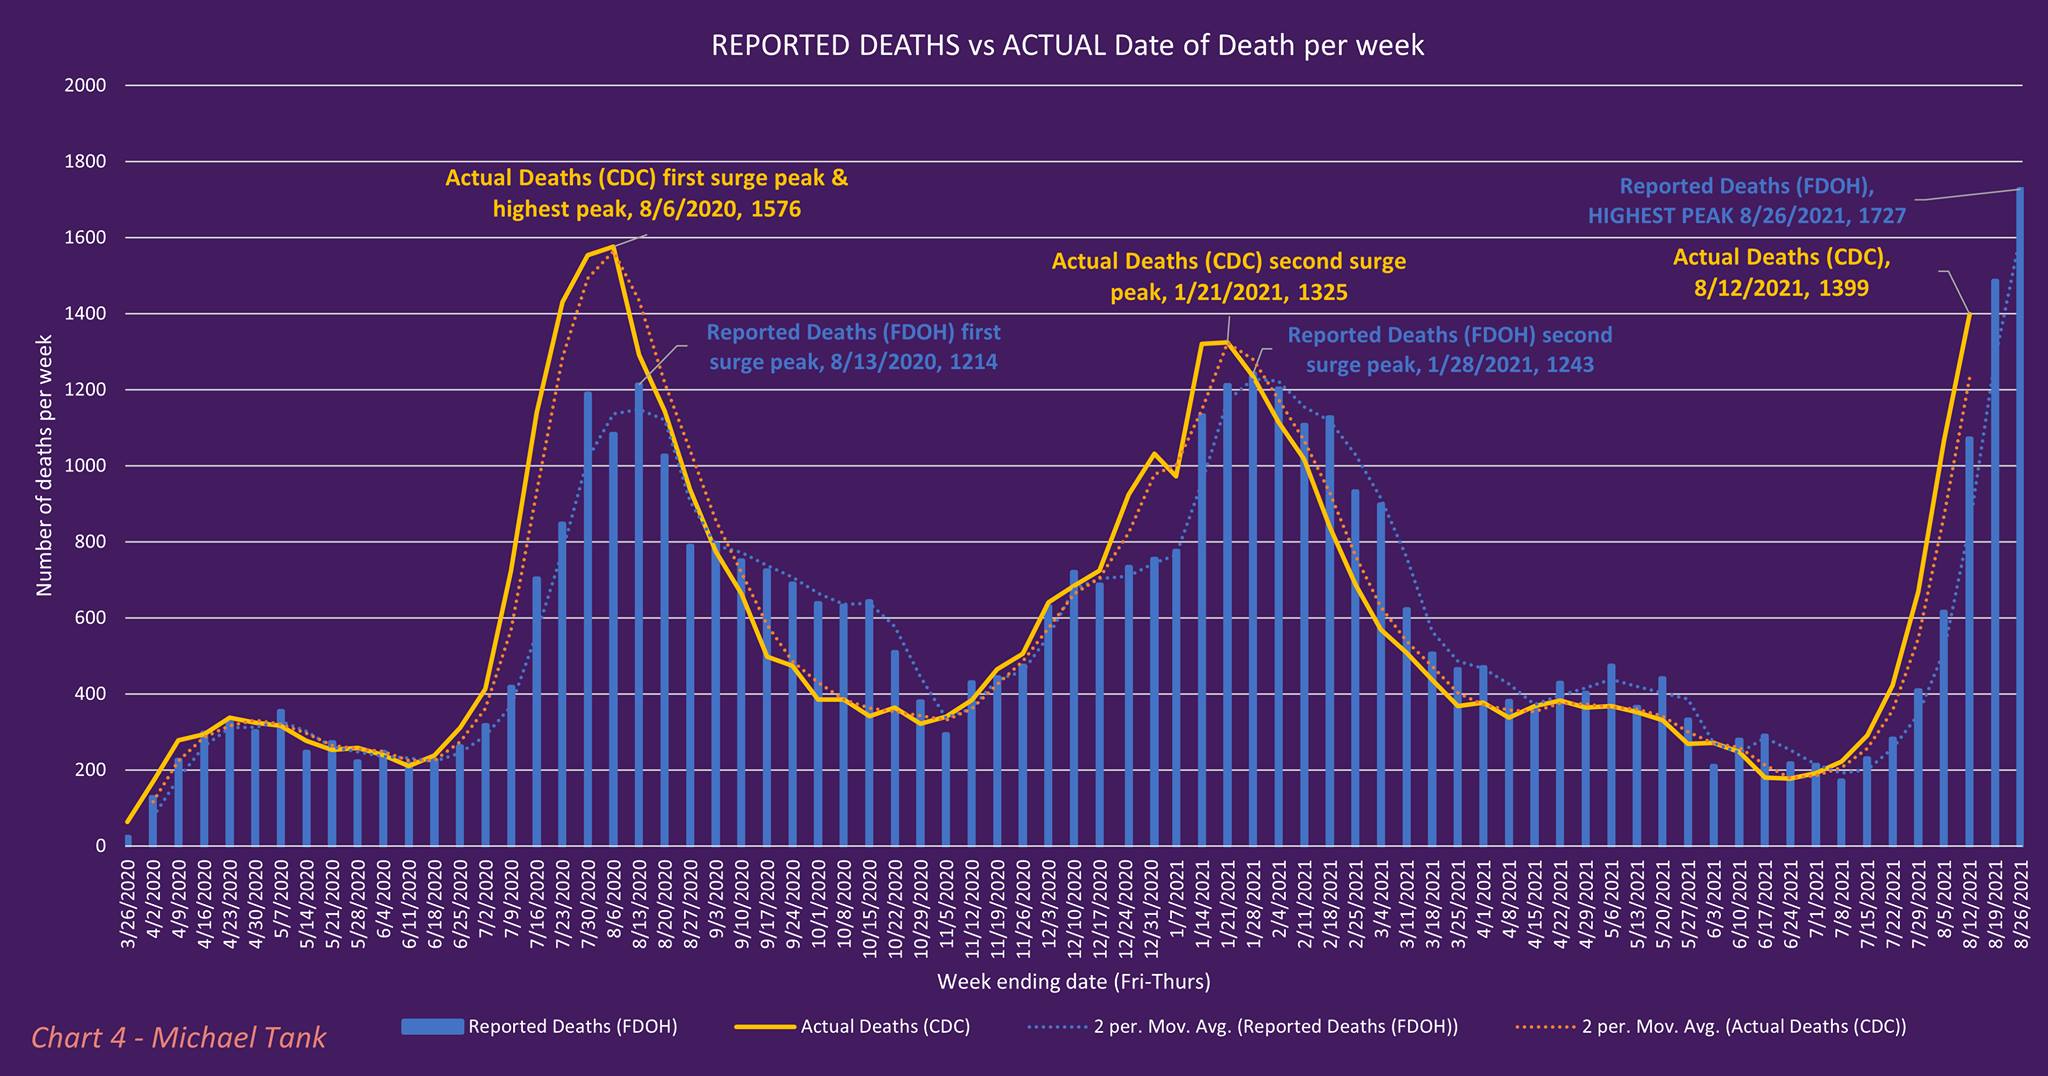
The FDOH is not reporting death numbers directly for Orange County, but judging from the graphs for the entire state of Florida, deaths are also at an all time high.
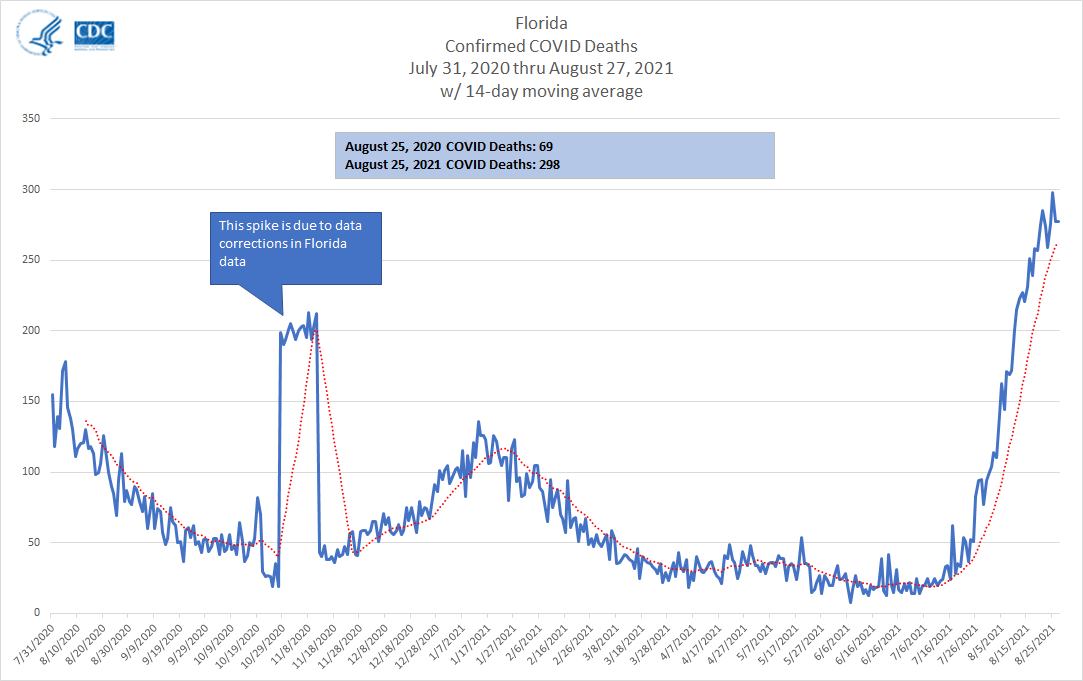
The “actual date of death” data lags behind the “reported date of death” data, but as you can see from historical trends, the reported death data is indicating that the actual date of death data will set new records in Florida.
Orange County Public Schools
In the entire 2020-2021 school year (when around half of the students were remote) OCPS reported a total of 5,072 student cases of Covid-19. (and 2,216 employee cases).
So far, in the first three weeks of the 2021-2022 school year (with the majority of students in-person) the OCPS dashboard has reported 2,599 student cases of Covid-19. (And 624 employee cases.)
Have we reached the peak?
In other countries surges driven by the Delta Variant have peaked hard and then receded quickly (after natural immunity is reached in the un-vaccinated population via infections) so we we may see a sharp decline in cases, hospitalizations, and deaths in September.