Garage Door Insulation — Part 2 (Reflectix radiant heat barrier)

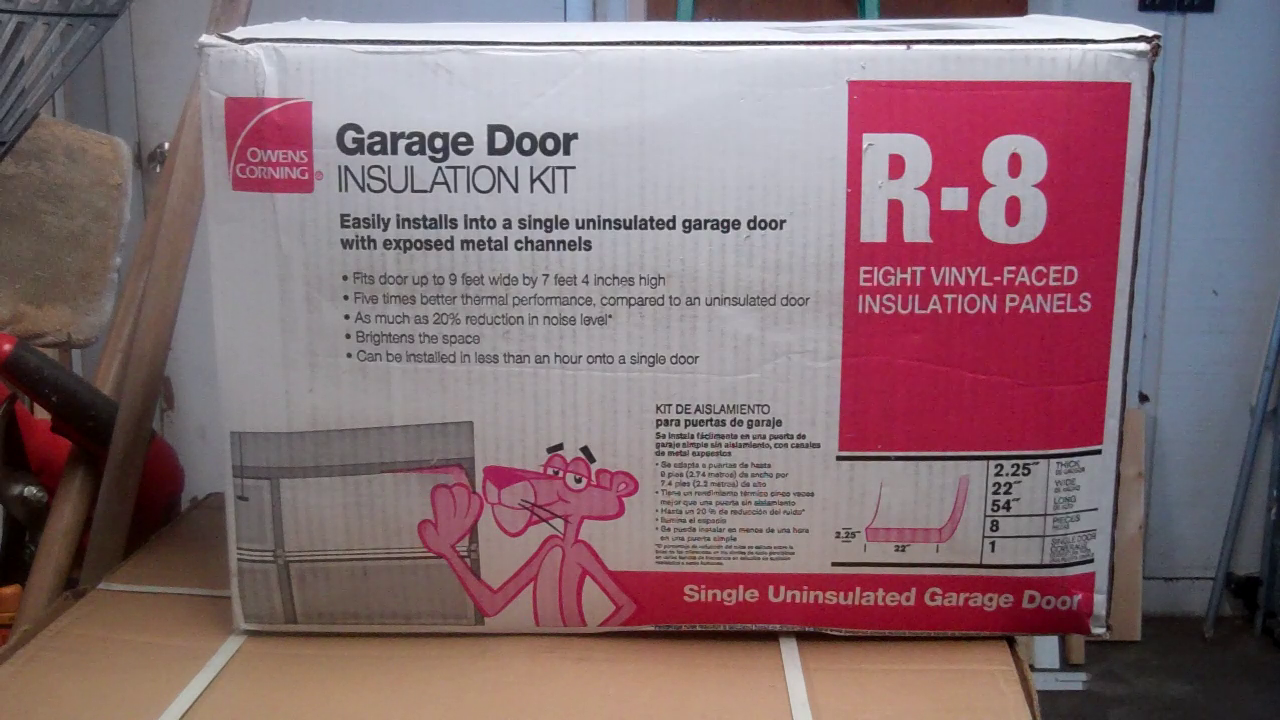
After installing the R-8 fiberglass batt with white vinyl backing, my garage doors were relatively well insulated, but I decided to add a layer of reflectix as a radiant heat barrier.

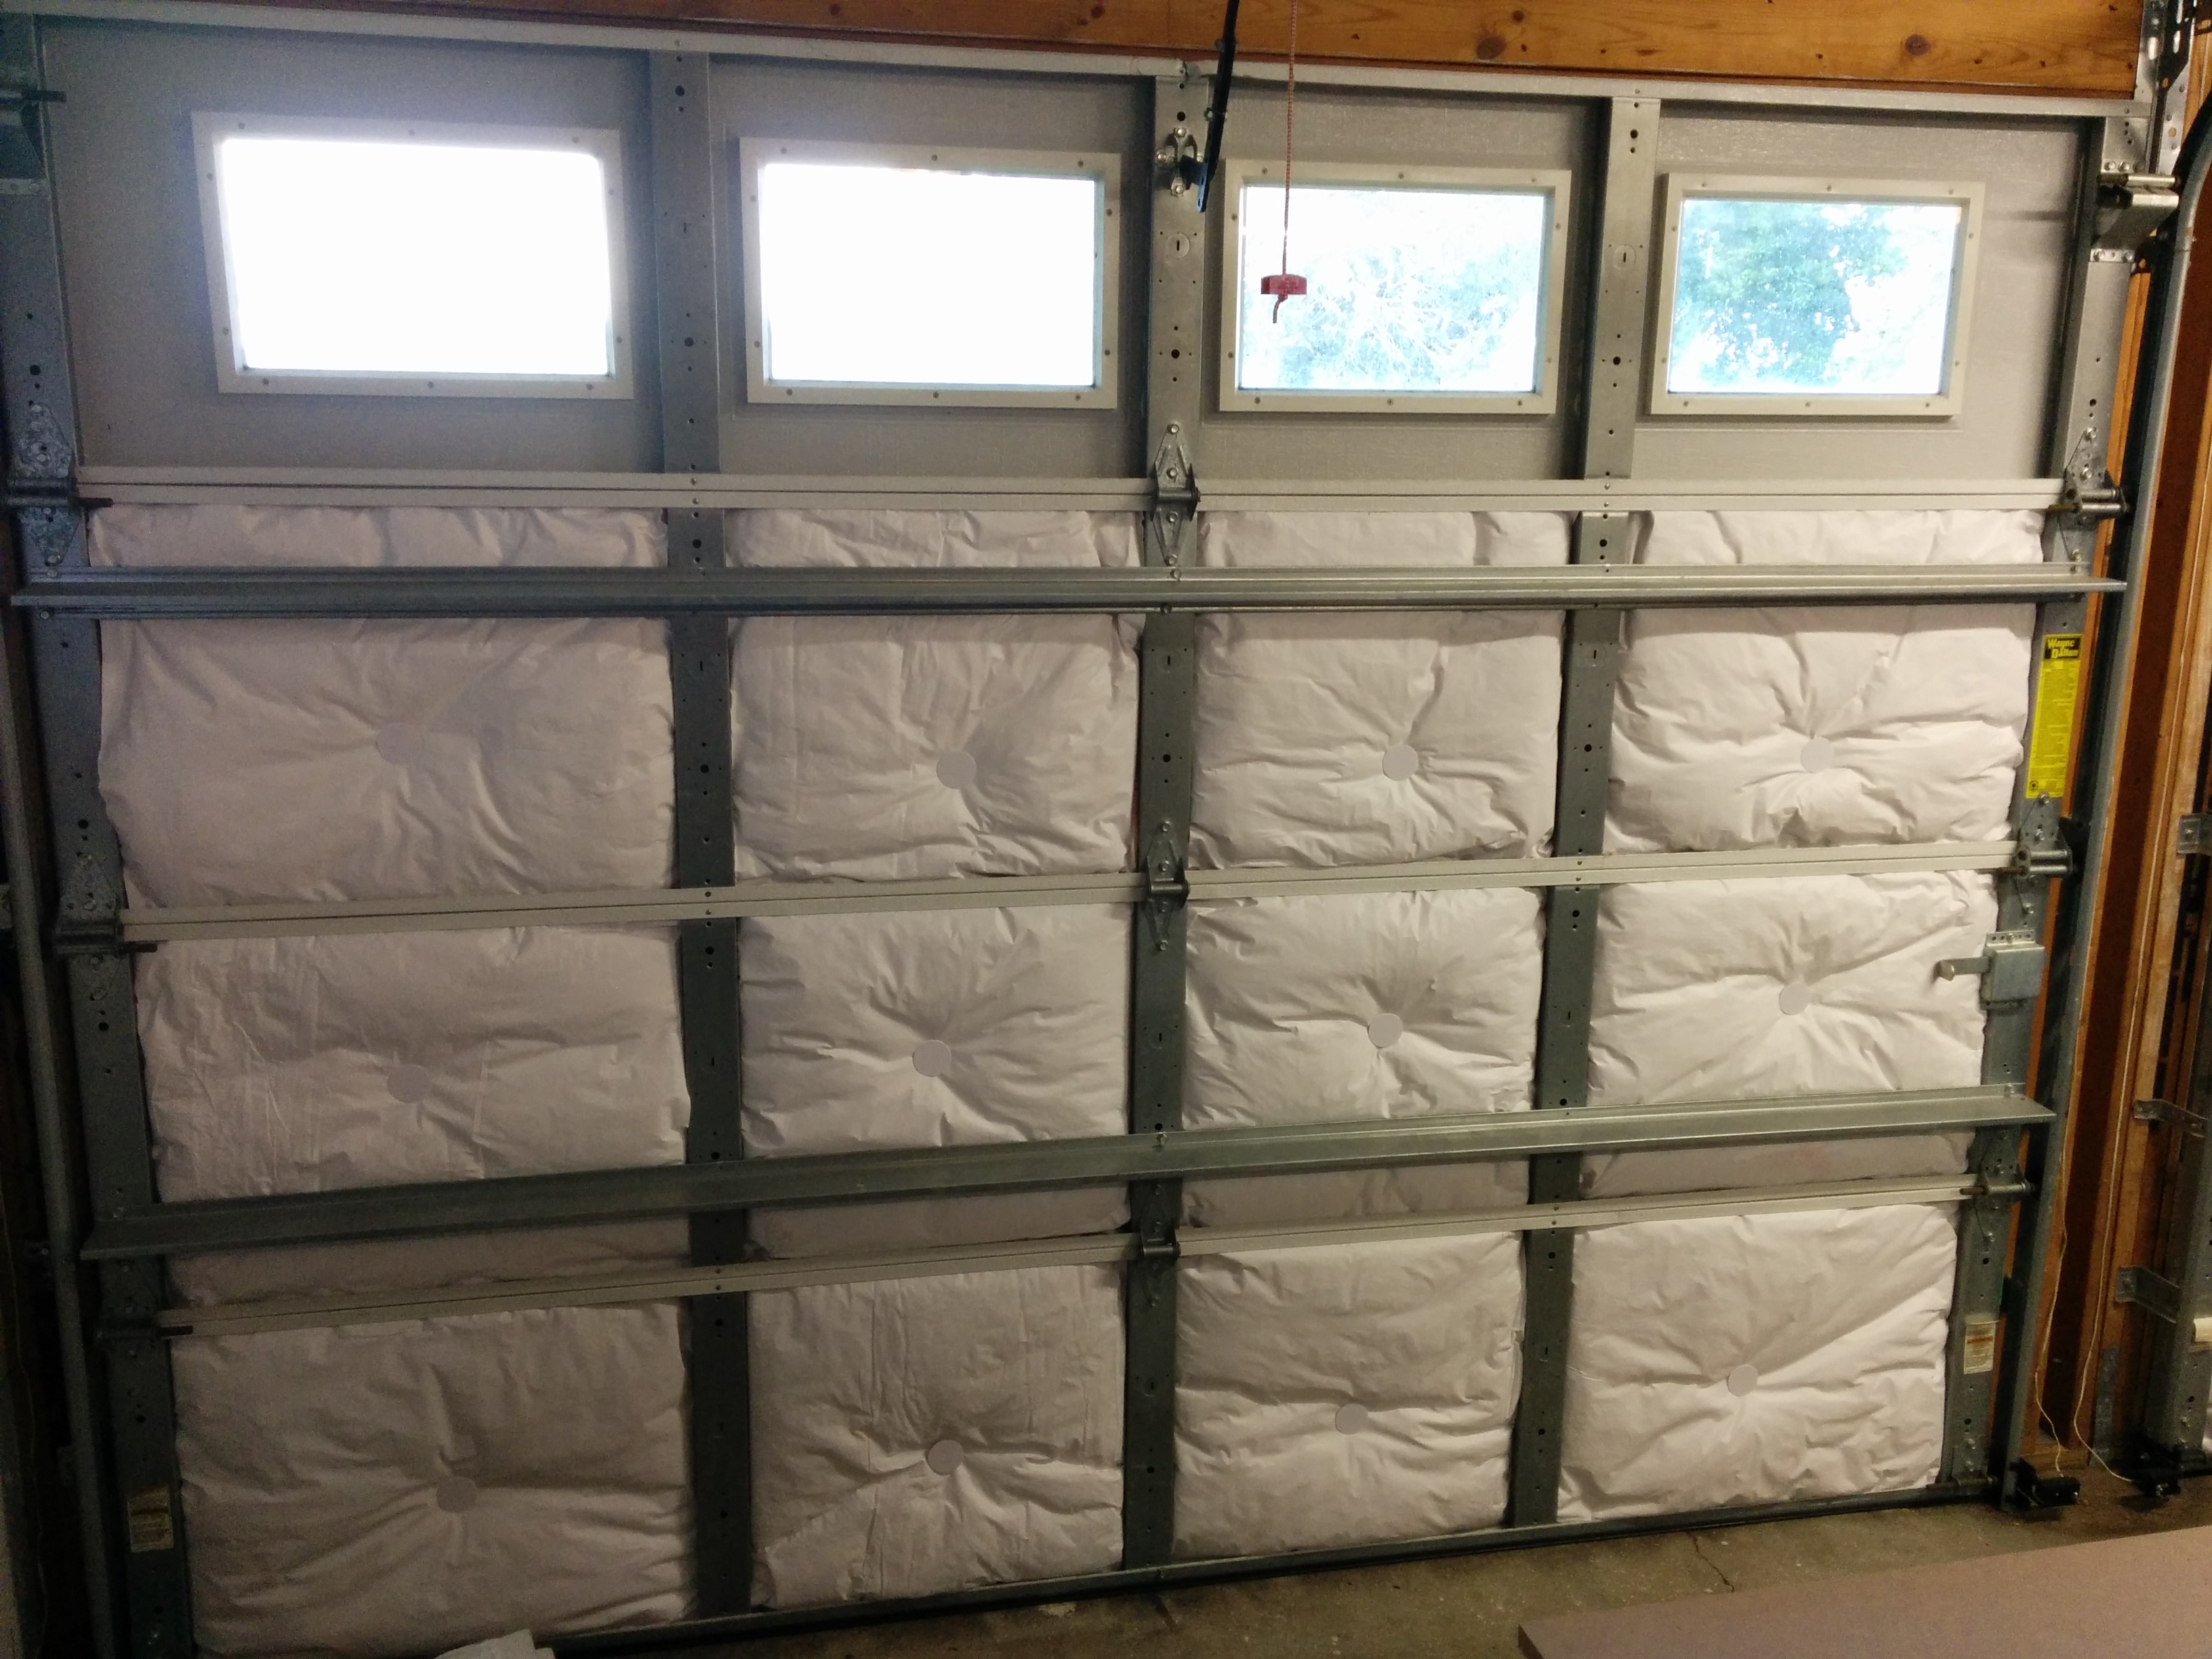
In this situation, with one side facing the open air of the garage, it adds about a 3 to the R factor. I also like the aesthetics of the silver bubblewrap more than the white puffy vinyl.

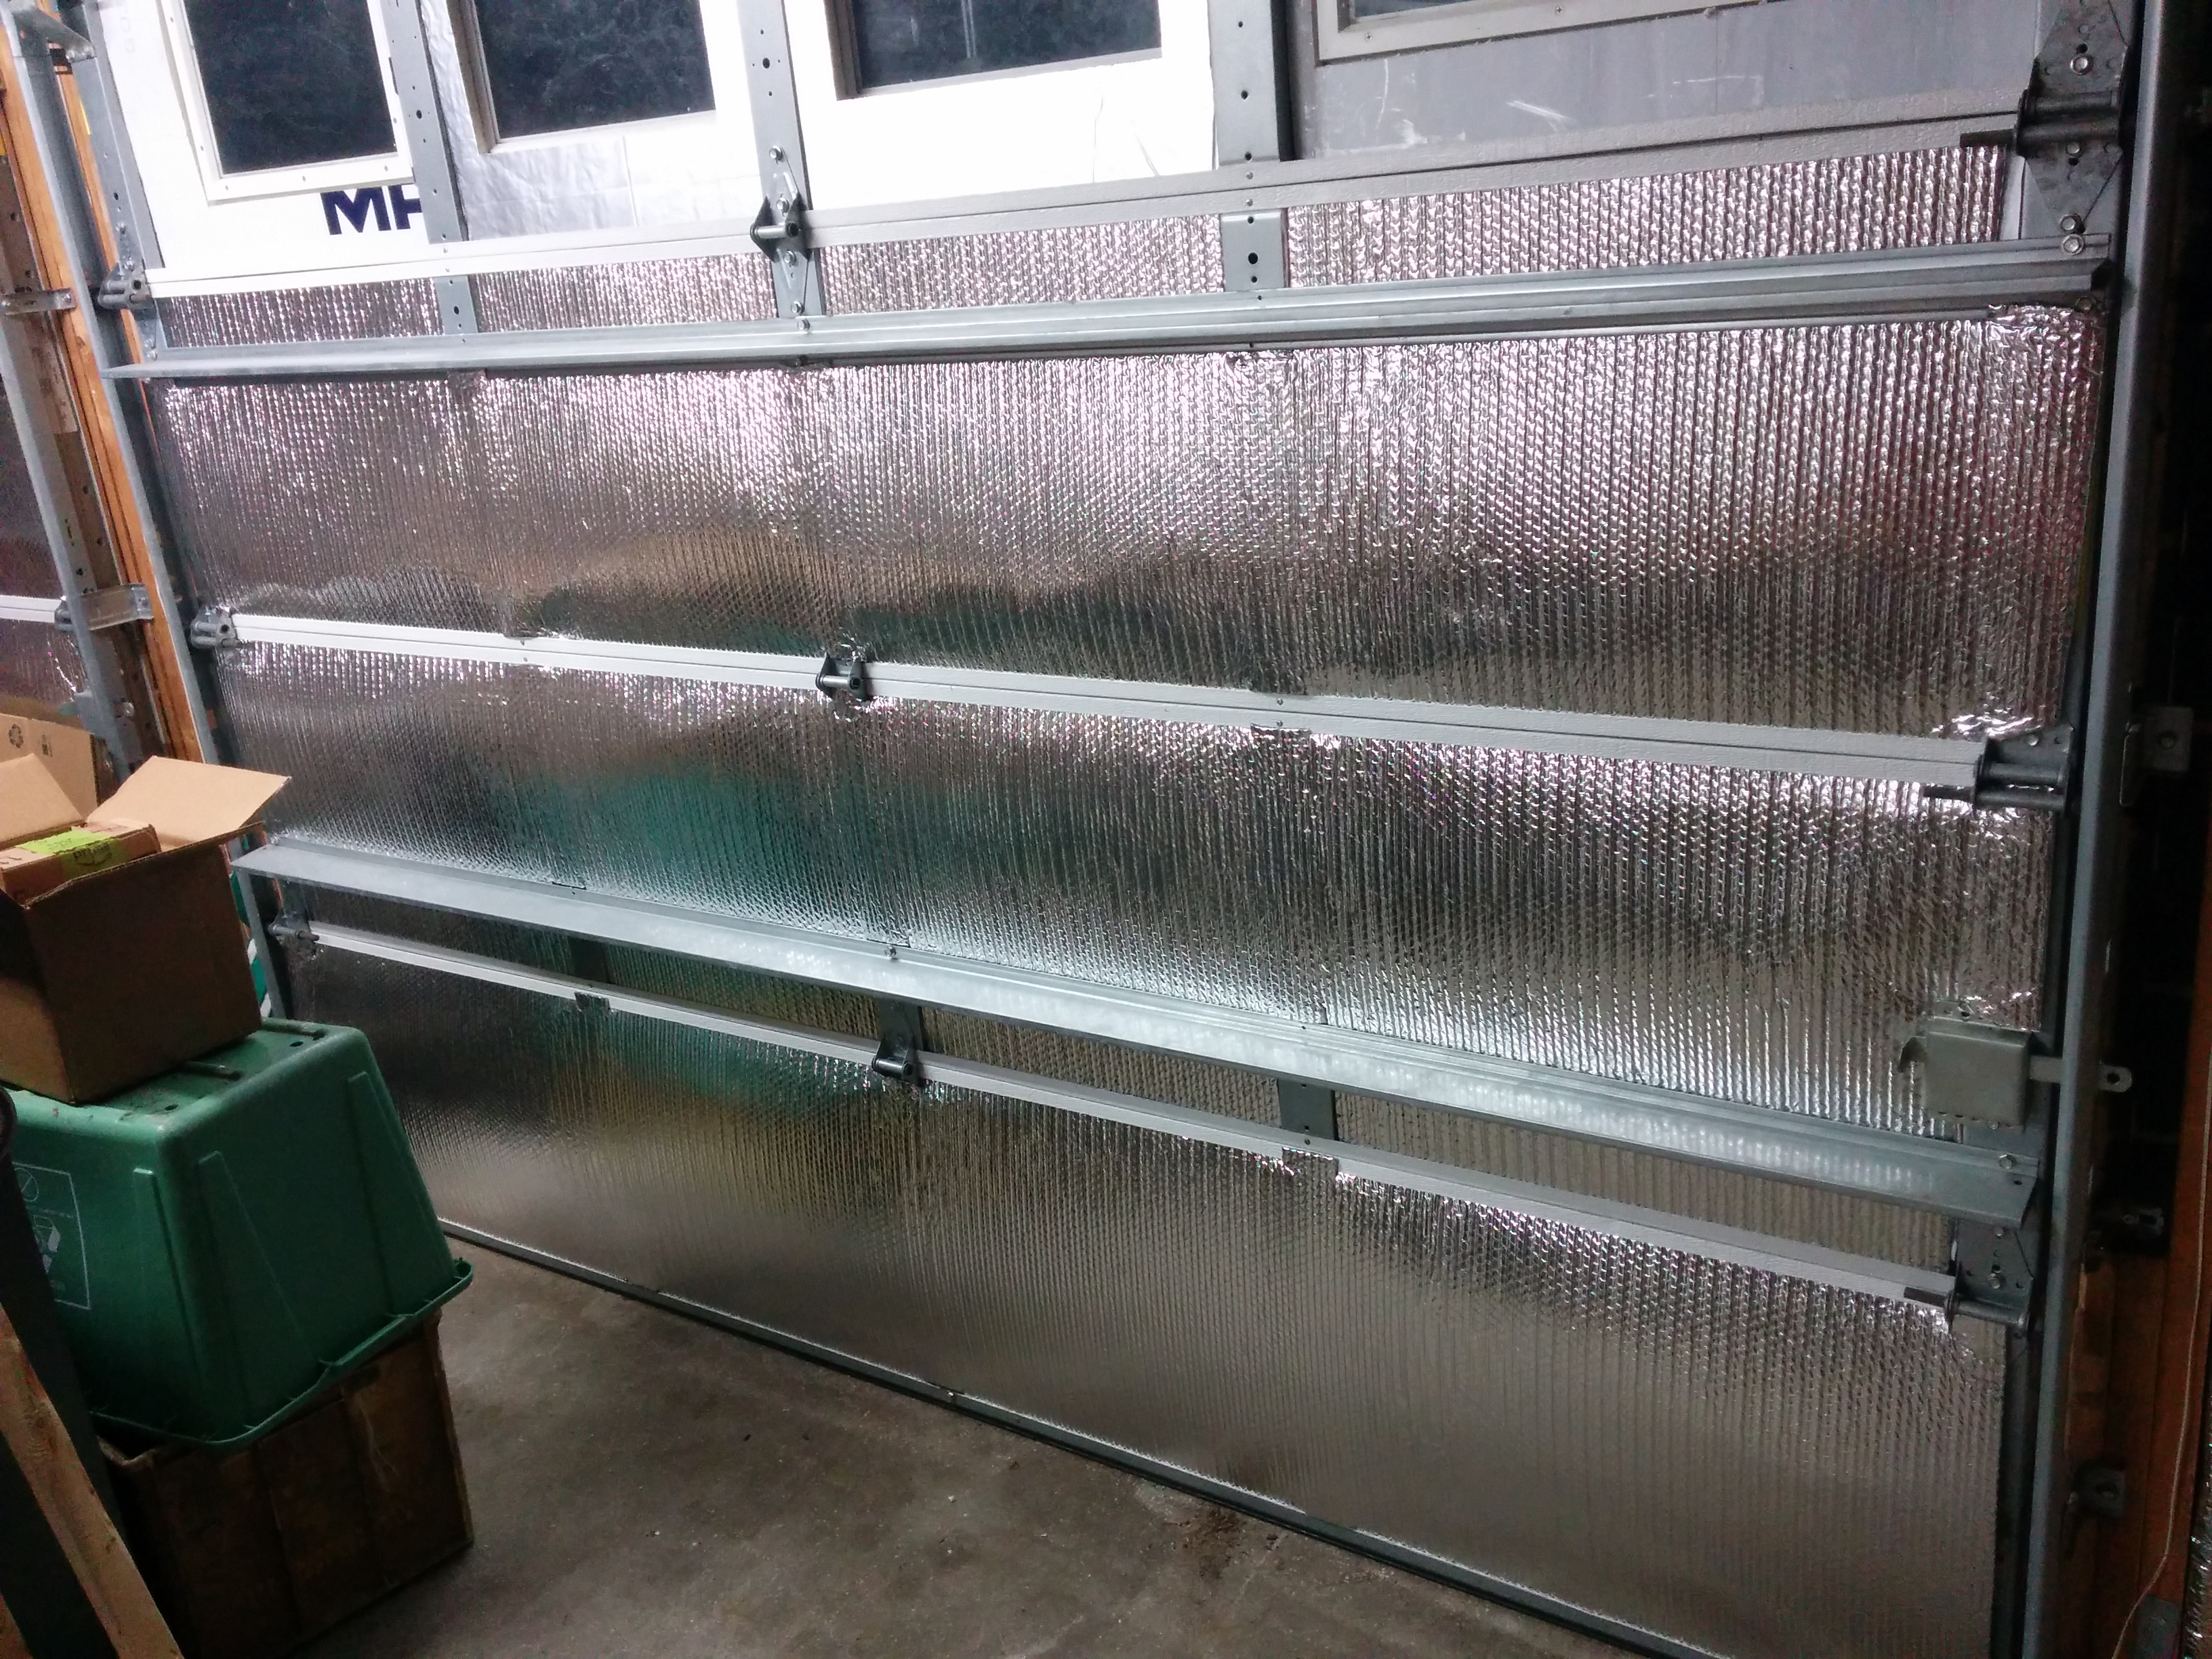
Unfortunately, unlike the Dow Corning fiberglass batt which is designed for garage doors and comes pre-cut at the factory to the correct height, I had to measure and cut the reflectix down from a 24 inch roll.

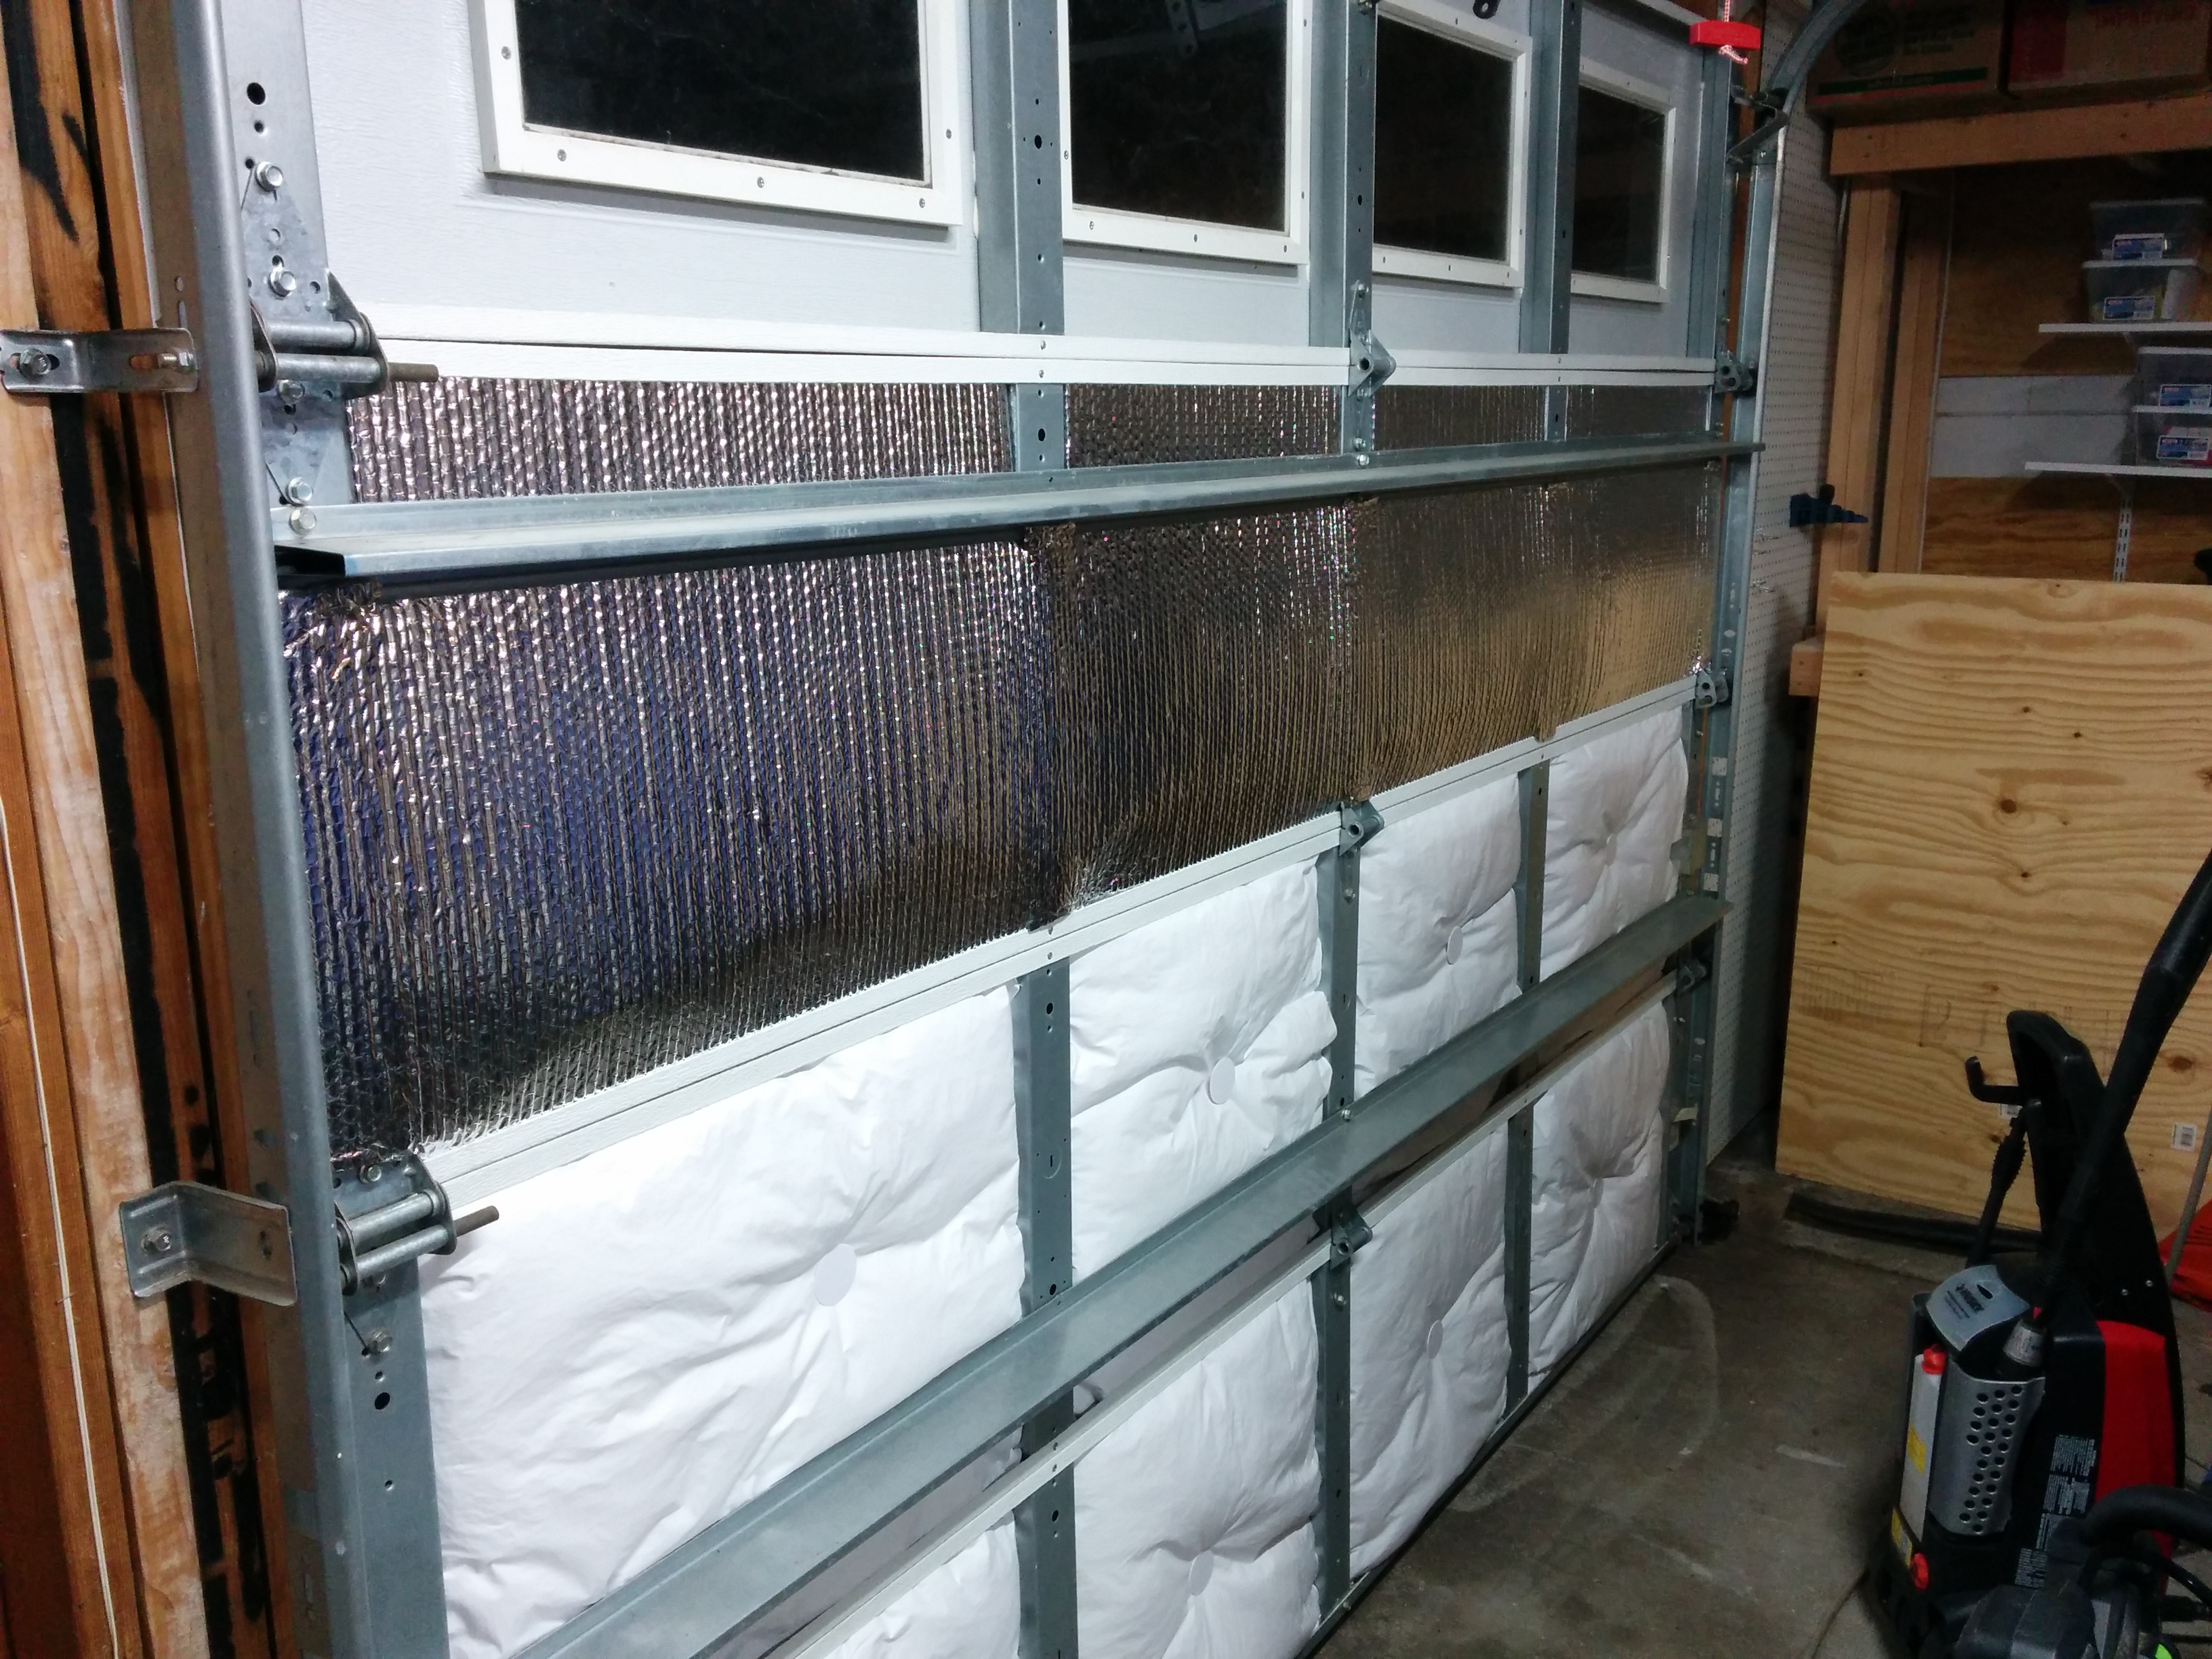
If you don’t have support bars, it’s relatively easy to install. Just make a few cuts to go around the upright bars and tuck the top and bottom inside the lips of the door panels. I was going to move the white plastic clips that hold the fiberglass in to outside the reflectix, but so far, a pure friction fit is holding it just fine.

The panels with support bars require more work. I guess it would be possible to remove the support bars and then re-install them on top of the reflectix, but I chose to measure and mark each bar location by cutting the edge of the reflectix, then taking it down and cutting the proper length. I installed the reflectix panel under the horizontal support bar, and made sure that the top lined up just under the height of the panel. Then I notched around the vertical bars so that I could get the top in place.

So far, they all stay in place with nothing more than a friction fit. The bottom panels that don’t have a horizontal support bar holding the reflectix bow the most when overhead and may pose a problem as they age, but if I run into issues, I’ll just take the plastic clips that hold the fiberglass on and move them to the outside of the reflectix to help hold it in place as well.

Next, I’m going to cut aluminum faced polyiso foam insulation for the spaces around the windows in the top panels.

Garage Door Insulation – Part 1 (Fiberglass door insulation)


My two car garage has four single wide doors. Two in the front, and two in the back, and they had no insulation. If you ever buy a new garage door, pay extra to get the insulated panels, otherwise, somebody may have to retrofit insulation later on.

I used 3 kits from Owens Corning that comes with R-8 fiberglass bat and plastic mounting clips. Because I’m only using it on the windowless bottom 3/4 of each door, I was able to   use 3 kits to insulate all 4 doors. I’ll be doing something different around the windows.


The other option is an R 4.8 Faced Polystyrene foam board kit, which is $20 cheaper per kit, but doesn’t offer as much insulation value, and would have required that I remove some support bars to install. Plus I hate cutting polystyrene as the beads get everywhere.

In addition to a pair of medium gloves, each kit came with two extra pieces of foam tape, 2 pairs of plastic clips, and a piece of vinyl repair tape.

I used acetone to remove the paint where I was going to be putting the foam stickers to mount the back half of the clips. I put up 12 foam squares at a time, and then put up 12 clips. You want to roughly center them in the openings. Where there were support bars, I centered into the remaining opening.

Then it’s just a matter of measuring each opening, and cutting your fiberglass batt’s about 1″ wider. The height comes pre-cut from the factory for standard garage door panels.

The kit includes a pair of medium plastic gloves, and you’ll also want a long sleeve shirt when handling the fiberglass. Then you just push the batt into the opening. After you are happy with how it is centered, you push down to find the end of the plastic clip, cut a small X in the vinyl with a razer knife, and push a mating clip onto it. The finished door is nice and white and puffy.


So far, friction and the plastic clips have held in all the fiberglass batts just fine. I’m probably going to be adding a layer of reflextix as a radiant barrier over the top of the   fiberglass. [I also plan on using foam insulation around the windows.]

There is a definite temperature difference between the insulated and non-insulated (top window) panels. Outside in the shade, the insulated panels were 99 degrees, and the uninsulated panels were 95 degrees, as they were being cooled more by the inside of my garage. (A bad thing…) Inside, the uninsulated panels were 94 degrees (a one degree difference from the outside) while the insulated panels were 88 degrees (an 11 degree difference).

Next up, wall and attic insulation.