Ham Radio can be a very inexpensive hobby if you are using a $30 Baofeng handy talky on the 2m or 70cm bands. But when you get into the lower HF bands (160-10m) costs start to mount (in both the core radio as well as the larger antennas and mounting hardware). I was able to put together a budget ham radio setup for $650, and I don’t see a lot of room to go lower than that without getting parts donated or using a much lower quality radio.
I have a listing of the model/part numbers and links to sources below.
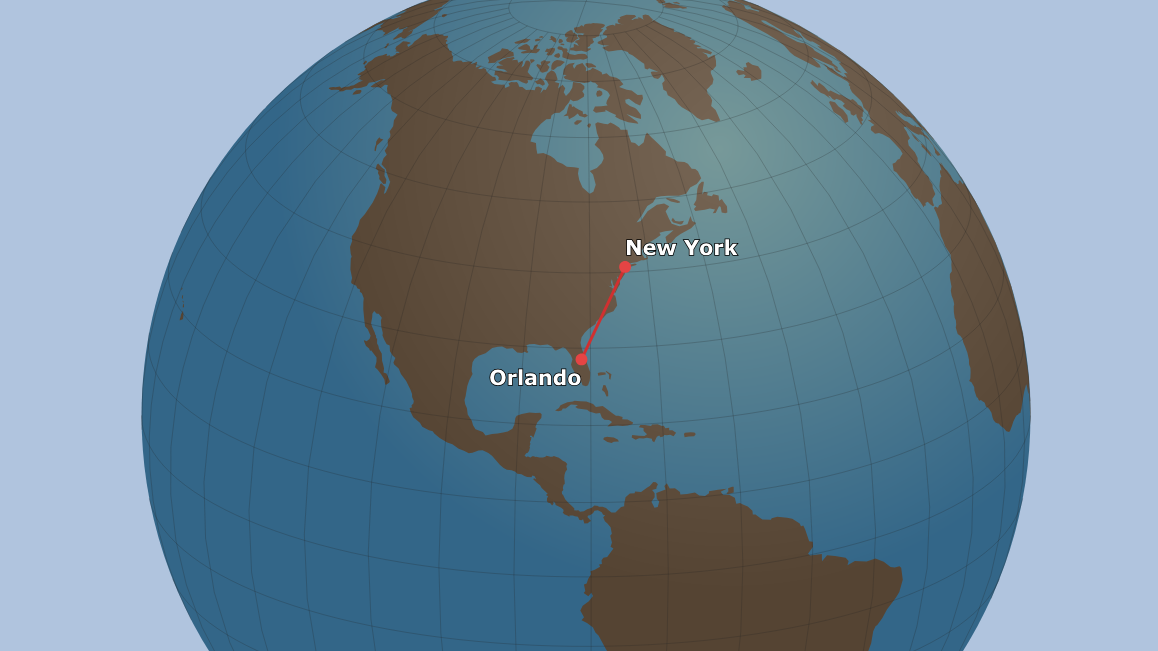
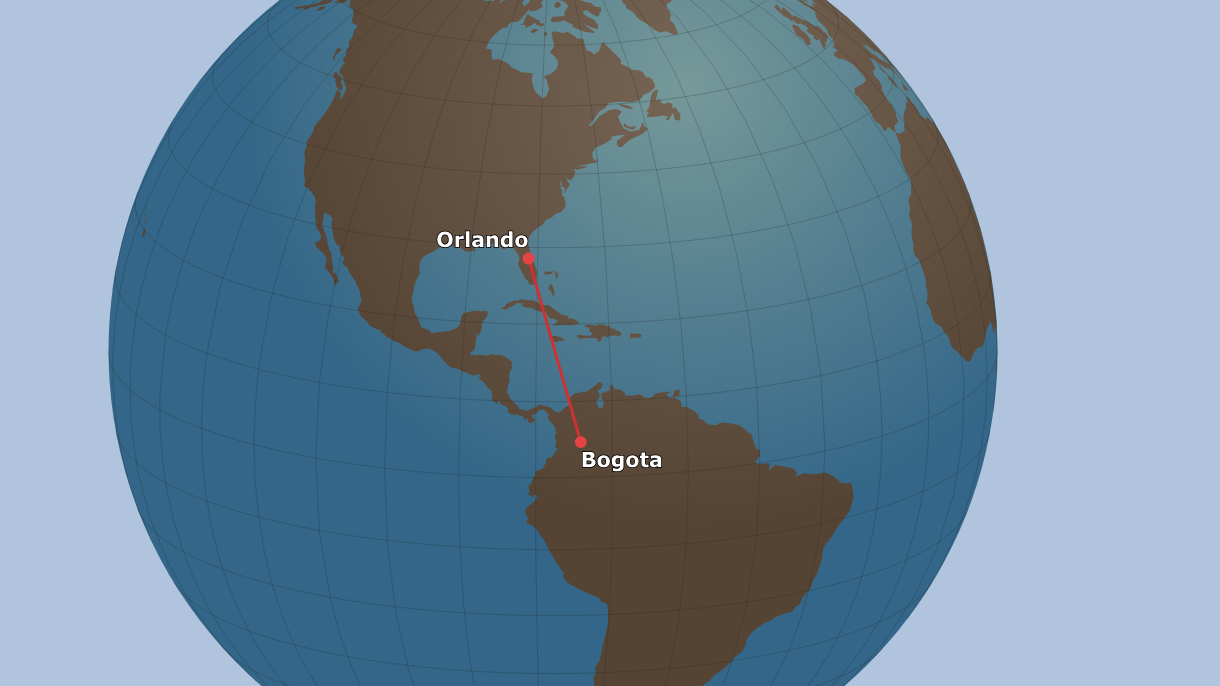
With this IC-725 radio and a 20m Dipole (mounted only 20′ up in the air) I’m able to easily make good voice contacts 1000-1,500 miles away (New York & Colombia).


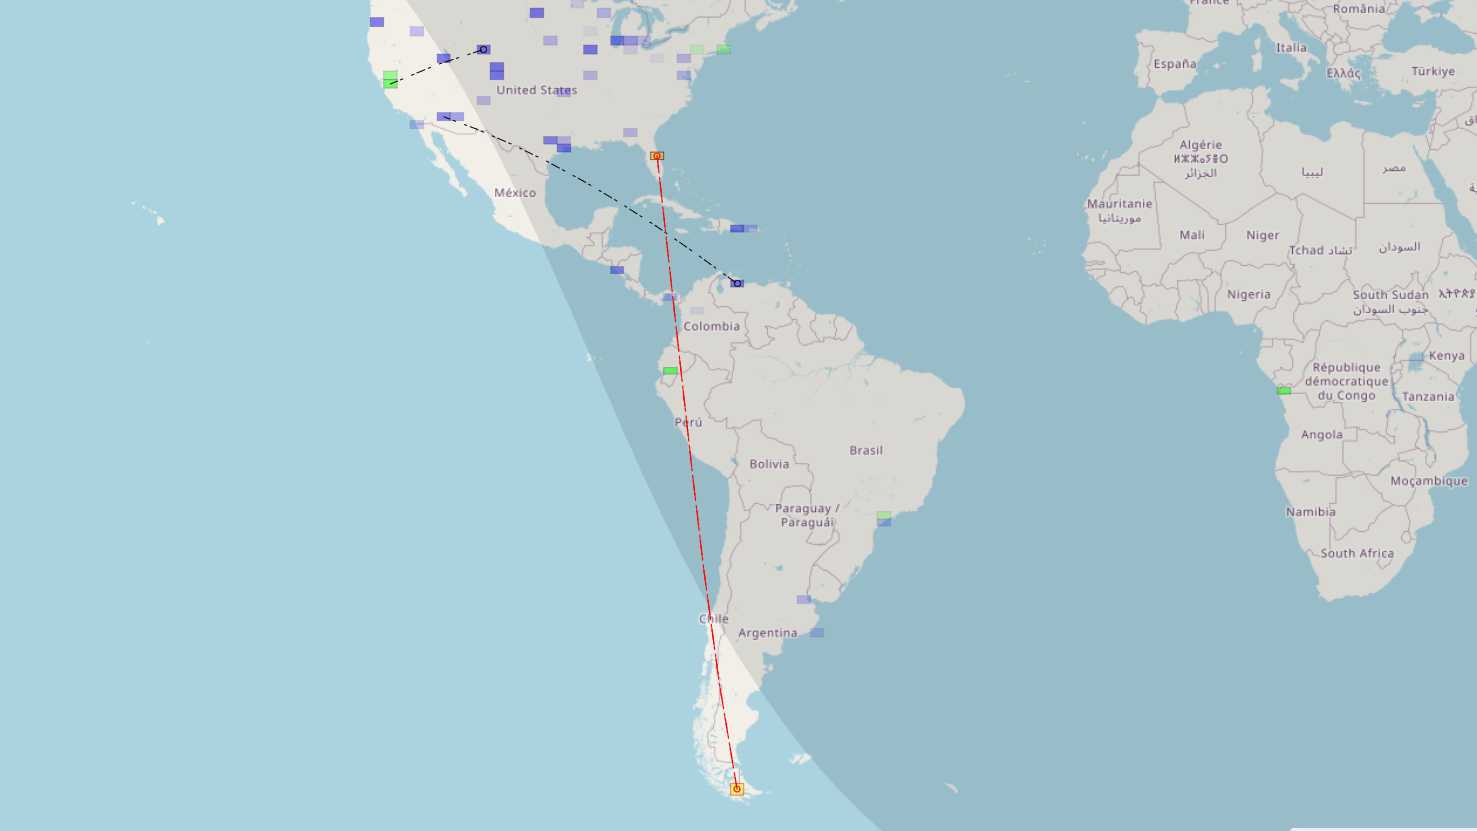
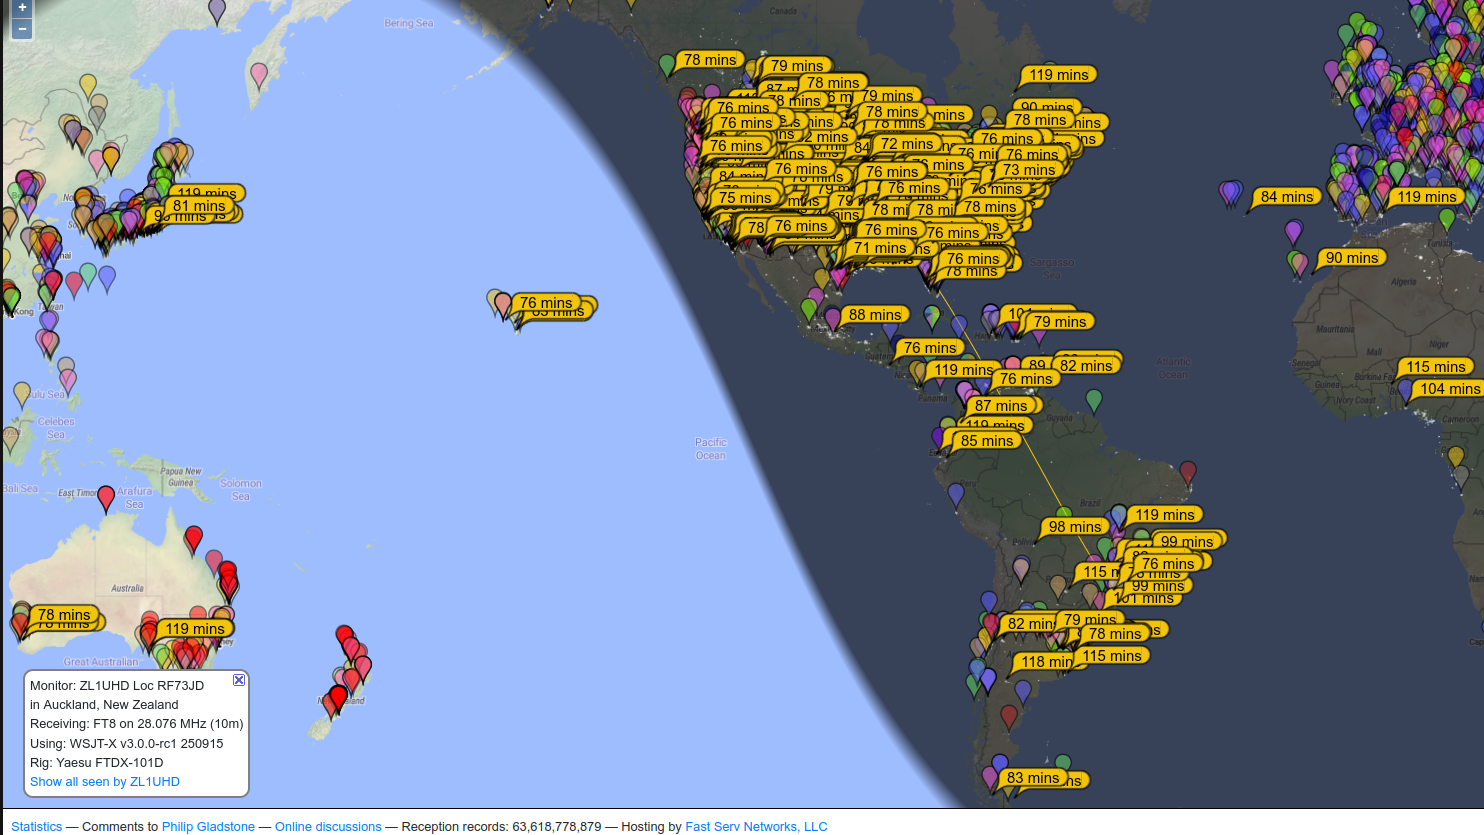
Using FT8 digital mode at 100 watts, I can reliably reach most of North and South America and parts of Africa. (If I re-oriented my antenna to face Europe, I’m sure I could also easily make contacts there).
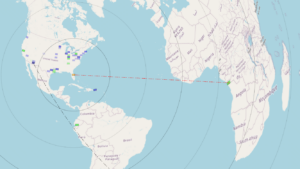

My longest contact to date (at a -19 reception level) was to Chongqing, China, but this was during exceptionally good atmospheric conditions (lots of bouncing through the F layer of the ionosphere) and it’s not something that happens regularly.

PSK reporter shows all of the remote stations have have heard my callsign (just because the can hear me, doesn’t necessarily mean I can hear/work them, as my IC-725 probably isn’t as sensitive as many newer transceivers).
Note that I’m using my “fair weather” radio outdoors on the patio, so I don’t have any lightning suppressors, grounding rods or wall penetration hardware/boxes, which will probably eventually add another $100-200 to make a permanent “ham shack” install.
I’m also planning on upgrading to a RadioWavz 40m DX off center fed (OFC) Windom dipole that will be resonate at 40m, 20m, and 10m, allowing me to try out two other bands without buying a separate antenna tuner (I’ll probably upgrade to a newer radio with a built in tuner before buying an external antenna tuner).
Parts list with costs and source links:
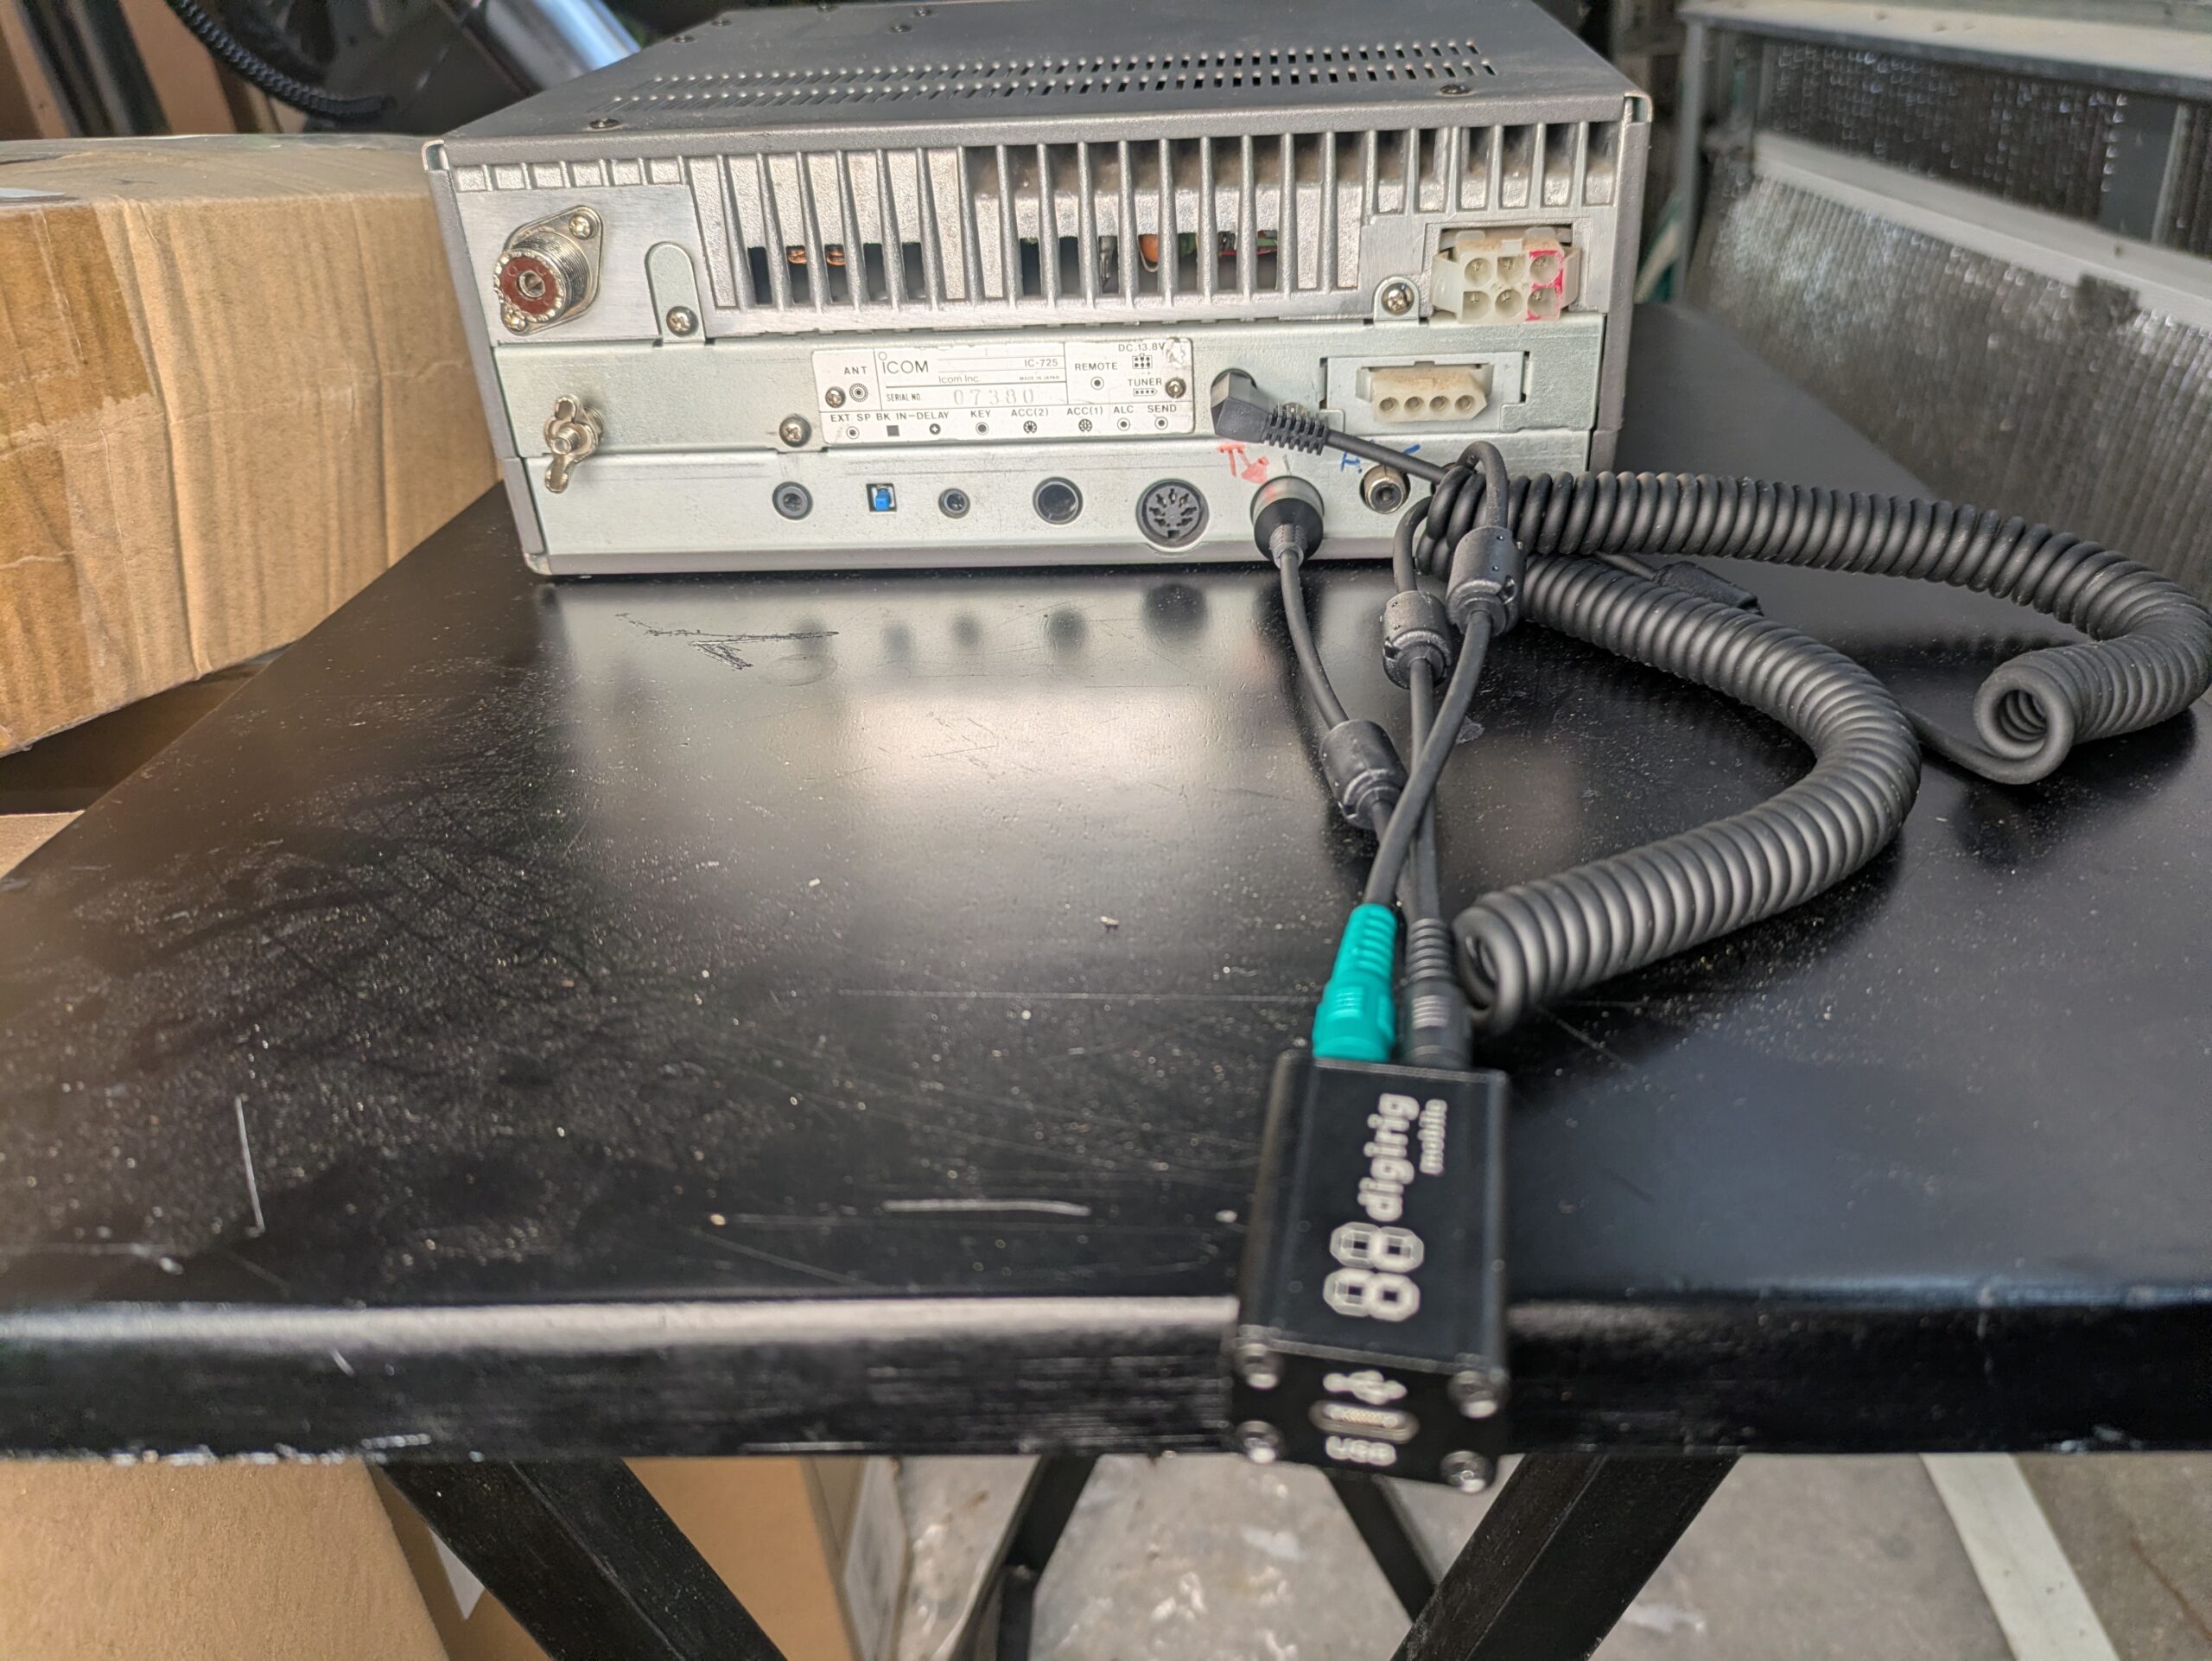
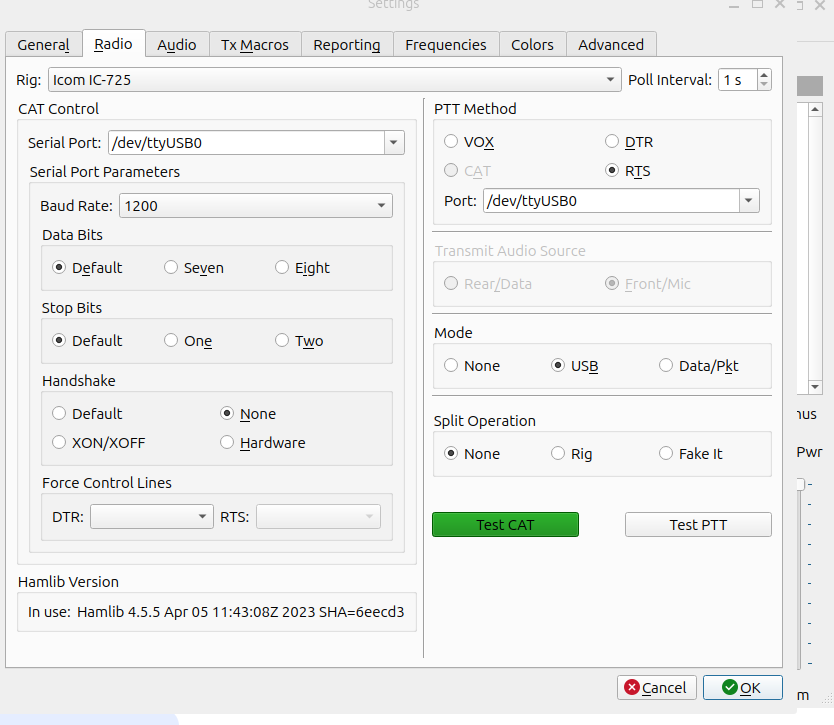
Icom IC-725 Ham Radio – 30 years old, 100 watt transmitter that covers 160-10m bands (but only if your antenna is resonate at the frequency, as it doesn’t include a built in Antenna tuner). $300 used (The Icom IC-7300 (not Mk2) can be purchased new for $1,000 right now on discount because ICom released the IC-7300Mk2, and is a direct replacement for this radio that is better in every way except price.)
Icom HM-36 hand mic (with Up/Down buttons) $40 used (+$10 s/h)
(I really appreciate the up/down buttons on the hand mic for searching the band at 1kHz increments….)
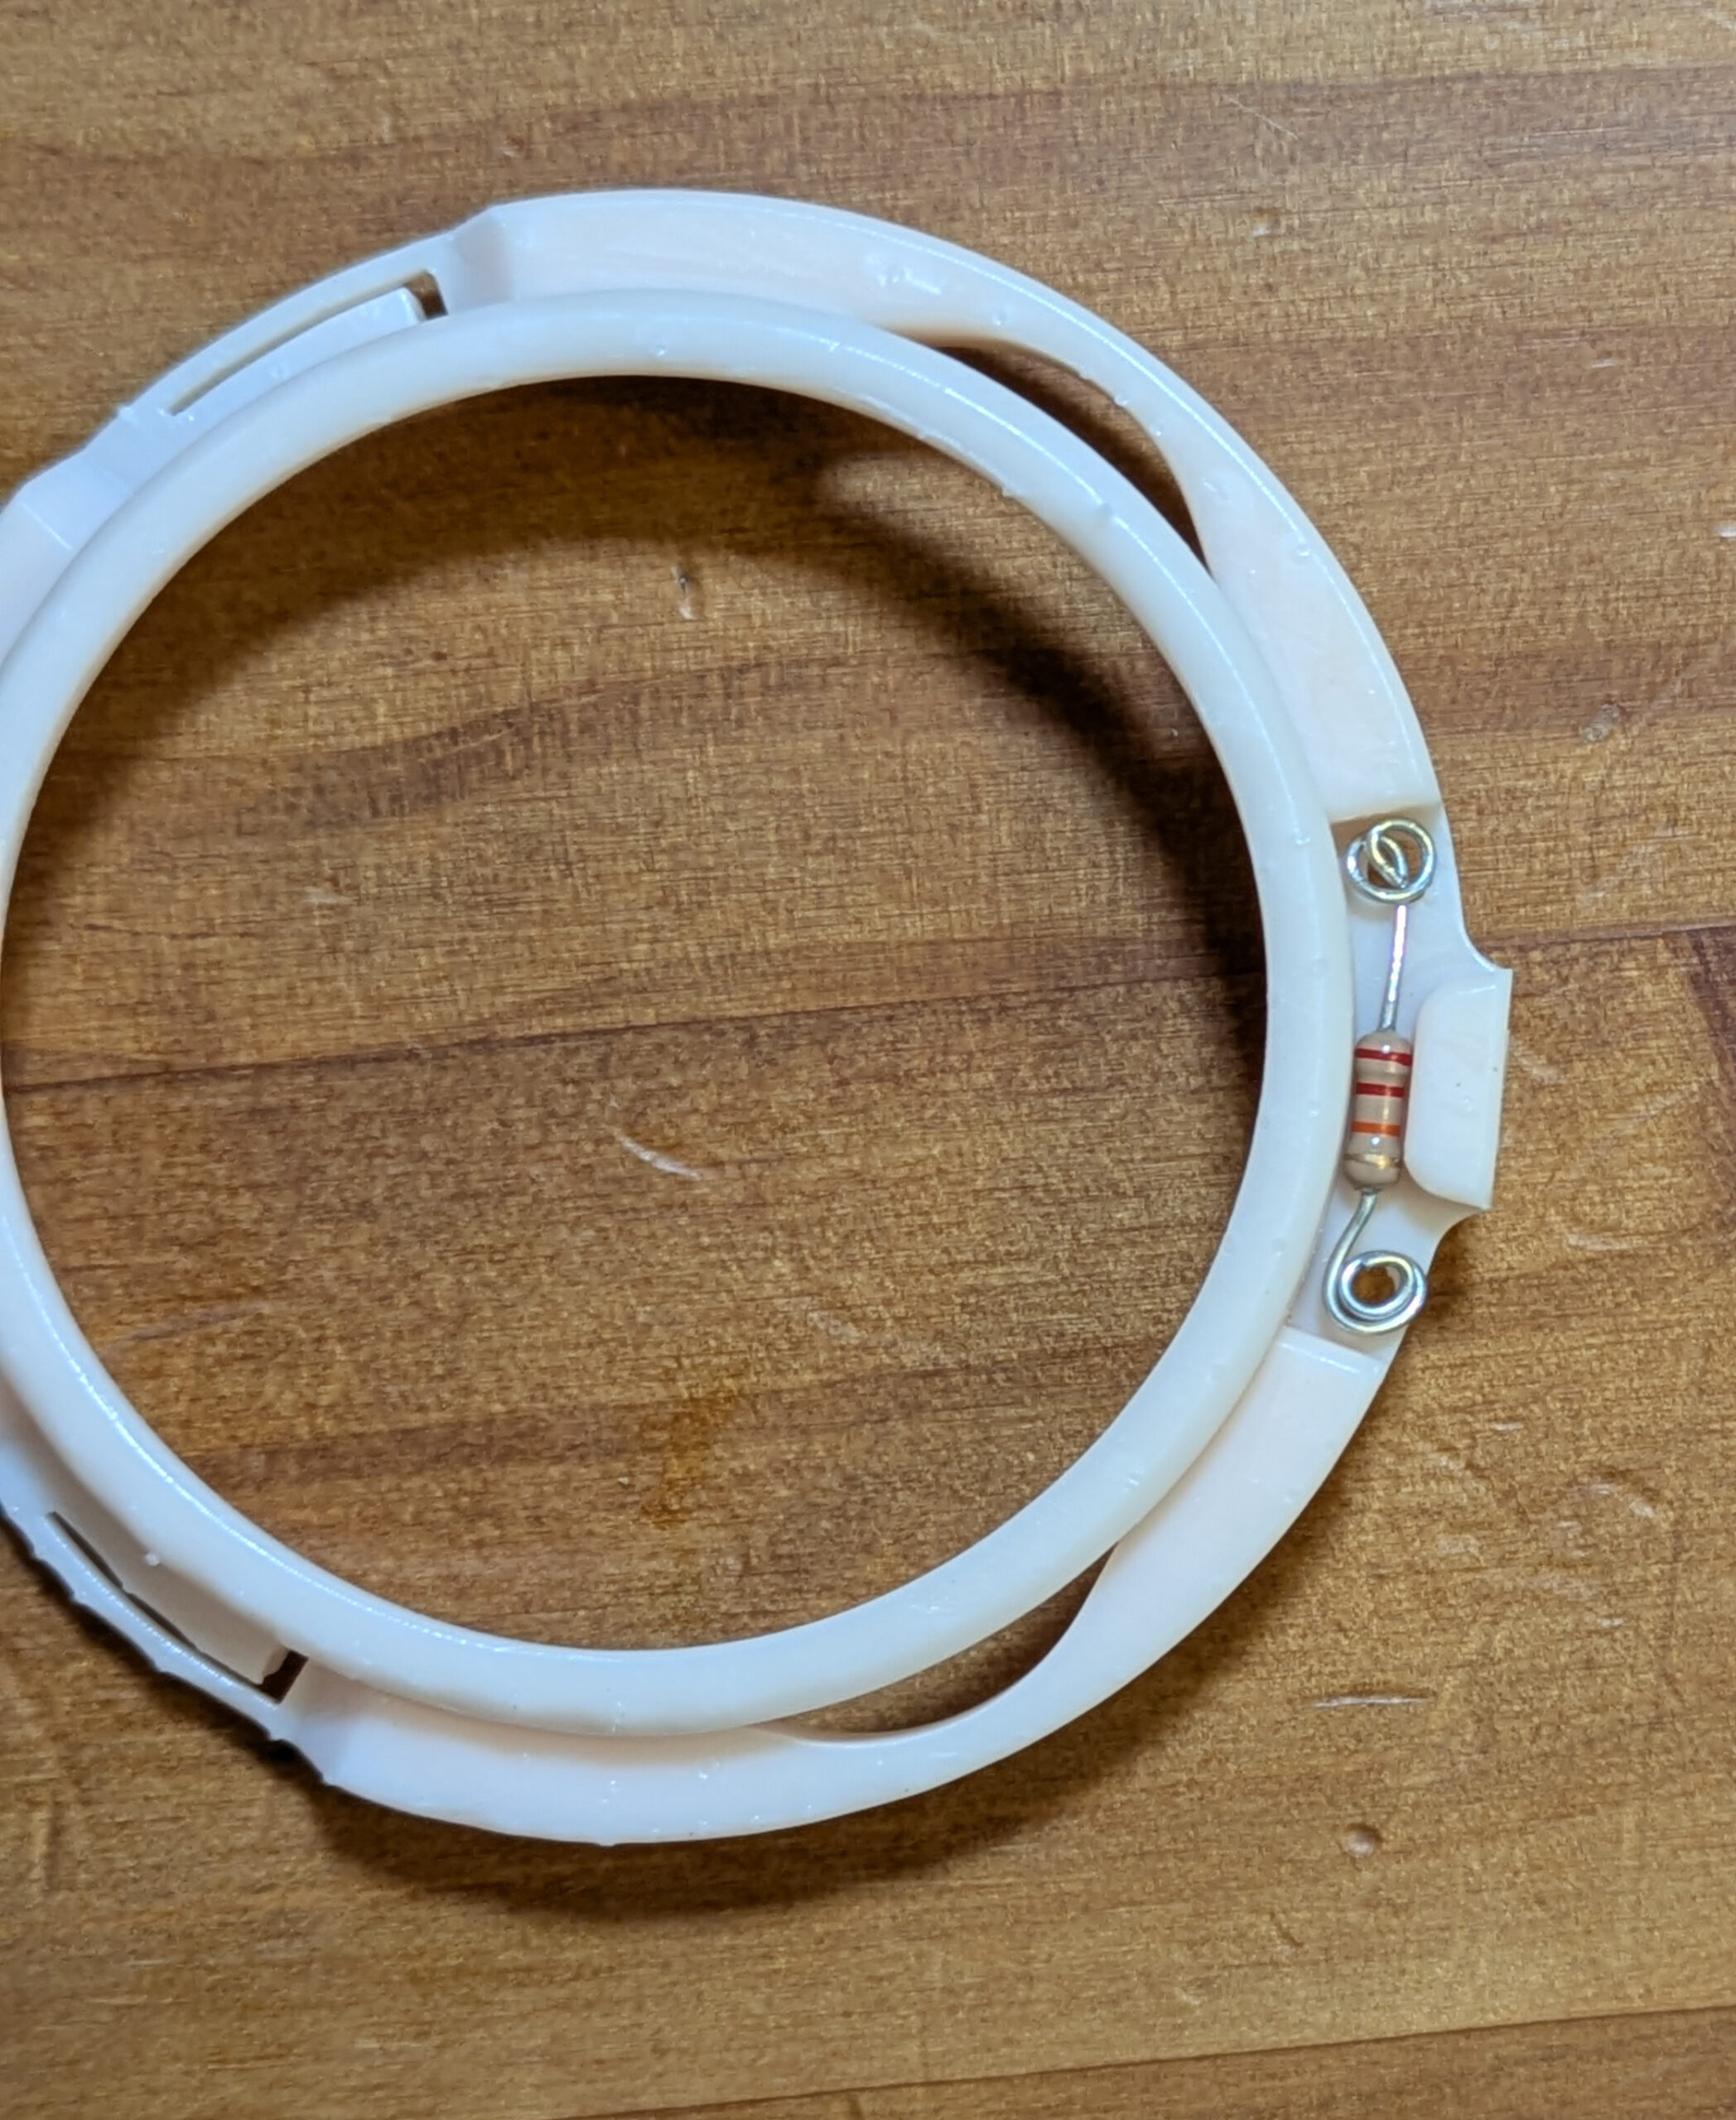
RadioWavz 20M “Double Bazooka” Dipole antenna ($40 used, $80 new w/ shipping)
DigiRig Mobile (CI-V configured) with ICOM CI-V Din 8 cables: $87.93 shipped
(I also recommend their shielded USB cables to prevent any RF/EMI from messing with your computer.)
Surplus LiIon “12 volt” (really 13.5 volts) 28 Ah battery: $60
(You could also buy an AC 13.8 volt 30 amp power adapter for under $100)
~ $100 of rope, pulleys, and coax to hang and connect the antenna (Note that I’m using my “fair weather” radio outdoors on the patio, so I don’t have any lightning suppressors, grounding rods or wall penetration hardware/boxes, which will probably add another $100-200 to make a permanent “ham shack” install).
50′ RG58 coax with PL259 connectors: $30
500′ 3/16 inch Black Dacron Polyester Rope $40
(I had some left over…)
2x U-Type Swivel Pulley 304 Stainless Steel $20
40 lb Neon Fire fishing line – 370 Yds (used to pull ropes and pulleys into trees) $13
I also used my son’s 20lb draw bow and arrow (for free!) but you’ll need something to launch the monofilament fishing line over tree limbs. I’d recommend a “Tree throw weight” thrown by hand as your least expensive option at $15 You can also buy a complete kit that includes 3mm rope instead of fishing line and a bag for $22.