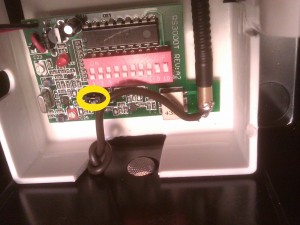
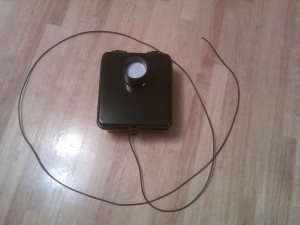
This is a photo of the radio transmitter inside of a Dakota Alert WMT-3000 wireless driveway alarm system. The wire coming through the hole drilled in the bottom of the case and soldered to the base of the antenna extends out to a 27″ wire whip antenna. Note the jumper circled in yellow. This jumper has a “high” and “low” setting. It is set to the “low” setting by the factory, and the “high” pin has been cut off. I found that the range was extended by soldering the “high” (cut off) pin to the center pin.
NetMedia iViewHD 2M POE Camera Review with ZoneMinder
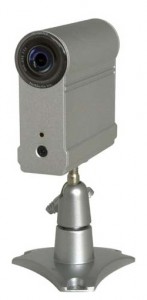
I have recently purchased a NetMedia iViewHD 2M power over Ethernet (POE) camera (retail price $105) for use with ZoneMinder.
This small camera must be hard-wired into a switch that provides power over Ethernet (which will cost another $80-100, but allows you to power up to 4 POE devices). I bought mine used, and don’t plan on buying more. The one I bought would reset to factory defaults (requiring you to upload a new “website”) every few months, and after a year of use it died completely (won’t respond to DHCP address assignments). At used prices the NetMedia iViewHD 2M could be a good deal for daytime shots, despite my nighttime image quality complaints below, if the one you buy lives longer than mine, but I can’t recommend it.
New voltage gauges
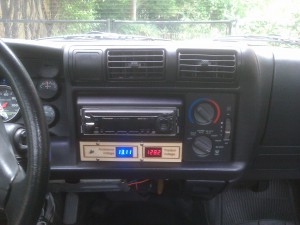
This picture shows off my new flush-mount laser cut panel with voltage meters installed. These new gauges are Datel self-powered LED voltage displays (DMS-20PC-8-DCM for the red traction pack display and DMS-20PC-0-DCM-B for the blue accessory battery display). They are considerably more expensive than my previous gauges ($50 for the red and $59 for the blue) but have two major advantages. First, they actually fit inside the dash, so I can flush mount them instead of building a box around them. Second, they are “self-powered”, which really means they have their own DC/DC converter built in and draw power from the source they are monitoring. But, because each gauge has it’s own DC/DC converter, they are completely isolated from each other (something that my previous “isolated” DC/DC converter didn’t really do well.) Having all the power circuitry integrated into the gauge also greatly simplifies the wiring.
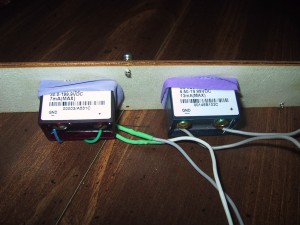
The gauges come with metal clips to fix them to the back of a panel, but the clips were too big for my opening. I improvised with a very close fit on the cutouts and some large rubber bands. If I ever need to replace the rubber bands, I just unscrew the four 6x 5/8 inch screws to remove the panel. (The screws are not exactly balanced on the panel as I was matching up to pre-existing holes.)
I wanted two different colors for the accessory and traction pack voltage, so I paid $9 extra to buy the blue LEDs for the 12 volt accessory battery. It turns out that this was a mistake. The blue gauge is much brighter than the red one, and at night it is blinding. I wired up a toggle switch to allow the driver to turn it off when driving at night. (The red gauge is just right, easily visible in the daytime but not too bright at night.) If anybody wants to buy a blue self powered voltage gauge for $50 including shipping I’d gladly sell it and buy a red replacement.
Jameco potentiometer grab bag
So, if you purchase a few Jameco grab bags of potentiometers, what exactly do you get?
- 100 – 10 Ohms a good number, plus a few 20 ohms
- 500 – 50 ohms, a good number
- 101 – 100 ohms, a slightly smaller amount
- 201 – 200 ohms, a good number
- 501 – 500 ohms, a metric boatload (filled up 2 squares in my organizer)
- 102 – 1K ohm, a large number
- 202 – 2K ohm, a large number
- 502 – 5K ohm, two
- 103 – 10K ohm, three
- 203 – 20K ohm, eight
- 503 – 50K ohm, two
- 104 – 100K ohm, two
- 204 – 200K ohm, one
- 304 – 300K ohm, five screw pots, plus six larger slider pots
- 504 – 500K ohm, a large number
- 105 – 1 M Ohm, five
- 205 – 2 M Ohm, seven
Of course, if you wait a few months, Jameco’s overstock may be completely different and their grab bags may have completely different distribution of potentiometers.
On-Dash voltage guages
I received a VWRAS2-D12-D9-SIP isolated DC/DC power adapter from Digikey and built an updated voltage gauge module with dual gauges (one for the 12 volt accessory pack, and one for the 120 volt traction pack). The gauges were slightly too large to fit inside the dash, so I built an enclosure out of craft plywood that sticks out flush with the bottom of the radio.
Continue reading
HOWTO: Full Disk encryption on Ubuntu 10.04
How to set up an entirely encrypted disk using Ubuntu 10.04 (LTS):
- Use the Alternative installer (text based) ISO image so that you have access to the LVM and Encrypted Disk options.
- Assuming you want to keep a windows partition or some other pre-existing partitions intact, you will have to manually partition things instead of using the guided partitioner, so select “manual”.
120 Volt Charging Plug
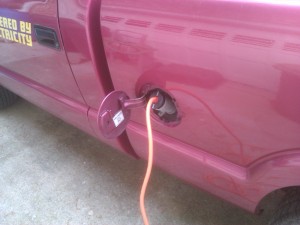
Our “new” electric pickup came with a 240 volt twist-lock connector where the gas cap would be. This is great for plugging into a 240 volt outlet, such as used by an electric range or clothes dryer, but we are primarily charging it with a 120v convenience charger. (So called because 120v outlets are more convenient to find. It actually takes about twice as long to charge using 120v so from a time standpoint it is less convenient.)
I decided to add a second 120 volt plug behind the fuel port door so that I could plug in either voltage cable. Continue reading
Building a PVC Vacuum Reservoir
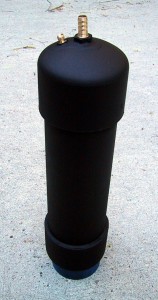
The electric pickup truck uses a vacuum pump to generate vacuum for the power brakes (and move vents in the HVAC system). It has a pressure switch that turns on the pump when the vacuum drops to under 15 inHg and turns it off once the pump has raised the vacuum to 25 inHg. The current system has a small 3″ by 1.5″ PVC cylinder as the vacuum reservoir. As soon as you press the brake the pump turns back on, and cycles on and off relatively frequently. I wanted a larger vacuum reservoir so that the duty cycle on the pump would be longer (it would stay on longer, but also stay off longer) and so that even when the vacuum drops to 15 inHg I could still operate the brakes several more times while the vacuum pump was working.
Continue reading
A Month Driving the Electric Truck
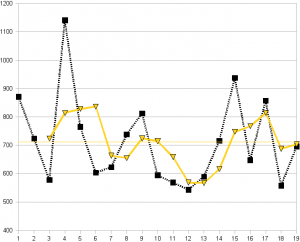
We have driven our electric S-10 pickup for a month now, putting 187 miles on it and charging it 20 times (averaging around 9 miles per charge). We used around 132 Kwh of electricity to re-charge it (13% of our total household electricity usage for the month) which cost around $13.20 (or 7 cents per mile). The truck is averaging around 700-720 Wh of power per mile driven. If we were paying $3.75 per gallon of gas and getting 20mpg on an equivalent vehicle, the energy price comparable MPG rating of the truck would be 54mpg. The chart above displays the watt/hour per mile calculation for our first 20 charges. As you can see, the numbers jump around depending upon where we drive, what route we take, what speed we drive, etc. We are also in the process of breaking in a new pack of batteries).
Continue reading
Traction Battery Volt Meter
The S-10 electric pickup has an analog voltage gauge in the instrument cluster which is useful to get a general picture of how the battery voltage is changing while you drive, but hard to read with any real accuracy. The previous owner had also wired 12v and 120v wires into the center of the dash in an attempt to set up a digital volt meter on the traction batteries. But the 12v supply burnt out his volt meter, and when I purchased the truck it was dead. I bought a 200 volt LED panel display from a surplus supply house for $12 to replace it. I also added a 1A fuse on the 120v supply line in the engine compartment as a safety feature.
Continue reading

