I am in the process of replacing the twenty (20) six volt lead acid golf cart batteries that power my electric pickup truck with 48 Nissan Leaf battery modules. Because the battery bays in the truck are specificity designed to hold 20 golf cart batteries (and the Leaf modules have a different form factor), it’s not a straight-forward drop in replacement.
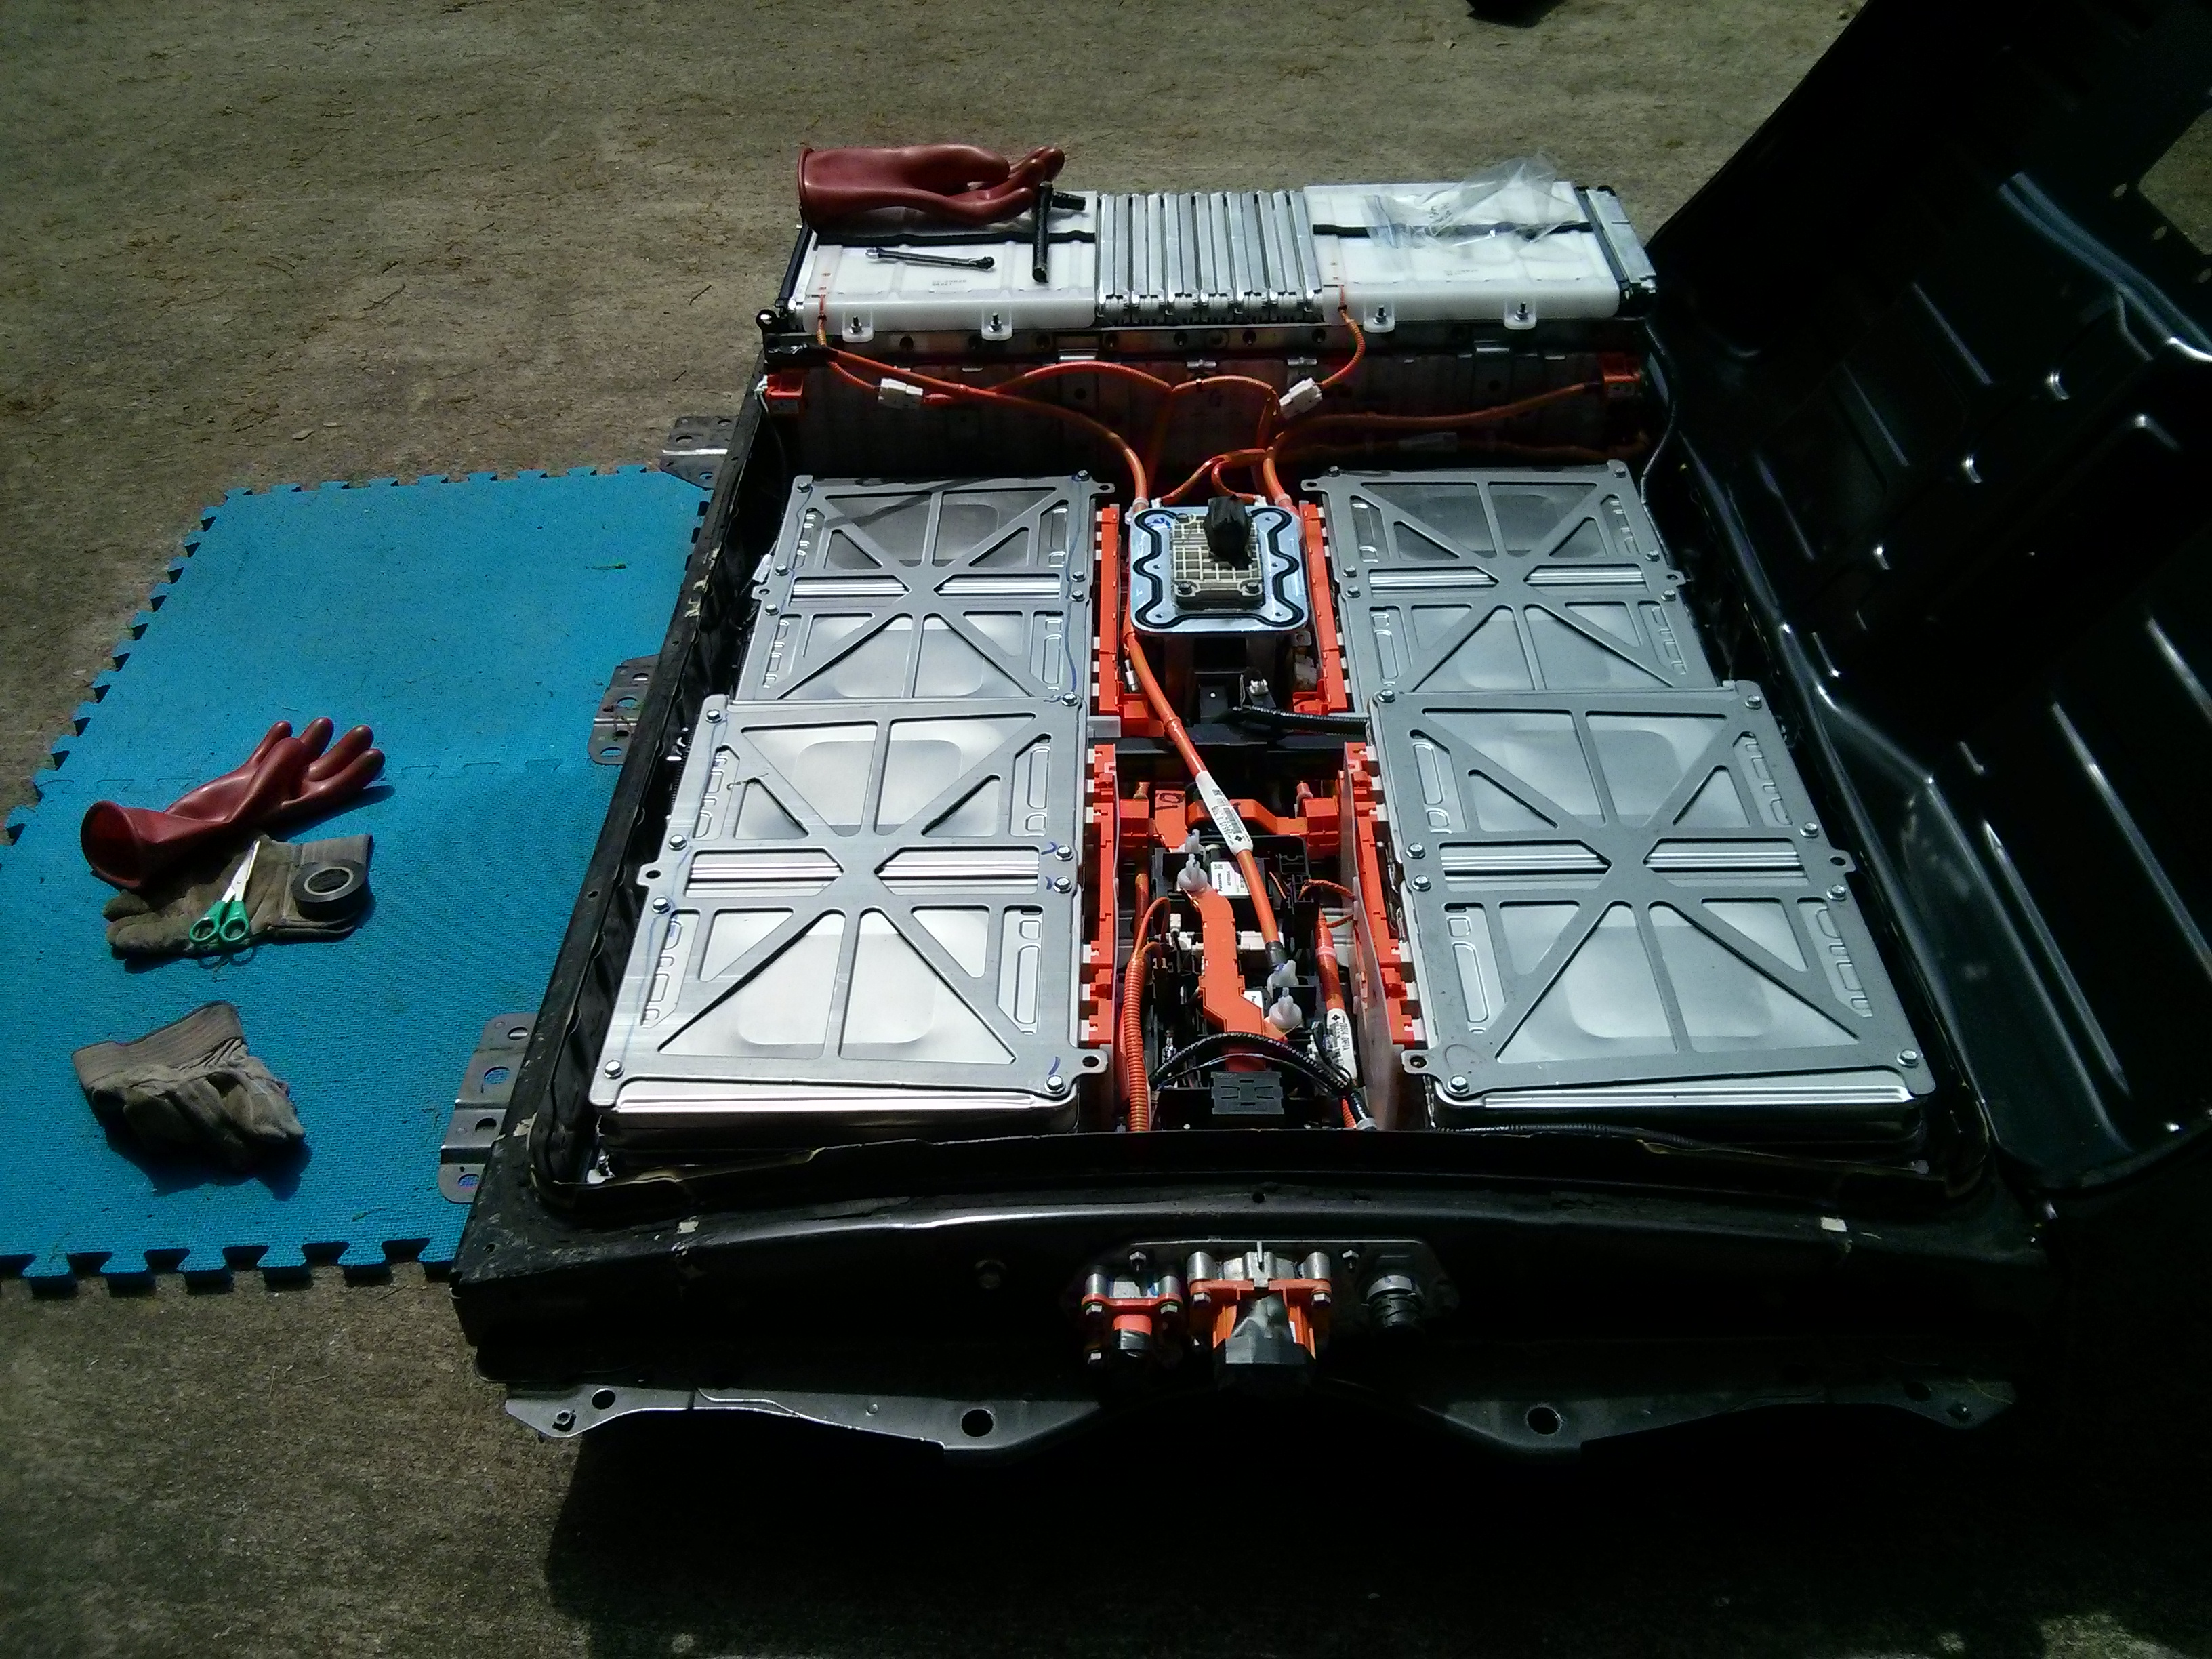
My initial design (not showing the compression plates that hold the six modules together in compression):

In the image above, the black bar is negative, Continue reading