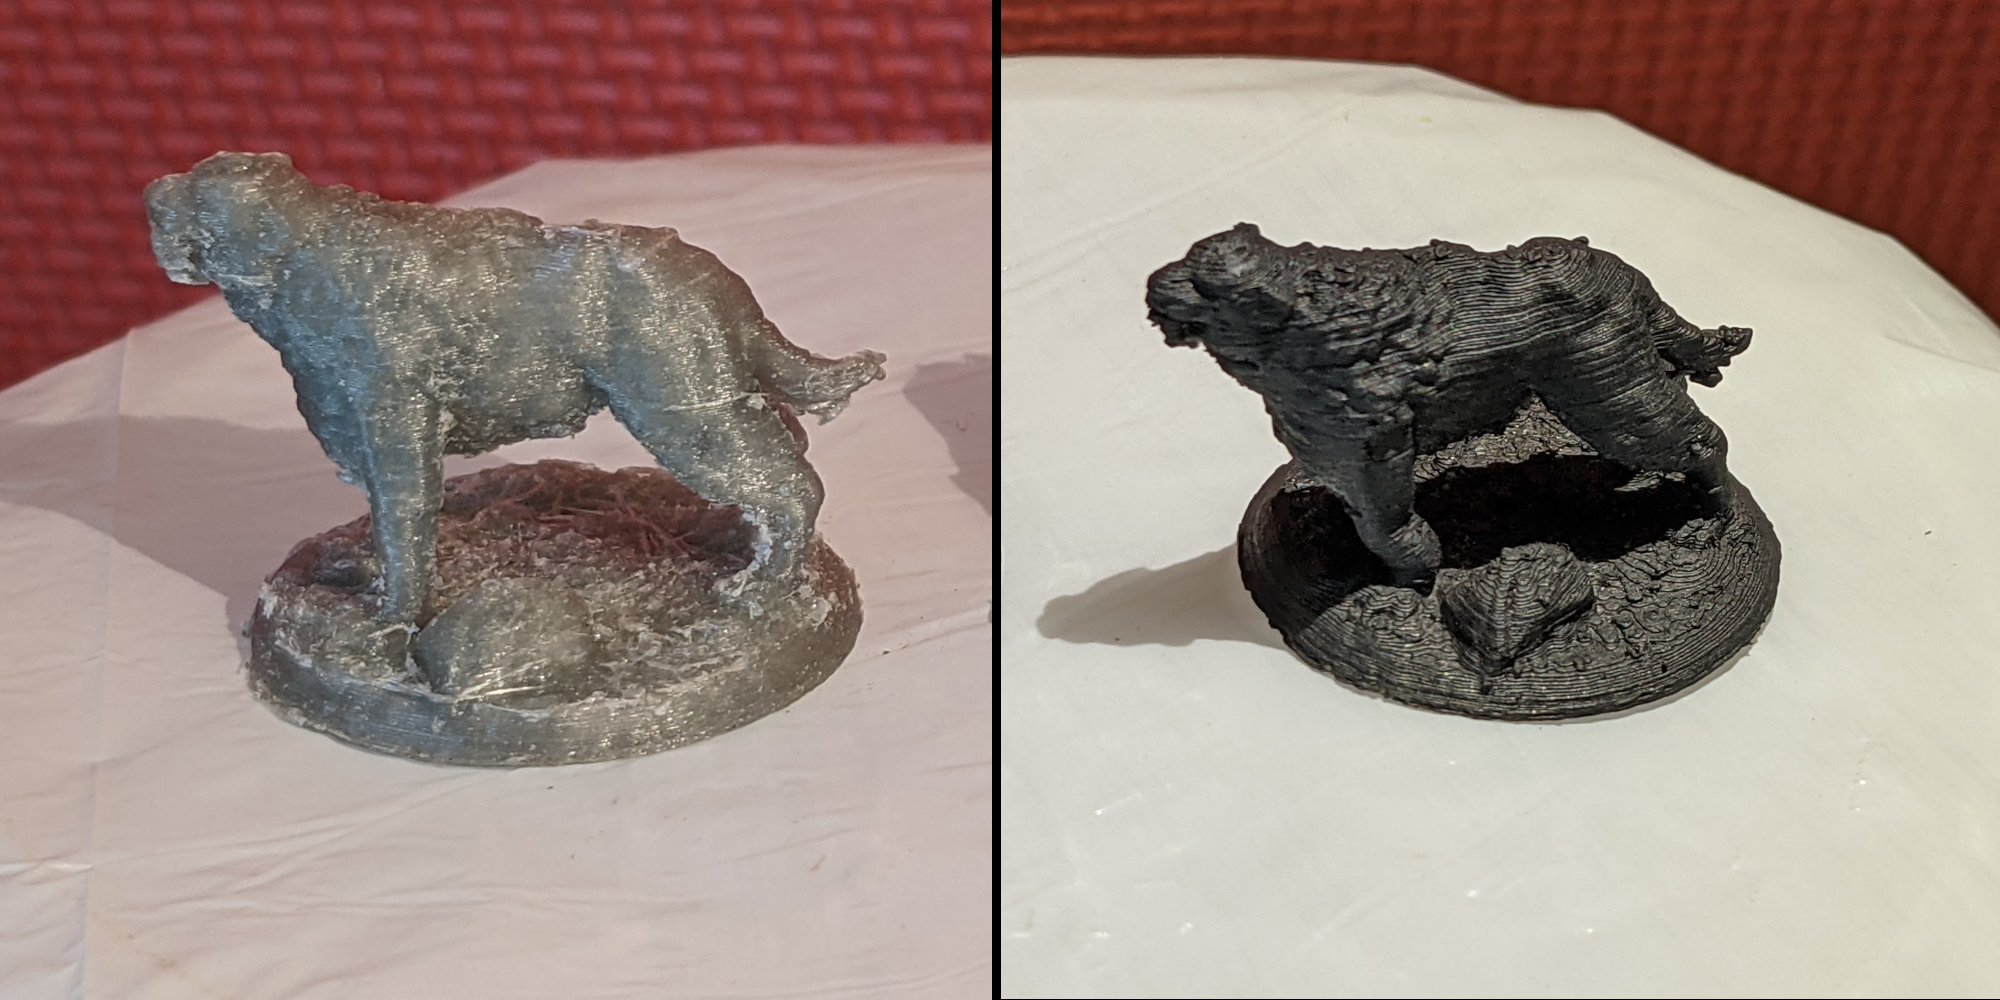
I printed this model from Thingiverse # 4839997 (scaled down) on my Monoprice Mini Delta 3D printer. It took a lot of time to remove all the support material due to the small scale (and I broke the head off in the process). Continue reading
I printed this model from Thingiverse # 4839997 (scaled down) on my Monoprice Mini Delta 3D printer. It took a lot of time to remove all the support material due to the small scale (and I broke the head off in the process). Continue reading

This is the gargoyle miniature from the Castle Ravenloft board game, painted. It took me three tries to get an effect I was fully happy with, mostly because I tried to use a gray primer instead of a black primer. (More on that later on….) Continue reading

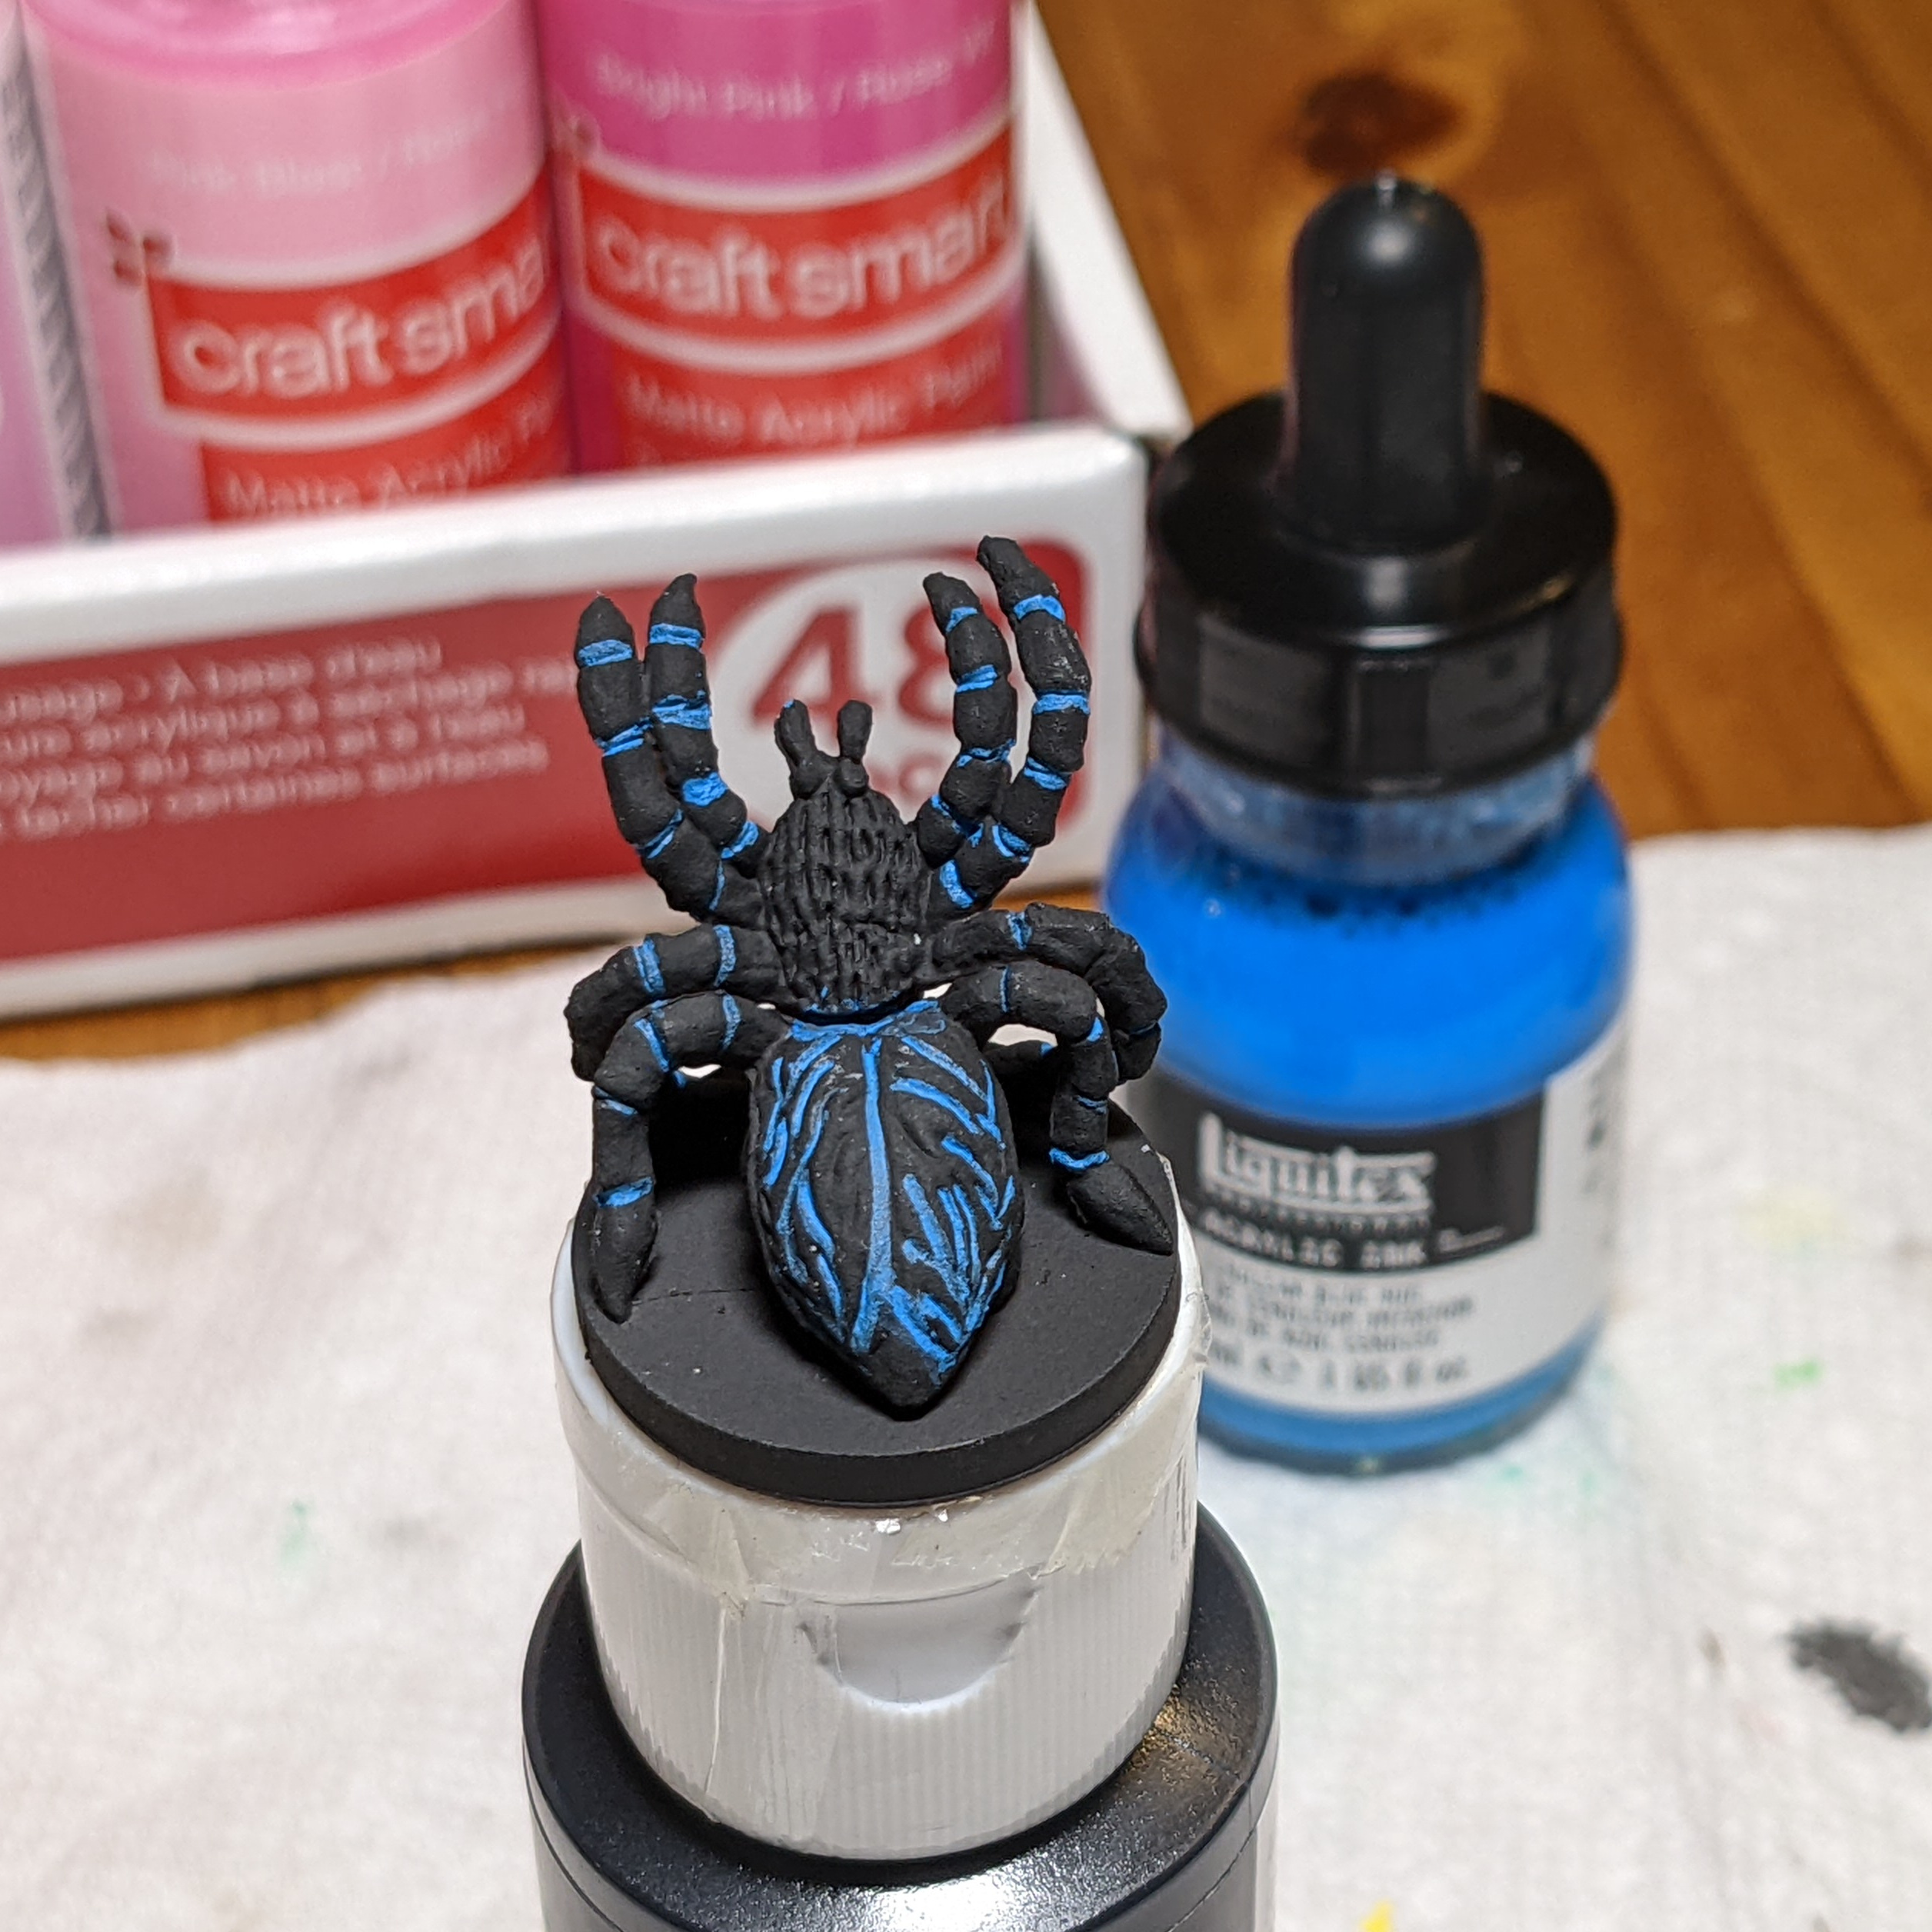
Normally you add details as one of the last steps when painting a model. For this spider from the Castle Ravenloft board game, I used Cerulean Blue (hue) acrylic ink from Liquitex to line most of the depressions on the back and the gaps between each leg segment right after the black automotive spray primer. Yes, it took a bit of time to pick out each segment and the depressions on the back, but I knew it would be worth it as soon as I saw the result. The high flow of the ink (vs standard acrylic paint) was key in filling the depressions without making the brush work too difficult.

I’ve started painting the minifigs / monsters that came with the Castle Ravenloft board game. I decided to start with the rat swarm first, because I figure if I can paint all those little rats and still retain my eyesight, the larger models should be a piece of cake.
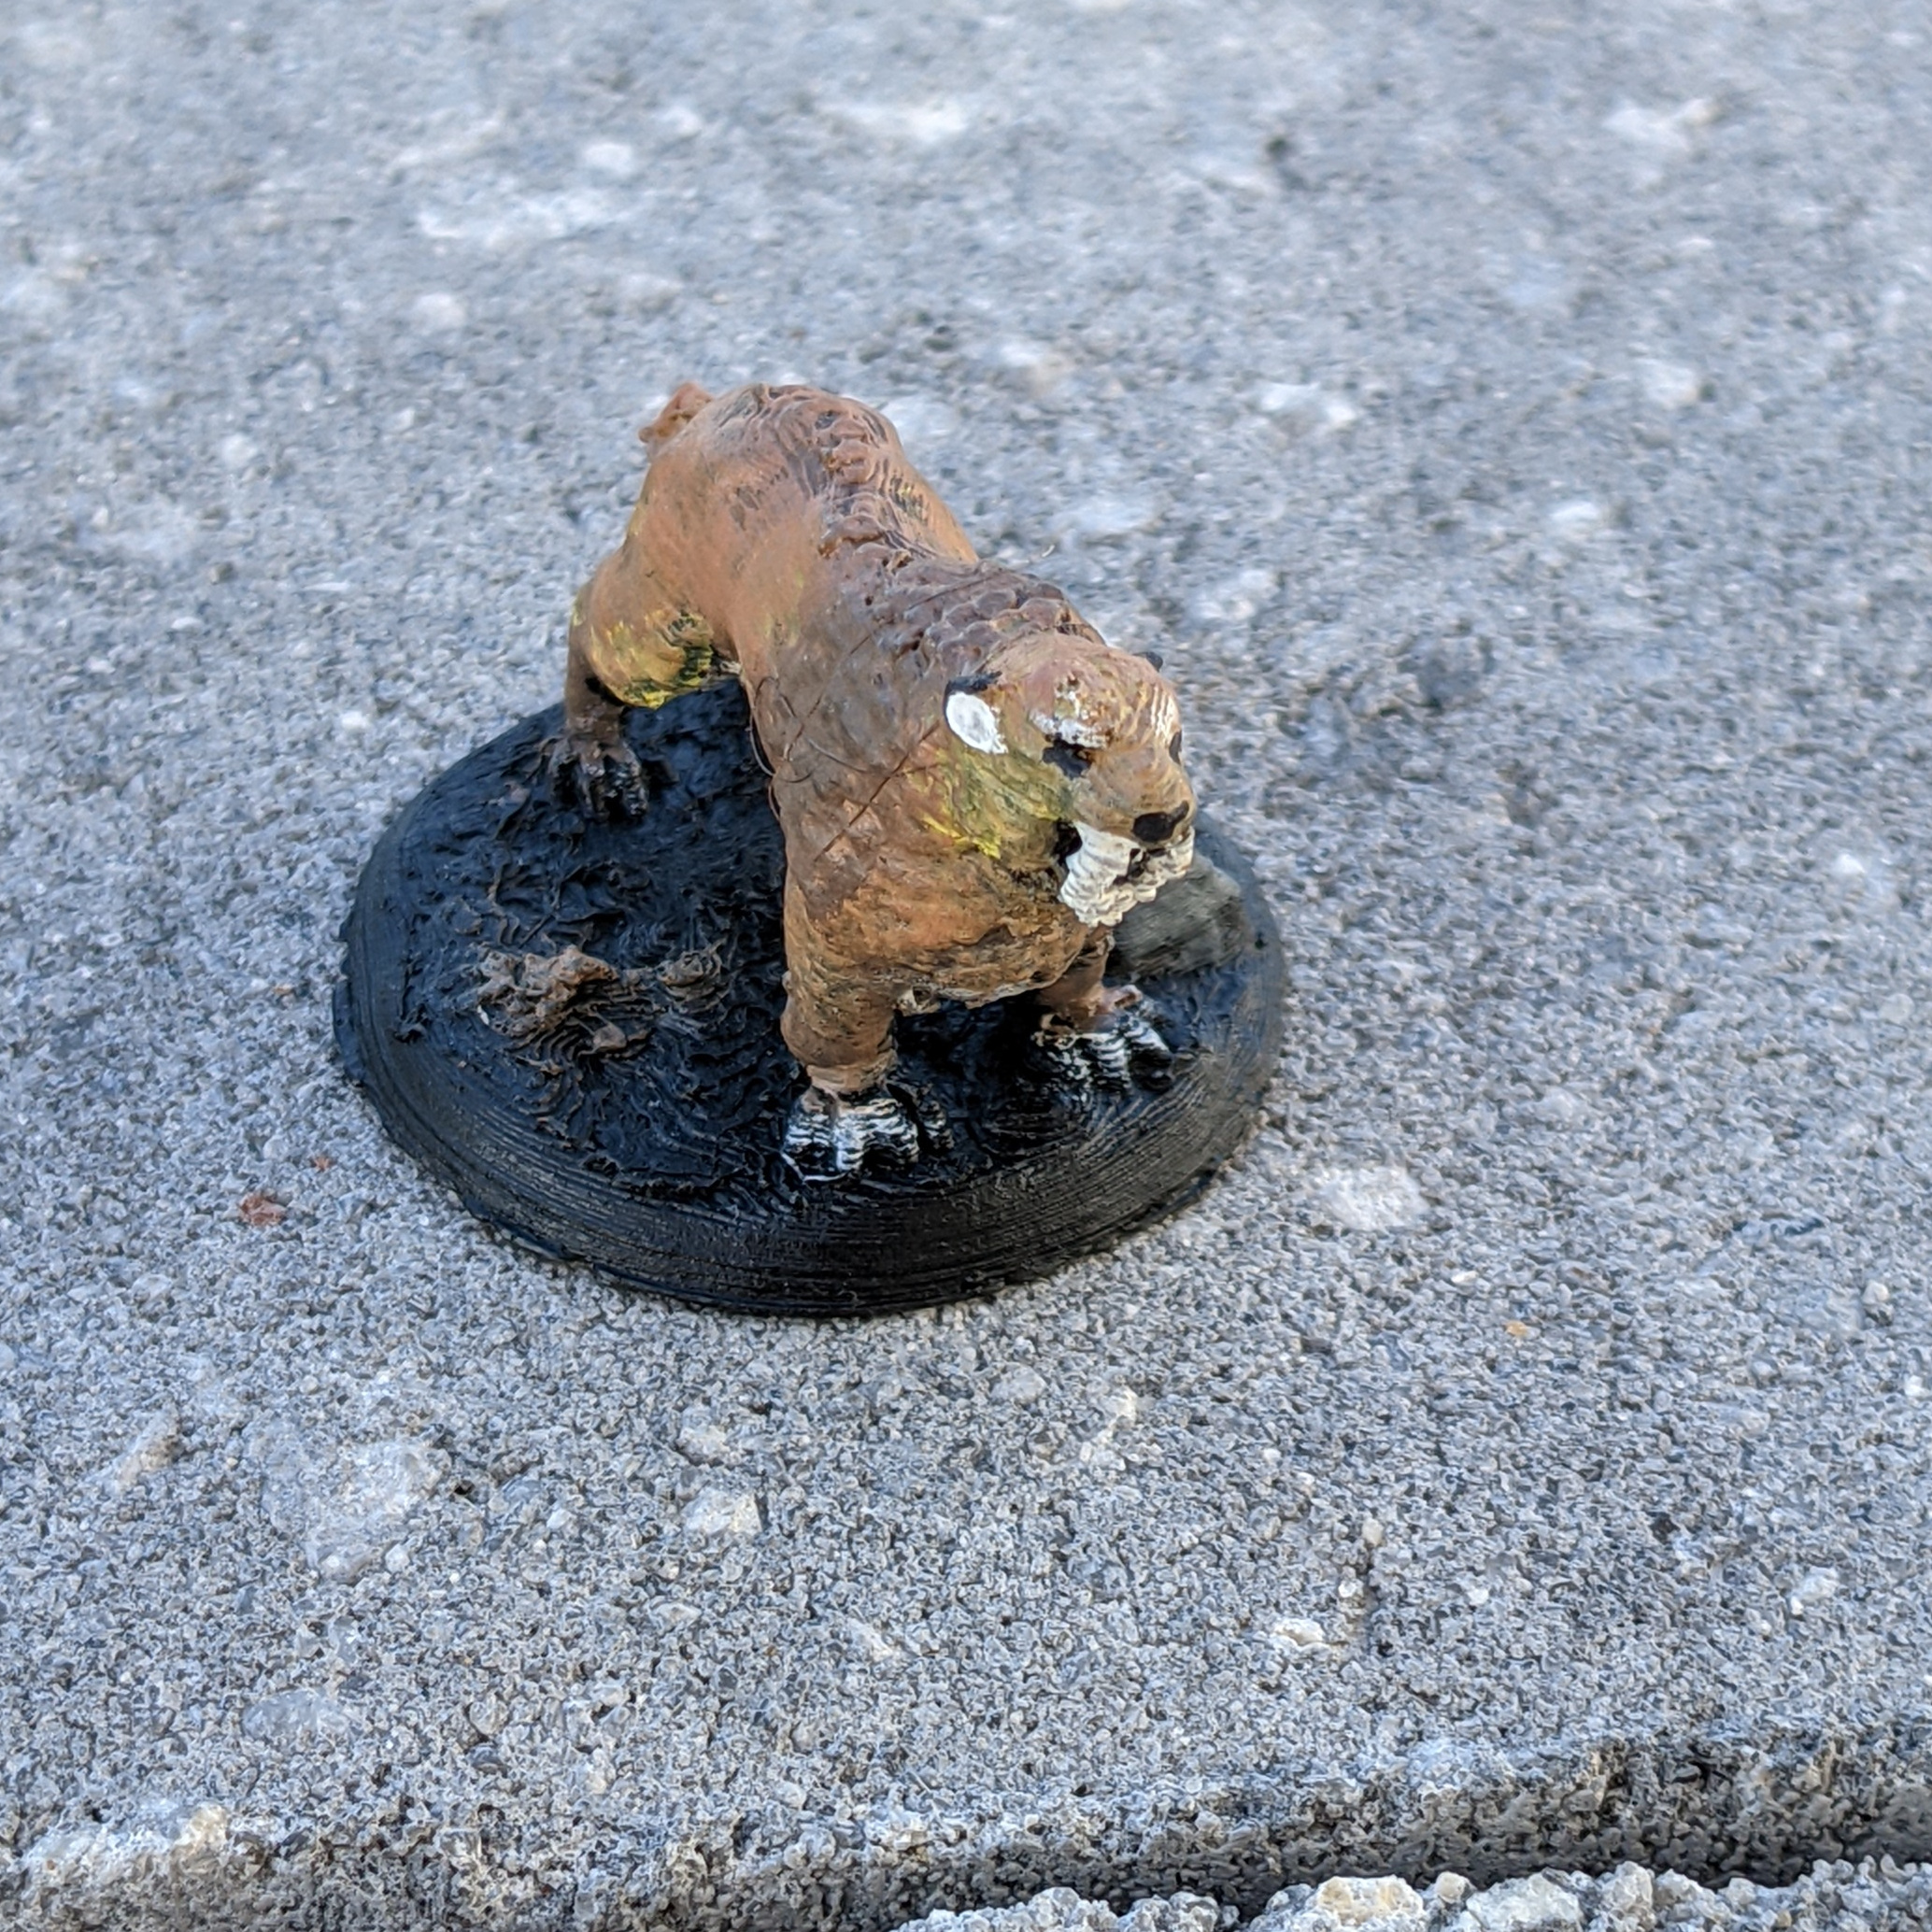
I printed this sabertooth tiger model from Thingiverse # 3931638 and painted it with acrylic paints.
Although not perfect for FDM printing, the 3D print wasn’t too bad, and looked relatively sharp after priming.
I painted on a base coat of dark yellow to brown colors, decided it was too dark, so lightened it up with a few areas of brighter yellow.
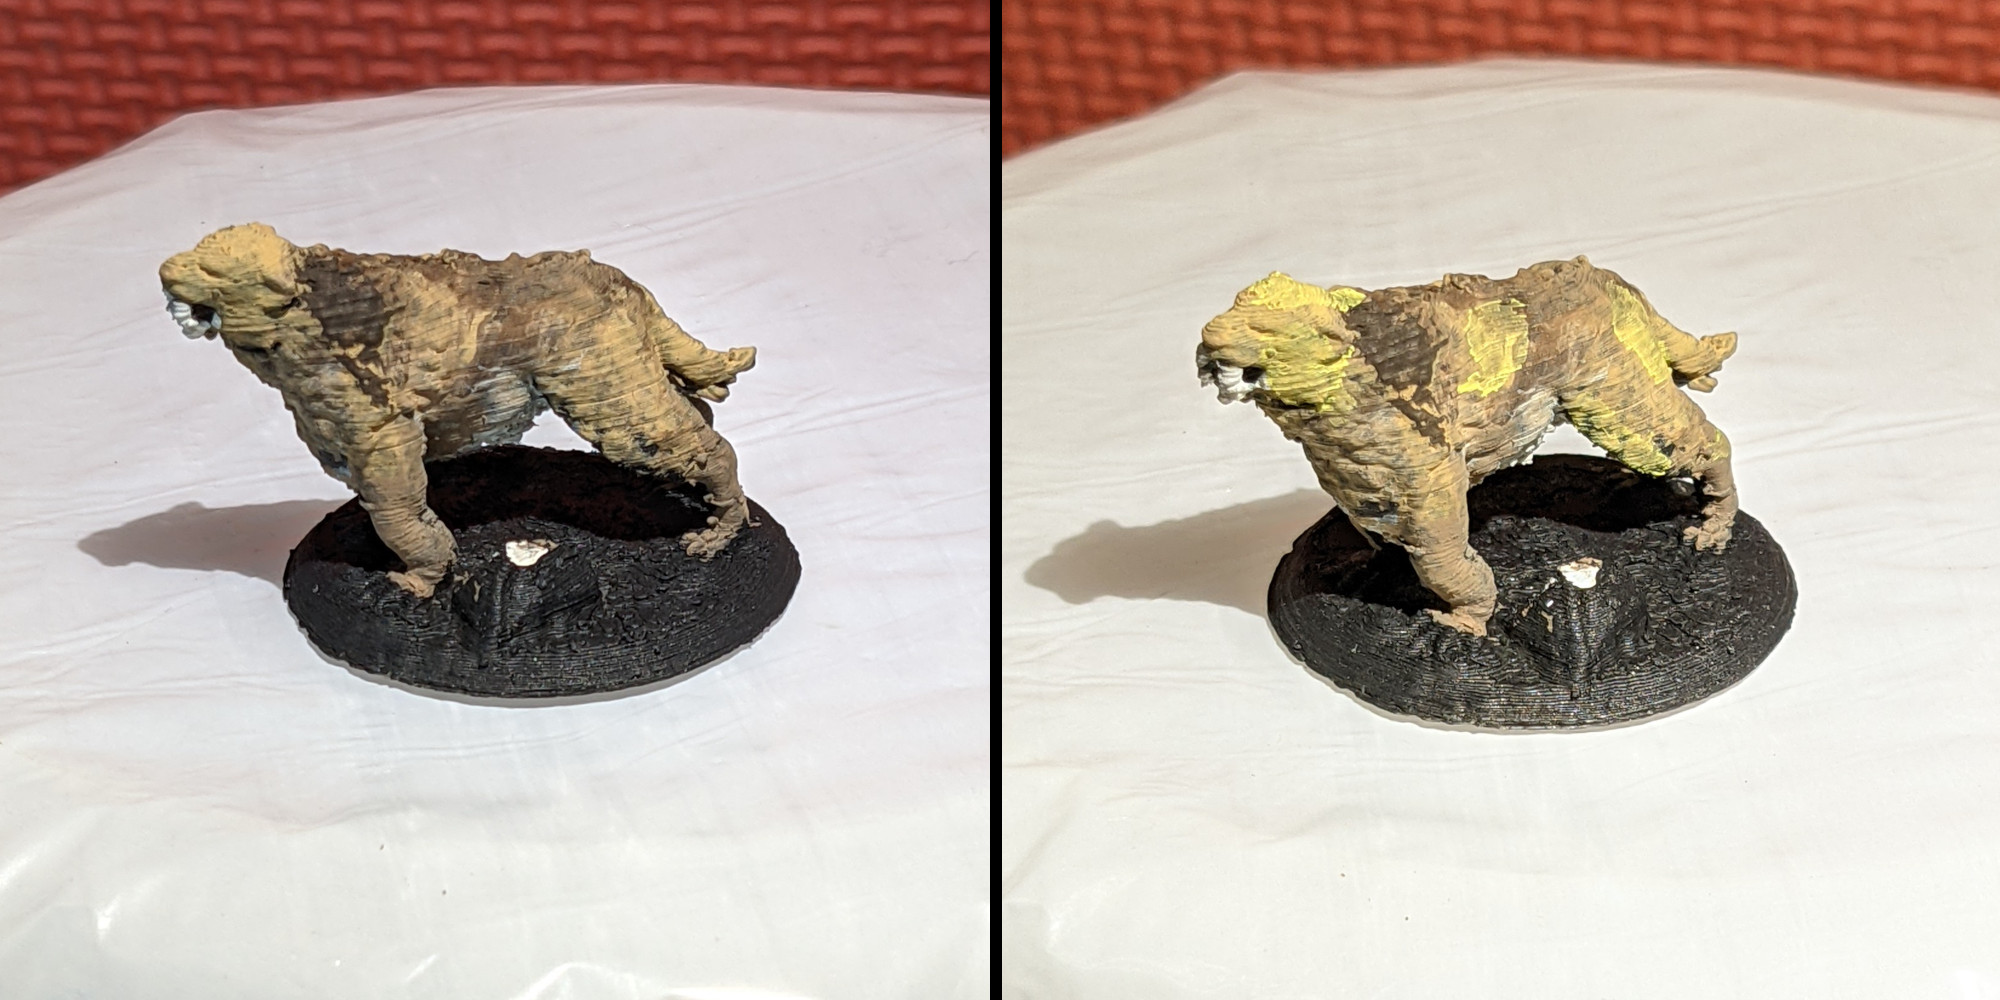
Then I dry brushed more brown and orange over the model, painted the rock on the base gray, and added some white details (claws, teeth, inside ears and above eyes) plus some black (for the eyes and above the ears).
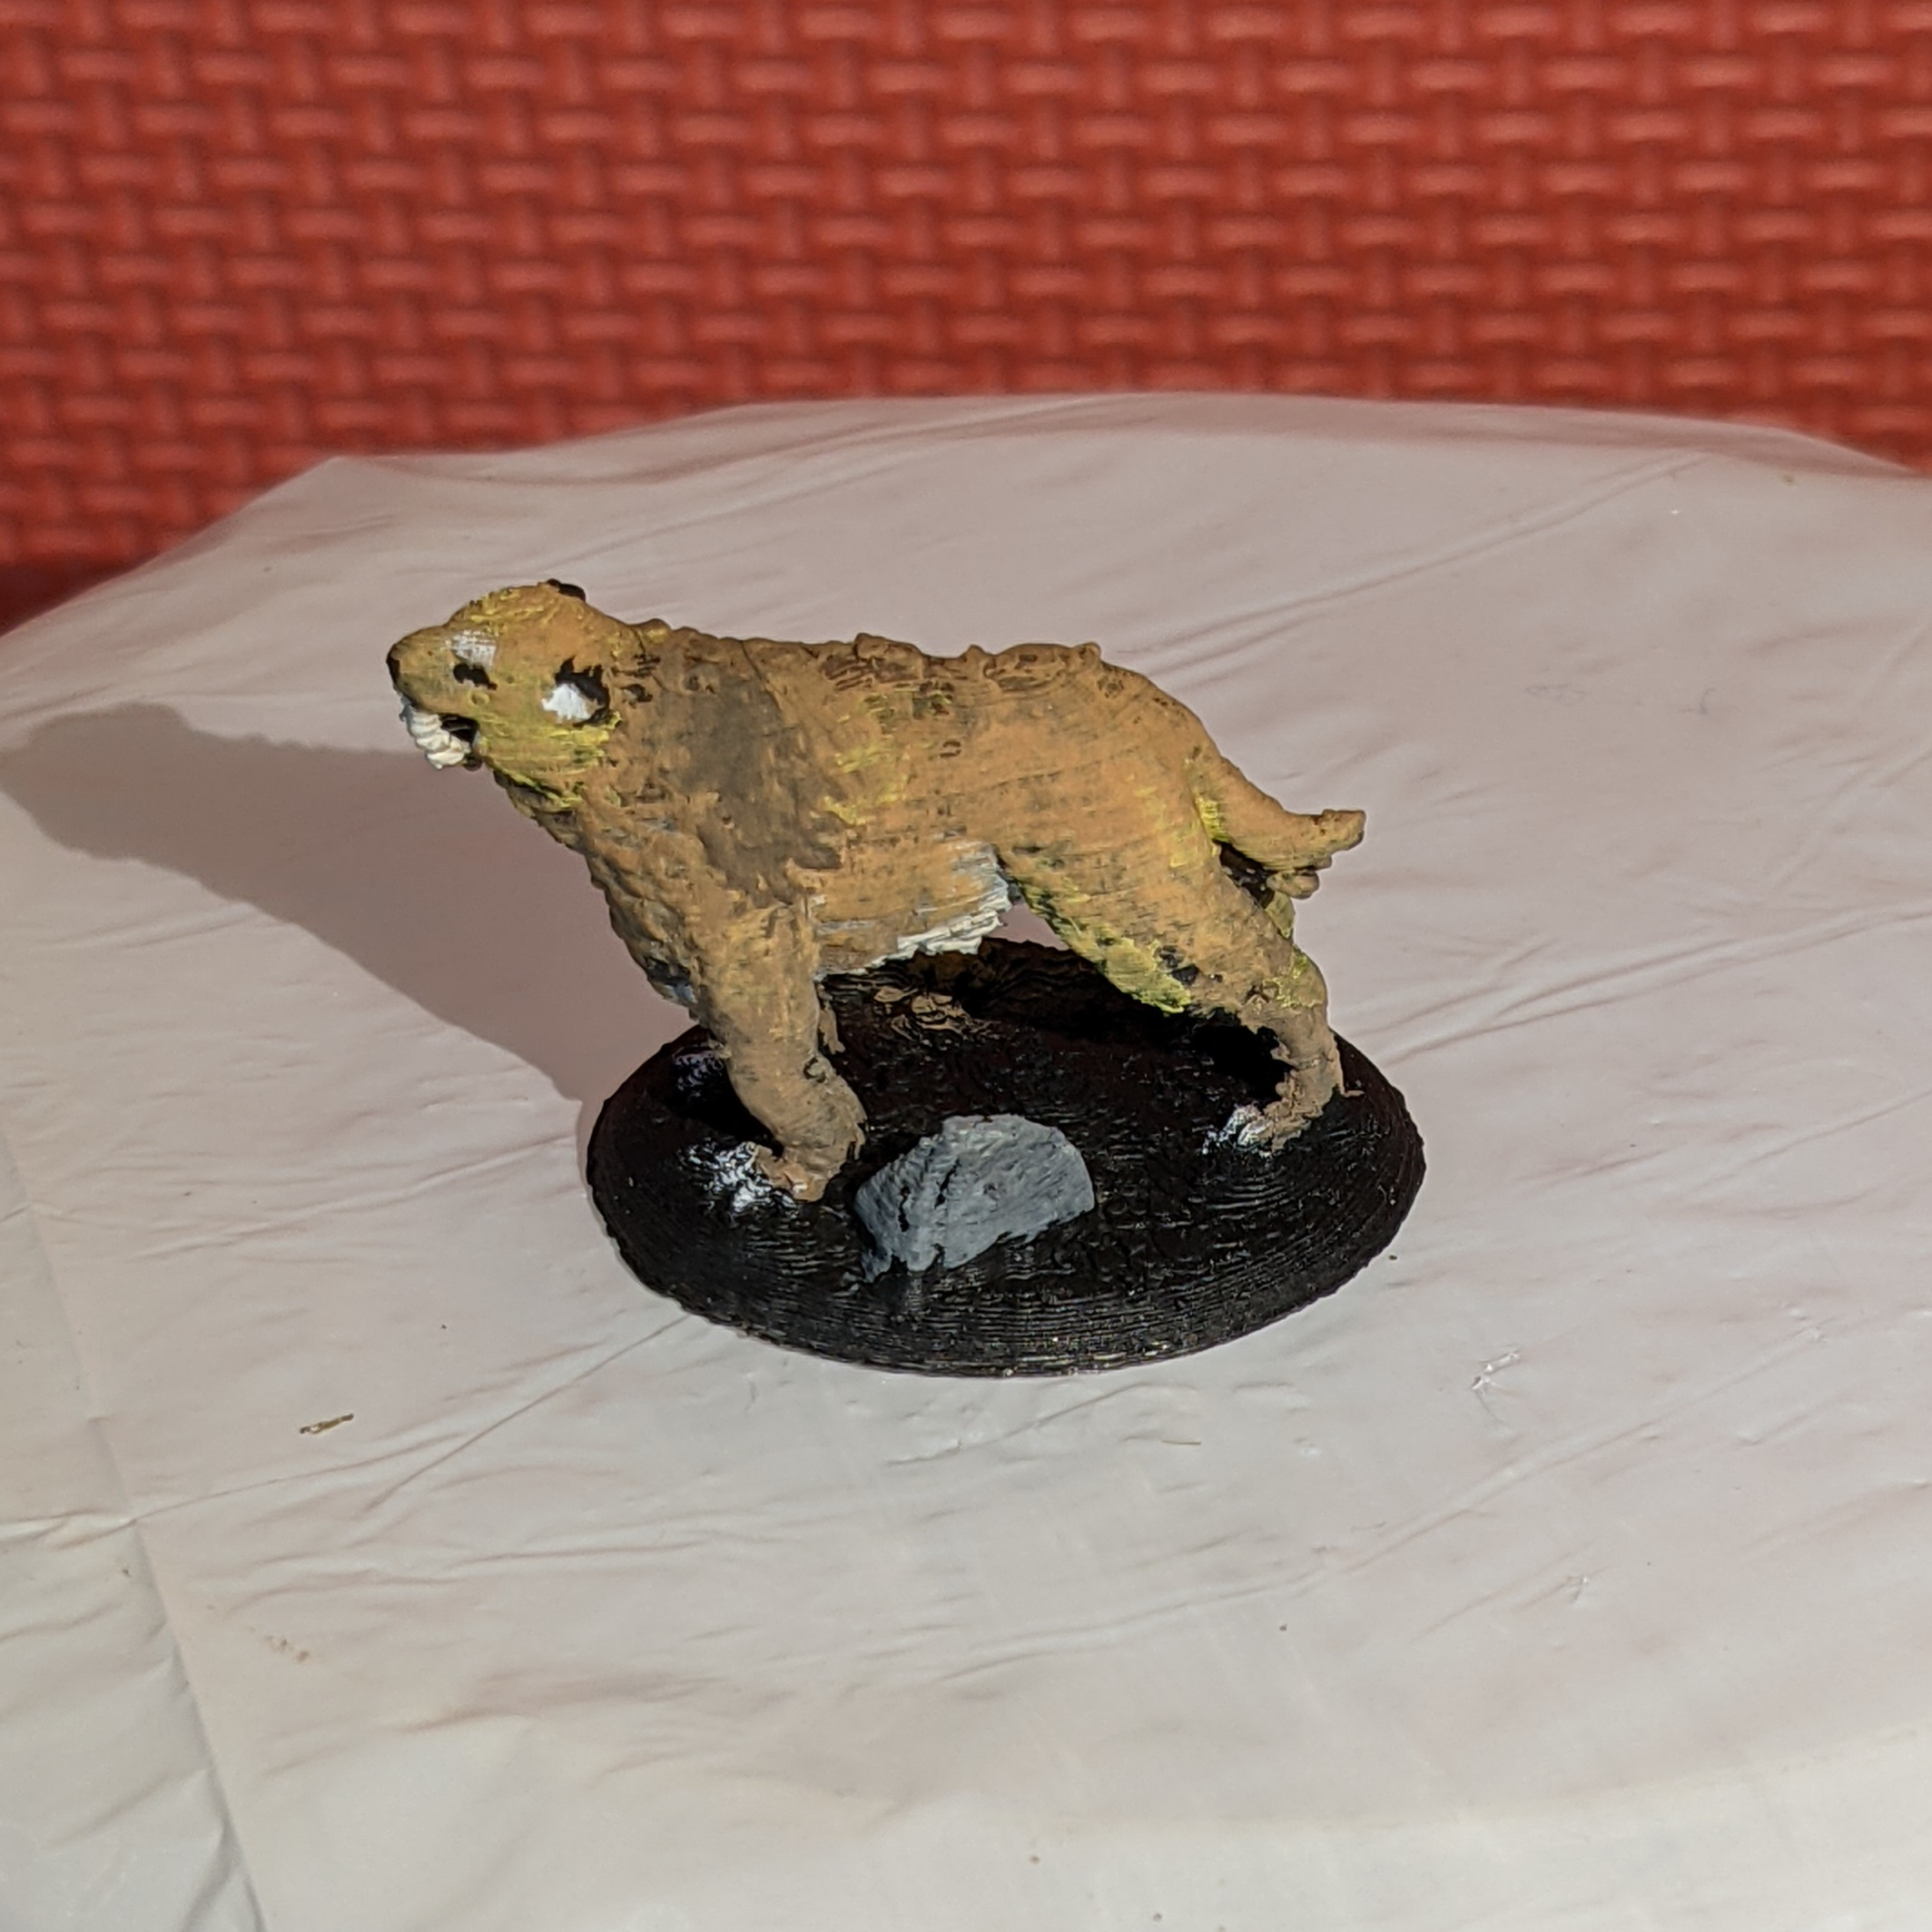
You can compare this to my reference photo (which has a lot more orange on it…) to see how well I did.
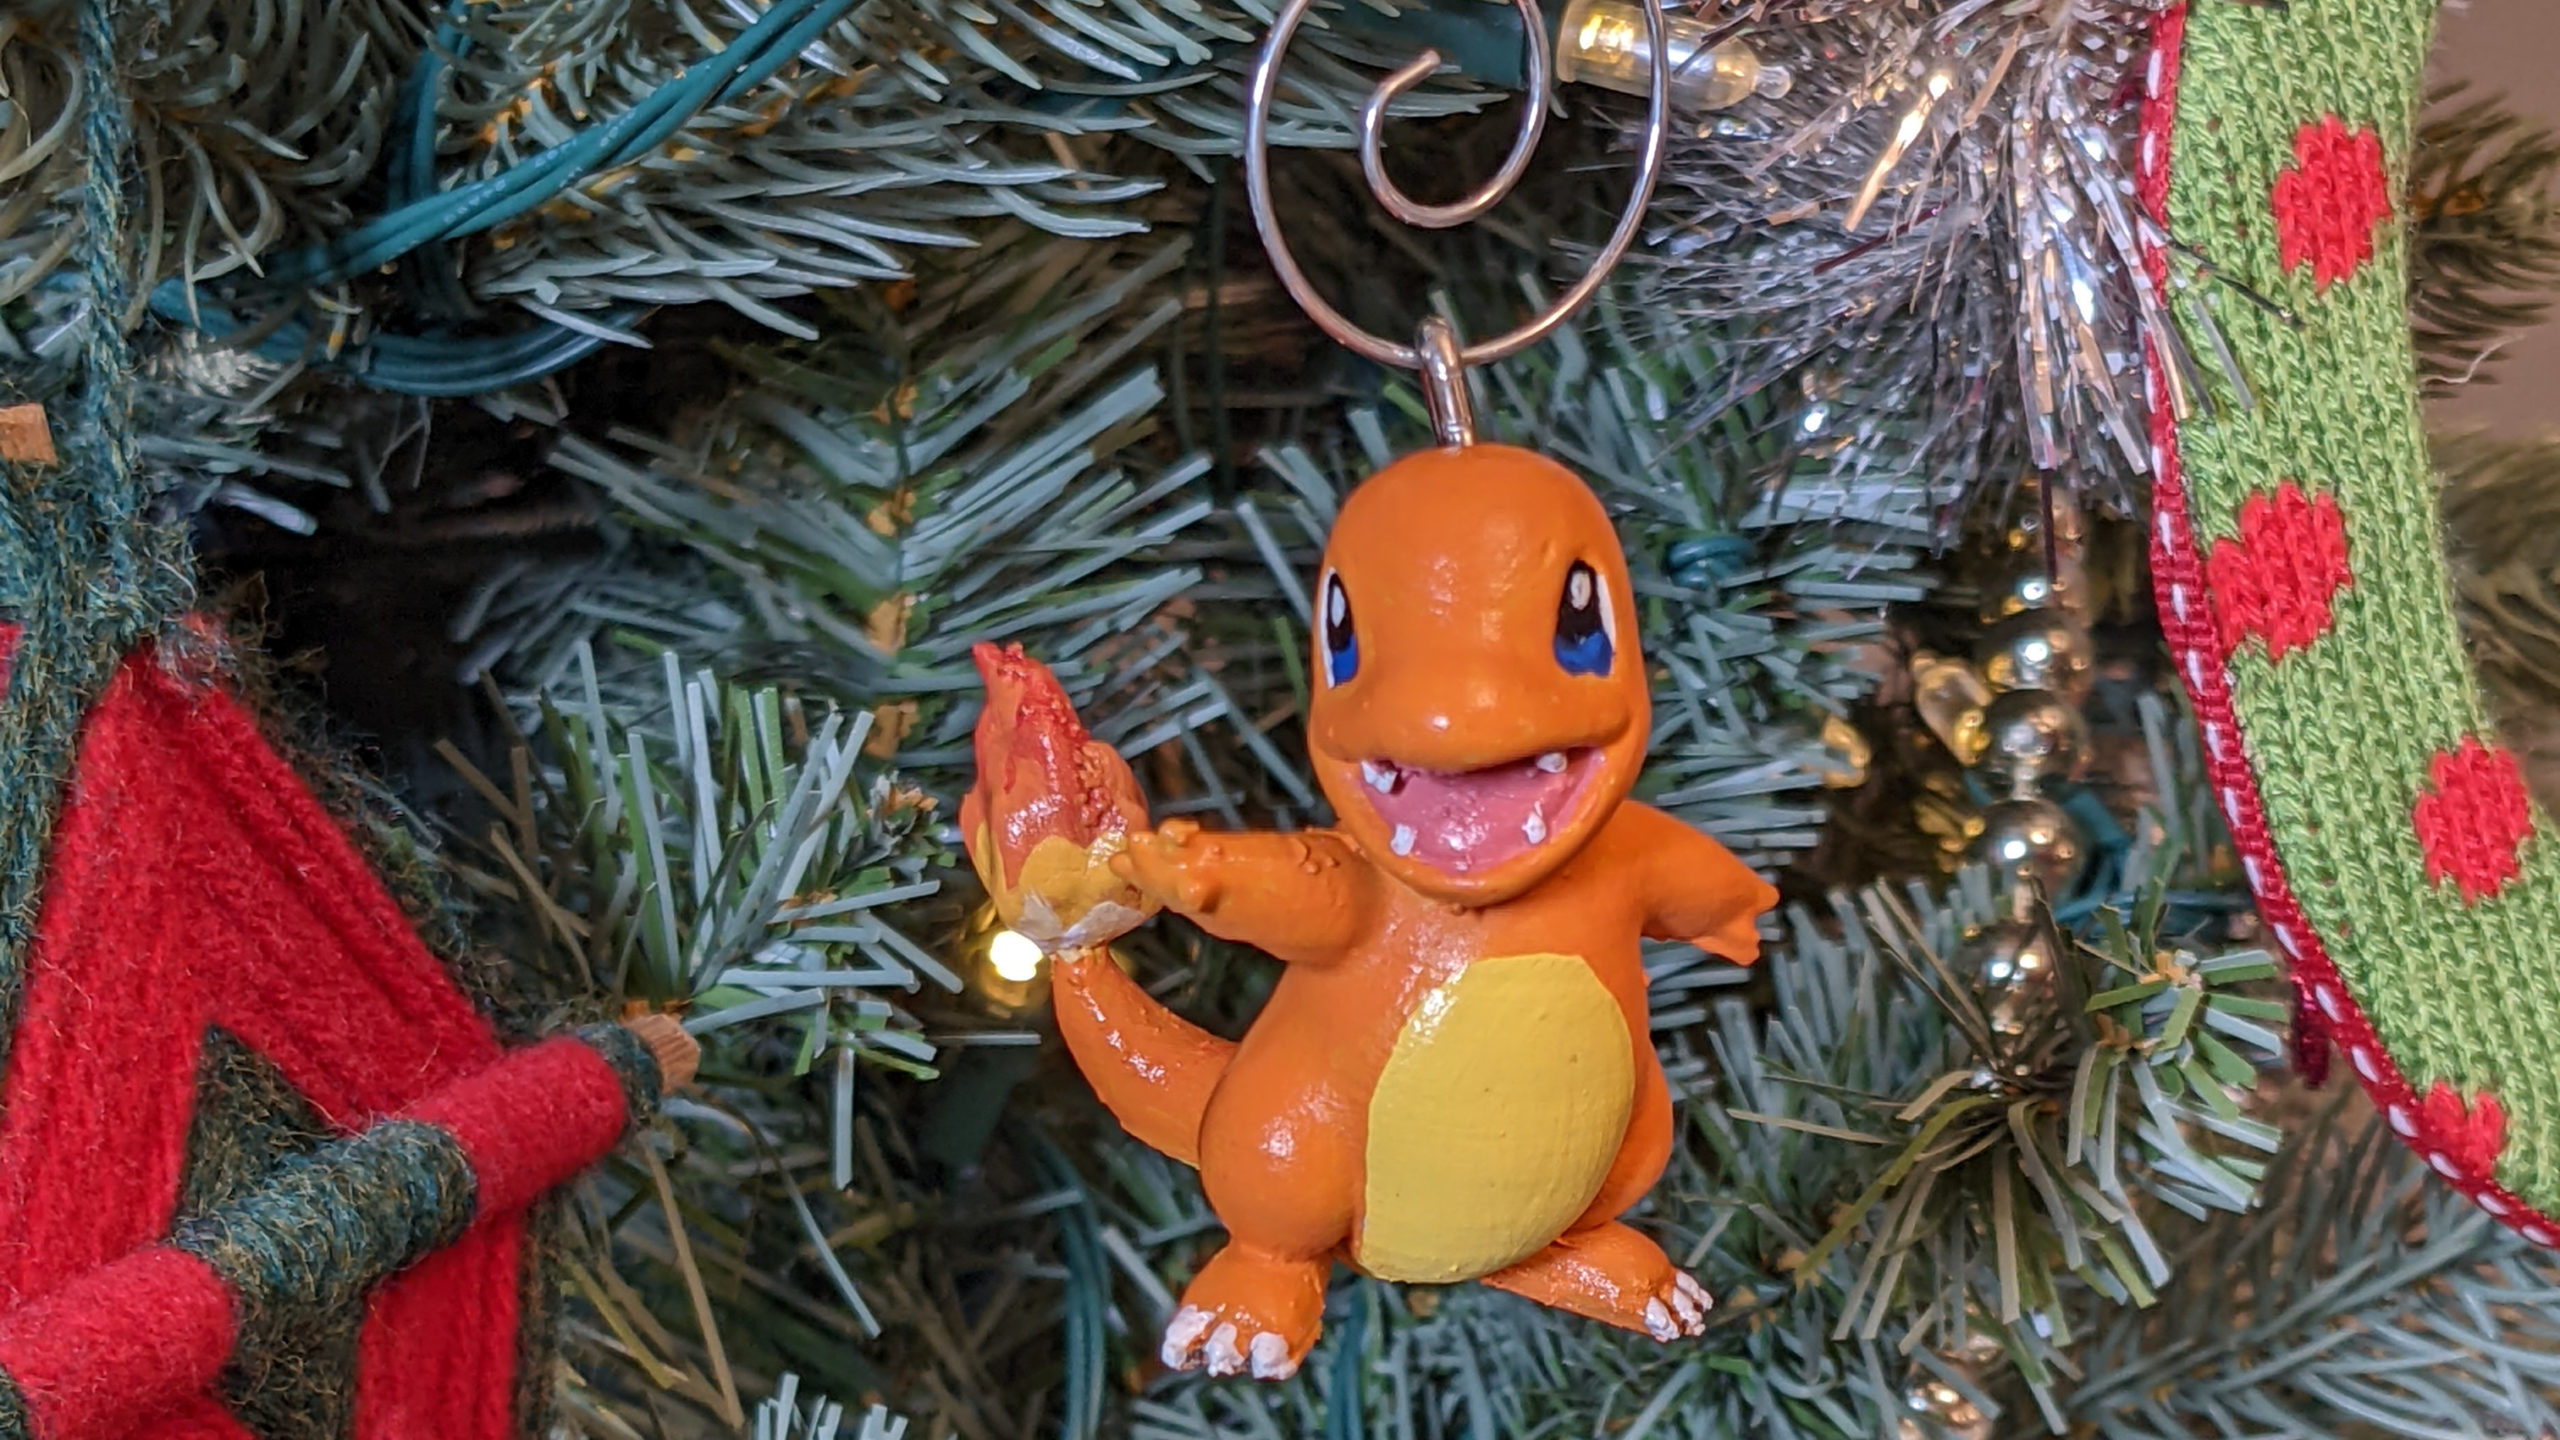
I printed this Charmander figure from Thingiverse#4600030 on my Monoprice Delta Mini 3D printer, and primed it with white spray-paint.
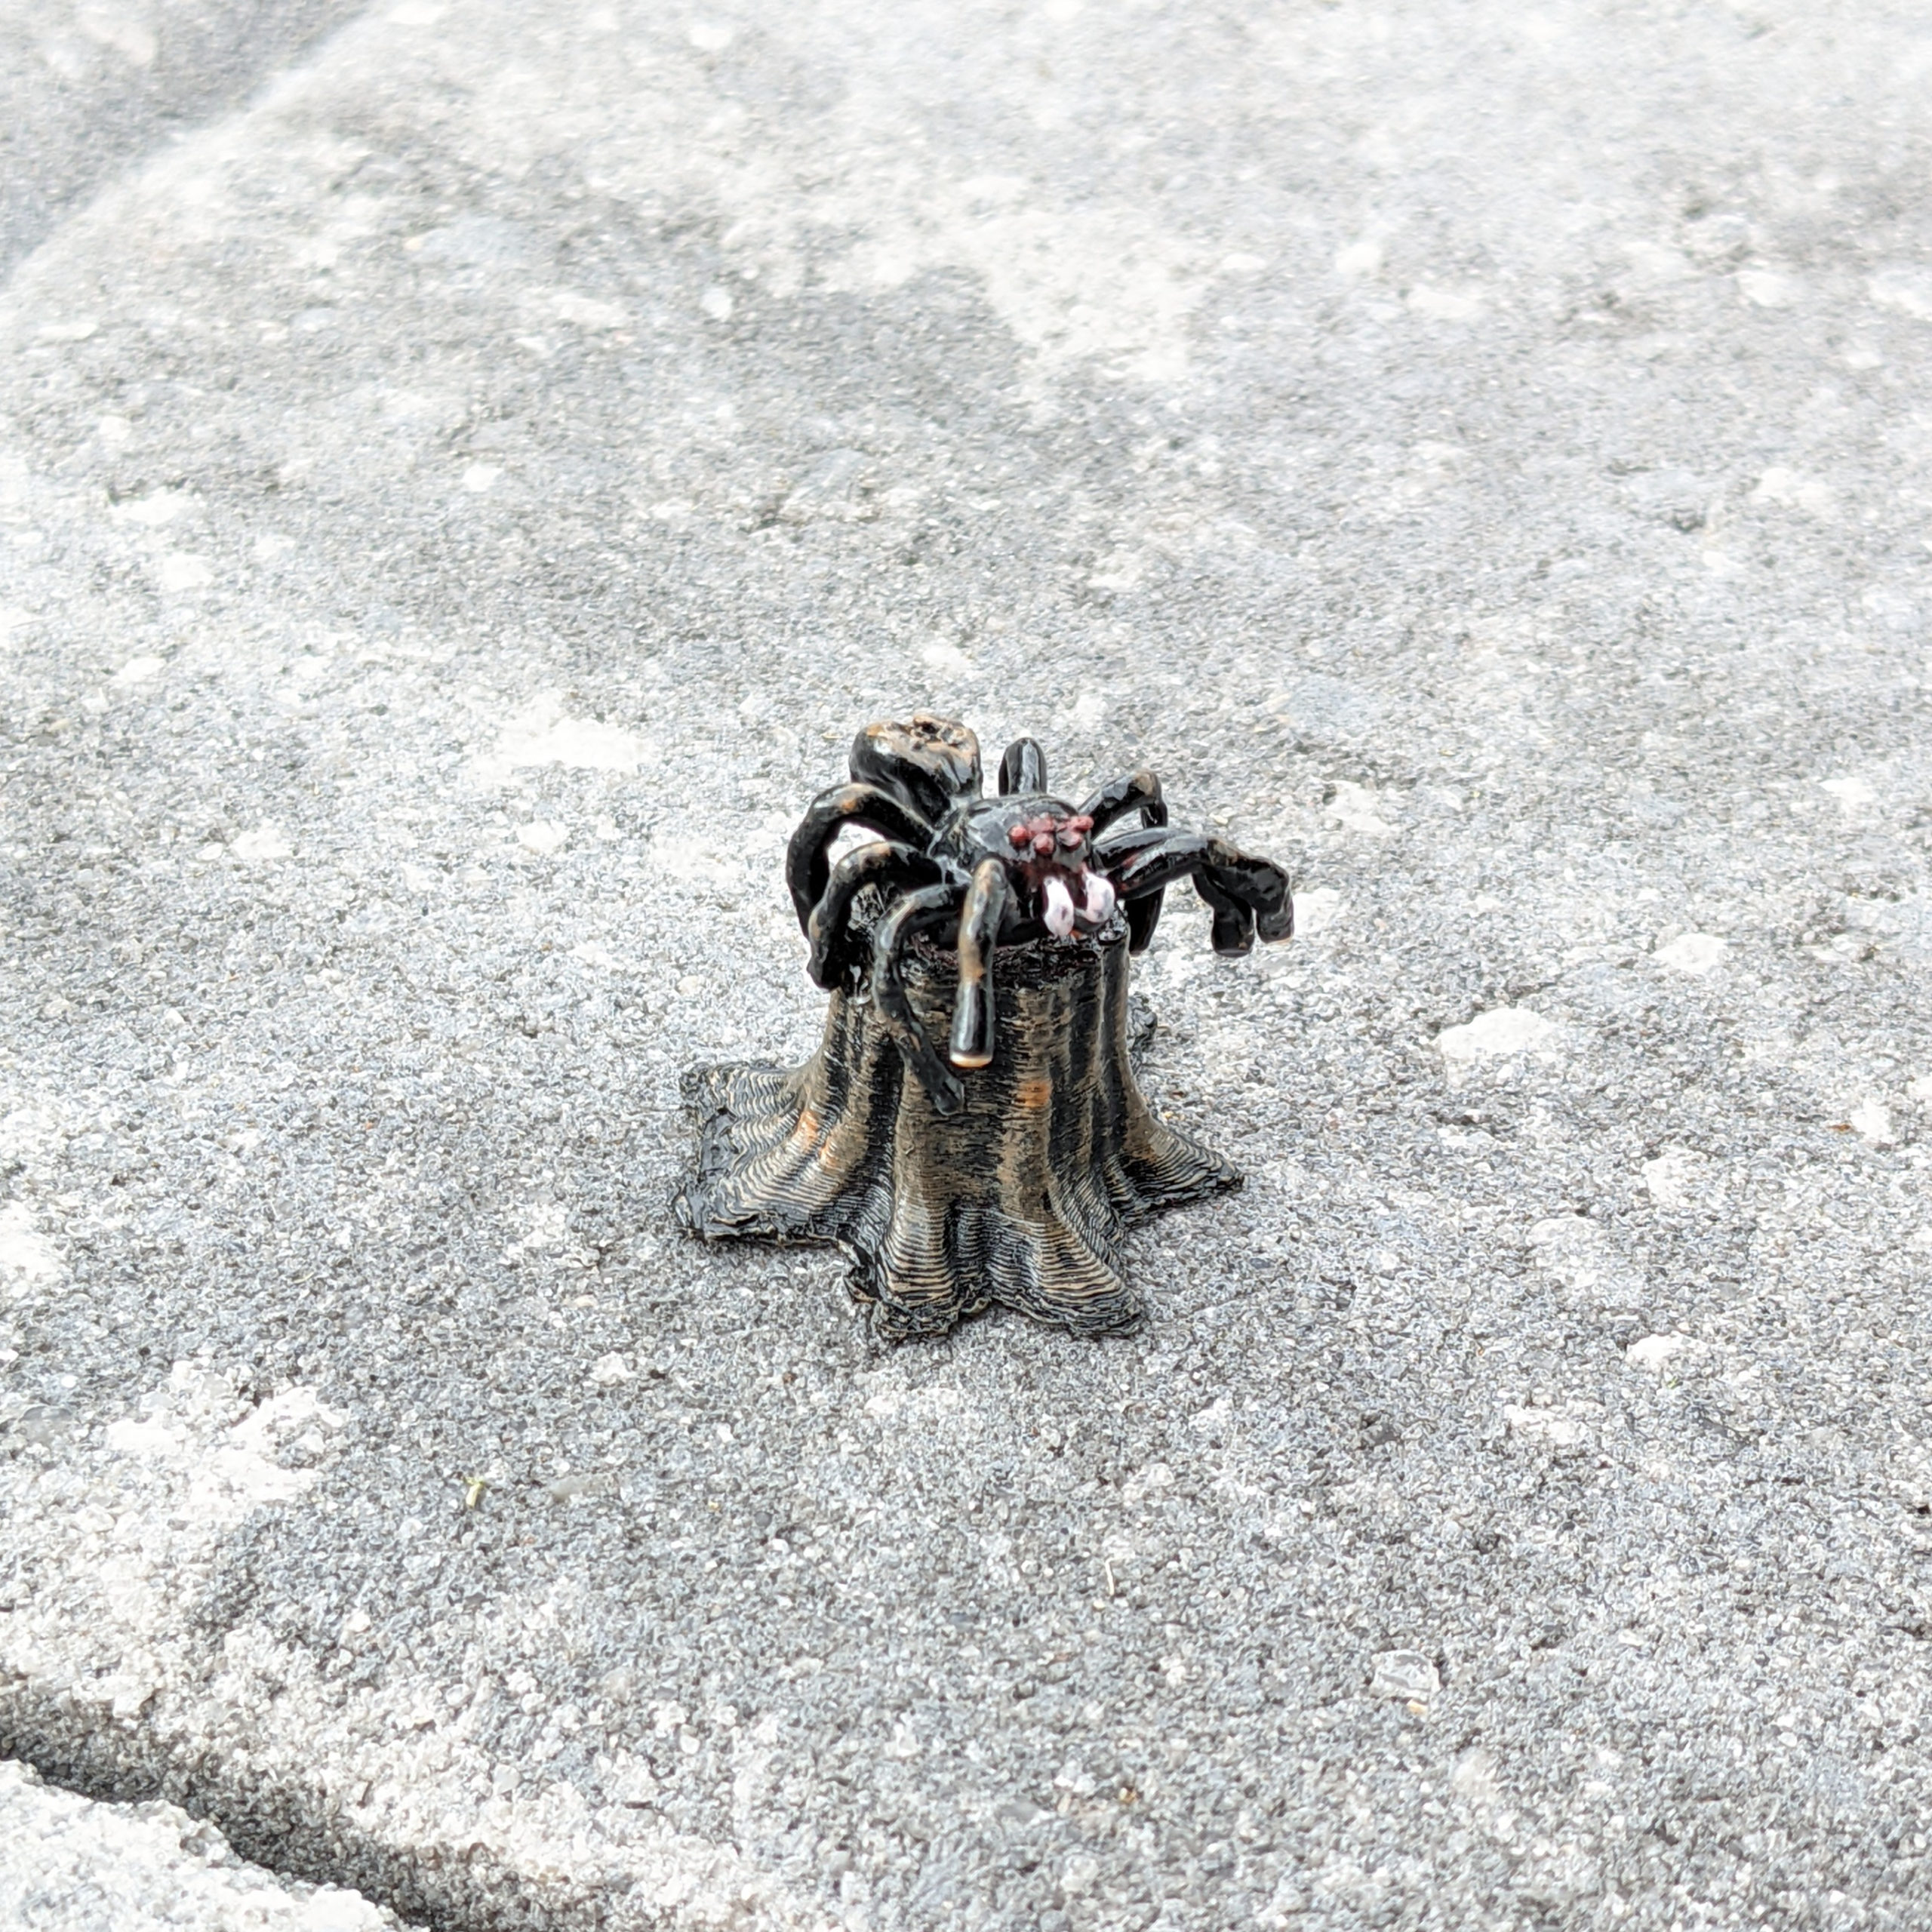
I was cleaning out my car and found a small toy plastic spider. I suddenly realized that if I were to hit it with a heat-gun, I could bend the legs into any pose I wanted. So I printed out a tree stump from Thingiverse # 3033820 scaled appropriately to be a stand, and bent the spider legs so that it would stand on the stump. After that, I just had to paint it….
Continue reading
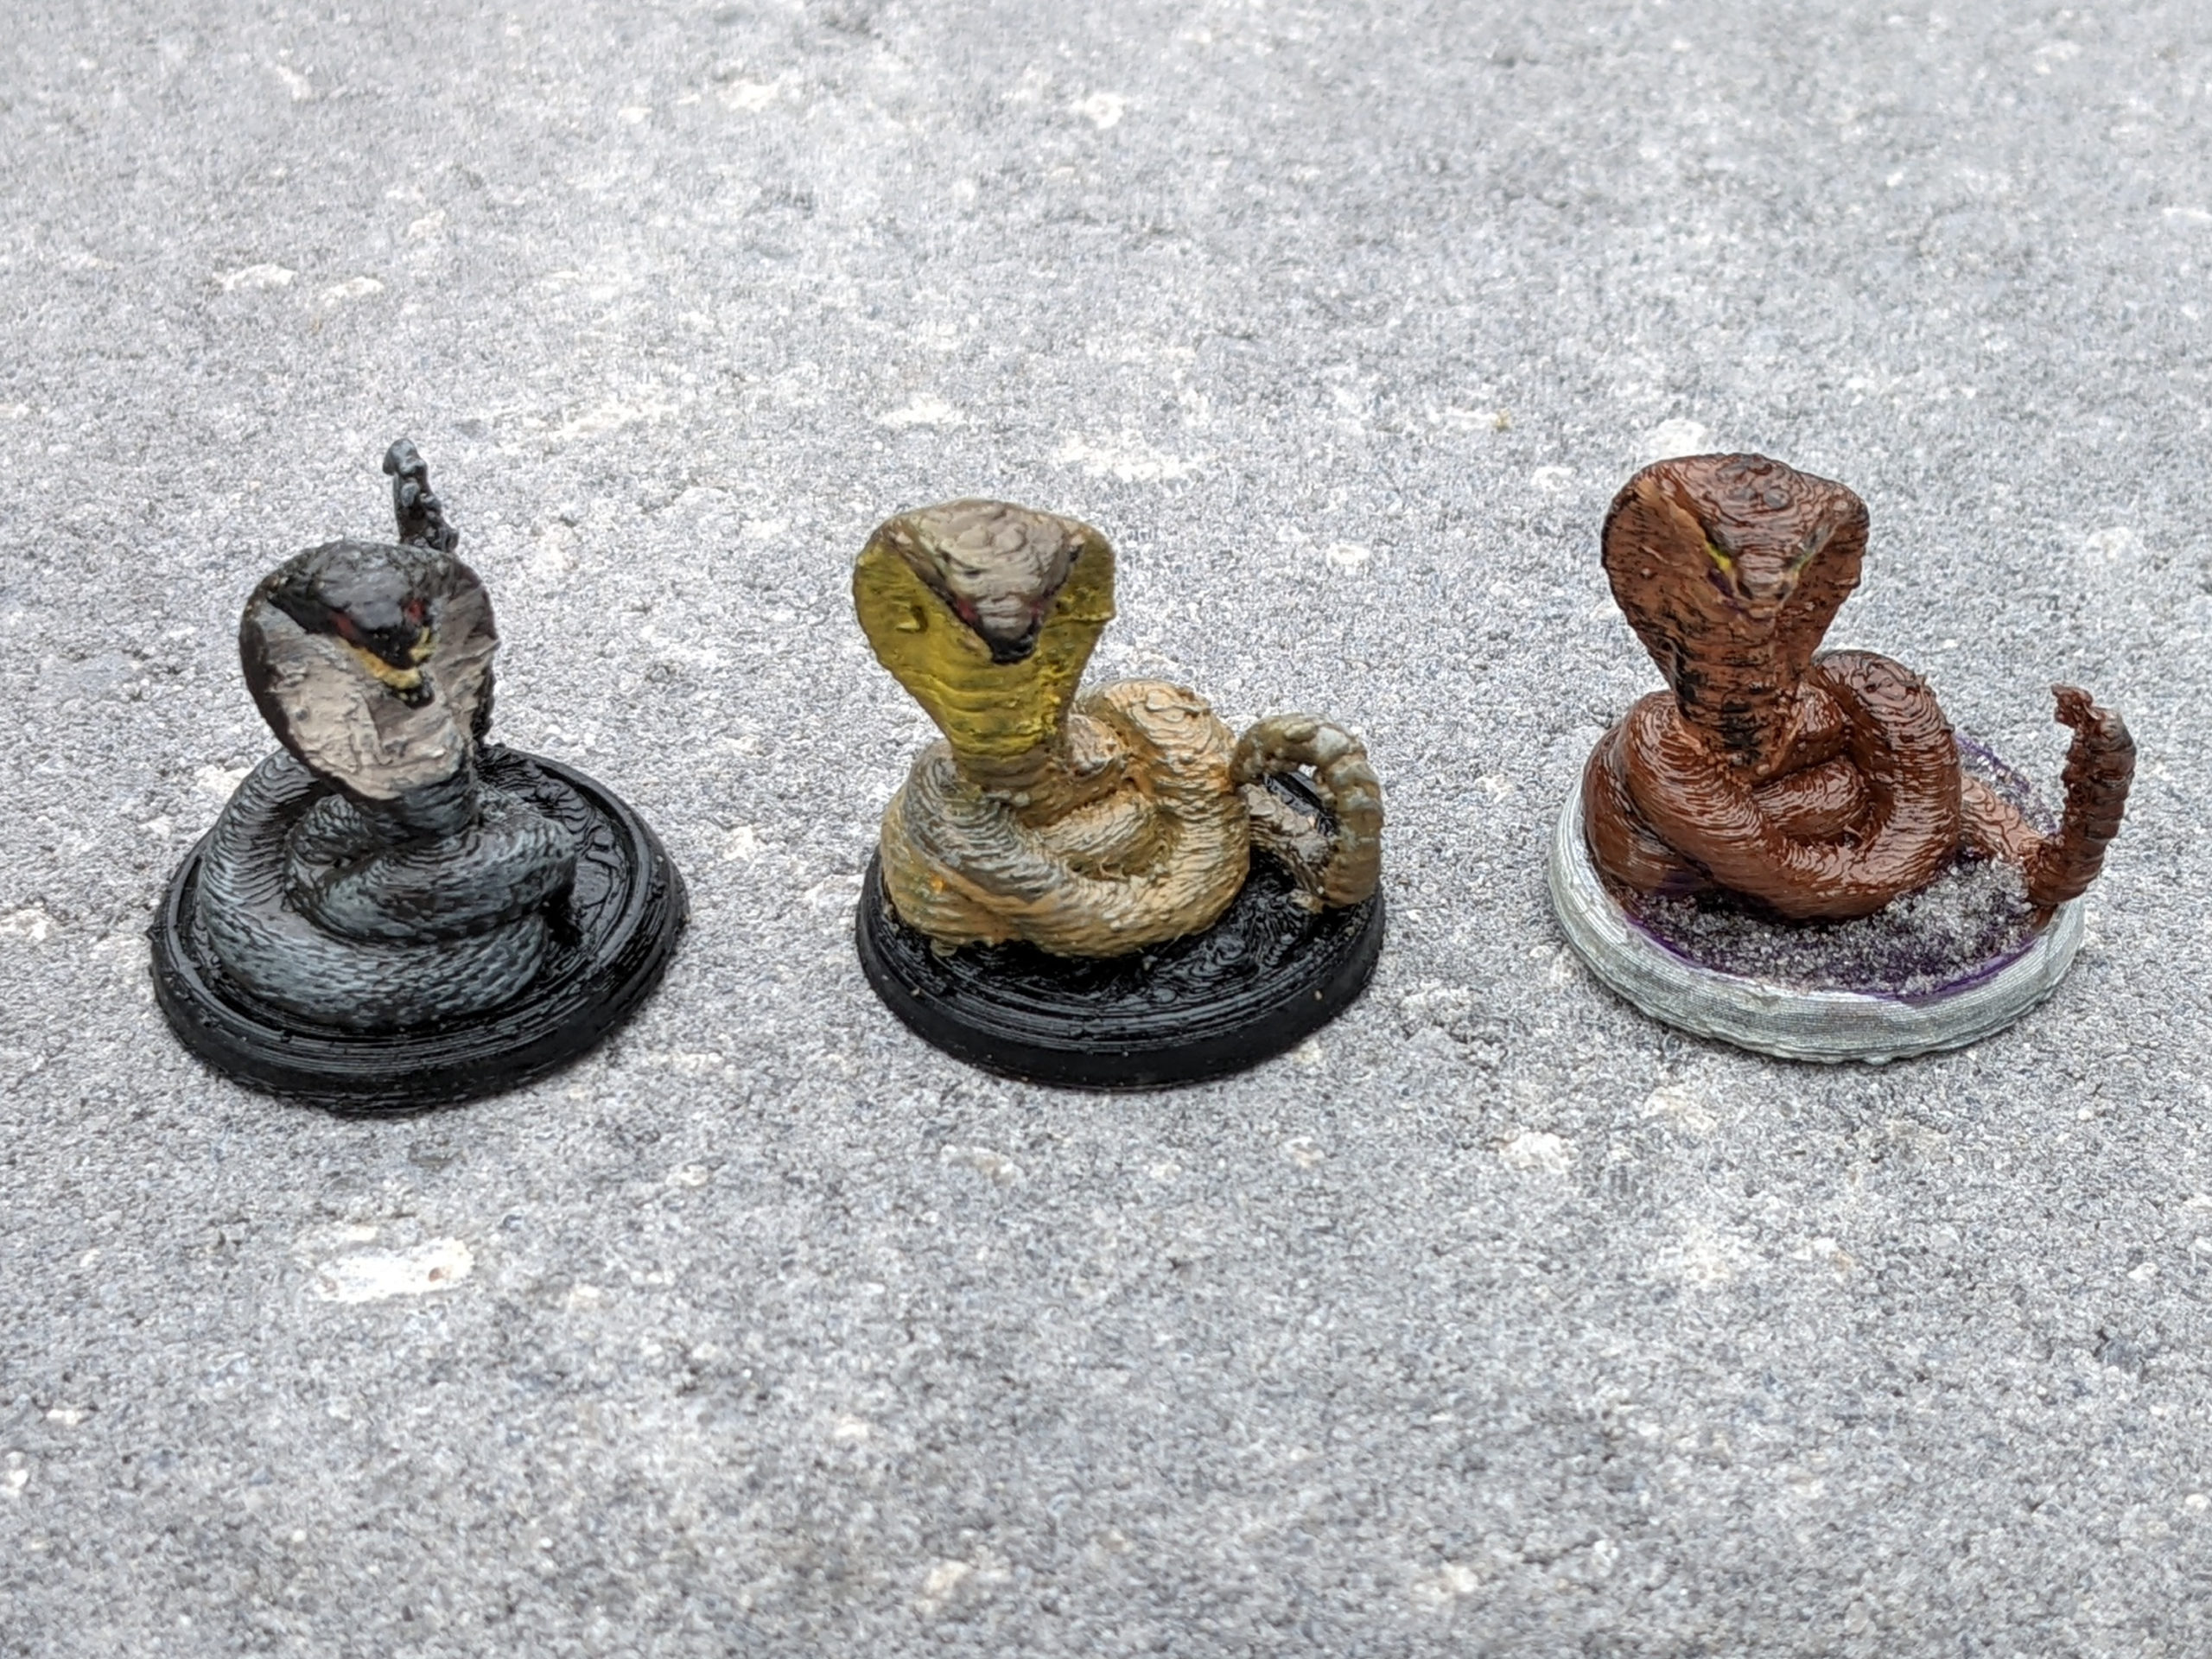
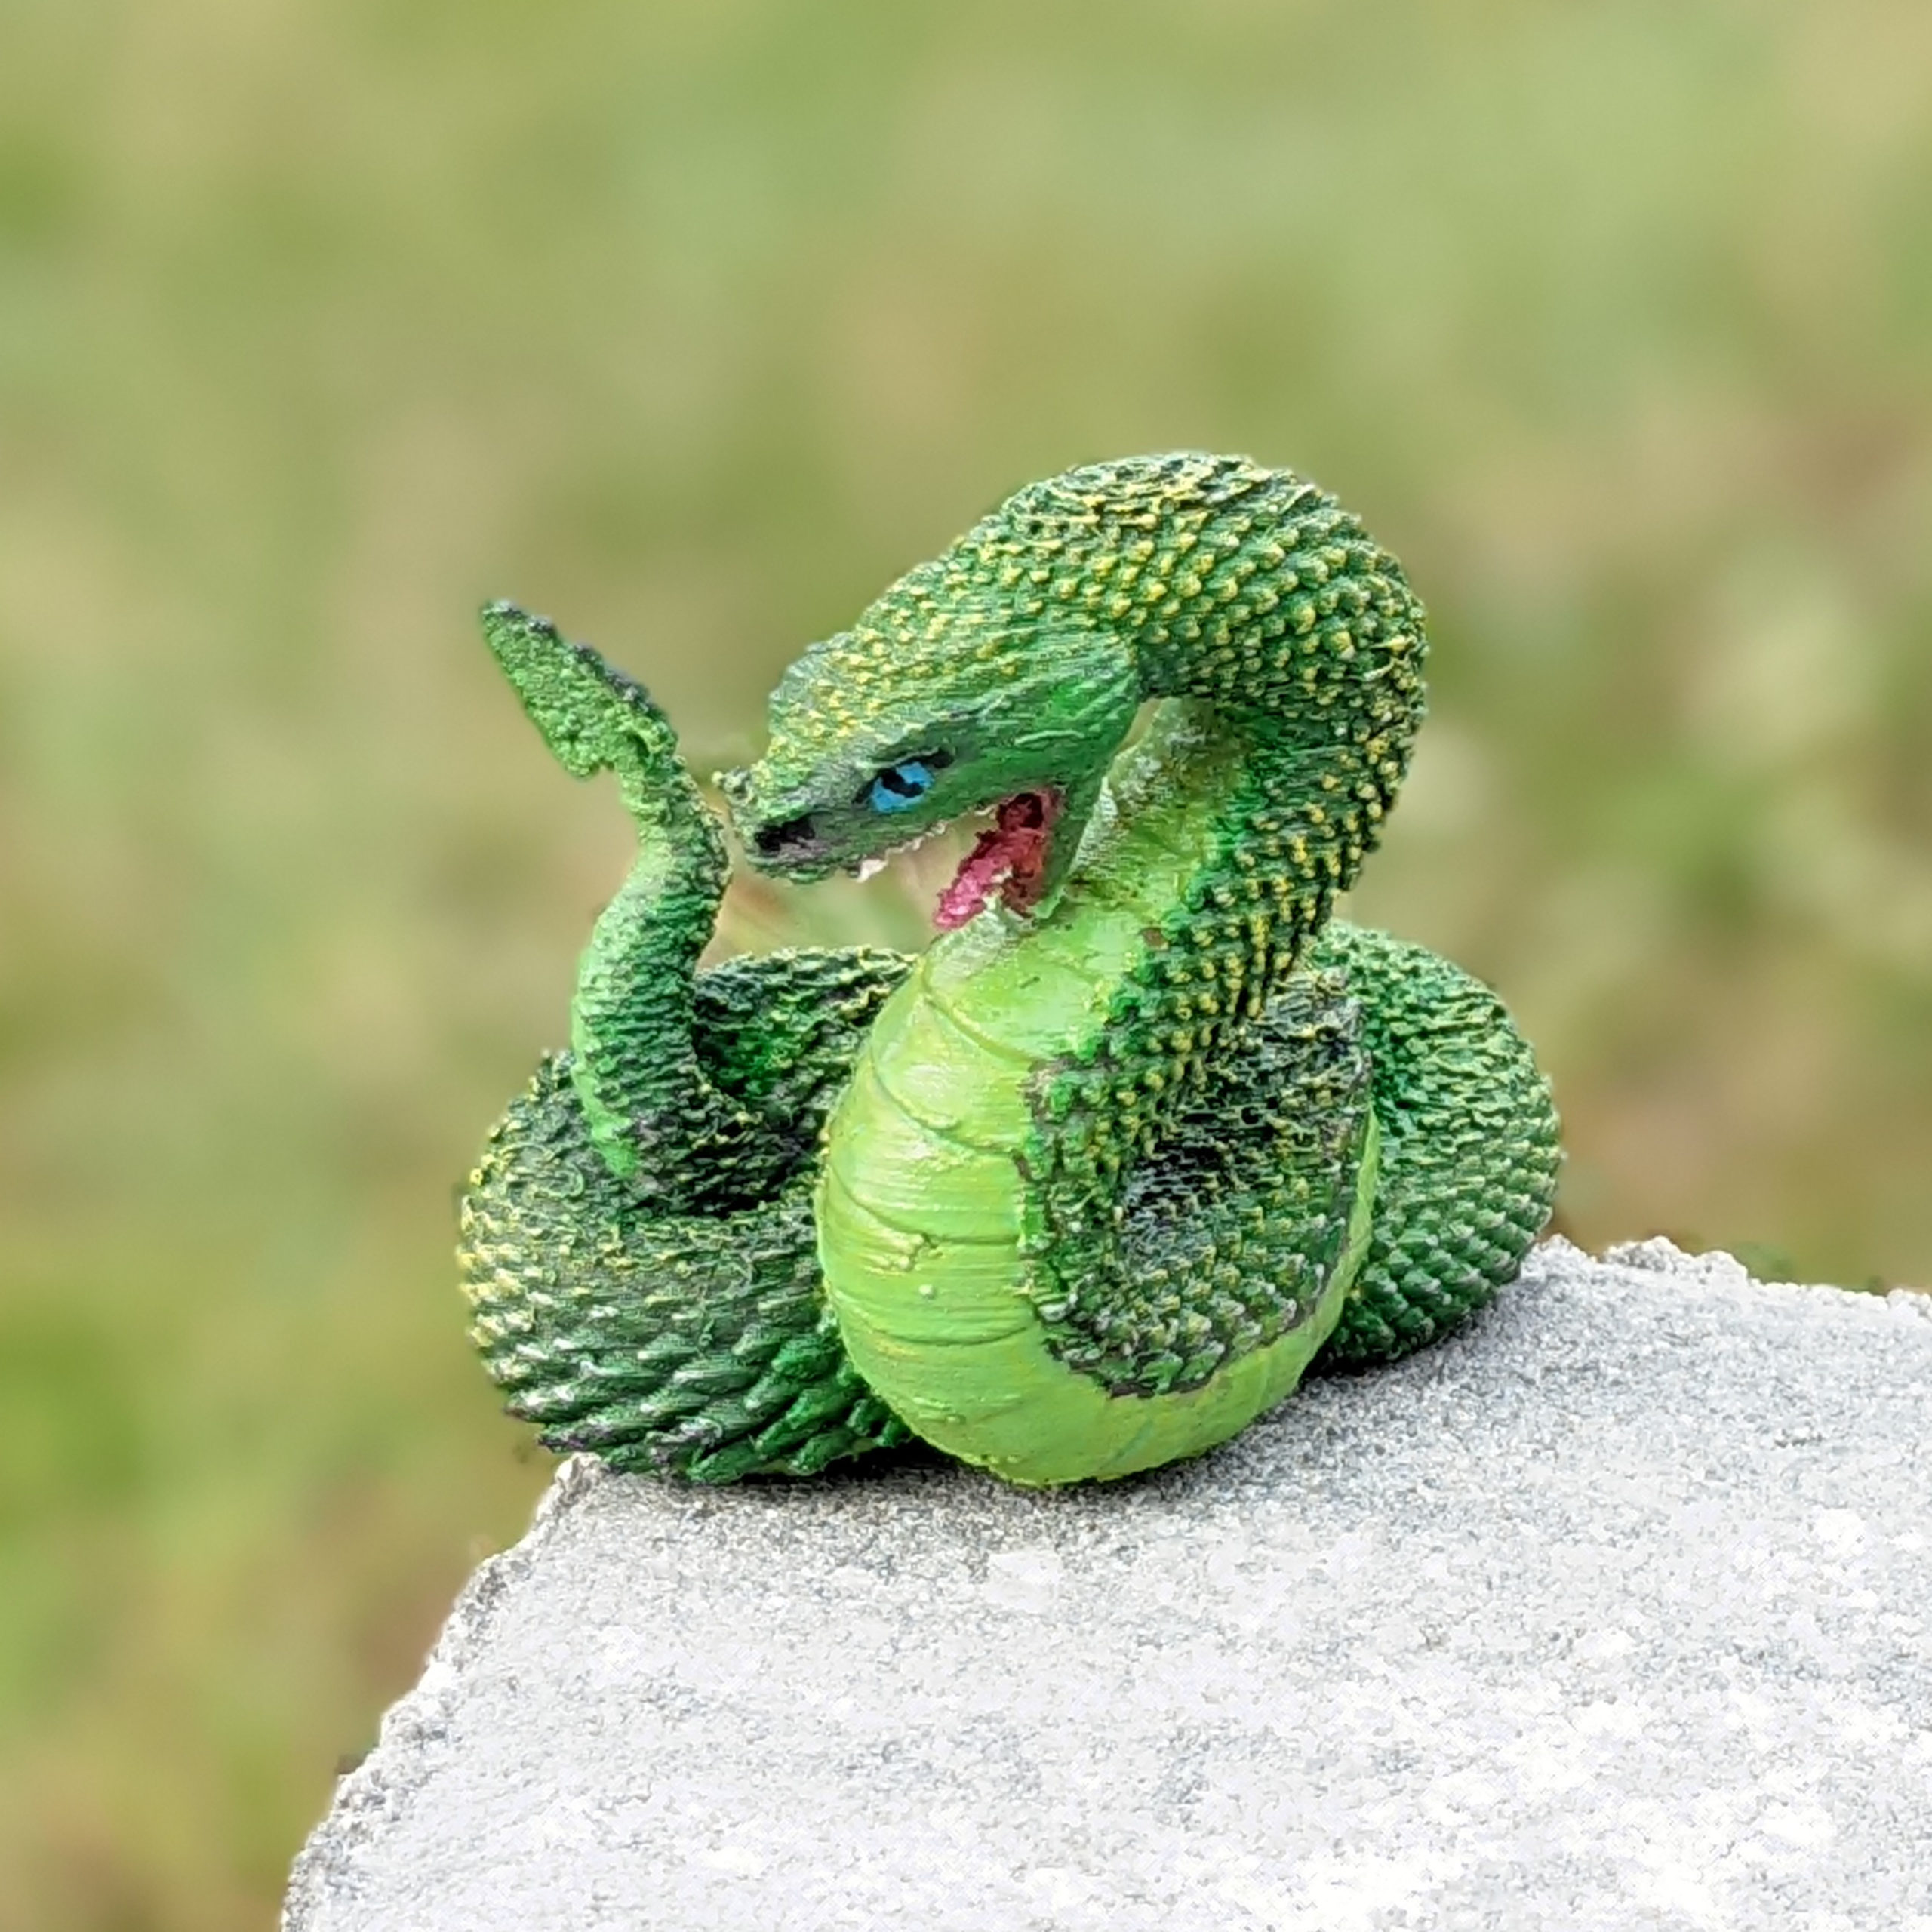
I’ve been very happy with this 28mm Cobra model from Thingiverse. Even printed on my low end FDM printer it retains enough texture so that dry brushing works well to accent the scales. I used a heat gun to rotate the left model’s head 90 degrees in relation to it’s body, and the center model’s tail into a loop so that the three figures look slightly different, but mostly the color choices are the defining differences.
I 3D printed and painted this Slurk from ClayRade’s Thingiverse # 4417796. The print worked well even on my low end FDM printer (I used the version with “Drool” to act as support for the fangs, but cut the connection to leave the fangs free standing).
Continue reading
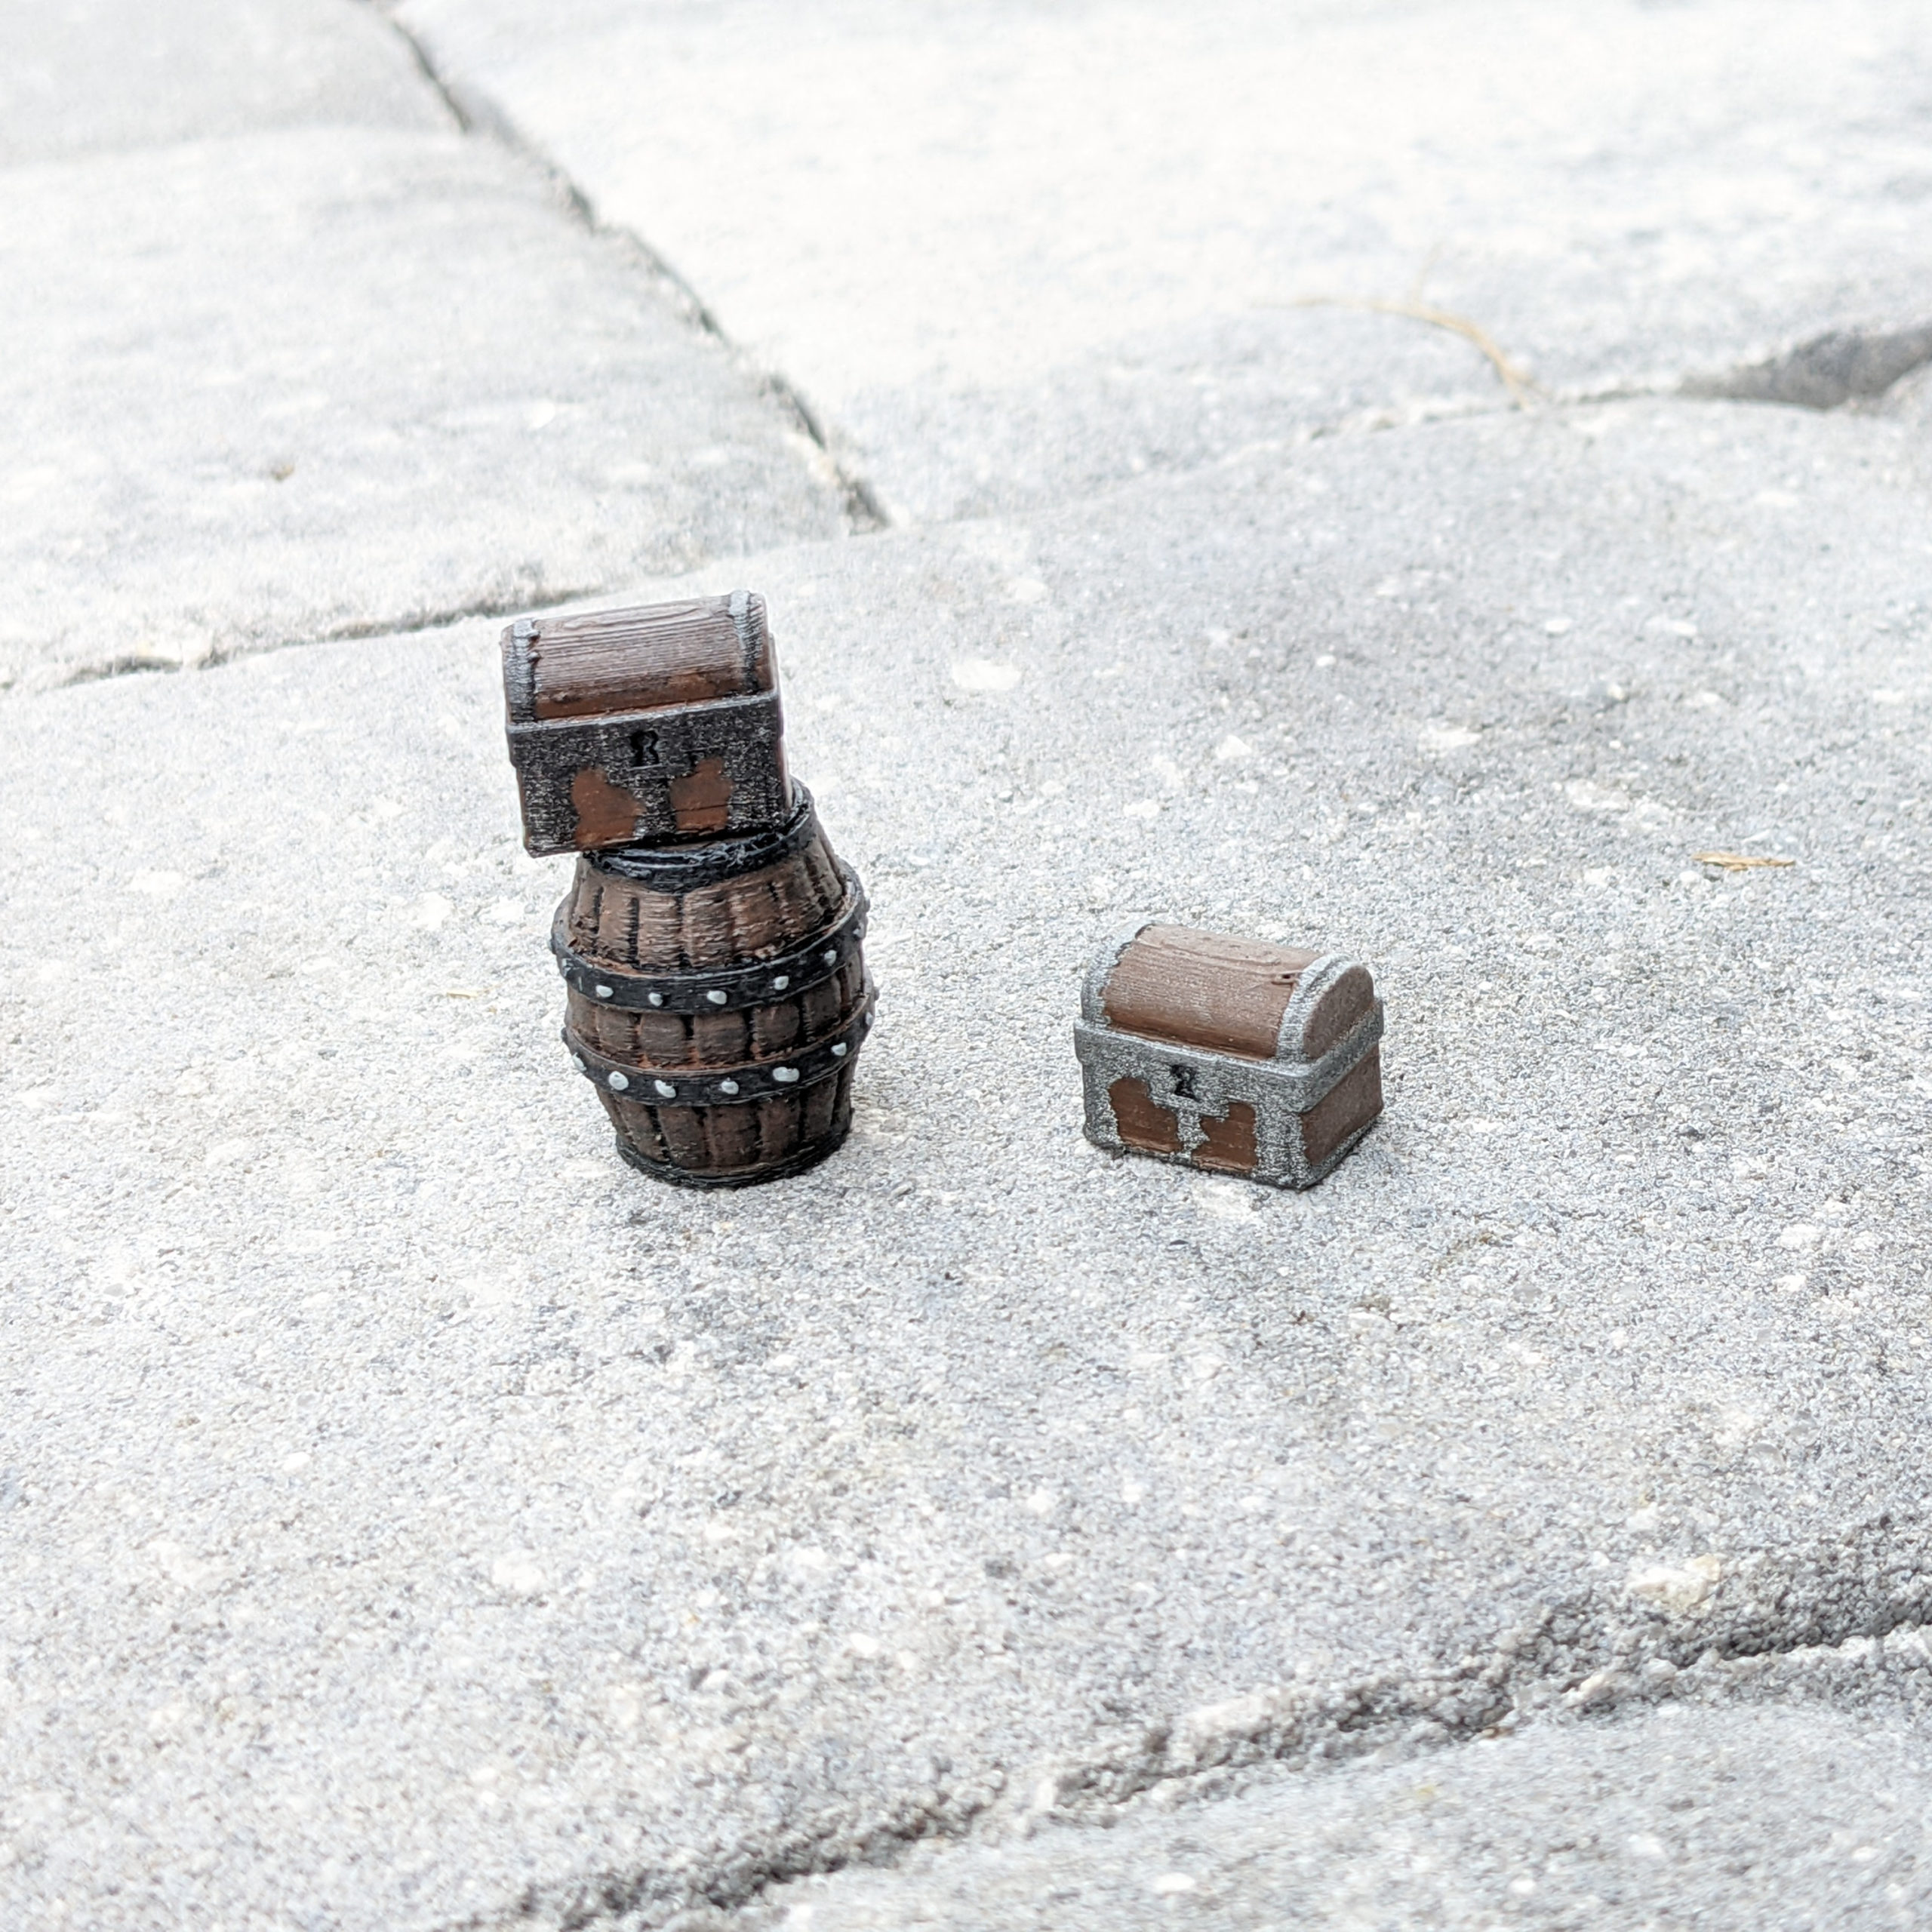
These treasure chests and barrels are from Dutch Mogul’s Loot Markers pack, Thingiverse number 2010492.
Continue reading