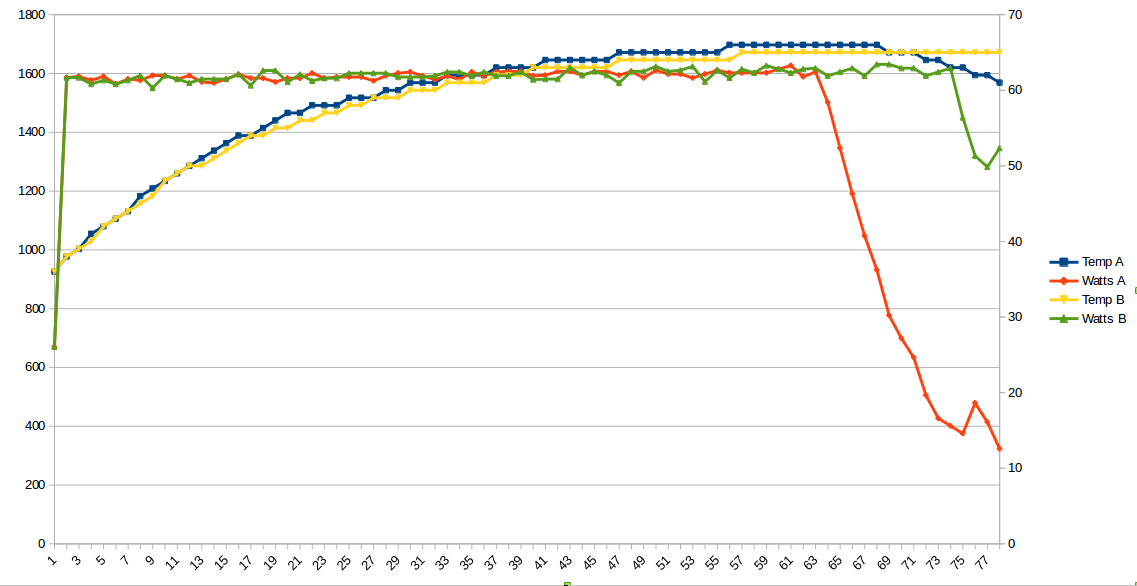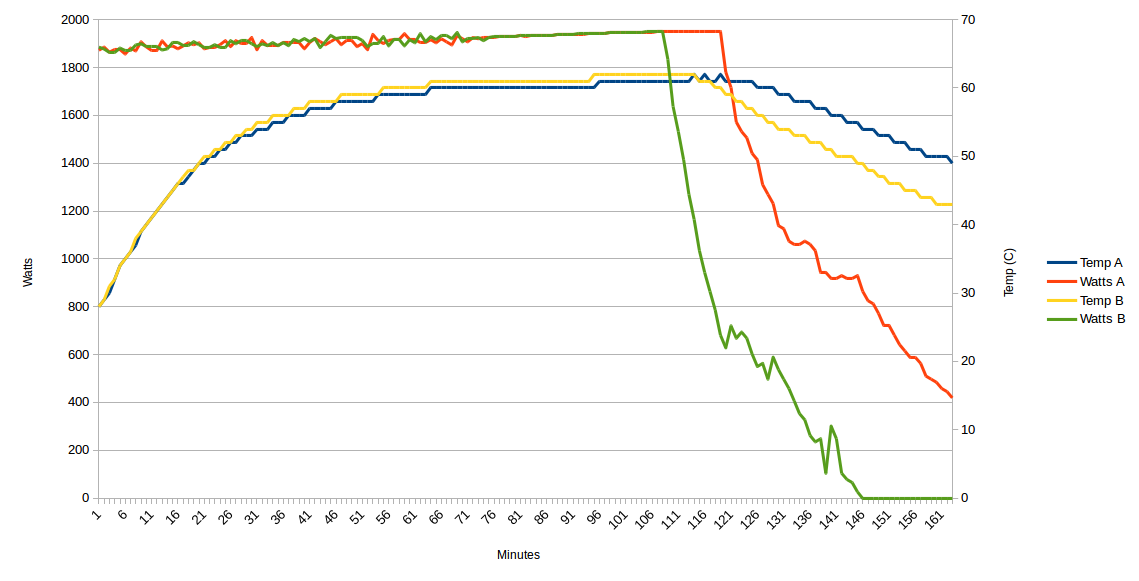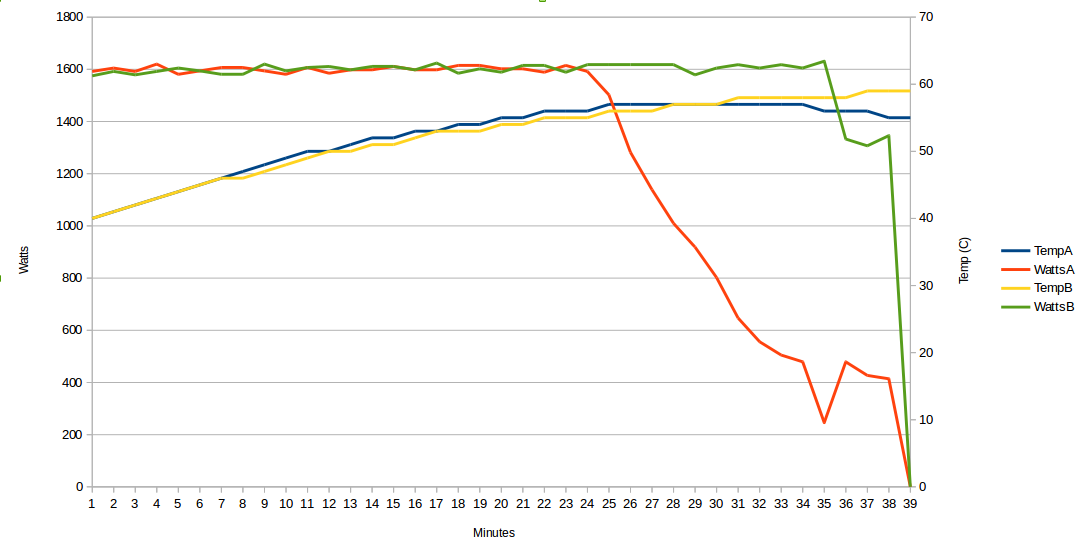
This graph shows the temperature (in C) of my two chargers, as well as the watts of power they report providing over time (in minutes) as they charge the Nissan Leaf battery pack in my truck.
For the first 23 minutes of the charging session, both chargers are putting out 12.5 amps (at around 129.5 volts) or around 1600 watts. The 12.5 amps is limited by my MaxC (maximum current) setting of 25 amps total by the Thunderstruck motors EVCC (Electric Vehicle Charge Controller). So in the first 23 minutes, the amount of power drawn is limited by the chargers.
From the 23 minute mark until the end of charging, the battery bank begins to accept less than 25 total amps (because the cells are getting charged, and the pack voltage is getting closer to the MaxV (maximum voltage) that the chargers are putting out.
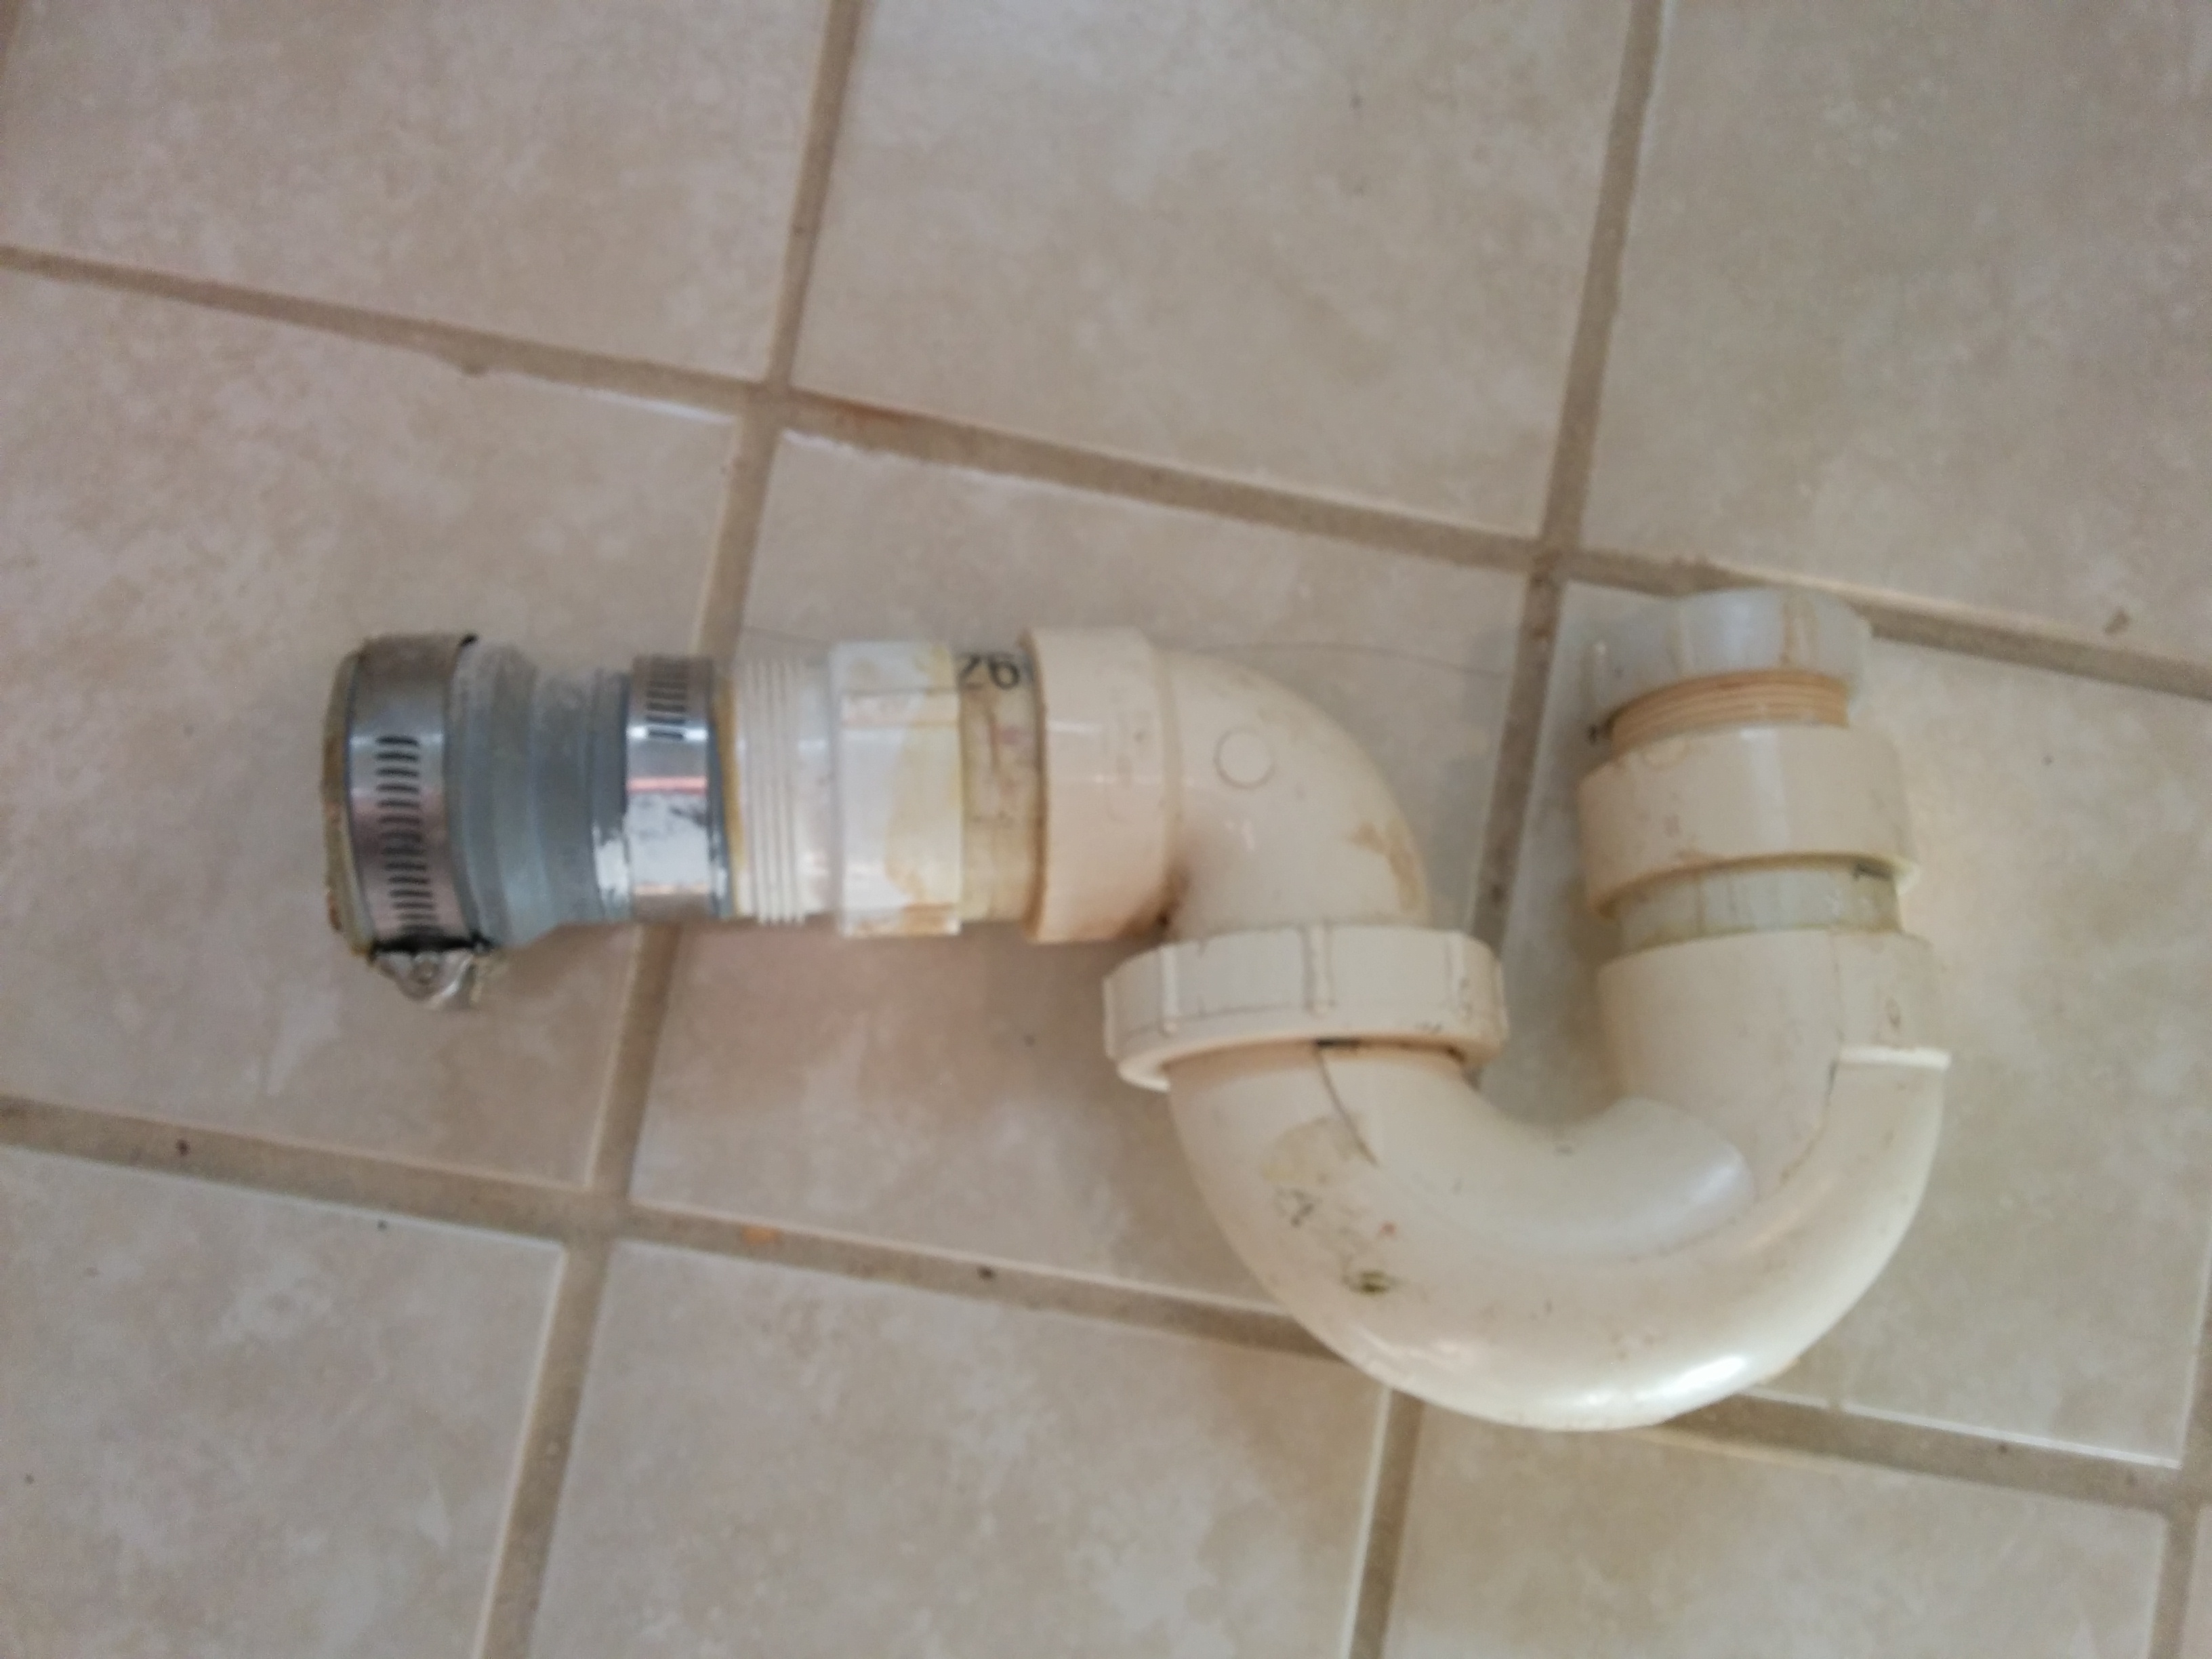
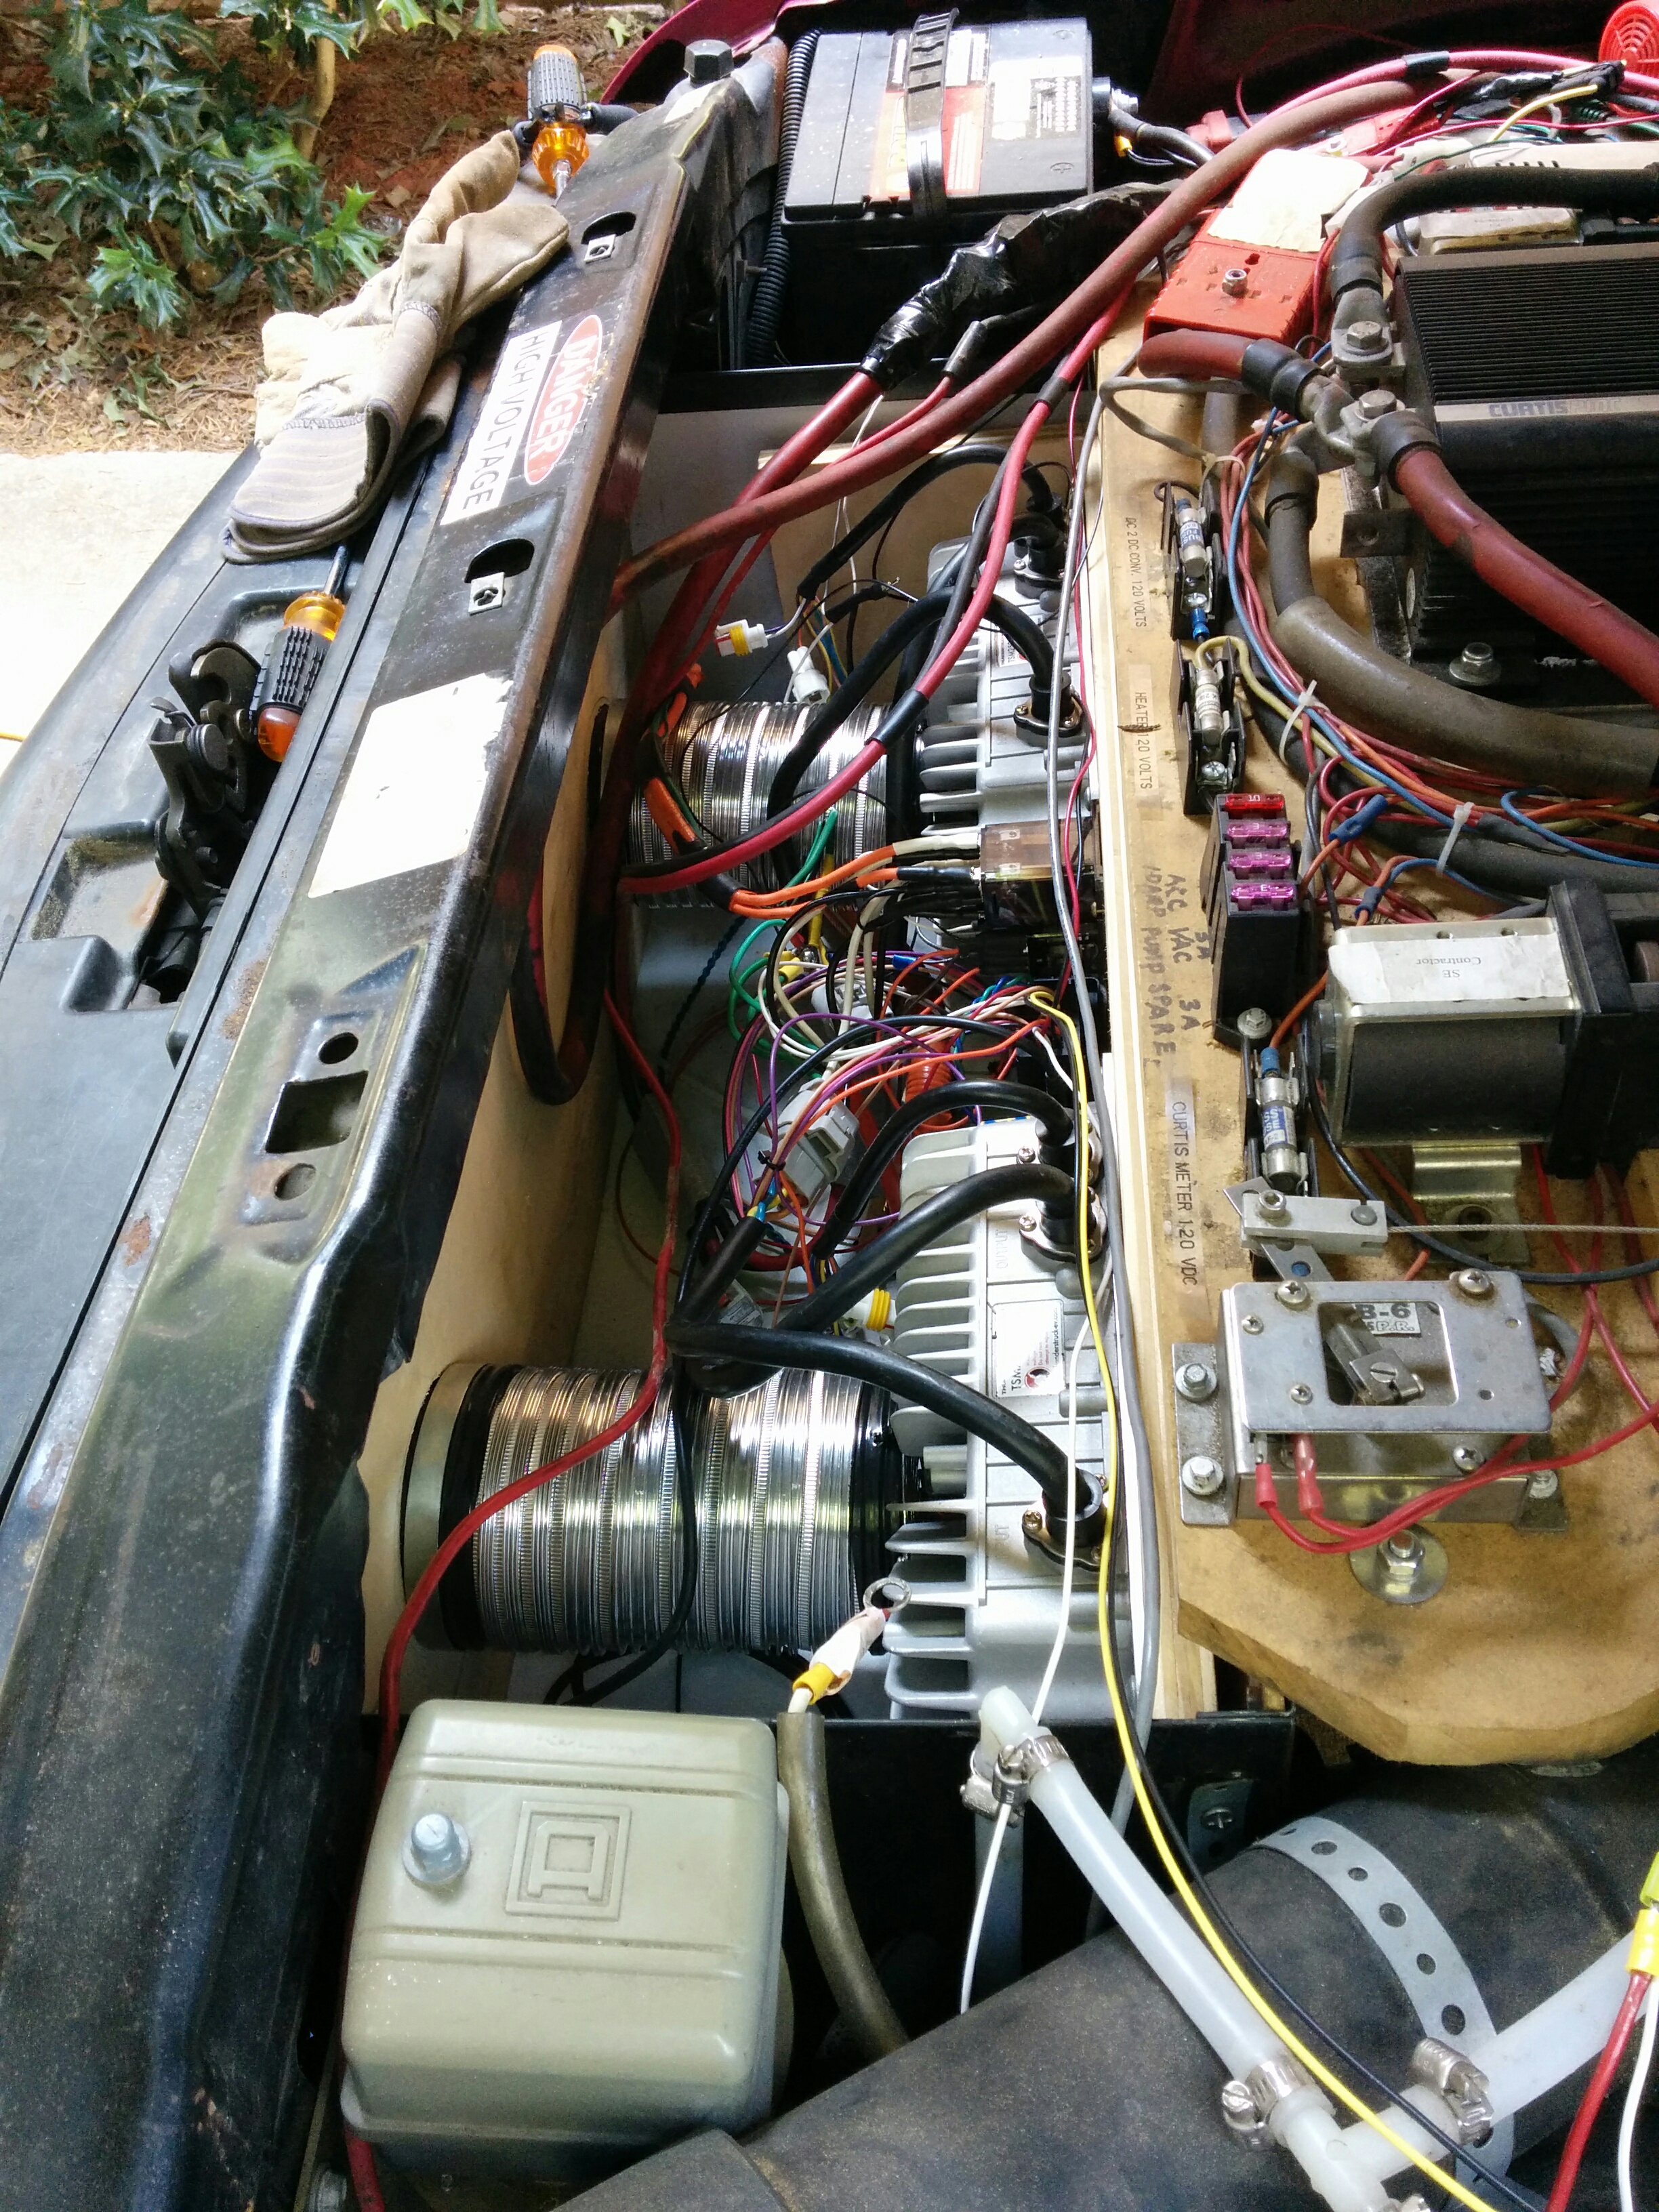
So for example, at minute 32, charger A is still supplying 12.5 amps (1600 watts), but charger B has dropped down to supplying around 4 amps (500 watts). (The difference in power output also has an effect on the temperature of each charger, shown in the yellow and blue lines…) I have been having overheating issues causing my chargers to shut down, hence the detailed logging….
My hypothesis is that the power difference is due to one charger providing a slightly higher actual voltage (e.g. it’s voltage sensor reads just slightly less than the other charger) so although they both claim to be limiting voltage to 129.5 volts, one of them is actually putting out a slightly higher voltage than the other, which causes more current to flow from the “hot” charger to the battery bank.
This graph is evidence that the ThunderStruck motors EVCC does not do “active” balancing of the chargers. I suspect that the EVCC probably just sets the “maximum” amps and volts for both chargers and then turns them loose.
The chargers report back the amps/voltage/watts they are providing, so the EVCC could in theory dynamically change the maximum current settings on the “hot” charger to only provide an amp or so more than the “cold” charger, more evenly balancing the load. However, this would add complexity and require extra code and testing. And as you limited the current provided by the “hot” charger the “cold” charger would start providing the extra current, and over time the identity of the charger providing more current would switch back and forth.
This active balancing would only be needed (or be useful) when the battery pack was drawing less than the maximum current capacity of your charger array (near the end of the charging session, in the 80-100% SOC range).
The limited potential benefits to this added complexity could be:
- Your chargers (and wires) would presumably stay closer to each other in temperature (only really an issue if you are suffering from overheating, which is why I was logging this data in the first place).
- If your chargers are more efficient at a lower current, it could save you some energy / heat. (Conversely, if your chargers are most efficient at full current, it may be better to run one charger at full current and just use the other charger to “fill in” any extra current needs.)
In short, I can understand why the ThunderStruck motors EVCC does not perform active balancing (at least with the version of the firmware I’m using — v2.3.1), but I would certainly be willing to test a current balancing feature in future firmware releases.