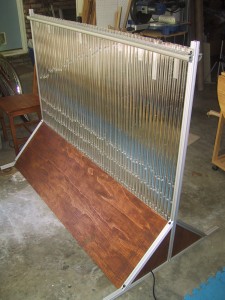
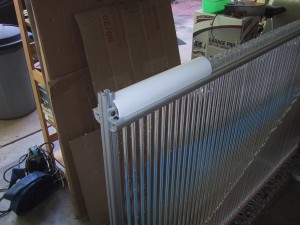
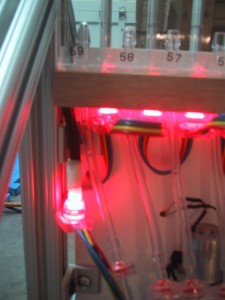
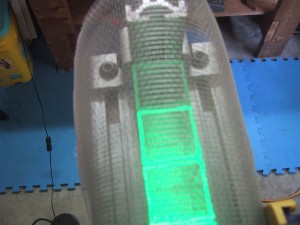
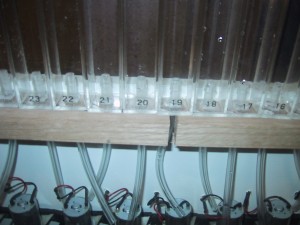
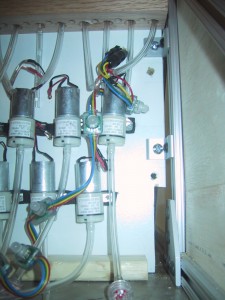
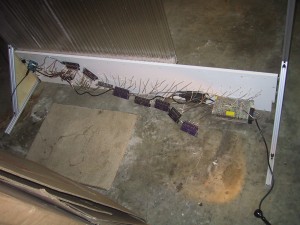
22 of 60 tubes running – First scaling up problem rears it’s ugly head.

Here is a video of 22 tubes running with water:

Now for the bad news….22 tubes actually measure 22 1/8″ wide. (apparently each tube is actually 0.00568 inches larger than 1″) This means my entire display would be 3/8″ too narrow, which just won’t work with the tolerances I have designed into my tube holder. That is why I only have 22 tubes in this video….the 23rd tube was just far enough off to not fit into it’s proper hole.

I fixed it by cutting the tube holder into 3 pieces and mounting them with a 1/4″ gaps between them.

A gap cut into a board

I also had to space the end pieces of aluminum farther out, which meant I had to drill 4 new holes to mount the side brackets to the bottom board 1/2″ farther apart. Luckily the T-Sloted aluminum mounting system allowed me to easily move my L-Brackets up slightly to hit the new holes.
mounted to two new holes 1/4" farther out

Unfortunately, I mounted the Shift MOSFET circuit boards on TOP of the screw heads holding the tube support board, so I had to take them all off to re-position the tube support board. Annoying, but not the end of the world.
circuit boards hanging off after I removed them to unscrew the board

So, after a bit of additional work, I now have all 60 tubes working.

Ubuntu probing all bluetooth serial connections for modems?

I use a scribbler robot with an IPRE fluke for my classes. On Ubuntu, I have a funky situation where the fluke does not work correctly the very first time I connect to it. Dan Walker, of BetterBots has captured all of the bluetooth data and says that Ubuntu is sending “AT+GCAP” data (AT command for a modem to “Request Complete Capabilities List”) to the fluke when first connected. This command gets the fluke into an unstable state and make it not work until rebooted (a possible problem with the fluke…but really, should custom hardware have to anticipate receiving random AT commands?)

The extra data doesn’t happen on subsequent connections to the same /dev/rfcomm* port until the laptop is rebooted. We suspect that the network manager may be the culprit. (I stay logged in until rebooting, so perhaps if a user logged out that would also trigger the network manager to re-probe?)

Thanks to Doug Harms for the solution…this is the ModemManager service probing all bluetooth serial ports. To disable it you can issue the following command (all on one line…):

sudo mv /usr/share/dbus-1/system-services/org.freedesktop.ModemManager.service
/usr/share/dbus-1/system-services/org.freedesktop.ModemManager.service.disabled

Disconnecting a lead & oakum seal on a cast iron drain pipe

If you have cast iron drain (waste) pipes they are likely joined with a lead & Oakum seal. Oakum is a hemp material coated in tar, it is placed into the joint to seal it (Oakum expands when it gets wet to seal the joint). The Oakum is held in place (and the pipe joint is given some strength) by casting a bead of lead about 1″ thick around the pipe inside the hub/socket. In this picture the cast iron pipe hub is on the left.

It is possible to remove the lead and oakum. After you have gotten all the lead out and cleaned up the hub, you can place a donut (also known as a compression joint seal) in the hub of the cast iron pipe to adapt it to PVC. (Note that donuts are only usable on non-pressurized pipes, such as waste/drain lines.)

I have manually cleaned out a lead & oakum cast iron joint. It sucks. My recommendation is to cut the pipe somewhere other than at the lead & oakum joint and then use a Flexible Coupling to join it to your PVC. Yes, this introduces discontinuities in the waste water flow, and gunk may collect and build up at these edges, possibly leading to plugged pipes in the future….but that is small price to pay for avoiding having to manually unseal a lead & Oakum joint. For the gory details of how to manually disconnect and clean out a lead & Oakum joint, read on…
Continue reading

Why you shouldn’t mix iron and water

Just because the black iron pipe is near the plumbing section at the hardware store doesn’t mean that you should substitute it for a bronze pipe nipple that attaches to a gate valve for a dishwasher. Iron and water don’t mix. Well, actually, they do mix very well, leading to rust and a leaking pipe, and rotting wood. Below is a picture of the before (incorrect iron pipe) and after (shiny new bronze pipe nipple). Click to zoom into the corroded mess that used to be the bottom of the pipe….
Rusted black iron pipe (top) and correct bronze hose nipple (bottom)

As it turns out, I could have actually re-used the dishwasher connector hose, but that corrosion looked so bad I just bought an entire new kit.

Of course, if I had seen this gem BEFORE finding the leak and having to move the dishwasher, I probably would have double-checked all of the water fittings at that point. Click to zoom in on the sacrificial-vice-grips-as-pipe-anchor in all it’s glory. (I actually couldn’t find a good practical reason to replace this….as it’s a righteous hack…but a hack it is…)

vice grips holding a pipe

First Light!

I have mounted and wired all sixty RGB LED’s under the tube support shelf. These RGB LED’s are in serial strings of 20 each, and I was able to connect them end-to-end, making the wiring much easier than the air pump motors! Each liquid filled tube in the bubble display will sit above one of the LED’s.
60 color controlled LED's mounted under the tube support shelf

Looking down through the holes in the tube support shelf, you can see each tube has a colored LED under it.

These LED’s are individually addressable by the Arduino that controls the entire system. In the video below I have them simply doing a simple color progression for testing.

Motors Done!

All 60 air pump motors mounted

I have all sixty of the air pumps soldered to connectors and mounted on vibration dampening foam. Thirty are in a line on top 1 and 7/8″ apart, and the other thirty motors are mounted offset just below them. The connectors will allow easy motor replacement if one should fail. (A screw, an electrical connector, and a 1/4″ tube will need to be moved over to the new air pump.)

My super high tech vibration dampening material is simply 3/8″ strips cut from donated black rubber mouse pads.
cutting foam from mousepads

Velocity Cruz T301 Android Tablet review

I purchased a refurbished Velocity Cruz T301 Android Tablet for $70, and it was worth it. This tablet has many downsides when compared to many more expensive tablets, but the $70 price tag makes it a decent deal.

Pros:

  • Good screen quality – I’m quite happy with the screen brightness and color representation. It’s not a super high resolution, but it’s quite good for the price.

Cons:

  • Weight & size: At just over 1 lb, this 7 inch tablet feels heavy and thick. Although it was originally sold as an E-Reader + Tablet, I don’t think I would want to use it as an e-reader for long periods of time.
  • MIPS processor – Many android applications are pure Java and will work fine on the tablet, but a lot of the “best” games, video players, and high end applications use native code that is compiled for ARM processors, and are not compatible with the T301 tablet.
  • Lack of native flash support – The built in browser (due to the MIPS processor) does not support flash video, and I haven’t found a good substitute that does. It does have a youTube application that works, but it’s annoying to have to switch over to that application and re-find the movie. It also doesn’t work in various embedded contexts. The built in browser also does not support HTML5 video.
  • Touchy accelerometer – The screen would sometimes turn upside down when the accelerometer glitches. Not super frequently, but often enough that I eventually disabled the auto-rotate feature because I got tired of shaking the tablet to right the screen orientation.

I plan on using it as a dedicated screen (photo viewer, video monitor, etc) but with the right 3rd party apps (NewsRob/ K9 mail) it can be used for checking out your RSS feeds or reading your email.

Frame and Tube support

Here is the final frame (without covers except for the triangular end pieces):

I cut the extruded aluminum t-channel pieces to the correct size and assembled them with the MDF tube support and plywood end panels (not yet stained/finished).

Here is a picture of one side panel, plus a “one tube, one inch wide” bubble display that I mocked up before getting the tube support finished:

One side panel of the frame, triangular bottom with a tall upright in the center

One tube sandwitched between two side panels

The two end panels are connected at the bottom by the tube support, which is just a MDF shelf on it’s side cut to the correct length. This piece of MDF rests on the ground along its entire length and serves as the support for the tube holder. I used a carpenters square and a level to make sure the tube support (and end panels) were square and correctly upright while attaching it. I would attach one bolt, and then square everything up before attaching the other bolt.
using a carpenters square on the frame

The tube support is screwed to the tube holder MDF using 32 wood screws. I might have been able to get away with 16…but I know 32 will hold!

As pictured here, the frame without electronics, tubes, motors or front/back covers weights in at 30.2 pounds.

Next up: Drilling 60 holes to mount the motors, and 30 or 60 holes for the motor power wires (I may combine the wires from two motors into the same hole, I haven’t decided yet) … and soldering connectors onto 60 motors (Which goes at around 20 motors per hour….).