Nirav Patel has made a 3D model of a lens/projector/globe mounting system for a Microvision show-WX laser projector, a Opteka fisheye lens, and a frosted glass globe for a spherical display system first described here using OpenSCAD. The OpenSCAD file is here. I went through the trouble of installing OpenSCAD and exporting the file as an STL file so that I could print it. If you want to avoid that trouble, you can download it from me here: lens_mount.zip.
Missed Schedule for wordpress posts due to .htaccess password protection blocking wp-cron.php
I recently set up a private blog that is fully password protected using an .htaccess file. (Users have to enter a username and password to view anything on the blog.) Everything was working well until we tried to set up posts scheduled to publish in the future. They would not post. The dashboard would show “Missed Schedule” and we would have to publish them manually.
After lots of head scratching, I finally figured out what was causing this. Apparently wordpress will call the wp-cron.php file every time a user views a page. HOWEVER, because the web server is doing this, and not the user’s browser, if the wp-cron.php file is protected by a .htaccess user authentication system it will not load (because wordpress doesn’t have the correct username/password!). So none of your scheduled actions will take place.
The solution is to allow (only) that file to be loaded without the normal username/password check in your .htaccess file like this:
#Require username and password for all files!

AuthName "Enter your username and password:"

AuthType Basic

AuthUserFile /home/yourdirectory/.htpasswd

Require valid-user
#Exclude the wp-cron.php file!
<files wp-cron.php>
Order Allow,Deny
Allow from all
Satisfy any
</files>
Of course, if your blog is password protected, the wp-cron.php file won’t get hit until somebody logs in to view the blog…but at that point any tasks that are pending will activate.
Spare One Phone – Dead on Arrival – Two Red LEDs
UPDATE: I called the company twice (once on Monday and again on Tuesday) and on Tuesday after asking a few questions they shipped me a new phone (arrived on Saturday and worked correctly!) and a label to ship back the defective unit. (I also emailed them on Sunday, and received an email reply 8 days later, after already receiving the replacement phone…so I would recommend persistent phone calls (it took a few tries to get to a human instead of voice-mail) over email.
Original post:
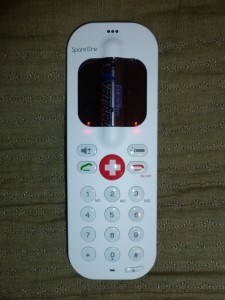
I purchased a SpareOne phone, which is a very simple GSM handset that is powered by a single AA battery. It has even less functionality than the Motorola MotoFone F3, as it has no display other than two indicator LEDs, so you can’t send or receive SMS messages. It comes with an Energizer Ultimate Lithium battery which has a 15 year shelf life (if you keep the battery disconnected from the phone with the provided plastic pull strip) and offers “up to” 10 hours of talk time on a single battery. My invoice number was 393, so it looks like I was within the first few hundred orders.
Unfortunately, when I received the phone and pulled the battery guard out, instead of turning on it just lit up both LED’s solid red (which I assume is some type of error code, although it is not mentioned in the small instruction sheet that came with the phone. I have tried a new battery, veracious press combinations of the ON button, and the keylock button, etc, but have gotten none of the feedback beeps demonstrated in the “how to” videos.
I will be calling their support line on Monday to see if they have any advice for how to re-set it, or return it for a replacement.
Dark wood table on a sewing machine base
Book Recommendation: Midnight Never Come by Marie Brennan
Midnight Never Come by Marie Brennan is a work of historical fiction set in the court of Elizabethan England, and the corresponding faerie court below London. If you like historical fiction and fantasy, Marie Brennan has done a good job at both. Her historical research makes the world very detailed, but it’s the characters and plot that make this book truly captivating.
Singer Sewing Machine Base gets a new table top

My wife purchased a few singer foot petal operated sewing machine bases and we finally finished one of them. The table top is made out of a piece of 18″ x 36″ wood purchased from Lowes that I edged with a piece of rope trim. After lots of sanding to get the edges of the trim and the wood to line up (the trim started off just slightly wider), my wife took over and stained and sealed the table top. After I screwed it to the base she had cleaned up and spray pained, here is the finished result.
Using refrigerator door bins and vegetable crisper drawers for garage organization
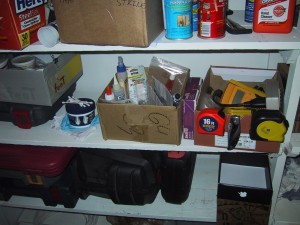
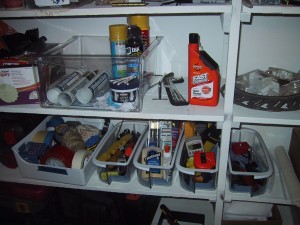
Cardboard boxes are fine, but refrigerator door bins and vegetable crisper drawers are nicer for storing things. The good ones I used here are made from clear plastic so you can see inside them easily and they don’t block light.
Of course, they are terribly expensive to purchase for this use, but with the (lack of) quality of Kenmore /Amana refrigerators manufactured after 2004 you can find free donor components relatively frequently. I also believe that with the addition of standard closet shelving support brackets the glass shelves from these fridges can be re-purposed into standard wall shelves.
Review: MPJA 9615: 0-30 volt, 0-3 Amp, Bench Power Supply
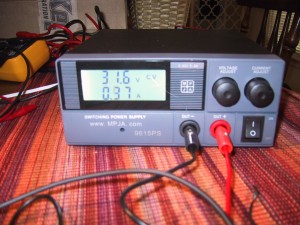
This is the MPJA 9615ps mini-bench power supply. The specs say that it will provide 0-30 volts and 0-3 amps. Mine actually goes up to 31.6 volts (displayed, measured to 31.3 volts on my lowest DMM) and has driven a short at 3.25 amps (verified with my DMM). As the previous sentence alludes to, the voltage display on my unit was 0.3 volts higher than my $50 Chinese DMM, and 0.1 volts higher than my $14 Chinese DMM. Given that my two DMMs don’t quite agree, I’m not willing to say anything other than the fact that I think it’s accurate to at least 0.3 volts. [The amp readings matched those on my DMM’s.]
Pros:
- The unit is nice and small.
- The black on white backlit LCD is easy to read.
- The price…this sucker costs $50!
Cons:
- It doesn’t have a switch to turn off the output, so if you want to adjust it to a specific voltage before applying power, you have to disconnect it from your circuit, set the voltage, and then connect it to your circuit.
- The knobs set the maximum voltage/current, but the LCD does not display the set value unless you are at the limit. So it typically displays the voltage set point (if the load is voltage limited), and if you want to set the current to a specific amount (higher than is currently being drawn) you’d have to short the leads or connect it to a dummy load. If you want to set the current to what the load draws or limit the current draw, you can start it off at zero and move it up until it hits the value you want.
- The banana jacks to alligator clips the unit ships with are cheap. Notice those screw heads in the picture on the jacks? They are energized, so don’t touch!
- The fan on the back runs continuously. It is not a terribly loud fan, but it is audible. (Think a laptop GPU fan that kicks in when you run a video game….except it never turns off.) This doesn’t bother me, but I wouldn’t leave the PS running all day either.
All in all, I’m happy with my purchase. This supply does what it’s supposed to and makes it easy to power circuits and monitor their power consumption. It makes a great inexpensive hobbyist bench supply, or a 2nd supply for a professional who just needs to power something.
Boost Converter Schematic

I have drawn up a schematic (click to enlarge) of the high current and sensing portions of my maximum power point tracking (MPPT) 2-phase boost converter battery charger circuit. The schematic does not include the micro-controller, MOSFET gate driver IC, and associated power supplies, as those items are on the (relatively) low-power side of things.
What do all of these things do?
- L1, Q1, and D1 – These three components make up the heart of the boost converter. When Q1 turns on, power builds up in L1 as the current rises. When Q1 turns off, all of that power exits via the only available route (out past D1) and the voltage is boosted as the inductor (L1) resists the current change. If you turn Q1 on and off very quickly (under control of the micro-controllers’ PWM output via a MOSFET gate driver) it raises the output voltage higher than the input voltage.
The $25 Sous-Vide Egg cooker
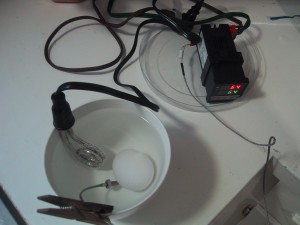
I put together a $25 sous-vide egg cooker with a $20 PID temperature control module I purchased from ebay (which included a thermocouple and free shipping), a $2 immersion heater and a $1 extension cord (both purchased at a thrift store). I added a few crimp on connectors that I already had (but we’ll say you could get a few for $2 at the hardware store) and a free bowl and clothespin that I stole from the kitchen.
I’m happy to report that it cooked the egg just fine.
I’m not 100% certain I’m going to get into Sous-Vide cooking, but the technology has several alternative uses: unpasteurized milk heating for making cheese, automatic baby bottle warmer, etc…
A few downsides to my $25 setup:
- The temperature of the water in the bowl would vary by about 5 degrees from the top to the bottom as I did not have any type of pump to circulate the water. I was hoping that convection currents would do something for me, but apparently the water just stratified.
- It has a few exposed wires laying about, and a bowl of water sitting near them. For permanent use an enclosure will add to the overall cost.
- It can only cook a single egg at a time. The immersion heater draws 125 watts at 120 volts (around one amp) which can easily be switched by the internal relay in the PID controller (rated up to 3 Amps). But, it won’t work with anything big (like the electric kettle I also purchased at the thrift store) until I add a bigger 10-25 amp relay (solid state or otherwise). If you plan on running a big 8-12 amp load from your PID module, I suggest getting one that has a 12 volt output designed to directly control a solid state relay.

