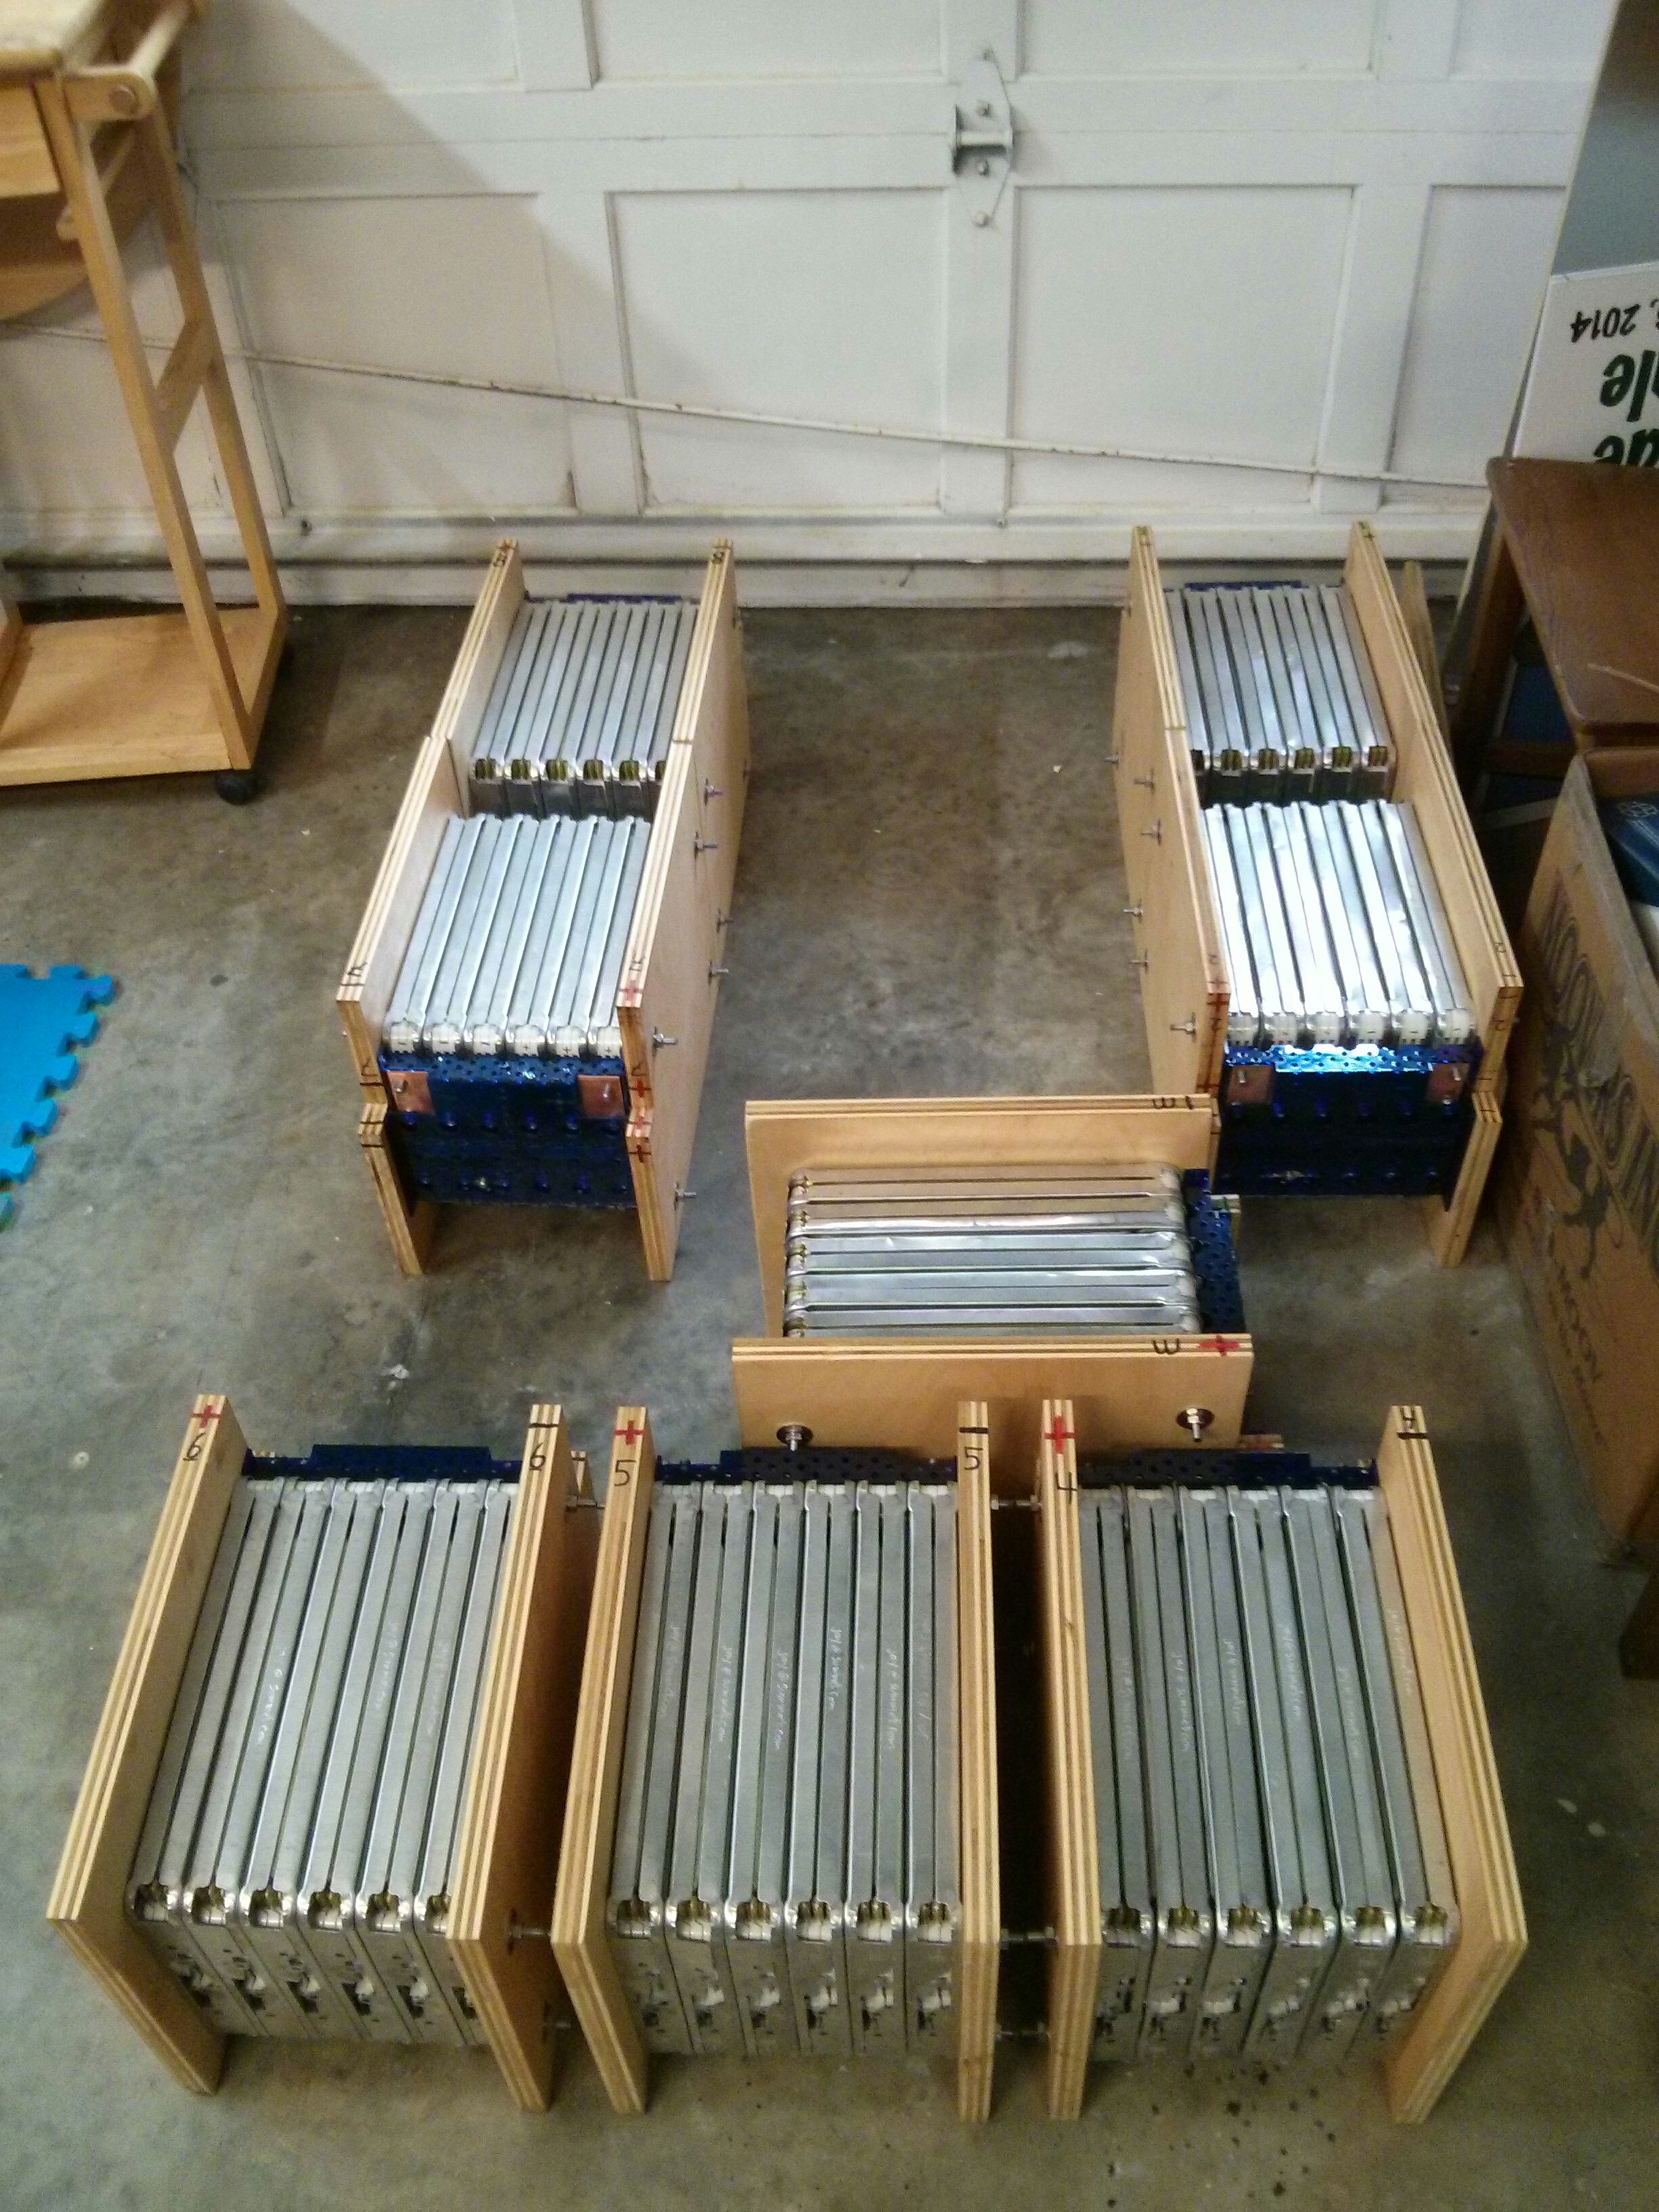
As part of the Li-Ion battery upgrade procedure, I needed a charger that could be programmed to work with the Li-Ion modules and my BMS loop system. I decided on the EVCC (Electric Vehicle Charge Controller) from Thunderstruck Motors paired up with dual TSM2500 ( a.k.a CH4100) chargers. The total system cost just under $1200 shipped, so it was quite economical for a 4.2 kW system. The trade off for the low cost is that you have to wire both chargers up to the battery pack and the J1772 inlet in parallel, requiring you to make two sets of Y adapter cables. Theoretically the EVCC can control up to 4 of the inexpensive TSM2500 chargers, but I think wiring up two is about the most I would want to do, and if you want a high power charger it would probably be better to purchase one or two PFC-3000 or PFC-4000 chargers (which also interface to the EVCC).
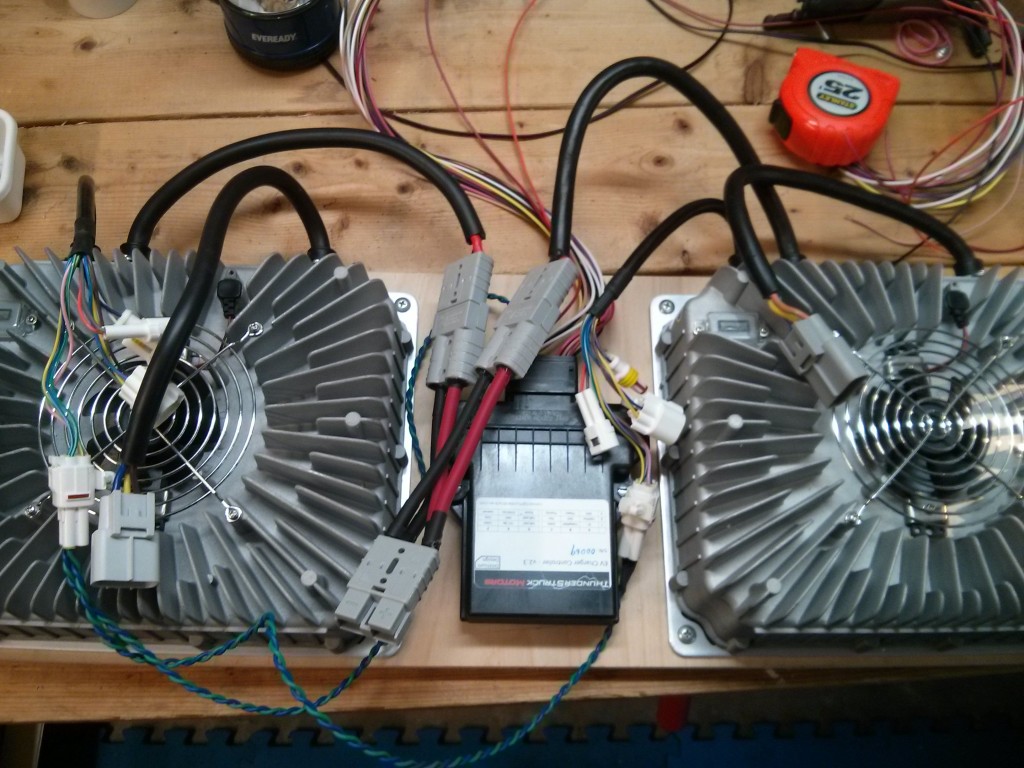
I really like the EVCC, as it supports the J1772 protocol and can monitor my mini-BMS loop both for charging as well as for a low voltage warning when running. It also supports the ability to disable the EV when the J1772 plug is inserted (drive away protection).
The first one I received had a few software/firmware bugs that required me to send it back for a re-flash (one of the bugs made it so that the bootloader couldn’t re-flash it in the field!), but after I received the upgraded module it has been working well and I haven’t noticed any more bugs.
I have it set up with a single charge profile so far, but it actually supports 4 charge profiles that can be user selectable via a resistor network on a rotary switch. I have installed the hardware to select different charging profiles and will be programming them in the future.
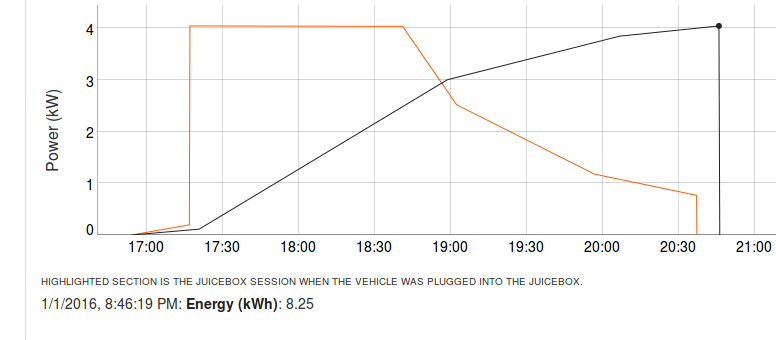
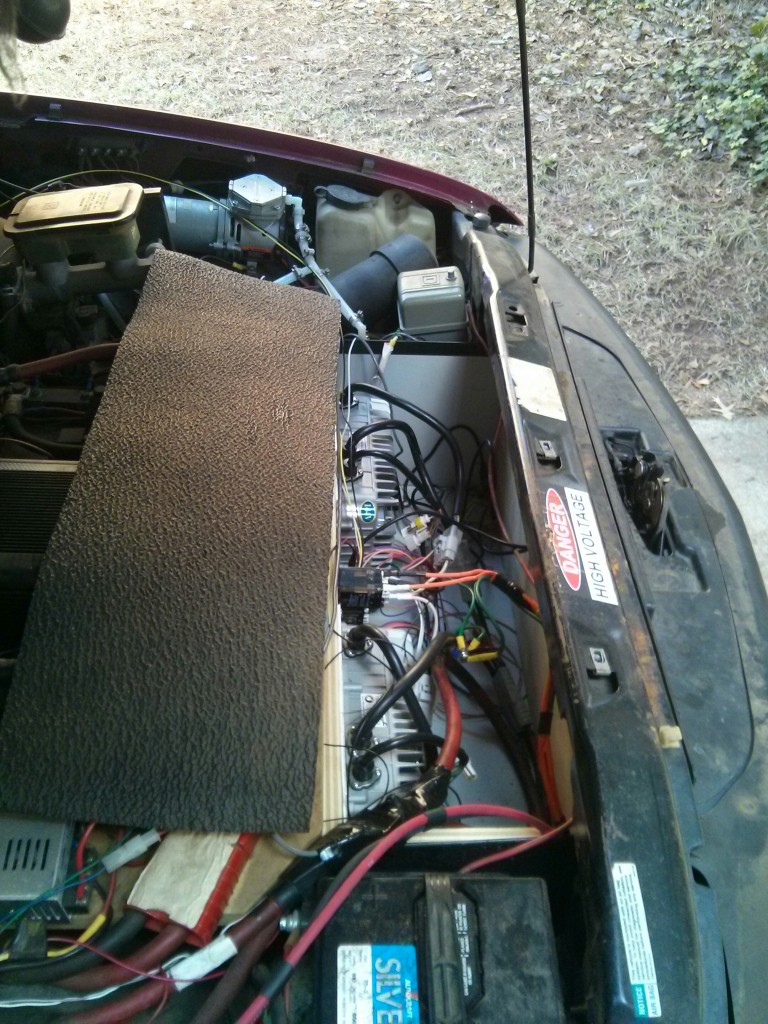
The two chargers, EVCC and a few relays (for switching between the J1772 port and 120 volt RV inlet) are attached to a piece of wood that fits into the former front battery bay of my S-10 conversion. Althought I COULD fit two more chargers in there, space would get tight, the wiring would be (more) messy, and I’d be worried about the airflow and cooling. As it is, I’ve found that 4.2 kW charging is plenty fast for me. I can take a 16 mile trip, which is much longer than my daily commute, and be recharged in 141 minutes.
I found a Chinese website selling the same charger with a different model number, and their technical specifications were slightly better, so I made a PDF out of the website which you can access here: CH4100-series_more_info