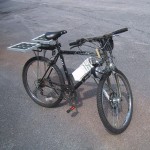
 An electric powered bike makes it easier to go up hills, and can turn a ride to the train station from a workout into a commute. Typically however, the batteries need to be plugged in to charge after your trip. Although electricity is cheap, this does require that you have removable batteries (or wheel your bike into the house or bring a charger outside). I decided to use the sun to recharge my bike, seeing as how I would be parking my bike outside at a train station all day. This way, it can be fully charged and ready for the ride home when I return. Continue reading
Category Archives: Projects
Bike Lighting: $15
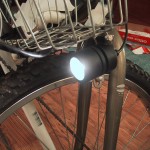 In case I need to commute home after dark on my electric bike, I added a front headlight (5 watt MR11 halogen) and a rear tail light (Red LED tail light for “off-road” use). The front headlight enclosure was designed to be used on a bike, and included a nice mounting bracket and enough cord that I could harvest some to run to the rear tail light. Black zip-ties hold the wires to the frame. The rear tail light had no enclosure, so I soldered the wire directly to it and epoxied it into the back of my rear rack. Both lights run off of only one of the 12v batteries through a 5A blade fuse and an automotive switch mounted under the battery pack. Continue reading
The $175 Electric Bike

Electric bikes are expensive. Even if you buy the cheapest electric bike you can find on deep discount at walmart, it costs $300. (Formerly $400 before they deeply discounted it.) I decided to build my own out of surplus parts and things I could buy at the local Ace Hardware for less than $300. (Mostly, for the fun of the build.)
So, I bought a surplus motor controller, handlebar mounted throttle, and a 250 watt electric motor. I bolted the motor to the front of my used $20 bike, built a battery holder out of PVC pipes, and made a vacuum formed cover.
Continue reading
Vacuuform Battery Cover
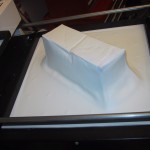
 After building a PVC pipe battery holder for my electric bike, I used a vacuum form machine to make a polystyrene battery cover. I built up a cheap tool form using cardboard (which turned out to be too week, but it was quick).
As the vacuum was forming the polystyrene around the cardboard the box started to deform so I had to release the vacuum before the styrene had fully formed itself to the PVC pipes, but it got close enough to be screw mounted. Continue reading
Encrypted home partition for Ubuntu 9.04
Following the directions on Lars’ blog, I set up an encrypted home directory on Ubuntu 9.04 using LUKS.
The following commands were all executed with root permissions. Add “sudo” to the front of the commands if you are not running with root permissions. Continue reading
Homebrew bicycle battery bracket
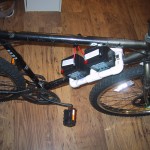
I created a battery holder (bracket) for my two 5 Ah gel cell batteries using more schedule 40 PVC pipe. I cut four 2 and 7/8 inch sections and three 3 and 5/8″ sections. Using four 90 degree elbows and two “T”‘s I arranged it to hold the two batteries. Continue reading
Electric Bicycle power circuit
Bolting a DC motor to the front basket of a bike and running a chain to the front wheel takes care of the mechanical linkage needed to make an electric powered bicycle, but you also need to provide power to the motor, and control that power in some way.
Luckily, the same place that sold me the 250 watt motor also sold a 40 amp speed controler. (It cost $33, or more than any single other part of my e-bike project.)
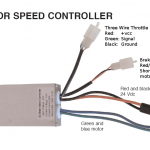
The speed controler is controlled by most standard e-bike throttles, such as this one from Currie Technologies. I also attached two 12v 5AH batteries in series to provide 24 volts. Because I calculated that my 250 watt motor running at 24 volts would draw approximately 10 amps, (250/24 = 10.4), I added a 15 amp fuse to the circuit. (The first 15A fuse was replaced by a second 15 amp fuse after it saved my speed controler from damage when I accidentally reversed the polarity on the power…)
Continue reading
Adding an electric motor to a bicycle
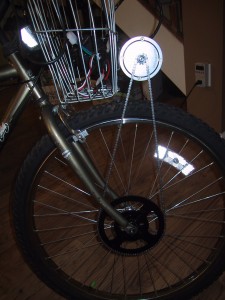
I purchased a surplus 250 watt motor with a matching wheel hub and 90 tooth sprocket. The motor has an 11 tooth sprocket, and both the motor’s sprocket and the hub’s 90 tooth sprocket are designed for #25 motor chain, which is slightly smaller than standard bicycle chain.
To get the hub and 90 tooth sprocket on the wheel, I had to remove the existing hub and rebuild the wheel on the new hub. Luckily the two hubs were close enough in size that I could re-use the existing spokes. Following the instructions on Sheldon Brown’s website, and also refering to this website I was able to re-spoke the wheel.
Continue reading
Currie Technologies 6 pin Diaganostic throttle pin-out
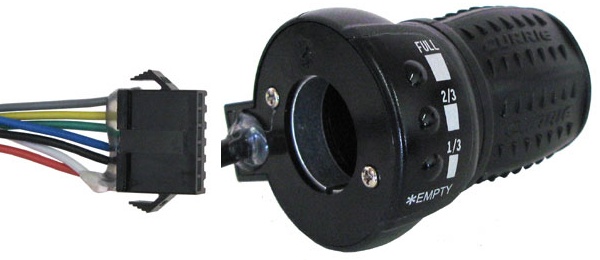
I purchased a surplus Currie Technologies “Diagnostic” throttle. (Which includes 3 LED’s labeled as 1/3, 2/3 and full charge indicators) It has a six pin (7 cable) connector with no pin-out diagram.
After opening it up, it appears that the blue, black, and red wires are connected to the throttle sensor itself, while the other four wires (White, Gray, Yellow, Green) connect to the LED circuit board.
The pin-out ordering is as follows, from the bottom of my picture up:
- Red/White (Throttle/LED, sharing a pin, + voltage)
- Black (to throttle, I assume Ground)
- Blue (from throttle, I assume signal)
- Green (Full LED)
- Yellow (2/3 full LED)
- Gray (1/3 full LED)
I connected the Red/Black/Blue wires to a motor speed controller that had a 3 wire throttle connection (matching them up to the Red/Black/Green wires from the controller) and it worked great!
The LED pin-out is as follows:
White (positive / Vcc)
Gray – 1/3 empty LED
Yellow – 2/3 full LED
Green – Full LED
Note that I was able to get the LED’s to light up with a 3V source, but I believe their forward voltage is less than 3V and you should use a current limited supply so that you do not burn the LED’s out.
Electric Scooter Power Usage Details
I purchased a used Navajo Turbo Z 24volt electric scooter. The person I bought it from had installed two brand new 12V 7.0Ah batteries, similar to the battery in this data sheet. Note that because the scooter will discharge the batteries in less than an hour, the pack’s usable capacity is closer to 4Ah. Because the batteries are sealed lead-acid, they are heavy, approximately 6lbs each, and the pair make up approximately 35% of the scooter’s 34lb total weight. (Most of the rest of the weight comes from the hefty all-steel frame, and the 5lb 200-watt motor.)
Continue reading
