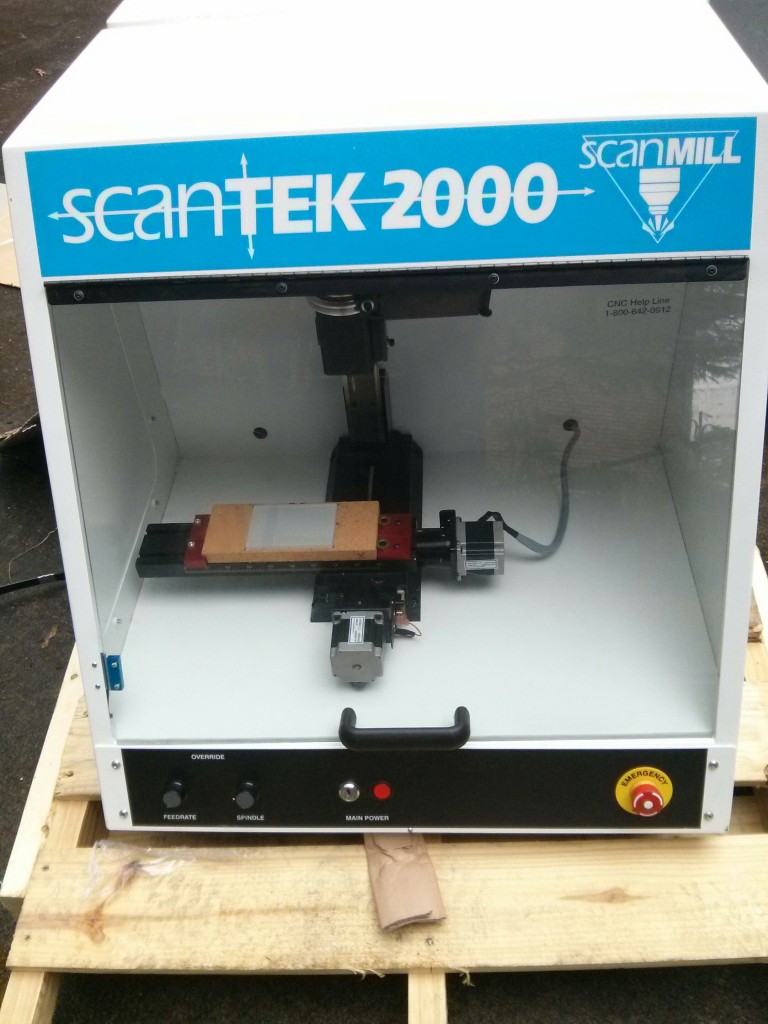
ScanTek (Denford) MicroMill 2000 – Initial powerup and front panel controls

IMG_20160108_141043

This is a ScanTek 2000, a rebranded Denford Micromill 2000 that has a CNC controlled Sherline mill in a nice steel enclosure with some fancy CNC electronics. According to the nameplate, it was dispatched in October 2005, so a relatively newer model.

They are designed for technical schools and shop classes to teach students the fundamentals of CNC machining without having to have a really large CNC mill. Although the Sherline Mill inside is relatively small, it is still a serious mill and can be very precise and even mill mild steel.   I purchased mine surplus, and it unfortunately did not come with the key for the front panel power switch, or the software to drive the mill. My first goal was to see if I could get it to turn on.

front_panel_only

Continue reading

Melted fuse leg

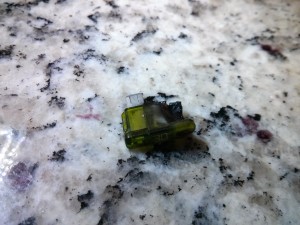
Driving down the road today I smelled a plastic/electrical burning smell, which caused me to stop the truck and run around it quickly checking for any problems in my new Lemelted_fuseaf modules. After verifying that they were not on fire, smoking, bulging, or even warm, I sniffed around the truck and decided the smell was emanating from under the hood, and eventually traced it to near my DC-2-DC converter (which keeps my 12 volt accessory battery charged up from the main 128 volt pack, replacing an alternator on an ICE vehicle). When I checked on the accessory battery voltage, it was 13.8 volts instead of the 14.5 volts that normally shows up when the DC-2-DC converter is working, so I thought that I had blown that out.

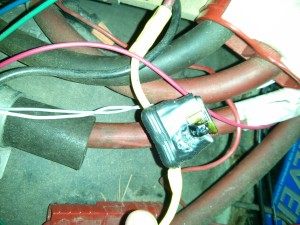
As it turns out, the only thing that had melted was the leg of the 30 amp 12 volt fumelted_fuse_holderse I have between my DC-2-DC converter and my 12 volt accessory battery. Note: the fuse did NOT blow. One leg of the fuse melted into the holder, melting one side of the fuse and the plastic holder. The DC-2-DC converter was still working (but no longer connected to the 12 volt accessory system), and all of the 12 volt components were working fine on the redundant battery power.

At the time this happened I had the headlights and fan blower on, so the 12 volt load was about as high as it gets, but I’d been driving around like that for several years without the fuse or holder giving me any problems.   The only explanation I can come up with is that the process of moving wires around for the Leaf Module install loosened up the fuse in the holder and caused a loose connection, and the added resistance heated the connection up until it failed. (Although the fuse looked to be fully inserted into the holder even after it melted…)

I will have to replace the fuse and holder, and I’ll probably zip tie the new fuse into the holder when I replace it.

Default Charging Profile: Charge to 80% capacity (quickly)

Because I have a relatively short commute, and rarely anticipate needing my full 100% pack capacity, I have chosen to charge my truck to an 80% SOC on a daily basis to maximize battery life. One nice thing about the 80% level is that most batteries can be charged at a relatively high rate of speed up to 80%, and then you need to slow down the charging a bit to prevent them from overheating. (This is why DC Quick Chargers will quickly bring an empty battery up to 80%, but then slow down quite a bit after that.)

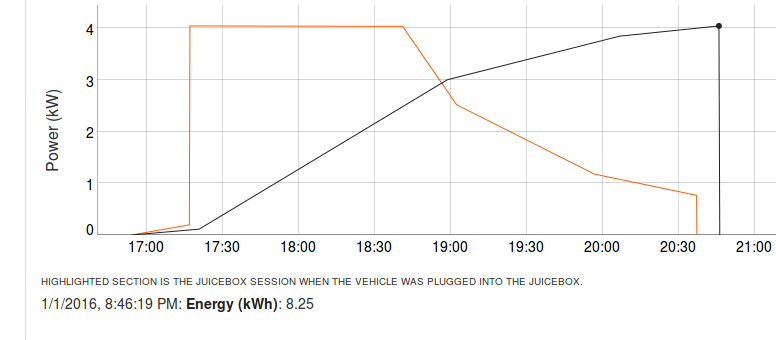
My first attempt at programming an 80% charging profile was very simple, just set   MaxV to 128.5 and set the TermC (termination current) to 2 amps. This works well, it gets the pack voltage up to 128.5 volts and holds it there until the battery stops accepting much current. The only issue is that it is wasting time, because for a good amount of the charging period the current flowing into the battery is less than the maximum 30 amps (4.0 kW) that the chargers can produce. The charging curve looks like this, with a 3hr 20 min total time:

charging_2amp_cutoff Continue reading

Thunderstruck Motors dual TSM2500 & EVCC charger package

As part of the Li-Ion battery upgrade procedure, I needed a charger that could be programmed to work with the Li-Ion modules and my BMS loop system.   I decided on the EVCC (Electric Vehicle Charge Controller) from Thunderstruck Motors paired up with dual TSM2500 ( a.k.a CH4100) chargers. The total system cost just under $1200 shipped, so it was quite economical for a 4.2 kW system. The trade off for the low cost is that you have to wire both chargers up to the battery pack and the J1772 inlet in parallel, requiring you to make two sets of Y adapter cables. Theoretically the EVCC can control up to 4 of the inexpensive TSM2500 chargers, but I think wiring up two is about the most I would want to do, and if you want a high power charger it would probably be better to purchase one or two PFC-3000 or PFC-4000 chargers (which also interface to the EVCC).
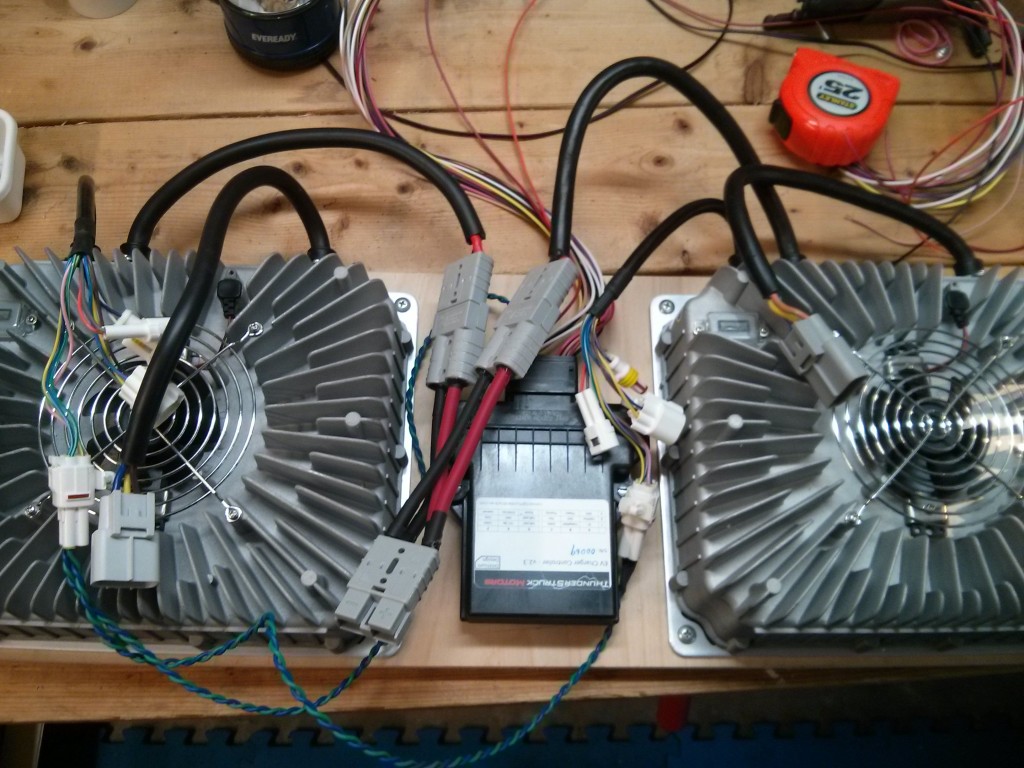
06_y_in_place

I really like the EVCC, as it supports the J1772 protocol and can monitor my mini-BMS loop both for charging as well as for a low voltage warning when running. It also supports the ability to disable the EV when the J1772 plug is inserted (drive away protection).

The first one I received had a few software/firmware bugs that required me to send it back for a re-flash (one of the bugs made it so that the bootloader couldn’t re-flash it in the field!), but after I received the upgraded module it has been working well and I haven’t noticed any more bugs.

I have it set up with a single charge profile so far, but it actually supports 4 charge profiles that can be user selectable via a resistor network on a rotary switch. I have installed the hardware to select different charging profiles and will be programming them in the future.

The two chargers, EVCC and a few relays (for switching between the J1772 port and 120 volt RV inlet) are attached to a piece of wood that fits into the former front battery bay of my S-10 conversion. Althought I COULD fit two more chargers in there, space would get tight, the wiring would be (more) messy, and I’d be worried about the airflow and cooling. As it is, I’ve found that 4.2 kW charging is plenty fast for me. I can take a 16 mile trip, which is much longer than my daily commute, and be recharged in 141 minutes.
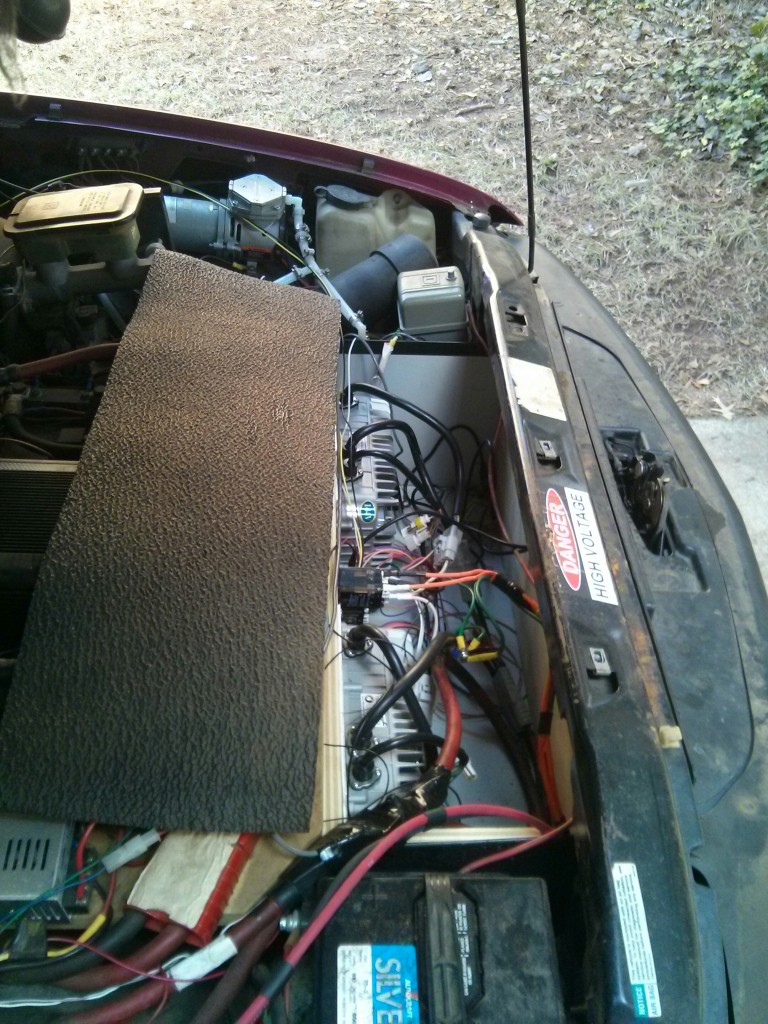
charging_bay


I found a Chinese website selling the same charger with a different model number, and their technical specifications were slightly better, so I made a PDF out of the website which you can access here: CH4100-series_more_info
Lead Acid to Nissan Leaf Pack upgrade process

The main process of upgrading my S-10 Electric Conversion pickup truck to use the Salvage Nissan Leaf LiIon modules took me 3+ days, and I still have a few more days of small jobs to finish before I can call the job completely done.

Day 1:
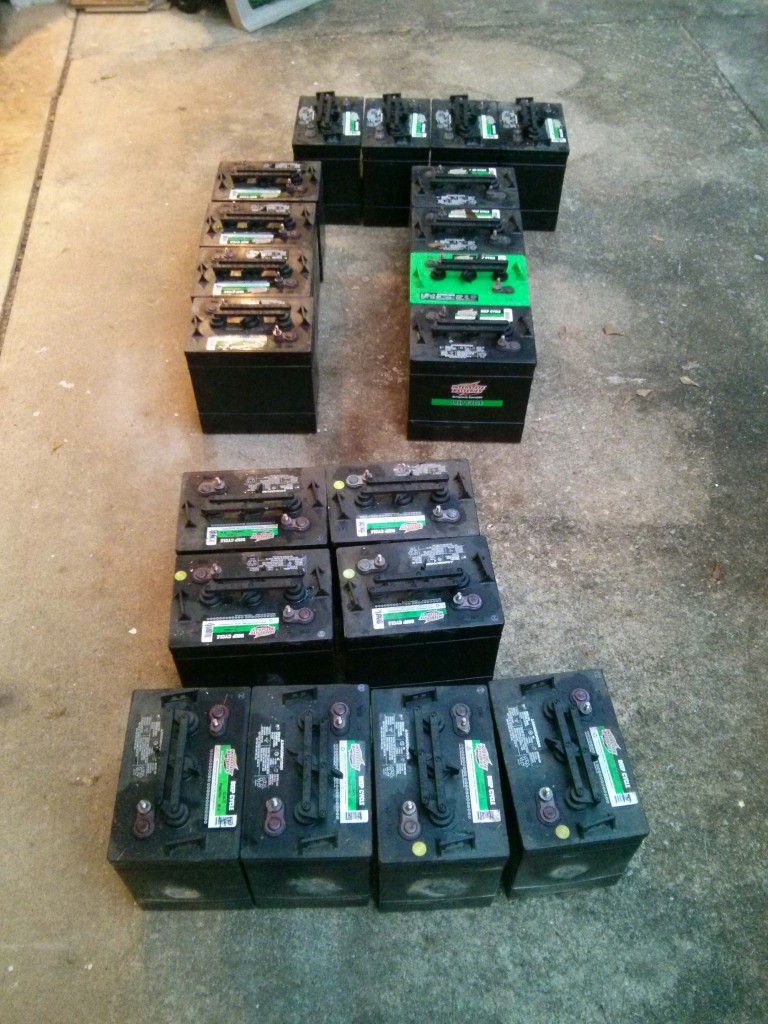
On the first day I removed all twenty of the existing lead acid golf cart batteries. This involved lifting the main piece of wood under the hood that holds the contractors, motor controller, and 12VDC voltage converter, as well as lifting the bed and removing all of my PakTrakr battery monitoring units. After manhandling 1200 lbs of lead out of the truck (only dropping one battery on its side…) I cleaned up the existing battery bays, replacing some rotted wood and dirty foam.
20_golf_cart_batteries
back_bays_empty
empty_front_bay
Continue reading

Nissan Leaf Modules powering my S-10 Pickup conversion

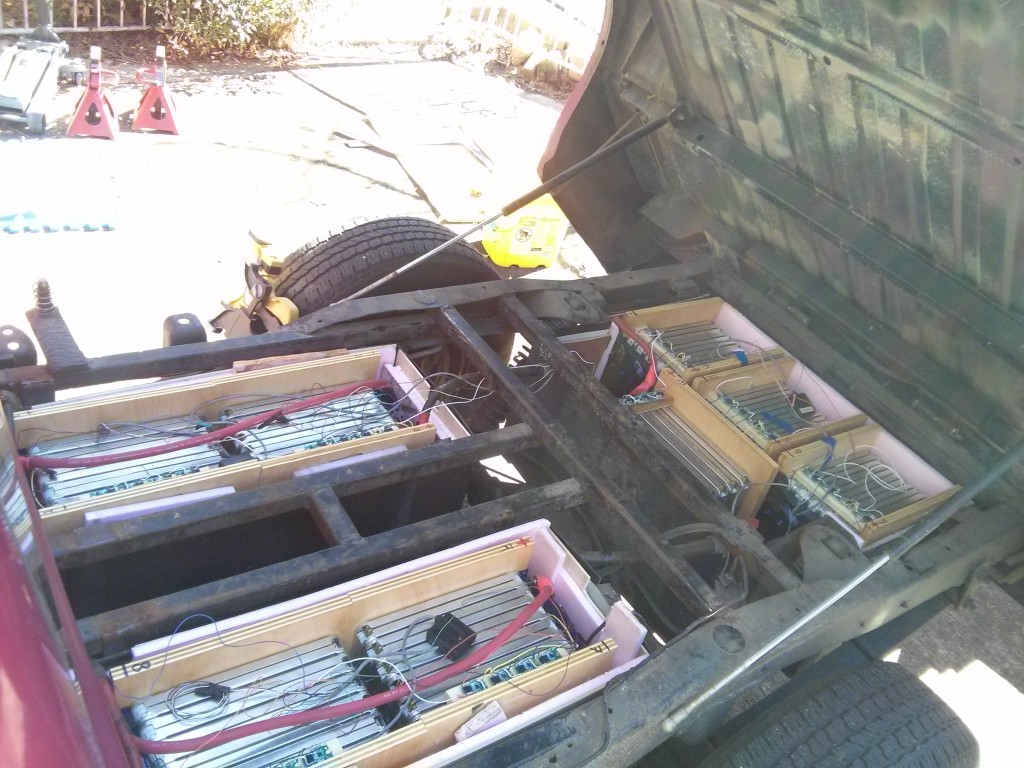
I have successfully driven my S-10 Electric Pickup conversion powered by 48 modules from a salvaged Nissan Leaf battery pack. I have them wired in series, 16 sets of 3 parallel modules, providing 128 volts with 180Ah capacity (23 kWh).

LeafPackInBack

It took me a full three days of work to make the swap and get the truck to a barely drivable condition. I have the cells hooked up with a warning buzzer on the BMS low voltage loop signal, but I do not yet have the charger fully connected. I anticipate another 8 hours of work to get the charger and pakTrakr system fully set up.

Continue reading

Lead Acid batteries for an EV: Not cost effective

20_golf_cart_batteries

My first pack of Sams Club lead acid golf cart batteries only lasted 2.75 years and 4861 miles. Total cost per mile was 67 cents including electricity, batteries, and maintenance. The battery replacement cost accounted for 65+ % of my cost of ownership over that time.   My second set of Interstate golf cart batteries were even worse, lasting only 2 years and 2870 miles at 85 cents per mile.   (I paid $277 for electricity for the truck over those 2 years, so 88% of the cost was the battery purchase price.)

Obviously, from a cost per mile perspective, this is more expensive than gas unless your car is a real lemon (needs lots of maintenance) or a real gas guzzler (Like a hummer).   I’ve reciently replaced them with the battery pack from a salvaged Nissan Leaf.   Because I put in a lot of sweat equity to retrieve the batteries and lower my costs by selling off the rest of the car, I was able to purchase my 3rd pack for $1200, which is amazingly inexpensive if you compare them to “new” Li-Ion batteries, or even lead acid golf cart batteries.

leaf_pack_packaged

Of course, my total upgrade cost was closer to $4000, as I had to buy some hardware to mount all those Leaf modules, as well as upgrading my battery charger to make use of them.   However, when I go to replace them, all I’ll need to do is purchase a wrecked Nissan Leaf and swap the modules out, so I expect the replacement cost could easily be in the $1500-$2000 range.

And, they should hopefully last a lot longer than the lead acid batteries they are replacing (reports in the 1000-3000 cycles instead of 300-600 cycle range….). They certainly offer better performance! (More available power, lighter weight, etc I’m very happy with the upgrade.)

In summary, I can’t recommend lead acid batteries for any EV that isn’t a golf cart, and even then a LiIon upgrade would probably be worthwhile.