Ring Video Doorbell Review

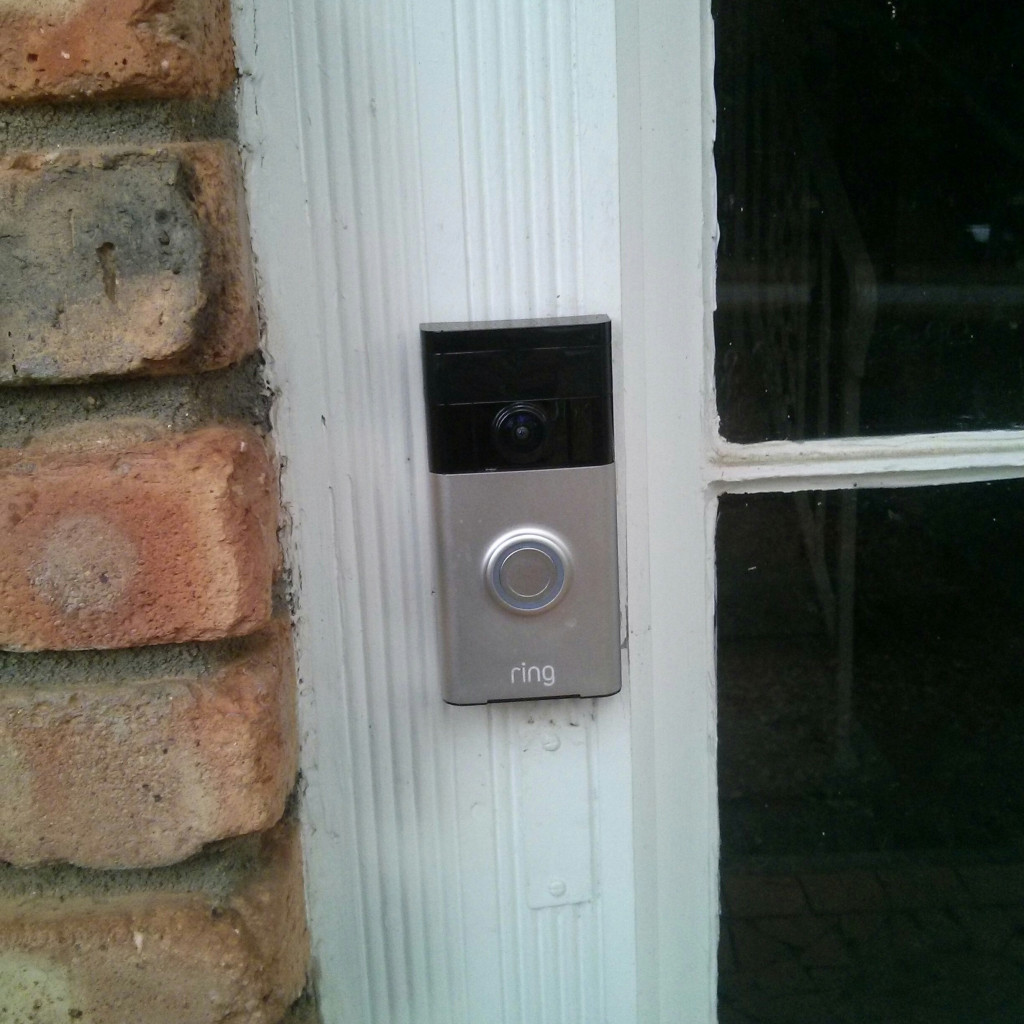
A few months ago I purchased a Ring video doorbell (along with a Chime Wifi announcer). This is a doorbell unit that has a video camera and motion detector built in, as well as the traditional button. It is powered either by your existing doorbell wires (if you have them) or via a rechargeable battery.
ring

It requires a connection to your home Wifi access point to work, as well as a smartphone (iOS or Android) to be configured and make use of the “video” part of the video doorbell.

When somebody pushes the button, your smartphone gets a “video call” and you can see the person at the other end and talk with them (they can’t see you) from anywhere your smartphone has a network connection. It can also be set to send you an alert whenever the doorbell sees motion, even if nobody pushes the button.

If you have a wired doorbell already, and connect the ring unit up to your existing wires it also rings your existing hard-wired doorbell like a standard $5 button. If you buy the optional WiFi chime unit that plugs into a standard power outlet, it will ring that as well (just in case you don’t have your phone nearby while inside the house).

An optional added service is their “cloud recording” option, which costs $30 a year, and stores a video recording when it sees motion or the button is pressed. In my opinion, 90% of the “home security” value of the doorbell relies on this cloud recording option, so if you buy the ring video doorbell, plan on paying $30 a year (for each ring unit if you have multiple) as well. (Which is a lot cheaper than buying and installing your own video recording hardware.)

The benefits:

  • I really like being notified when motion occurs at my front door. It can tell you when packages are delivered (most delivery drivers push the button, but some do not and are detected by the motion detection feature), or when a family member arrives home.
  • The “video call” option can make it appear that somebody is inside the house, even when you are not. You can tell somebody that you are not interested, or to drop a package at the door, etc… (this can also be used to “greet” the visitor from within your own house without actually coming to the door, due to laziness or safety concerns.)
  • Having a doorbell with an obvious “video camera” built in should help with home security, as long as potential burglars notice it, even if it’s not working.
  • Having a video recording saved (offsite, in the cloud) every time there is motion near your front door is a very nice security feature. (This requires $30 a year subscription.) With this you can check to see if/when a package was delivered, even if you missed the initial “call” from the doorbell, as well as the obvious home security applications.

The downsides (areas for improvement):

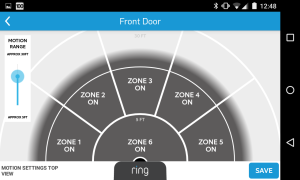
    • Motion detection can be overly sensitive, and not sensitive enough at the same time. The Ring unit has “zones” where you can turn on or turn off motion detection, and adjust the “range” of the motion detection. However, it uses passive IR detectors, which mostly detect movement of a heat source. My front door faces a street (about 50 feet away) and heat from moving cars will set off the Ring unless I turn all of the zones off except the one directly in front of the unit. And then, it will only detect motion from people if they actually step onto my porch. Even so, very hot vehicles (such as garbage trucks) will still trigger a motion alert. My motion sensitive lights do a better job of detecting people walking around without getting false positives from the road.
      Ideally, you will be able to mount it such that a road is not in it’s field of view, even if the road is relatively far away from the front of the house.

Screenshot_2015-12-04-12-48-06

  • The wifi/network connection is mostly fast enough, but not always. Typically I will get a notification on my cell phone within a few seconds of motion being detected or the button being pushed. However, sometimes this delay extends into the 10-30 second range, by which time whoever was there has already left. If you pay the $30 a year fee for “cloud recording”, you can go back and view who you missed, but you can’t actually talk with them. And on one memorable occasion when they were having problems with their servers, the Chime wifi doorbell announcer unit would “ring” about 10 minutes after the Ring doorbell was pushed!
  • If the doorbell isn’t connected to existing doorbell wires driven by a low voltage AC transformer, you need to take it off the wall and re-charge it every few months. The battery life is quite respectable, even with the motion detection settings set to “frequent” it lasted around 50 days for me and if you turn the motion detection settings to “smart” it should last 2-3 months. But still, it takes 5 minutes to find the special security screwdriver they include in the package, take it off the wall and plug it in. (Also, you don’t have a doorbell for the 8 hours it takes to charge.) The phone application will notify you when the battery is getting low.
  • It requires wifi to work. If your DSL goes down or wifi router is on the blink, your doorbell will not sound a chime. (Even though the Ring unit makes some noise and flashes a light when the button is pushed, giving the person outside the impression that the doorbell activated. (If you have it hard wired into a “real” doorbell it will at least ring the wired doorbell inside your house, even if it can’t notify your smartphone.)

Overall I’m happy with the device, and it works relatively well overall, but having it hard wired into a “real” doorbell would definitely improve things. I think that if you are replacing an existing (wired) doorbell button it would provide the best experience. Our house had a wired doorbell at one point in time (but it was replaced with a wireless doorbell before we moved in) so I’m hoping to re-wire the Ring unit up to a physical doorbell and low voltage AC transformer so that it will work as well as a regular doorbell even with networking glitches, and never need to be re-charged. The biggest win in my mind is having a cloud based recording of any motion near your front door.


Update 2016: After being installed for several years, I had an issue where the screws in the bottom of the ring got corroded, and “stuck” to the push in metal nuts inside the ring. when I tried to unscrew the doorbell to charge, the metal nuts broke free of the plastic. (This may be because the people who pressure washed the townhomes were were living in had used some type of chemical that wasn’t good for the metal.) The ring doorbell itself still worked, but it wouldn’t mount anymore. Ring customer support sent me a free replacement, which was very nice of them, as it was out of the 1 year warranty.

Update 2018: I came home one day to find my ring doorbell unresponsive. I thought it might be due to a low battery, so I charged it up, but it turns out that the problem was something else. Although it would accept a charge, we were unable to get it to “boot” up, or attach to a wifi network. Ring Technical Support walked me through the procedure to reset the unit to the factory default firmware/bootloader, but that did not work. Luckily for me, I had recently signed up for the Ring Protect Plus service, which includes extra warranties on the devices, so they sent me a replacement unit.   The screws on the bottom of this unit showed some small evidence of corrosion, but it was not as bad as the previous unit and they did not get stuck.

All in all, the ring devices appear to be relatively robust, the technical support is top notch, and if you are signed up for the Ring Protect Plus plan the warranty coverage is very good.

Update 2020: I upgraded this unit to the 2nd Gen version and am happy with the improvements.
16 volt Nissan Leaf Battery Management System (BMS) information

In a previous post I have shown how to physically mount six Nissan Leaf battery modules in two series groups of 3 parallel modules to build a 180 Ah by 16 volt Lithium (LiNMC) battery.

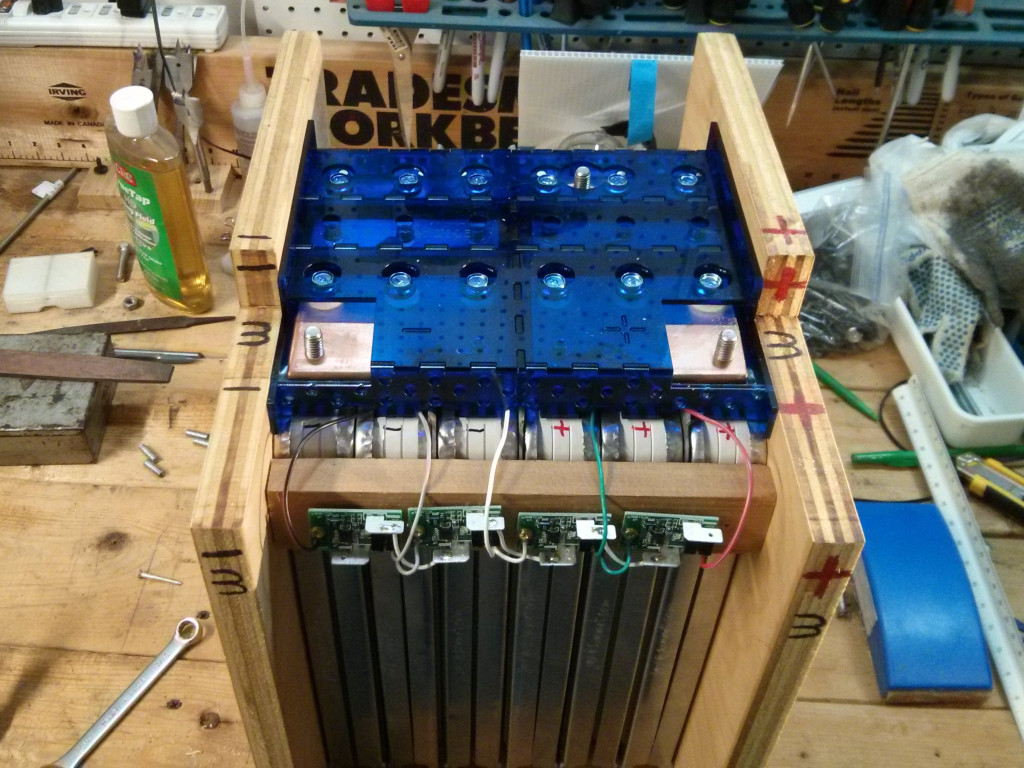
The batteries are covered by these very cool laser cut acrylic protective covers (which obscure the BMS wiring).
cover_with_bms_topview

Anthony Felix asked for more information about the BMS units I’m using on my batteries, so here it is! (Jump down to the last picture if you just want to see where the BMS units are attached….all of the text between here and there is an explanation of WHY they are attached there…)
Continue reading

S-10 EV New J1772 and 120 Volt Charging Inlets

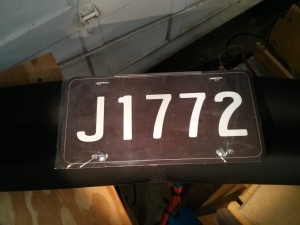
My Chevy S-10 electric truck is about to get a new charger, and the upgrade will also include a new set of charging inlets hiding behind this J1772 novelty front license plate.
IMG_20151129_201443

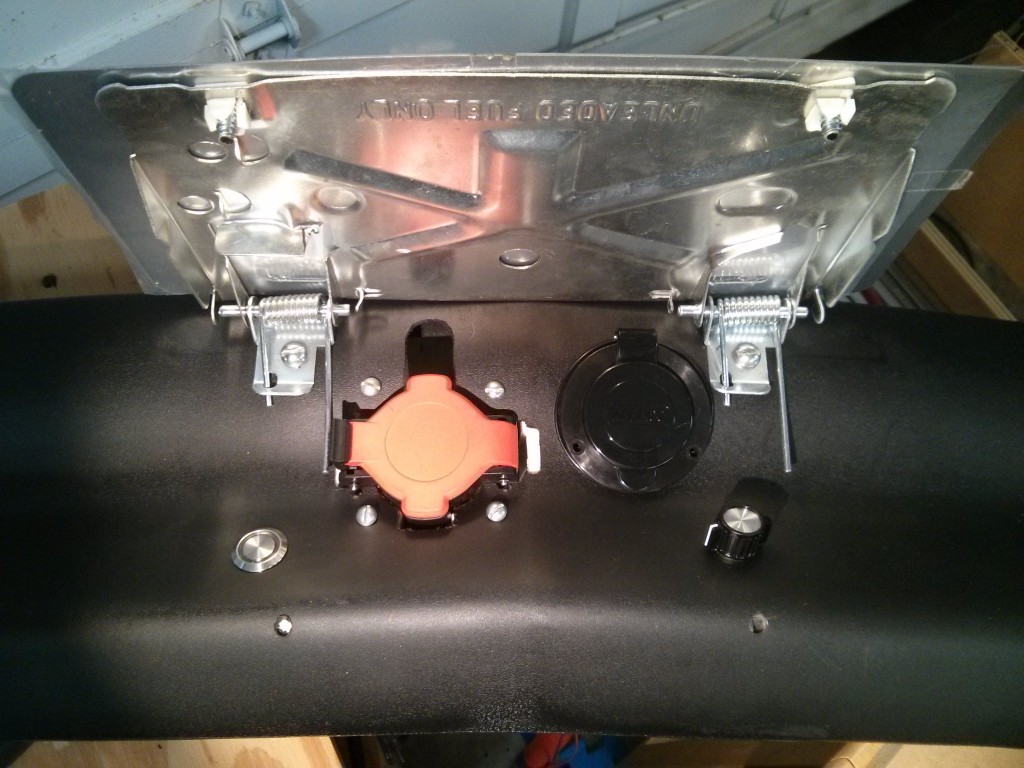
When you flip the license plate up, it reveals a J1772 inlet, as well as a 15 amp 120 volt RV inlet that any standard extension cord can plug into. I also have a rotary switch to select different charging modes, and a push button with LED indicator light to enable the charger and flash status messages.
IMG_20151129_201401

Here is a video overview of the setup:

YouTube Video

To prevent both inlets from being energized at the same time, I will be routing them through a power relay to the charger. The J1772 inlet will be connected by default. This will make sure that the exposed plugs on the 120 volt inlet are never energized by the 240 volt J1772 source.

If 120 VAC is present on the 15 amp RV inlet, the relay will connect it to the charger (and disconnect the J1772 inlet). I’m not terribly worried about people reaching into the J1772 inlet, as the plugs there are designed to be finger safe, but I don’t want some idiot plugging the J1772 inlet AND an extension cord into the truck at the same time and accidentally connecting 240 volts to a 120 volt circuit.

The rotary switch will allow me to switch between four modes on my charger.
Continue reading

Ubuntu 14.04 Zoneminder PPA not showing images or videos in the web console

When you use the Ubuntu package manager to install Zoneminder on Ubuntu 14.04 using the PPA, one configuration line defaults to the wrong path. This prevents the web console from showing you videos or events, although if you configure a camera it will capture pictures from it correctly and show you them in the Zone editing tools.

Specifically, under Options->Paths you need to change PATH_ZMS to:
/zm/cgi-bin/nph-zms

(adding the /zm to the front).

Error log messages look like the following:

ERR [socket_sendto( /var/run/zm/zms-299592s.sock ) failed: No such file or directory]

One other issue that could cause similar behavior is not having mod-cgi enabled in apache.

New S-10 front Air Dam / Air Deflector / Lower Valance Panel

I am getting ready to add a J1772 electric vehicle charger inlet (salvaged from a Nissan Leaf) to the front of my truck. I decided to hide it behind a fold up license plate. [In Georgia, we only need rear license plates, but many vehicles have novelty plates on the front.]

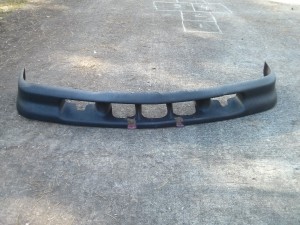
However, the stock front air dam / deflector / lower valance panel that was under the front bumper had a lot of air and foglamp holes molded into it, didn’t really have a good spot to mount the inlet or a fold up license plate bracket, and had a few pieces of plastic cut out where somebody had tried to mount something previously. (Note, the pictures below show the air dams resting upside down on the concrete, the side facing down bolts to the bottom of the bumper.)

Original part

Looking around online, I found an online distributor (getallparts.com) that was apparently closing out their supply of an after-market smooth front air dam that replaces the stock one. (OE # 15658455, Partslink GM1092157)

What really sealed the deal was the fact that they were charging only $9.42 (plus $18 S/H). (Other websites were selling a similar part for $80-90, so this was quite a deal. At that price, I almost ordered two of them…except that the shipping costs were not combined and also doubled…)

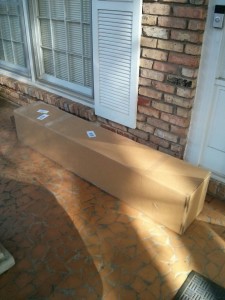
A few days later this really large (72″x12″x12″) box arrived:
Really Large Box

The aftermarket air dam is nice and solid, with no holes. It slopes inward at the bottom a bit and has a slightly concavity, but it will be much easier to work with than the previous one, and may even help my aerodynamics slightly.
New Part

As a side note, getting the original part off was a real pain. Access to the bolt heads is inside the bumper, and you really want a ratcheting box wrench, as there isn’t enough room to get a real rachet inside, and various steel pieces keep you from moving a wrench more than 10 degrees at a time on a few of them. I eventually just got out my sawsall and cut through all of the bolts (melting the top of the old part a little in the process). The main problem is that the plastic clip nuts couldn’t be turned, and the bolt heads were the only part that could be turned. I will be replacing them with stainless steel bolts, nuts and fender washers, making it much easier to install/remove by tightening the nuts on from the bottom, and counting on a generous application of Loctite to hold things in place.

Illuminated Garage Shelves

regular_shelvesilluminated_shelves

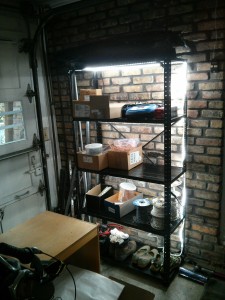
Sometimes it’s hard to find what you are looking for on garage shelves. Sometimes you just need a little more light over in that corner of the garage. Sometimes you find a good buy on LED rope lights and have a lot of zip-ties just laying around….

(LED rope Lights can also be useful in storage attics….)

Economies of harvesting Nissan Leaf battery modules

rear_of_car_smushed

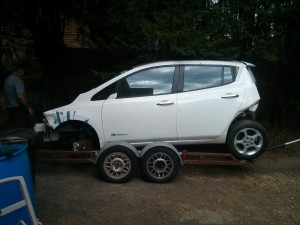
I purchased a 2013 salvage (wrecked) Nissan Leaf from the CoPart auto auction house for $4081 (including delivery and fees). I consider this to be a very good price for a wrecked Leaf, but if you stalk a lot of auctions and bid on Leafs that have the most damage you can probably get a similar deal with enough patience.

Then I spent 439$ on the following tools that I needed to move the car around and extract the battery (the largest amount was for jacks and wheel dollies…)

Car Cover (Keep the neighbors happy) 37.1
Wheel dollies & Jacks 243
Bluetooth OBD II scanner 9.98
Leaf Spy Pro android app (to check battery) 14.99
500V gloves   (Safety first!) 21
2 Jackstands (already had 2) 25
Air Impact Wrench & Sockets 46.5
18mm wrench 12.4
13mm deep socket 8.99
21 mm combination wrench 20.69

This puts my total costs at 4520.75 ($94.18 per module) for a 24 kWh battery pack, which is less expensive than if I bought large format prismatic cells.

Of course, with a lot of time and effort, you can sell all of the other parts from the car. Over the course of six months I made back $3180.46 (including the sale of the smallest of the three jacks I had purchased and 0.46 in change I found in the car.) I’m posting this after selling the main body of the car, leaving me with just a few small items listed on ebay. I may earn a few hundred extra dollars over the course of the next several months, but the overall cost recovery is finished.
final_sale

My current total out of pocket expenses (not including lots of labor!) is 1340.29 (or $27.92 per module) which is quite a significant savings over other options for purchasing large format Lithium Ion batteries.

I’ve seen Nissan Leaf modules selling on Ebay for around $130 each with shipping (in larger quantities), so my ~ $30 per module cost is around 21% of the cost of purchasing them on the used market.

To put this cost savings in perspective, purchasing 20 lead acid golf cart batteries to replace my current pack would probably cost me around $2000-$2200, so the Lithium Ion Nissan leaf battery pack was actually less expensive than a replacement lead acid pack!

However, the process of parting out the wrecked car takes a lot of time and effort. If you are just after the battery and can find one for sale at a salvage/junk yard for less than $2500 it would probably be easier to buy the battery alone without the rest of the car. The one advantage of purchasing the whole car is that you can (sometimes) find out how many miles are on the battery pack. In my case, I was able to use an OBDII scanner with the Leaf Spy Pro application to find out that my battery pack health was still at 98% before I removed it from the car.

If I were to buy a whole car again, I would try much harder to sell the entire car (minus battery) in the $2000-2500 range before parting it out and trade some money for my time.

The Nissan Leaf pack weighs about 650 lbs less than the lead acid batteries currently in my truck. They are capable of providing more amps with less voltage sag due to lower internal resistance, and more of the pack capacity is usable as they don’t suffer from the Peukert effect as much as lead acid batteries.

The overall performance of the truck should be much improved. Also the battery life should be much longer than 2 years. (Cycle life for lithium ion batteries is measured in thousands of charge cycles, instead of hundreds of charge cycles for lead acid batteries.)

However, because I am changing battery chemistries, I am also upgrading my trucks’ charging system (and home EVSE) and those costs are actually more than the battery pack, so the total upgrade cost will be more than just getting another lead acid battery pack. (I will talk more about charger upgrade costs in a later post).

Making Thunderbird send messages in the background (like Outlook)

My work recently changed over to using Office365.com for their email. As long as Office365 supports IMAP and SMTP (it does) I don’t mind so much, as I can continue to use Thunderbird on my desktop to access my email.

However, because the mail servers are no longer located “on-campus” the lag to the SMTP server is much more noticeable than before. When I pressed the “Send” button, Thunderbird would sit there for 20 seconds with a progress bar sending the mail, interrupting my flow of email processing much more noticeably than when the server was hosted on the same network.

So I tweaked a few advanced settings in Thunderbird by going into Thunderbird Preferences (Edit->Preferences), clicking the “Advanced” tab, then selecting the “config editor” button and promising to be careful. [Newer versions of Thunderbird have these options under the tools -> Options menu. ]

mailnews.show_send_progress false
mailnews.sendInBackground true
offline.send.unsent_messages 1

Telling thunderbird to not show the progress indicator only hides the dialog, but the compose window still sits up on your screen (with no visible indicator of what it’s doing) until the mail is sent, so you also need to turn on “sendInBackground” to make the compose window disapear immediately after you press send.

This makes the message go immediately to your Local Folders -> Outbox, but DOES NOT SEND IT, until you select File -> Send Unsent Messages. Hence the “offline.send.unsent_messages 1” which tells Thunderbird to send unsent messages (from Folders -> Outbox) whenever it can. It still takes 20-30 seconds for the message to be sent, but it is done in the background now.

Rivaling mill accuracy with a printed template and centerpunch

Using a printed template you can center punch drill pilot holes and rival the accuracy of a milling machine. It’s faster than using a mill, and a lot cheaper as well!

While making the busbars for my Nissan Leaf batteries, I needed to precisely drill holes with 1.3333″ centers. I’m fortunate enough to own a small mill, which I used to drill small pilot holes, allowing me to drill the main holes on a drillpress very accurately.

But what if you don’t have a mill? You can actually get similar accuracy by using a
printed template and careful application of a centerpunch. Just create a template in
a drawing program such as InkScape, Corell Draw, or any other tool that allows you to
lay out lines in a dimensionally accurate way. Print it out on a standard printer, and
then use a center punch to mark the drill starting point on your metal.

center_punch_results

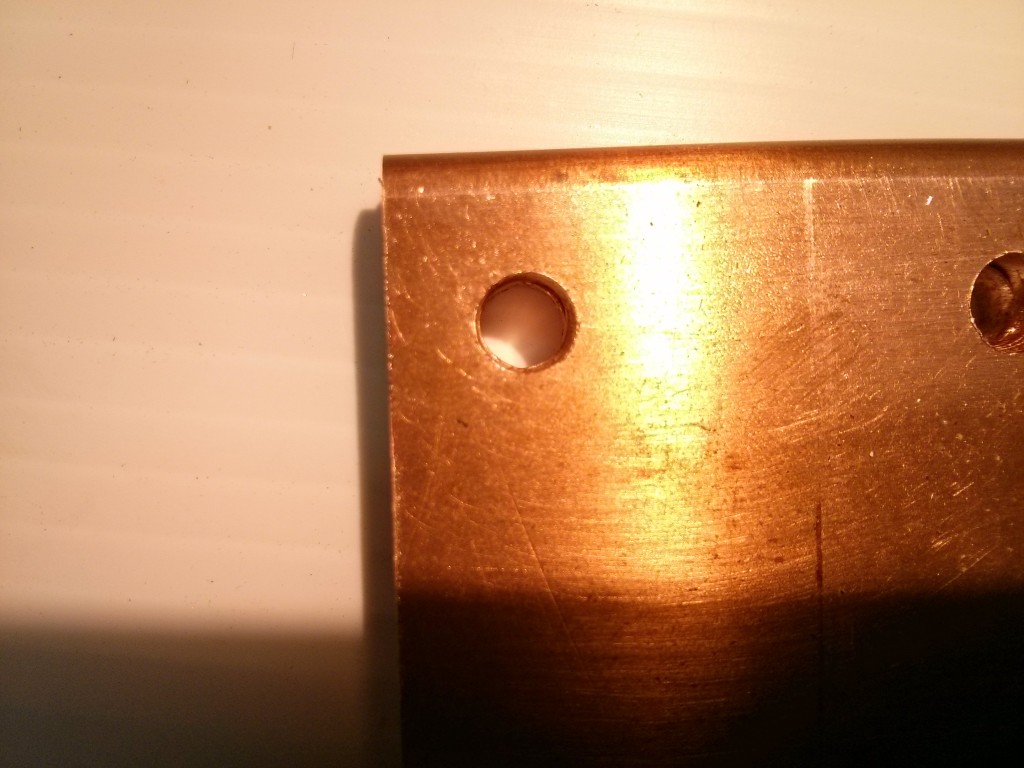
Here you can see me comparing the holes in my milled busbar with the center-punched busbar by passing some bolts through two of the three holes and shooting a picture of the third hole.

center_punch_to_mill_hole_aligment

How to build custom length high current cables

IMG_20151025_203133

IMG_20151025_202930

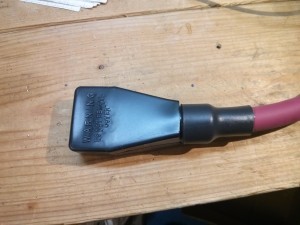
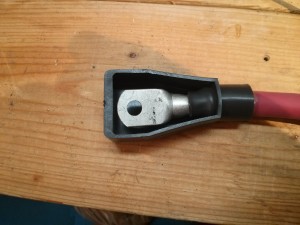
When wiring up an electric vehicle traction pack battery, an off-grid battery backup bank, or other high current power systems, you sometimes need a cable capable of handling high-current with a custom length. If you have a few tools, it is easy to make your own by crimping terminals onto welding cable. This video shows a time-lapse overview of making such a cable:

Here is a set of links to the tools and materials I used:
Continue reading