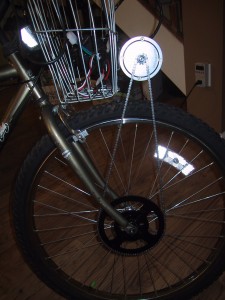
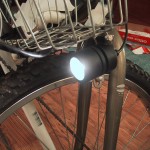
 In case I need to commute home after dark on my electric bike, I added a front headlight (5 watt MR11 halogen) and a rear tail light (Red LED tail light for “off-road” use). The front headlight enclosure was designed to be used on a bike, and included a nice mounting bracket and enough cord that I could harvest some to run to the rear tail light. Black zip-ties hold the wires to the frame. The rear tail light had no enclosure, so I soldered the wire directly to it and epoxied it into the back of my rear rack. Both lights run off of only one of the 12v batteries through a 5A blade fuse and an automotive switch mounted under the battery pack. Continue reading
The $175 Electric Bike
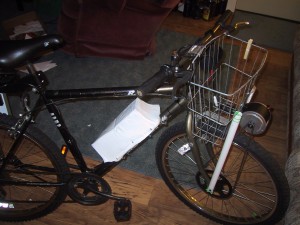
Electric bikes are expensive. Even if you buy the cheapest electric bike you can find on deep discount at walmart, it costs $300. (Formerly $400 before they deeply discounted it.) I decided to build my own out of surplus parts and things I could buy at the local Ace Hardware for less than $300. (Mostly, for the fun of the build.)
So, I bought a surplus motor controller, handlebar mounted throttle, and a 250 watt electric motor. I bolted the motor to the front of my used $20 bike, built a battery holder out of PVC pipes, and made a vacuum formed cover.
Continue reading
Vacuuform Battery Cover
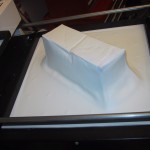
 After building a PVC pipe battery holder for my electric bike, I used a vacuum form machine to make a polystyrene battery cover. I built up a cheap tool form using cardboard (which turned out to be too week, but it was quick).
As the vacuum was forming the polystyrene around the cardboard the box started to deform so I had to release the vacuum before the styrene had fully formed itself to the PVC pipes, but it got close enough to be screw mounted. Continue reading
Ubuntu 8.04 SSH login slow
SSH Login to my Ubuntu 8.04 machine was slow. (It would delay about 5 seconds after I issued the ssh command for the remote machine to request a password.) I believe this is because the remote machine is on my home network, and I have set up it’s hostname using host entries instead of having a true DNS name.
I edited the /etc/init.d/sshd_config file and added the single line:
UseDNS no
which fixed this problem as soon as I restarted the SSH server, with
sudo /etc/init.d/ssh restart
Compiz keybindings in Ubuntu 9.04
Ubuntu 9.04 comes with some visual effects from Compiz turned on by default. This post contains a list of the key combo’s used to active some of them. Compiz also offers many other “cool” effects. If you install the compizconfig settings manager you can enable/disable all of the neat effects (most of which are eye-candy, and not really useful).
Continue reading
Encrypted home partition for Ubuntu 9.04
Following the directions on Lars’ blog, I set up an encrypted home directory on Ubuntu 9.04 using LUKS.
The following commands were all executed with root permissions. Add “sudo” to the front of the commands if you are not running with root permissions. Continue reading
Acer Aspire One D150 – Ubuntu 9.04 Jaunty Linux
Installing Ubuntu 9.04 (Jaunty) on an Acer Aspire One (Model D150) worked quite well. I had to use an external USB CD-Rom Drive as the Aspire One does not have a built in drive, but after enabling the “Press F12 to choose boot device” menu in the system BIOS I was able to boot off of the external USB CD-Rom drive.
Ubuntu worked well with all the major hardware (video, wifi,wired-ethernet, soundcard, and webcam) and the only hiccup was with the built in microphone, which did not work out of the box (the microphone jack would work, just not the built in microphone.)
To get the built in microphone working, I had to install the latest version of the ALSA driver following the instructions I found in post 28 on this thread, as copied below:
So I downloaded alsa-driver-1.0.20.tar.bz2 from
http://www.alsa-project.org/main/index.php/Main_Page
I unzipped the package, I entered into the main directory of the package and then I typed:
sudo apt-get install build-essential ncurses-dev
./configure –with-cards=hda-intel
make
sudo make installThen I edited /etc/modprobe.d/alsa-base.conf and I added at the end of file the line:
options snd-hda-intel model=acer-aspireAfter the reboot I adjusted the audio preferences in this way:
Device: HDA Intel (Alsa mixer)
Preferences: The first 3 items and last 2 items (Front Mic is disabled!!!)
Input Sources is set as default at Mic (not Front Mic!!!).Finally check that System->Preferences->Sound->Sound Capture is set to “HDA Intel ALC272 Analog(ALSA)” not “ALSA”
Homebrew bicycle battery bracket
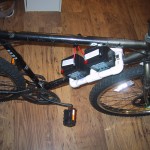
I created a battery holder (bracket) for my two 5 Ah gel cell batteries using more schedule 40 PVC pipe. I cut four 2 and 7/8 inch sections and three 3 and 5/8″ sections. Using four 90 degree elbows and two “T”‘s I arranged it to hold the two batteries. Continue reading
Electric Bicycle power circuit
Bolting a DC motor to the front basket of a bike and running a chain to the front wheel takes care of the mechanical linkage needed to make an electric powered bicycle, but you also need to provide power to the motor, and control that power in some way.
Luckily, the same place that sold me the 250 watt motor also sold a 40 amp speed controler. (It cost $33, or more than any single other part of my e-bike project.)
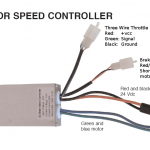
The speed controler is controlled by most standard e-bike throttles, such as this one from Currie Technologies. I also attached two 12v 5AH batteries in series to provide 24 volts. Because I calculated that my 250 watt motor running at 24 volts would draw approximately 10 amps, (250/24 = 10.4), I added a 15 amp fuse to the circuit. (The first 15A fuse was replaced by a second 15 amp fuse after it saved my speed controler from damage when I accidentally reversed the polarity on the power…)
Continue reading
Adding an electric motor to a bicycle
I purchased a surplus 250 watt motor with a matching wheel hub and 90 tooth sprocket. The motor has an 11 tooth sprocket, and both the motor’s sprocket and the hub’s 90 tooth sprocket are designed for #25 motor chain, which is slightly smaller than standard bicycle chain.
To get the hub and 90 tooth sprocket on the wheel, I had to remove the existing hub and rebuild the wheel on the new hub. Luckily the two hubs were close enough in size that I could re-use the existing spokes. Following the instructions on Sheldon Brown’s website, and also refering to this website I was able to re-spoke the wheel.
Continue reading
